509-201-4190

Do you have wood siding that’s seen better days? Are you having trouble with wood rot, insect damage, or other issues that are making your house look less than its best? You’re not alone. Many homeowners struggle to keep their wood siding looking good and free from damage. The good news is that with a few expert tips and the right products, it’s possible to repair and restore your exterior to its former glory. In this article, we’ll take a look at some of the common problems associated with wood siding, as well as some simple steps you can take to help get yours back in shape. So read on for all the information you need to bring your home’s exterior back to life!
Disclaimer: This article is intended to provide general information on wood siding repair and restoration. While we have provided some tips on how to address common problems, it should not replace the advice of a trained professional. If you’re unsure about how to tackle any of the issues discussed here, we highly recommend that you consult a professional for advice. When it comes to finding the right solutions for your home, Advance Roofing LLC has been proudly serving the Spokane, WA area with the highest standard of quality roofing solutions for many years. We are always happy to help!
What is Wood Siding?
Wood siding is an attractive, natural option for homeowners looking to enhance the look of their homes. It is a versatile and popular choice of siding material due to its aesthetic appeal and durability. However, like any other type of material, wood siding is subject to
wear and tear over time. In this article, we will take a closer look at wood siding, its advantages and disadvantages, and the common problems associated with it. We will also provide expert tips on repairing and restoring your exterior wood siding to keep your home looking beautiful and well-maintained for years to come.
The Pros & Cons of Wood Siding
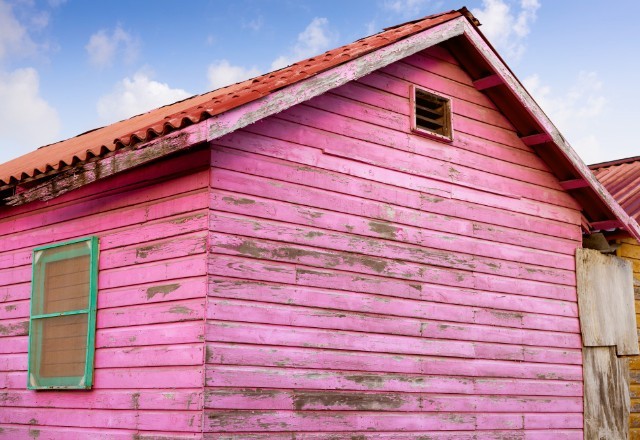
Wood siding is a popular choice for many homeowners due to its natural and classic look. It adds a warm and inviting feel to the exterior of homes that other siding materials such as vinyl or fiber cement simply cannot match. However, like all siding options, wood siding also has its advantages and disadvantages. In this article, we’ll explore the pros and cons of wood siding to help you make an informed decision.
Pros:
- Natural and classic look: Nothing beats the natural beauty of wood. It adds warmth, character, and charm to any home and is perfect for those
looking for a traditional look.
- Easy to paint: Unlike other siding materials, wood siding is easy to paint and holds paint well. With a fresh coat of paint, you can instantly give your home a new look.
- Eco-friendly: Wood siding is a renewable resource and is therefore an eco-friendly choice compared to other siding options. Additionally, wood is biodegradable and easily recyclable.
Cons:
- Wood siding is a costly option compared to vinyl or fiber cement siding, with prices that can be two to three times higher.
- Regular maintenance: Wood siding requires regular maintenance every 3-7 years to protect it from the elements. This typically involves cleaning, sanding, and applying a fresh coat of paint or stain.
- Prone to damage: Wood siding is susceptible to water damage, pests, and rot, which can lead to costly repairs or replacement.
An alternative to traditional wood siding is engineered wood siding, which is made from wood fibers and resin. Engineered wood siding is more cost-effective than traditional wood siding and requires less maintenance. It is also more durable, resistant to rot and pests, and comes in a variety of colors and finishes.
Wood siding is a beautiful and classic choice for homeowners, but it comes with a high price tag and requires regular maintenance. If you’re looking for a more cost-effective and low-maintenance option, engineered wood siding may be a great alternative. However, if you’re willing to invest in the beauty of natural wood, regular maintenance can pay off for years to come.
Common Problems with Wood Siding
Wood siding is a popular choice for homeowners due to its natural beauty and classic look. However, it is not without its problems. In this article, we will discuss some common issues that can arise with wood siding and provide expert tips on how to repair and restore your exterior. Whether you’re dealing with water damage, structural issues, paint problems, or pests, we have you covered with practical solutions to keep your wood siding looking beautiful and functional for years to come.
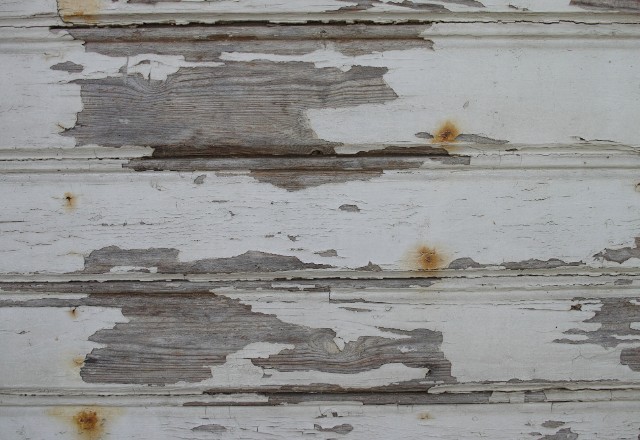
Moisture Damage, Rotting, and Warping
Moisture damage, rotting, and warping are common problems that can arise in wooden siding. These issues are often signs of dry rot, which can cause structural damage to your home if left untreated. Addressing dry rot in wooden siding is crucial to maintaining the integrity of your home’s structure.
The first step is to identify the area of dry rot. This can be done by looking for areas with cracked or warped wood or a discoloration of the wood. Once identified, it’s important to address the issue as soon as possible to prevent further damage.
Begin by removing any rotted wood and cleaning the surface thoroughly. Use a soft bristle brush or wire brush to remove any loose or flaking paint. If necessary, use a heat gun to help loosen the paint. Sand the area to remove any rough spots.
Afterward, treat the area with a fungicide to kill any remaining spores. Once the area is dry, replace the damaged wood with preservative-treated wood to prevent future rotting. Sand and smooth the surface to prepare it for staining or painting.
To prevent dry rot from recurring, it’s important to address any underlying moisture issues. This may include fixing leaky pipes or improving drainage around the home. Taking these extra steps can help prevent dry rot and prolong the life of your wooden siding.
Chipping and Cracking Paint
Chipping and cracking paint is a common problem for wooden siding when proper surface preparation is not carried out. Over-thinning of paint can also result in this issue. Heavy-handed painting or not allowing sufficient drying time between coats can lead to chipping and cracking paint.
Over time, paint may become more fragile and less able to accommodate variations in temperature and humidity, potentially resulting in cracking. In addition, failure to maintain paint can increase the likelihood of chipping and cracking.
To address chipping and cracking paint on wooden siding, the surface must be thoroughly prepared by stripping the wood to create a solid foundation for the paint. This process may involve removing any previous coatings or sanding the surface to ensure it is free of debris.
Choosing high-quality paint that is resistant to weather and temperature changes is crucial. Apply several thin and even coats of paint, allowing sufficient time for each coat to dry before adding another. The use of a soft-bristle brush can help avoid further damage to the already compromised surface.
In conclusion, chipping and cracking paint on wooden siding stems from insufficient surface preparation, over-thinned paint, heavy-handed painting, or lack of maintenance. To fix this issue, choose high-quality paint, prepare the surface thoroughly, and apply several thin and even coats of paint. This will create a long-lasting, beautiful finish for your wooden siding.
Loose or Missing Pieces of Siding
Loose or missing pieces of siding can be a frustrating and potentially damaging problem for homeowners. It is important to take prompt action when you notice any signs of loose or missing pieces of siding on the exterior of your home.
There are several factors that can contribute to loose or missing pieces of siding, including weather damage, rot, or improper installation. Regardless of the cause, addressing this issue is essential to avoid moisture infiltration and damage to the underlying structure.
The first step in addressing the problem is to assess the extent of the damage. Check the surrounding areas for any additional signs of damage, such as rot or water stains. Once you have identified the affected area, it is time to move on to replacing the loose or missing pieces of siding.
To begin the process of replacing the damaged siding, it is important to remove the nails or screws that hold the damaged piece in place. Carefully use a pry bar to lever the damaged piece away from the house, taking care not to cause any further damage to the surrounding pieces of siding.
With the damaged piece removed, it is time to replace it with a new piece of siding that matches the type and color of the existing siding. Measure the dimensions of the damaged piece and cut the replacement piece to size. Make sure to leave a small gap between the new piece and the surrounding pieces to allow for expansion and contraction due to temperature changes.
Once you have the replacement piece ready, use nails or screws to secure it in place. Be sure to use the same type of fasteners used on the surrounding pieces of siding to ensure consistency in the appearance of your home’s exterior.
Insect Infestation and Decay
Wood siding is a popular choice for many homeowners due to its natural beauty and durability. However, it’s not immune to problems such as insect infestation and decay. Understanding the types of infestation and decay commonly found in wood siding is crucial in preventing and addressing the issue.
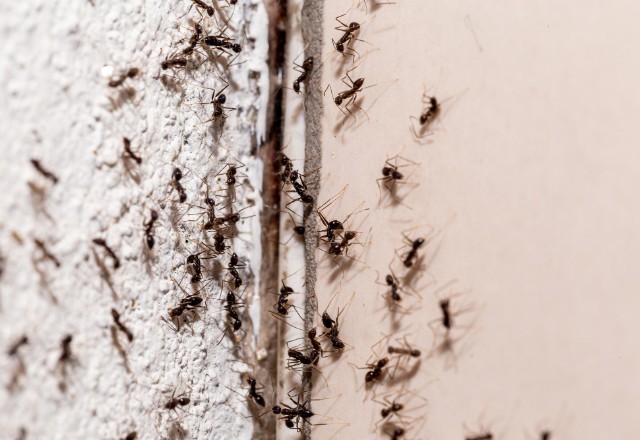
Insect infestation is a common problem in wood siding and can be caused by various pests such as termites, carpenter ants, and powderpost beetles. Termites are often referred to as the silent destroyers because they can go undetected for years while causing significant damage to the wood. Carpenter ants can also cause damage, but they do not eat wood and instead create nests inside the siding. Powderpost beetles are tiny insects that lay their eggs in the pores of wood, and their larvae can feed on the wood for years, causing damage along the way.
Signs of insect infestation in wood siding include tiny holes in the surface of the wood, sawdust around the area, and winged insects near the damaged wood. It’s important to address a potential infestation immediately to prevent further damage from occurring.
Decay is another problem that can affect wood siding, often caused by fungi that thrive in moist environments. Fungi such as mold and mildew can grow on the surface of the wood, but decay fungi can penetrate the wood and cause significant damage. This type of decay is often found in areas of the siding where there is moisture buildup or lack of ventilation.
Preventing insect infestation and decay in wood siding can be achieved by keeping the area clean and dry. Regular cleaning and maintenance, including repairing leaks and ensuring proper ventilation, can help prevent the buildup of moisture that can lead to infestation and decay. Using treated or naturally resistant wood can also help prevent insect infestation and decay.
If infestation or decay is already present in wood siding, addressing the issue immediately is crucial. Appropriate treatments, such as applying insecticides or fungicides, can help eradicate the problem. In severe cases, it may be necessary to replace damaged pieces of siding or even entire sections of the siding.
Structural Damage from Wind or Hail
Strong winds and hail can cause structural damage to wood siding, leading to loose or broken pieces. This damage can be unsightly and leave your exterior vulnerable to water damage, so it’s important to address it as soon as possible.
The first step is to inspect the area thoroughly for any damage. Look for loose or missing pieces of siding, as well as any cracks or splits caused by hail. Check for any structural damage to the framework underneath the siding that may need to be repaired.
Once you’ve identified the damage, it’s important to repair any structural damage first before painting or staining your exterior. This means fixing any framework that has been compromised by the wind or hail. If any pieces of siding need to be replaced, make sure to use the same type of wood and ensure that it matches the rest of the exterior.
If there are dents or cracks in the wood, these can be filled with wood filler and sanded down to create a smooth surface. For larger areas of damage, it may be necessary to replace the entire piece of siding.
After all structural damage has been repaired, it’s important to prime and paint or stain the area with the appropriate products. This will help protect the wood from further damage and restore the appearance of your exterior.
Tips for Repairing & Restoring Wooden Siding
Wooden siding is a popular choice for homeowners due to its natural beauty and durability. However, like any exterior material, it’s subject to wear and tear over time, and may need repair or restoration. In this article, we’ll provide expert tips on repairing and restoring your wooden siding to keep it looking beautiful and protecting your home for years to come.

Inspect the Area for Any Damage
When it comes to wood siding, one of the most important steps in maintaining its longevity and appearance is to inspect the area for any damage. Before making any repairs or restorations, it is crucial to identify and address any underlying issues that may be causing the damage.
Begin by examining the siding for signs of moisture, as this is one of the most common culprits of damage to wooden siding. Look for discoloration or warping, which can be signs of water penetration and subsequent damage. Additionally, inspect the area for any insects or signs of infestation, such as frass or sawdust.
It is important to thoroughly check the seams and corners of the siding, as these areas are typically more susceptible to water penetration and subsequent damage. Look for any gaps or cracks, and be sure to address them promptly to prevent further moisture infiltration.
After addressing any potential moisture issues, assess the overall condition of the paint or stain. Chipping or cracking paint or stain can be a sign of multiple coats applied over time, which can result in a buildup that prevents proper adhesion and ultimately leads to peeling or flaking.
Clean the Surface Thoroughly to Prepare for Repairs
Before repairing your wood siding, it’s important to thoroughly clean the surface to ensure that the repairs will properly adhere and that your fresh coat of paint or stain will look its best. Start by taking note of any severe damage or rot that will require special attention during the repair process.
To begin cleaning, you can use a household cleaner or a solution of 75% water and 25% white vinegar (for mold and mildew) to remove any grime or stains. Be sure to collect all necessary materials for cleaning, including a soft bristled brush, sponge or cloth, and a five-gallon bucket.
When cleaning your wooden siding, it’s important to avoid causing damage to any surrounding landscaping. You can do this by using a non-toxic cleaning solution or by rinsing plants with water before and after cleaning.
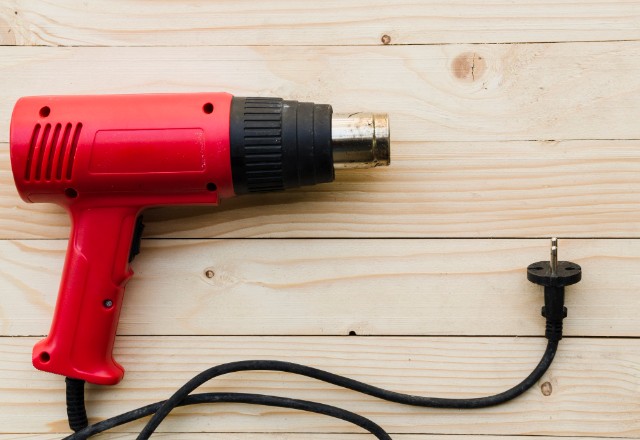
Use a Heat Gun to Remove Loose Paint or Old Caulk Around the Seams
If you’re planning on restoring your wooden siding and notice some loose paint or old caulk around the seams, a heat gun can be a useful tool to have on hand. Using a heat gun is an effective and efficient way of removing old paint and caulk, preparing the surface for a fresh coat of paint.
A heat gun works by heating the paint or caulk to a high temperature, which makes it more pliable and easy to scrape away using a putty knife. This tool is particularly helpful in removing stubborn paint or caulk around edges and corners.
Safety is paramount when using a heat gun. Make sure to wear heat-resistant gloves and goggles to protect your hands and eyes from any possible burns or flying debris. Before using the heat gun, test the temperature on an inconspicuous area to ensure that your wooden siding won’t be damaged by the heat.
Start with a low heat setting and hold the heat gun about an inch away from the wooden siding. Move the heat gun slowly across the painted or caulked area to ensure that everything is evenly warmed. Avoid aiming the gun directly at one spot for more than a few seconds, as this can cause the wood to warp or become damaged.
Once the paint or caulk is heated, use a putty knife to scrape it away. Be gentle and take care not to scratch the wood. If the paint or caulk is proving particularly stubborn, add more heat and test the area again. Continue this process until all the old paint or caulk is removed from the wooden siding.
Repair any Structural Damage First Before Painting or Staining Your Exterior
When it comes to painting or staining your exterior wooden siding, it’s essential to ensure that you first check for any signs of structural damage. Structural damage can lead to further issues such as moisture damage, rotting, and warping of your siding. Introducing any new paint or stain to damaged wood can further deteriorate the structure of the siding. Therefore, it’s crucial to repair any structural damage before proceeding with painting or staining your exterior.
The first step is to inspect the wooden siding for any signs of decay, including mold, mildew, or dry rot. These issues can weaken the structure of the wood, making it more susceptible to moisture damage and rotting. If you notice any of these signs, it’s essential to address them before continuing with your painting or staining project.
Once you’ve identified any structural damage, it’s time to repair it. Start by replacing any damaged or rotted wood with new boards to ensure a sturdy foundation for your paint. You may need to remove entire sections of damaged siding and replace them to ensure that your repair work is effective.
Ignoring structural damage and proceeding with painting or staining can lead to more costly repairs down the road. Moisture damage can spread quickly, causing rotting and warping of the wooden siding. By addressing any structural damage before painting or staining, you can ensure that your exterior will look its best for years to come.
Choose an Oil-Based Primer for a Smoother Finish on Your Exterior Walls
When it comes to prepping your wooden siding for paint, selecting the right primer is crucial. An oil-based primer can offer many benefits that water-based primers cannot. In particular, an oil-based primer can provide a smoother finish that will help your exterior walls look polished and professional.
Oil-based primers have superior penetration into the wood fibers, which allows them to seal the wood more effectively than water-based primers. This means that they can resist moisture better, helping to prevent wood fibers from swelling or expanding due to exposure to the elements. This moisture resistance is especially important if you live in an area with high humidity or frequent rain.
In addition to their moisture resistance, oil-based primers offer better adhesion than water-based primers. This means that they can stick to a wider variety of surfaces, including old paint layers and surfaces that have been previously sealed or stained. This can save you time and money in the long run, and ensure that your finished paint job will last for years to come.
When it comes to chip and peel resistance, oil-based primers are also superior to their water-based counterparts. This means that once your paint job is complete, it will be less likely to chip or peel, even in harsh weather conditions. This can also save you time and money on repairs and repainting efforts.
Finally, as mentioned earlier, oil-based primers can provide a smoother finish than water based primers. This is due to their finer pigment particles, which help to fill in small cracks and imperfections in the surface of the wood. This results in a more polished and even finish that will enhance the overall look of your wooden siding.
Conclusion
Wood siding can be a great feature for any house, but it requires regular care and maintenance. Fortunately, with the right products and a bit of DIY know-how, it’s possible to repair and restore your wood siding to its former glory. Whether you’re dealing with rot, insect damage, or other issues, taking these steps can help ensure that your exterior looks great for years to come.