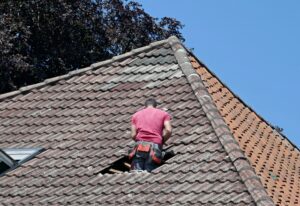
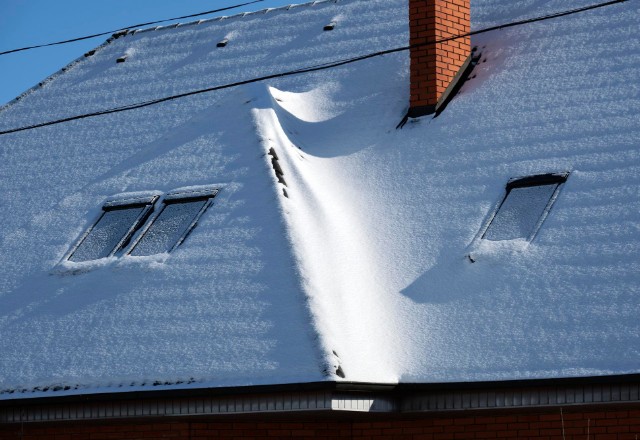
Tile roof repair can seem daunting, but it doesn’t have to be! There are a few easy steps that you can take to quickly and safely address issues with your tile roof.
Description: Tile roofs can be a beautiful addition to any home, but they require regular maintenance to ensure they stay in good condition. Learn how to repair your tile roof quickly and safely with these helpful tips. Get advice on the most important areas of your roof and how to identify potential issues before they become major problems.
What is a tile roof?
A tile roof is a type of roofing system that is made using overlapping tiles. Tile roofs are commonly made using materials such as clay, concrete, or ceramic and are known for their durability and long lifespan. Tile roofs have been around for centuries, and they are still used today due to their many benefits.
Tile roofing offers many advantages over other roofing materials.
For one, tile roofs are highly resistant to extreme weather conditions, including strong winds and heavy rains.
They are also resistant to fire, making them a great choice for areas that are prone to wildfires.
Additionally, tile roofs are energy efficient, which can help homeowners save money on heating and cooling costs.
Tile roofs come in many different shapes, sizes, and colors, which allows homeowners to choose the perfect style to match their home’s design and aesthetics.
Clay and ceramic tile roofs are very popular due to their versatility and classic appearance.
They are also eco-friendly and can be made from sustainable materials.
Concrete tile roofs are known for their durability and are often preferred in areas that experience harsh weather conditions.
One thing to keep in mind with tile roofs is that they require regular upkeep to maintain their longevity. This includes regular inspections and repairs to fix any broken or cracked tiles. If you have a tile roof and notice any signs of damage, it is important to address the issue as soon as possible to prevent further, more costly repairs down the line.
Overall, tile roofs are an excellent choice for homeowners who want a durable, long lasting roofing system that will protect their home for years to come. With their many benefits and styles to choose from, tile roofs are a great investment for any homeowner.
Benefits of tile roofing


Tile roofing is a popular choice for homeowners for a variety of reasons.
One of the biggest benefits of tile roofing is its durability. Tile roofs can last for decades or even over a century with proper care and maintenance. This longevity can help homeowners save money on replacements over time, making it a cost-effective option in the long run.
Tile roofing is also incredibly versatile when it comes to style and design. With a range of colors and textures available, homeowners can choose a tile roof that complements their home’s architecture and adds curb appeal. Additionally, tile roofing can increase the value of a home, making it a smart investment for those looking to sell in the future.
Another benefit of tile roofing is its energy efficiency. Tile roofs can help regulate a home’s temperature, keeping it cooler in the summer and warmer in the winter. This can lead to lower energy bills and a reduced carbon footprint. Additionally, many tile roofing materials are made from sustainable and eco-friendly materials, making them a good choice for environmentally conscious homeowners.
Tile roofs are also very resistant to weather damage. They can withstand high winds, heavy rains, and even hail. This makes them ideal for homes located in areas with extreme weather conditions. Additionally, tile roofs are resistant to fire, which can give homeowners peace of mind knowing their home is protected from potential wildfires.
Finally, tile roofing is relatively low maintenance compared to other roofing materials. While regular inspections and repairs are still necessary to ensure the longevity of the roof, tile roofs require less maintenance than other materials like asphalt shingles. This can save homeowners both time and money in the long run.
Overall, tile roofing offers many benefits to homeowners. With its durability, versatility, energy efficiency, weather resistance, and low maintenance requirements, it’s easy to see why tile roofing is such a popular choice for both new construction and roof replacements.
Preparing for Repair
Preparing for tile roof repair can help ensure that the repair process is quick and safe. Here are some steps homeowners can take before calling in a professional roofing contractor:
- Inspect the roof – Before you call in a roofing contractor, it’s important to inspect the roof to identify the source of the damage. This can help you communicate the issue to the contractor and get an accurate estimate for the repair work. Look for broken or cracked tiles, damaged flashing or vents, and any other visible signs of damage.
- Clear the roof – Make sure the area around the damaged tiles is clear of debris, branches, and other objects that can obstruct the repair process. This can help the contractor safely move around the roof and efficiently complete the repair work.
- Gather information – Consider gathering information about the type of tile used on the roof and the age of the roof. This can help the contractor determine the best approach to repairing the roof and ensure that they have the necessary materials on hand.
- Schedule the repair – Once you’ve identified the damage and gathered information, it’s important to schedule the repair work with a professional roofing contractor. Make sure to choose a reputable contractor with experience working with tile roofs.
- Prepare for the repair – On the day of the repair, make sure to clear the area around the house and move any valuable items out of harm’s way. If necessary, consider covering furniture and other outdoor items to protect them from potential debris from the repair work.
By taking these steps before the repair work begins, homeowners can help ensure that the repair process is smooth and efficient, and that their tile roof is repaired quickly and safely.
Safety Considerations
When it comes to repairing a tile roof, safety should always be a top priority. Roof work can be dangerous, and falls from roofs can result in serious injury or even death. Therefore, it’s important to take the necessary precautions to ensure that you and your roofing contractor stay safe throughout the repair process.
Here are some safety considerations to keep in mind when repairing a tile roof:
- Wear protective gear – This includes a hard hat, safety glasses, gloves, and slip resistant shoes. Roof work can be slippery, so it’s important to choose shoes that offer good traction. Additionally, wearing a harness and using proper fall protection equipment can help prevent falls.
- Use ladders safely – Before climbing up to the roof, make sure your ladder is set up on a flat, stable surface and is securely fastened to the roof. Use an extension ladder that extends at least 3 feet above the roofline, and make sure the ladder is rated to support your weight.
- Be aware of weather conditions – Avoid working on the roof during extreme weather conditions, such as heavy rain or strong winds. These conditions can make the roof slippery and increase the risk of falls.
- Work in teams – Don’t work on the roof alone. Have someone on the ground to assist you, hold the ladder, and help pass tools and materials to you.
- Use the right tools – Make sure you have the necessary tools for the job, such as a putty knife, roofing cement, and replacement tiles. Use caution when using power tools and make sure you are familiar with their operation.
By following these safety considerations, you can help prevent accidents and ensure a successful tile roof repair. Remember, if you’re unsure about any aspect of the repair
process or don’t feel comfortable doing it yourself, always consult with a professional roofing contractor.
Gather Necessary Supplies


Before attempting to repair your tile roof, it is important to gather all the necessary supplies. This will not only save time but also ensure that the job is done correctly. Here are some supplies you will need:
- Replacement Tiles – The first thing you should do is check your tile roof for any missing or broken tiles. You will need to replace these tiles in order to prevent any water leaks or further damage to the roof.
- Roofing Cement – Roofing cement is an adhesive that is used to attach the replacement tiles to the roof. Make sure to choose a high-quality roofing cement that is suitable for your specific type of roof.
- Putty Knife – A putty knife is a thin, flat tool that is used for applying roofing cement to the replacement tiles. The size of the putty knife will depend on the size of the replacement tiles.
- Safety Gear – As mentioned earlier, safety should always be a top priority for any roof repair project. It is important to wear a hard hat, safety glasses, gloves, and slip-resistant shoes. A harness and proper fall protection equipment should also be used.
- Ladder – In order to reach the roof, you will need a sturdy and stable ladder. Make sure the ladder is in good condition and rated to support your weight. Have someone hold the ladder and assist you, especially when carrying supplies and tools up and down.
- Cleaning Supplies – Depending on the state of your roof, you may need cleaning supplies such as a broom or leaf blower to remove any debris or dirt from the roof surface.
By gathering all the necessary supplies ahead of time, you can ensure that your tile roof repair is efficient and successful. Remember to prioritize safety in every step of the process and seek professional help if needed.
Assess the Damage


Before beginning any tile roof repair, it is essential to assess the damage thoroughly. This step will help you fully understand the scope of the problem, determine the best course of action, and avoid any further damage.
Start by doing a visual inspection of the roof’s surface. Look for any cracked, broken, or missing tiles. Pay close attention to any areas where water might collect or flow, such as valleys, ridges, and edges. Check to see if the flashing is secure and any vents are in good working order.
It’s important to address any issues as soon as possible, as minor problems can quickly escalate into more significant ones, especially during inclement weather conditions. Water leaks, for example, can cause severe damage to the roof’s structure, insulation, and even contribute to mold growth. Damage caused by wind or hail can also lead to structural damage and may cause tiles to become dislodged or cracked.
If you’re unsure of the severity of the damage, consider scheduling a professional inspection. They will be able to identify any underlying issues and provide an accurate assessment of the roof’s condition. In some cases, a professional roofer may be necessary to perform repairs or replace tiles to avoid further damage down the line.
In conclusion, assessing the damage is a crucial step in any tile roof repair project. This will help you understand the scope of the problem and determine the best course of action. Don’t underestimate minor problems, as they can quickly escalate into significant issues. Remember, it’s always better to address problems early on to avoid costly repairs down the line.
Applying Putty or Caulk to Cracks and Gaps
One common issue with tile roofs is cracking and gapping between tiles. These cracks and gaps can allow water to seep underneath the tiles and cause damage to the roof deck and structure below. Fortunately, fixing these cracks and gaps is relatively straightforward with the use of putty or caulk.
First, you’ll need to locate any cracks or gaps in your tile roof. It’s essential to inspect the entire roof thoroughly, paying particular attention to areas where there is a higher likelihood of wear and tear, such as valleys and eaves. Once you’ve identified the areas that need attention, the first step is to clean the area around the crack or gap. Use a wire brush or another suitable tool to remove any debris or loose material around the area.
Next, you’ll need to choose the appropriate putty or caulk for the job. For smaller cracks or gaps, a standard roofing caulk will suffice. For larger areas or gaps, you may need to use a putty that can be molded to the shape of the roof tile. Be sure to select a product that is specifically designed for use on tile roofs and is compatible with the type of tile you have.
Once you have your putty or caulk, apply a line of it to the underside of the tile along the length of the crack or gap. Use a putty knife or your finger to smooth the putty or caulk evenly along the length of the gap. Be careful not to overapply the putty or caulk, as this can cause it to stick out from the tile and detract from the appearance of the roof.
After you’ve applied the putty or caulk, it’s essential to give it time to dry and cure fully. Most products will dry within a few hours, but it’s best to wait at least 24 hours before walking on the roof or allowing any traffic on the area you’ve repaired. Once the putty or caulk is fully cured, you can paint it to match the color of the surrounding tiles and provide added protection against the elements.
Repairing cracks and gaps in your tile roof with putty or caulk is an easy and cost effective way to extend the life of your roof. However, it’s important to note that this method is only suitable for minor damage. If you notice significant structural damage or issues with the roof deck, it’s best to contact a qualified roofing contractor to assess the problem.
Removing Damaged Tiles


When it comes to repairing a tile roof, one of the first steps is removing any damaged tiles. Whether your tiles have cracked, broken, or become dislodged, it’s important to replace them as soon as possible to prevent further damage to your roof and the interior of your home.
To remove damaged tiles, start by locating the affected area on your roof. Carefully climb up to the roof, ensuring that you are using proper safety equipment and techniques. Once you reach the damaged tiles, use a putty knife or other tool to gently lift up the surrounding tiles and expose the damaged one.
Next, use a hammer and chisel to remove the nails or adhesive holding the tile in place. Be careful not to damage any surrounding tiles in the process. Once the damaged tile has been removed, inspect the area around it to ensure that it is free from any debris or old adhesive.
Now, it’s time to replace the damaged tile. First, select a replacement tile that matches the size, shape, and color of the surrounding tiles as closely as possible. If you’re unable to find an exact match, consider contacting a professional roofer or tile manufacturer for assistance.
Once you have the replacement tile, apply a small amount of roofing adhesive to the back of the tile, ensuring that it covers the entire surface. Carefully slide the tile into place, ensuring that it is flush with the surrounding tiles and securely held in place.
Finally, reattach any surrounding tiles that were lifted during the removal process, using roofing nails or adhesive as needed. Once all the tiles have been securely reattached, inspect the area for any remaining damage or issues, and perform any additional repairs as needed.
Removing damaged tiles is an essential step in repairing a tile roof. While the process may seem daunting, with the right tools and techniques, it can be completed safely and efficiently. If you’re unsure about your ability to properly repair your roof, don’t hesitate to contact a professional roofer for assistance. By addressing damage as soon as possible, you can avoid more extensive and expensive repairs down the line, and help to ensure the long-term health and safety of your home.
Replacing Broken Pieces of Tile
If you’ve noticed a broken piece of tile on your roof, it’s essential to replace it promptly. Leaving a broken tile in place can lead to further damage to your roof, such as water leaks and structural damage. Luckily, replacing a broken tile is a relatively straightforward process that can be done with a few simple tools. Here’s how to replace a broken piece of tile on your roof:
First, carefully remove the broken piece of tile from the roof. Use a putty knife or another suitable tool to carefully lift the tile and remove any remaining pieces. Be sure to take note of the surrounding tiles’ position to ensure that you can replace the broken tile with a new one that matches the rest of the roof.
Next, measure the size of the opening left by the broken tile. You’ll need to purchase a replacement tile that is the same size and shape as the one you removed. You may be able to purchase a replacement tile from your roofing contractor or hardware store, depending on the type of tile you have.
Once you have your replacement tile, apply a small amount of roofing cement to the underside of the tile and carefully slide it into place. Be sure to position the tile so that it aligns with the rest of the roof and sits flush with the surrounding tiles.
Once the replacement tile is in place, use roofing nails to secure it to the roof. Hammer a nail into each corner of the tile and one in the center to ensure it’s secured firmly in place. You may need to trim the nails so that they sit flush with the surface of the tile.
Finally, use a putty knife to cover the nails and any gaps around the new tile with roofing cement. Be sure to smooth the cement evenly over the surface of the tile and into any gaps to prevent water from seeping in. Allow the cement to dry fully before walking on the roof or allowing any traffic on the area you’ve repaired.
Replacing a broken tile on your roof is a straightforward process that can be done with a few simple tools. If you’re uncomfortable doing the job yourself, be sure to contact a professional roofing contractor to ensure the job is done correctly and safely. By maintaining your roof and replacing broken tiles promptly, you can extend the life of your roof and prevent costly damage down the line.
Securing New Pieces with Roofing Nails
When it comes to repairing a tile roof, one crucial step is securing new pieces with roofing nails. These nails are essential to ensure that the replaced tile stays in place and doesn’t shift or move around.
Before you start hammering away, it’s important to choose the right nails for the job. You’ll want nails that are long enough to penetrate the roof’s structure, but not so long that they poke through the other side. Some general guidelines suggest using nails that are at least 2 inches long but can vary depending on the thickness of the tile and the roof’s structure.
Once you have your nails, it’s time to start securing the replacement tile. Begin by placing the tile in its proper position and using a pencil or marker to mark the spots where the nails will go. Typically, you’ll want to place nails in each corner of the tile and one in the center for added security.
Now it’s time to hammer those nails in. Use a roofing hammer to ensure that you have a good grip and angle the nail slightly so that it penetrates the tile at an angle. This will help to hold the tile securely in place and prevent any water from seeping underneath it.
Be careful not to over-hammer the nails, as this can damage the tile or cause it to crack. It’s also important to note that different types of tiles may require different techniques and tools for securing them properly, so consult your roofing contractor or manufacturer’s guidelines if you’re unsure.
After the nails are in place, you can use a pair of tin snips to trim the excess off and prevent any sharp edges from protruding. Finally, cover the nails with a bit of roofing cement to seal them off and prevent any water from penetrating the roof.
Securing new pieces with roofing nails is a crucial step in tile roof repair. Take your time and choose the right nails for the job to ensure that your repair lasts for years to come.
Access the Roof Deck


If you are planning to install a new roof, inspect your existing roof or perform any kind of repairs on your roof, accessing the roof deck is an important step. The roof deck is the foundation of your roof, and it is where all of the other layers of your roof are installed. By accessing the roof deck, you can assess its condition, repair any damage, and ensure that it is ready for the next layer of your roofing system.
The first step in accessing the roof deck is to ensure that you have the necessary safety equipment and tools. This includes a sturdy ladder, a safety harness, a hard hat, and appropriate footwear. It is also important to check the weather forecast, and avoid accessing the roof deck during wet, icy or windy conditions.
Once you have gathered the necessary equipment and determined that the weather is suitable, it is time to climb up to the roof. Before you start climbing, make sure that the ladder is secure and that someone is nearby in case of an emergency.
Once you are on the roof, use a roofing pry bar to gently pry up the existing shingles or tiles, and remove any fasteners that are holding them in place. Make sure to work slowly and carefully, so that you do not damage the tar paper or any other layers of your roofing system.
Once you have removed enough shingles, tiles or other materials, you will be able to see the roof deck. Inspect the deck carefully for any signs of damage, such as rot, moisture, or cracks. If you find any damage, it is important to repair it before you proceed to the next step.
If the deck is in good condition, it is time to install or repair any additional layers of your roofing system. This may include installing flashings, drip edges, or underlayment depending on the type of roofing system you are installing.
Accessing the roof deck is an essential step in maintaining the integrity of your roof. By ensuring that the deck is in good condition, you can ensure that your roof will last for years to come, and protect your home from the elements.
Finishing Touches to Ensure a Watertight Seal
When it comes to repairing a tile roof, it’s not just about replacing the broken tile. The finishing touches to ensure a watertight seal are just as important as the repair itself. Here are some steps you can take to ensure your tile roof repair is watertight and sturdy:
- Clean the Area: Before you begin any repair work, make sure the area around the broken tile is clean and free from debris. Use a putty knife or similar tool to remove any dirt, leaves, or other materials that may have accumulated in the area.
- Apply Roofing Cement: Once the area is clean, apply some roofing cement around the edges where the new tile will be placed. This will help to create a watertight seal and prevent any water from seeping through the tile.
- Place the New Tile: Using the correct roofing nail, place the new tile in position and secure it with the nails. Make sure to place nails in each corner of the tile as well as one in the center.
- Add More Roofing Cement: Once the tile is secured in place, add a layer of roofing cement over the nails to seal them off and ensure a watertight seal. This will also help to keep the nails from rusting over time.
- Apply a Sealant: Finally, apply a sealant to the edges of the tile where it meets the surrounding tiles. This will help to prevent any water from seeping under the tile and causing damage to the roof.
By following these steps and taking the time to add the finishing touches, you can ensure that your tile roof repair is not only sturdy and secure but also watertight. Remember to always consult with a roofing professional if you have any questions or concerns about repairing your tile roof.
Check for Leaks Along Flashing, Valleys, and Vents
One of the most common causes of roof leaks is faulty flashing, valleys, and vents. These areas of your roof are particularly vulnerable to water damage and can easily become the source of a leak.
In order to prevent leaks from occurring, it’s important to regularly check these areas of your roof for any signs of damage or wear. Here’s what you should do:
- Check Flashing: Flashing is the metal or rubber material that covers joints and seams on your roof. Look for any signs of damage or gaps in the flashing. If you find any, you can typically repair the flashing with a roofing cement or by replacing it altogether.
- Inspect Valleys: Valleys are the areas where two sloping sections of roof meet. These areas are particularly prone to leaks, so it’s important to inspect them regularly. Check for any debris that may have accumulated in the valley, as this can cause water to pool and lead to a leak.
- Examine Vents: Vents are used to allow air to flow through your attic space, but they can also be a source of leaks if they’re not properly sealed. Check the sealant around the base of your vents and make sure it’s not cracked or damaged.
- Schedule Professional Inspections: If you’re unsure about the condition of your flashing, valleys, and vents, it’s always a good idea to schedule a professional inspection. A roofing contractor will be able to identify any areas of your roof that need repair and provide you with recommendations for how to fix the problem.
By regularly checking for leaks along these important areas of your roof, you can prevent the need for costly repairs down the road. Don’t wait until you have a leak to take action – make sure your roof is in good condition by inspecting it regularly.
Conclusion
In conclusion, maintaining and repairing your tile roof can help prevent costly water damage and ensure the longevity of your roof. Regularly inspecting the flashing, valleys, and vents can help you identify any potential issues before they become major problems. If you’re not comfortable with performing repairs yourself, it’s always best to hire a professional roofing contractor to ensure the job is done safely and correctly.
Remember, even minor roof repairs can go a long way in preventing major damage to your home. Don’t neglect your roof – take the necessary steps to keep it in good condition and address any issues as soon as they arise. By taking a proactive approach to roof maintenance, you can ensure your home stays safe and dry for years to come.