 509-201-4190

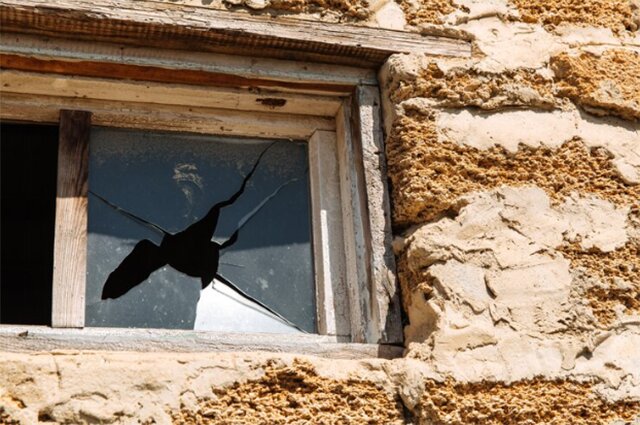
If you’ve ever had the misfortune of having a broken window, you know that it can be a stressful and potentially costly experience. Replacing a window yourself may seem daunting, but with the right tools and guidance, it can be fairly simple. In this step-by-step guide, we’ll walk you through the process of replacing a broken window quickly and safely so that your home is secure again in no time. Let’s get started!
Disclaimer: The information provided in this article is intended to be an instructional guide only. It does not constitute professional advice, and should not be relied upon as a substitute for consultation with a qualified professional. If you have any questions or concerns about replacing a broken window, we highly recommend that you consult with an expert at Advance Roofing LLC. We are proud to have been providing quality roofing solutions to the Spokane, WA area for many years and strive to deliver the highest standard of customer service every time.
What You’ll Need
Before we dive into the step-by-step guide on replacing a broken window, it’s essential to prioritize safety. Broken glass can cause serious injuries, so it’s crucial to take the proper precautions. Here are some safety tips to follow while repairing your window:
- Wear work gloves and safety glasses – These are essential to protect your hands and eyes from glass shards while repairing the window. Safety glasses will protect your eyes from flying debris, and work gloves will prevent cuts from sharp glass edges.
- Use personal protective equipment – In addition to work gloves and safety glasses, consider wearing other protective gear like a dust mask and safety shoes. These additional safety measures will provide further protection from potential accidents while working with glass.
- Secure rubber seals – Before attaching a new glass pane, ensure that the rubber seals are secure. This will help keep the glass in place and prevent it from shifting or falling out.
Follow these safety tips and remember to prioritize safety, and take all necessary precautions to ensure a safe and successful repair.
Step 1: Here are the Instructions for Preparing the Window Frame
Before replacing a broken window, it’s important to prepare the window frame. This step involves two tasks: removing the broken glass and cleaning out the frame. Both tasks require careful attention and precision to ensure that the new glass pane will fit properly and securely. Here’s a step-by-step guide for preparing the window frame.
Removing the Broken Glass
To start, make sure to protect yourself with thick gloves and safety goggles.
- To ensure safety when working with cracked glass, use duct tape to secure the pane and prevent any potential shard accidents.
- Next, use a flat head screwdriver or utility knife to carefully remove the old glazing surrounding the broken pane. If the glazing doesn’t come off easily or is stuck in place, using a heat gun to warm it up can help loosen it.
- Once the glazing is removed, it’s time to safely remove the broken glass from the frame without causing further damage. Begin by gently rocking the glass back and forth to loosen it from the frame. Then, carefully grasp the broken glass and, wearing gloves, slowly and cautiously lift it out of the window frame.
Always be sure to handle broken glass with extreme care to avoid injury. Once all of the broken glass has been removed from the window frame, the preparation for installing a new pane of glass can begin.
Cleaning Out the Frame
- First and foremost, ensure your safety by wearing gloves to protect your hands against sharp edges and safety goggles to shield your eyes from any flying debris.
- Next, carefully remove any glass shards sticking out of the frame and dispose of them in a secure container. This helps to prevent any injuries that could occur while scraping off the old glazing compound.
- Now, using a putty knife, pliers, or a thin flathead screwdriver, gently scrape off the hardened glazing compound or putty around the glass. You can also use a heat gun to heat up stubborn glazing that won’t come off easily.
- Once the glazing or putty has been removed, pry open the old glazing points and take out all the broken glass carefully, making sure no extra debris is left in the frame.
- It’s now time to scrape down the inside of the frame gently with a chisel to remove any remaining bits of the old glazing compound and smooth out the wood using fine sandpaper if necessary. This ensures that the new glass pane fits snugly into the frame without any gaps or bumps.
- For wooden frames, it’s also important to apply a coat of linseed oil using a paintbrush and wait for it to dry before moving on to installing the new glass pane. This step helps to preserve the wood and prevent any rotting or warping.
By following these steps, you can effectively clean out the window frame in preparation for installing the new glass pane, ensuring a safe and efficient removal and replacement process.
Step 2: Measuring and Cutting the Replacement Glass
Before proceeding with the replacement process, it’s essential to measure the window frame accurately to ensure the new glass pane fits impeccably. Remember the old carpenter’s adage: “Measure twice, cut once!” This step not only guarantees a secure and airtight fit but also ensures optimal energy efficiency. Selecting the right type of glass is also crucial to the replacement process. There are various types of glass panes available, each with varying levels of durability, insulation, and ease of installation. In the following sections, we’ll explore these two steps in detail to ensure a smooth and effective window replacement process.
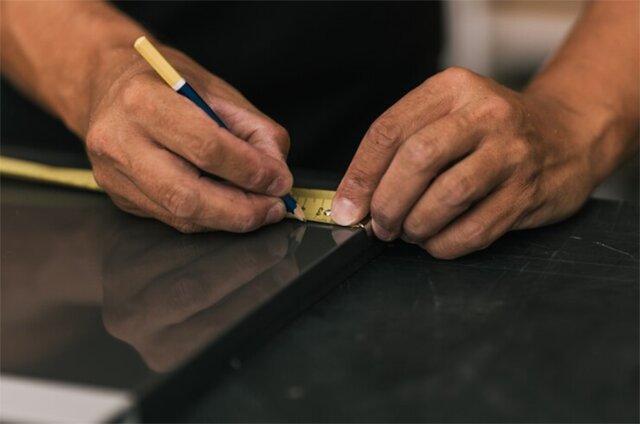
Measure Twice, Cut Once!
Once you have removed the broken glass from the window frame, it’s essential to take accurate measurements of the empty frame before deciding on the replacement pane’s correct size. As the old carpenter’s adage goes, “Measure Twice, Cut Once!” This step is critical to ensure a perfect fit of the new glass and avoid a waste of time, money, and effort.
Using the precise measurements gathered in the previous step, it’s crucial to double check them before making any cuts. An inaccurate cut will not only waste a new piece of glass but may also cause safety hazards due to shards of broken glass leftover.
When going through this process, it’s advised to use a square to ensure that all the sides have equal measurements. By doing so, you can guarantee that the glass fits perfectly in the window frame, creating an airtight and secure seal.
In conclusion, accurate measurements and double-checking them before making any cuts in the glass pane cannot be emphasized enough. This saves time, money, and most importantly, your safety. So remember, “Measure Twice, Cut Once!”
Selecting the Right Type of Glass
Choosing the right type of glass for your window replacement project can be overwhelming with so many options available in the market. It’s essential to consider certain factors before making your final decision.
Firstly, you should take into account the strength of the glass panes. Depending on the window’s location, you may require a durable glass that can withstand extreme weather conditions and potential impact from debris, such as tempered or impact-resistant glass.
Energy efficiency is another crucial factor to consider. Opting for energy-efficient windows can significantly reduce your home’s energy costs, and by extension, your carbon footprint. Energy-efficient options, such as double-pane or triple-pane windows, and insulated glass units (IGUs) filled with argon or krypton gas, increase your home’s insulation, helping to keep the heat inside during the winter and outside during the summer.
Size is also a vital consideration; ensuring the size of the window pane is accurate will help prevent a drafty window seal. This is where speaking with a window expert can be beneficial, as they can recommend the best glass options based on your specific needs.
If you feel unsure which type of glass to use, getting advice from a window expert could help save you time and money in the long run. They can offer recommendations and provide additional insights, ensuring you select the best glass for your needs.
It’s worth noting that custom or specialty glass will come with additional costs, so it’s important to be mindful of your budget while still considering all the factors mentioned above.
In summary, selecting the right type of glass for your window replacement project requires careful consideration of factors such as energy efficiency, glass strength, and size. Consulting with a window expert can help you make a more informed decision, and while custom or specialty glass may cost more, it could offer additional benefits to your home’s energy efficiency and overall value.
Step 3: Installing the New Glass Pane
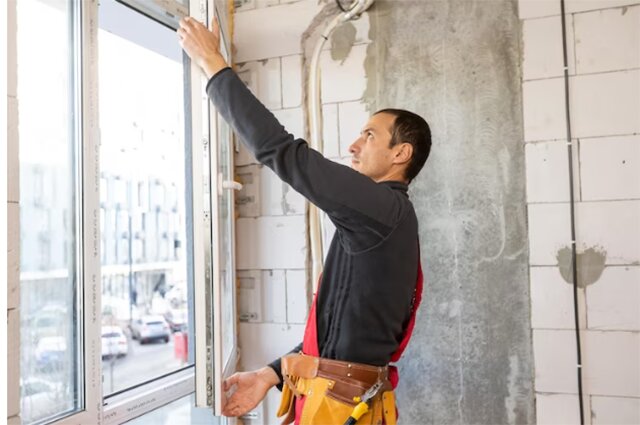
Now that you have removed the broken window pane, it’s time to install the new glass. You will need a few tools such as a putty knife, glazing compound, duct tape or wire brush, safety glasses, and a pair of pliers. There are different methods for installing the new glass, and we will cover two of the quickest and most effective ways: applying putty knife caulk and securing with duct tape or wire brush.
Applying Putty Knife Caulk
Using a putty knife to apply caulk is one of the quickest and most effective ways to secure a new glass pane in place. Here are the steps to follow:
- Check the area where the new glass pane will be installed. Make sure it is clean and free from any debris.
- Using a putty knife, apply a continuous, even bead of putty around the entire perimeter of the window frame. Make sure that the depth of the putty is enough to hold the new glass pane in place.
- Once the bead of putty is applied, carefully place the new glass pane on top of it. Use the putty knife to press the glass firmly into the putty so that it adheres well.
- Be sure to apply pressure evenly across the entire pane to ensure that it is fully secured in place.
- Once the glass pane is securely in place, scrape off any excess putty that may have squeezed out of the joint between the glass and the frame to achieve a smooth finish.
By following these simple steps, you can quickly and effectively install a new glass pane using a putty knife and caulk to provide added strength and durability.
Securing with Duct Tape or Wire Brush
If you need to replace a broken window pane quickly, using duct tape or a wire brush can be a practical solution. Here’s how to do it:
- Cut a piece of duct tape that’s long enough to cover the whole crack or broken area of the glass.
- Apply the tape over the damaged area, starting from one end and pressing it firmly on both sides of the glass.
- Repeat the process on the other side of the window as well.
- For an alternative option, use a wire brush to secure the glass pane. Push the wires around the edges of the glass to hold it in place.
- Make sure that the glass pane is completely secured in place, without any additional movement or wobbling.
- Finally, remove any excess duct tape or debris on the surface of the window to keep it looking clean and tidy.
By following these simple steps, you can use duct tape or a wire brush to quickly and effectively secure a replacement glass pane in place, giving you a quick fix until you’re able to carry out a more permanent repair.
Step 4: Finishing Up
Now that you have successfully replaced the broken window pane, it’s time for the final clean-up. This step is crucial to ensure that your newly installed window functions properly and remains in top condition for years to come.
- Remove any excess putty or glazing compound from the window frame using a putty knife or utility knife. Be careful not to damage the freshly installed glass.
- Clean the window frame thoroughly using a damp cloth to remove any dirt or debris. If the window is particularly dirty, you may need to use a mild soap solution.
- Inspect the newly installed glass to ensure that it’s secure and flush against the frame. If it’s not, gently push the glass into place.
- If you notice any gaps or cracks around the window frame, fill them with a small amount of glazing compound using a putty knife. Smooth it out with your finger or a 45-degree angle tool to create a clean finish.
- If you removed any hardware from the window, now is the time to reinstall it. Use a pair of pliers to tighten any screws or bolts and ensure that everything is securely in place.
By following these final clean-up steps, you can rest easy knowing that your window is secure, functional, and visually appealing. With proper maintenance and care, your newly replaced window will last for many years to come.
Final Clean-Up
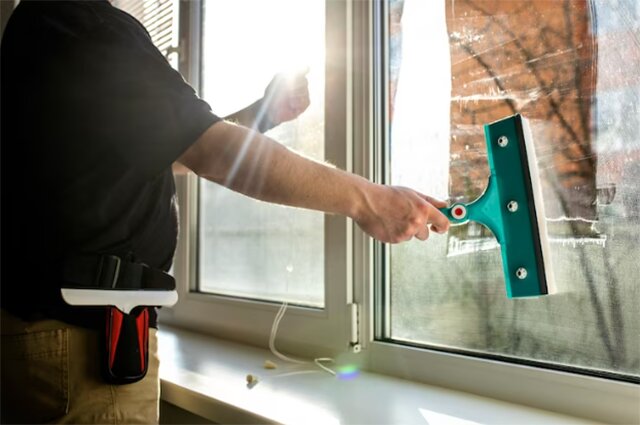
After you’ve successfully installed the new glass pane, it’s time to clean up the work area. Completing this final step will not only keep your space tidy but will also ensure that your new window functions properly.
- Remove Excess Putty. During the installation process, some putty may have squeezed out from the edge of the window frame. Use a putty knife or razor blade to carefully remove any excess putty. Be sure not to scratch or damage the new glass.
- Clean the Glass. After removing the excess putty, it’s time to clean the glass surface. Use a high-quality glass cleaner and a lint-free cloth to avoid leaving any streaks or damaging the new glass pane.
- Vacuum or Sweep the Debris. To finish up, vacuum or sweep any debris left from the installation process. This final step will help keep your space clean and prevent any potential harm. Be sure to dispose of any debris properly.
By following these simple clean-up steps, you can ensure that your new window is in top condition. Remember to handle the glass with care and be diligent while removing excess putty to avoid leaving any scratches or damage.
Conclusion
In conclusion, the final inspection and clean-up process are critical to the success of any broken window repair project. By taking the proper safety precautions and following the necessary steps, you can ensure that your newly repaired window is safe, secure, and functioning well for years to come.


