509-201-4190

Gutter installation can be a daunting task, but it doesn’t have to be. With the right tools and knowledge, you can easily install seamless gutters like a pro. Seamless gutters are an excellent choice for homeowners looking to enhance the beauty of their property while protecting it from water damage. This step-by-step guide will walk you through all the necessary materials, measurements, and steps to properly install seamless gutters in no time! So don your tool belt and prepare for a successful gutter installation project!
Disclaimer: This article provides general information about installing seamless gutters like a pro and should not be considered professional advice. If you need help with your specific gutter installation project, we recommend contacting the experts at Advance Roofing LLC. They have been proudly serving the Spokane, WA area for many years with the highest standard of quality roofing solutions. For additional help or guidance, please don’t hesitate to reach out to their team today!
What Are Seamless Gutters?
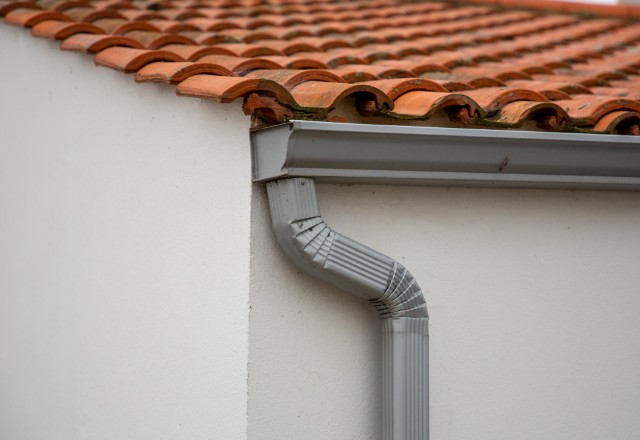
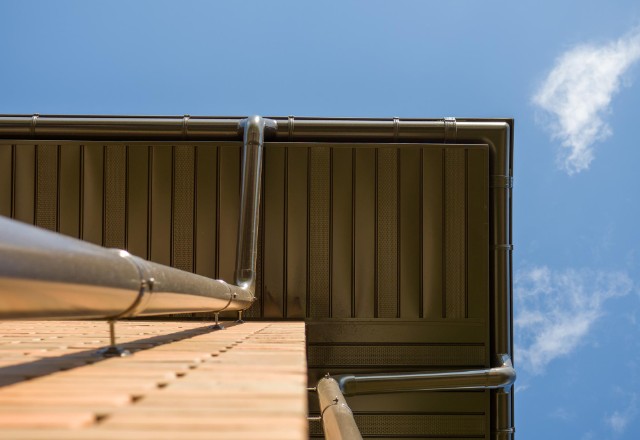
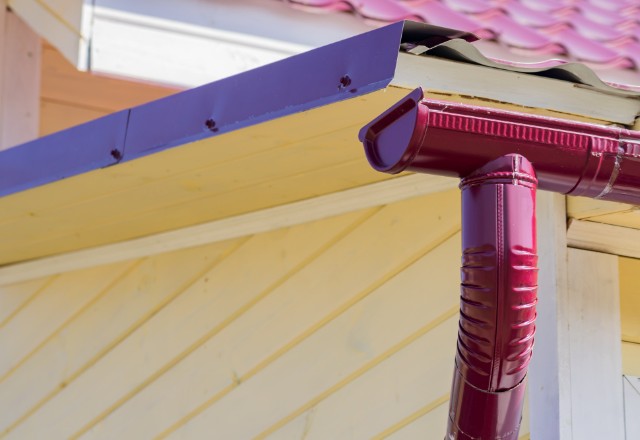
Seamless gutters, also known as continuous gutters, are a great option for homeowners looking to add a modern touch to their property and protect it from water damage. Seamless gutters come in a variety of materials, sizes, and colors, so you can easily find one that matches your home’s exterior design. Unlike sectional gutters, seamless gutters are made from single pieces of material that run the entire length of your roof line without any seams or joints. This eliminates potential weak spots in the gutter system and helps reduce the risk of leaks. Additionally, they require less maintenance than traditional sectional gutters since there are no seams or connections to worry about. Ultimately, seamless gutters offer an excellent combination of durability and aesthetic appeal that can help improve your home’s overall value and curb appeal.
Seamless gutters are a great way to modernize your property and protect it from water damage. With their superior durability, aesthetic appeal, and low maintenance requirements, they are an excellent choice for homeowners looking to improve their home’s value and curb appeal. So why install seamless gutters? Find out in the next section!
Why Install Seamless Gutters?
Seamless gutters are a great choice for homeowners looking for a modern and stylish gutter system that can protect their home from water damage.
- Seamless gutters offer superior durability with fewer weak spots compared to traditional sectional gutters, making them less likely to leak or require repairs.
- Additionally, they come in a variety of colors and materials, so you can easily find one that matches your home’s exterior design.
- Plus, they require less maintenance than traditional sectional gutters since there are no seams or connections to worry about.
With all these benefits combined, seamless gutters are an excellent way to increase your home’s value and curb appeal. So why install seamless gutters? It’s simple: they’re more durable, require less maintenance and look great!
Materials Needed for Installation
When it comes to installing your seamless gutters, you’ll need the right materials to get the job done. Start by gathering all the necessary parts and supplies, including gutter sections, downspouts, end caps, brackets and fasteners. You’ll also need a ladder that is tall enough to reach the roofline, as well as a few basic tools like a drill, hammer and level. Additionally, some homeowners may want to purchase sealant or caulk in order to ensure that water tight connections are made between pieces of gutter material. With these materials on-hand and ready to go, you’ll be prepared for a successful seamless gutter installation!
A well installed seamless gutter system can provide a lasting solution to any home’s water management needs. With the right materials and some basic tools, you’ll be on your way to a successful installation. Now that the groundwork is set, it’s time to move onto the next step: Gutter Hangers!
Gutter Hangers
Gutter hangers are an essential part of any seamless gutter installation. These metal brackets provide a secure and reliable anchor point for your gutters, helping to ensure that they remain firmly in place during heavy rainstorms or strong winds. Additionally, gutter hangers help to support the weight of the entire system, preventing sagging and dislodging over time. When installing your hangers, make sure you measure each section carefully and use a level to ensure that they’re evenly spaced along the roofline. Additionally, it’s important to make sure that the hangers are securely fastened with screws or nails. With proper installation and maintenance, gutter hangers should provide years of reliable service for your home’s seamless gutter system!
Tin Snips
Tin snips are an essential tool for any seamless gutter installation project. These scissors-like tools are designed to cut through thin sheets of metal, making them perfect for creating custom-sized pieces of gutter material. When using tin snips, it’s important to wear safety goggles and gloves to protect your eyes and hands from flying metal pieces. Additionally, make sure you use the right type of snips for the job; there are three basic types available, each designed to handle specific materials and thicknesses. Finally, always start your cuts with a gentle pressure and gradually increase it as needed; this will help reduce the chances of warping or twisting the metal during the cutting process. With proper use and maintenance, tin snips can provide many years of reliable service for all your seamless gutter projects!
Pop Rivets or Sheet Metal Screws
Pop rivets and sheet metal screws are two of the most commonly used fasteners for seamless gutter installations. Pop rivets are easy to install and provide a secure, permanent connection between two pieces of material. To install them, simply insert the pop rivet through the materials you wish to join, then use a pop rivet gun or air hammer to drive the mandrel into the head and expand it. Sheet metal screws provide an even stronger bond than pop rivets, making them ideal for heavier-duty installations. These self-tapping screws feature sharp points that easily penetrate materials such as aluminum and vinyl siding without pre-drilling. Once installed, they require no additional sealants or adhesives to remain secure. Both pop rivets and sheet metal screws are essential tools for successful seamless gutter installation projects!
Gutter Sealant
Gutter sealant is an essential part of any seamless gutter installation project. This specialized adhesive helps to fill in small gaps and crevices between gutter sections, preventing water from seeping through and causing damage to the home. Gutter sealant also helps to keep out pests and insects that can cause further damage. When selecting a gutter sealant, choose one designed specifically for gutters—these products are formulated with special ingredients that allow them to adhere better and last longer. Before applying the sealant, make sure the surfaces of the gutters are clean and dry, then apply a thin layer using a caulking gun or putty knife. Once applied, let it sit for at least 24 hours before testing its strength; if there are still gaps or weak spots, reapply more sealant until all areas are properly sealed. With proper application, gutter sealants can help provide years of protection against water damage!
Extension Ladder
Extension ladders are an essential tool for any homeowner or contractor looking to take on projects that involve a good amount of height. Not only do they provide the necessary stability and reach, but they also fold up into manageable sizes that make them easy to transport and store. When using an extension ladder, it’s important to ensure you’re following safety protocols. First and foremost, secure the ladder in place before ascending—this can be done by tying off to a secure point or anchoring with weights at the bottom. Next, make sure the rungs are facing away from the wall when climbing, as stepping on the wrong surface could make the ladder unstable. Finally, always keep three points of contact with the ladder when ascending or descending; never overreach or lean too far out from side to side. With these few simple tips in mind, you can rest assured your extension ladder will serve you well for years to come!
Calculating Gutter Lengths

Calculating the proper length of gutters for your home is extremely important. The wrong size could lead to water spilling off your roof and onto the ground, which can cause a host of problems. Fortunately, calculating gutter lengths is not difficult—it just requires a bit of math. First, measure the length of your roof’s perimeter. Next, subtract out any areas that don’t require gutters—such as overhangs or dormers—and divide the remaining distance by two. This will give you the total linear footage for one side of your roof. To calculate the total gutter length required for both sides, multiply this number by two. Finally, add a few extra feet to account for downspouts and corners in order to ensure you have enough material on hand when it comes time to actually install the gutters. With these simple steps, you’ll be sure to have all the materials needed for a successful gutter installation project!
With this method, you’ll have all the measurements needed for accurate gutter length calculations. Now, find out how many linear feet of gutter materials you need to complete your project in the next section!
Measurements Per Linear Foot of Gutter Needed for Installation
It’s important to know the measurements per linear foot of gutter needed for installation. This will help you determine the total amount of material you’ll need and allow you to order the right amount up front. Generally speaking, each linear foot of gutter requires two pieces of vinyl or aluminum fascia trim, one hanger with screws, one downspout outlet and one drop outlet. For gutter lengths over 10 feet long, you’ll also need additional outlets, end caps and hangers every 10 feet. To be safe, always measure twice before cutting any materials and make sure all pieces fit together properly before installation begins. With these simple steps, you’ll have the confidence to tackle any gutter installation project like a pro!
Step-by-Step Guide: How to Install Seamless Gutters Like a Pro
Installing seamless gutters can be a daunting task for even the most experienced DIYer. But if you follow these simple steps, you can tackle any gutter installation project like a pro!
- First, measure the length of your gutter run to determine the number of linear feet needed for installation.
- Then, calculate exactly how much material is required for each linear foot of gutter. This includes two pieces of vinyl or aluminum fascia trim, one hanger with screws, one downspout outlet and one drop outlet. For longer runs, you’ll need additional outlets, end caps and hangers at 10-foot intervals.
- Next, make sure all pieces fit together properly before beginning installation. Finally, begin installing your gutters from the top corner of your roof and work your way down in sections until complete.
By following these steps closely and using high-quality materials, you’ll successfully install seamless gutters that will look great and last for years to come!
Now that you have the basics of installing seamless gutters down, you’re ready to tackle your project with confidence. But don’t forget: preparation of the area and measuring for fascia brackets are key steps in ensuring a successful installation. Next up, we’ll show you how to get started!
Preparation of the Area and Measuring the Fascia Brackets
Preparation of the area is an important step in any gutter installation project. Before you start, take the time to clear away any debris or foliage on or around your roofline that may hinder the installation process. You’ll also want to make sure the area is free from obstructions and hazards, such as overhanging trees or power lines.
Measuring for fascia brackets is another critical step in successful gutter installation. You’ll need to measure for both the width of each bracket and its distance from the edge of the roof line. Depending on your gutter system’s design, you may need to adjust the measurements accordingly. For example, some systems require a greater gap between brackets than others.
Following these steps closely will help ensure that your gutters are installed correctly and securely and will last for years to come!
Cutting the Sections of Gutter to Length and Installing the Gutter Hangers
Cutting the sections of gutter to length can be a tricky part of the installation process. To ensure an accurate cut, it’s important to measure twice and cut once! A good rule of thumb is to add at least an inch or two extra after you measure, just in case. Once your sections have been cut to size, you’ll need to install gutter hangers every three feet along your roofline. This will help keep your gutters firmly attached and prevent them from sagging over time.
Gutter hangers are typically made from galvanized steel and come in a variety of sizes and styles. Before you begin installation, make sure that you’re using the appropriate type of hanger for your particular gutter system. For best results, use a drill with a special adapter to securely fasten the hangers into place. Keep in mind that if your area experiences heavy snowfall or ice buildup during winter months, additional reinforcement may be necessary to prevent your gutters from becoming dislodged or damaged by extreme weather conditions.
Connecting the Downspout Outlet and Adding Elbows, If Necessary
Connecting the downspout outlet and adding elbows, if necessary, are the next steps in installing seamless gutters. The downspout outlet is the piece that connects your gutter system to the ground. It’s important to properly seal this connection with silicone or another waterproof material to prevent leaks. Once your downspout outlet is secured, you may need to add elbows or other connecting pieces to create a smooth transition from the roofline to the ground.
Elbows come in several sizes and angles, so make sure you select one that best fits your needs. If you’re unsure which type of elbow is right for you, consult with a professional installer who can offer advice on selecting and installing the perfect piece. With all of these components in place, your gutter system should be able to effectively direct water away from your home and protect it from damage caused by heavy rains and snowfall.
Securing Each Section of Gutter with Pop Rivets or Sheet Metal Screws
Securing each section of gutter with pop rivets or sheet metal screws is essential to ensure a strong and reliable gutter system. Pop rivets are the most common type of fastener used for gutters, as they provide a secure connection and are easy to install. Sheet metal screws are also an option, although they can be slightly more difficult to drive into the material.
Before you begin, make sure you have the right size rivet or screw for your gutter system, as using the wrong sized fasteners can cause damage or weaken its integrity. When installing pop rivets, firmly press down on one side of the gutter until it’s flush with the other side before drilling in the fastener. For sheet metal screws, use a power drill with a Phillips head bit to securely drive them into place. With either type of fastener, make sure each connection is tight and secure before moving on to the next step of your installation project.
Installing Downspout Brackets at Appropriate Intervals Along the Roofline
Downspout brackets are an important part of your gutter installation project. Placed at appropriate intervals along the roofline, these brackets will hold the downspouts securely in place and help to direct water away from your home’s foundation. When selecting downspout brackets, make sure they’re made of a durable material that can handle the weight of the water as it flows through the gutter system. It’s also important to choose a style that matches your existing gutter system for a cohesive look.
To install downspout brackets, begin by marking their locations on the fascia boards with a pencil and measuring tape. Use lag screws to secure each bracket into place, making sure they are flush with the wall or fascia board before tightening them into place. Finally, attach the downspouts to each bracket with sheet metal screws or pop rivets, depending on which type of fastener you used during installation of your gutters.
Digging a Hole for the Downspout Outlet and Installing an Extension Ladder, if Necessary
Digging a hole for the downspout outlet is an important step in your gutter installation project. Start by determining where to place the outlet and the size of the hole you need to dig. Mark the spot with a stake, then use a shovel or posthole digger to carefully excavate the area. Make sure you’re digging deep enough so that the outlet pipe will be flush with or slightly below ground level. If you need to use an extension ladder during this process, make sure it’s placed on solid, even ground before beginning your work. It’s also important to wear sturdy shoes and gloves while digging and climbing ladders in order to avoid injury. When finished, fill in any gaps around the pipe with dirt and tamp it down firmly before continuing onto the next phase of your installation project.
Attaching the Downspout Outlets to the Fascia Boards with Sheet Metal Screws or Rivets
Attaching the downspout outlets to your fascia boards is an important step in your gutter installation project. Begin by measuring the distance from the hole you dug for the outlet to the fascia board, and then cut a piece of sheet metal that size. Make sure it’s long enough for the outlet pipe to fit through. Next, use sheet metal screws or rivets to attach the metal flashing to the fascia board, making sure it’s secure and fits properly around the pipe. To ensure a waterproof seal, apply silicone caulk or tar around any openings between the flashing, pipe and board. Finally, slide the outlet into place and screw it in securely with galvanized screws. Be sure to check all connections one last time before moving onto the next phase of your gutter installation project.
Conclusion
Installing seamless gutters like a pro doesn’t have to be a daunting task. With this step by-step guide, you can be sure your gutter installation project is done right the first time. From attaching the downspout outlets to the fascia boards with sheet metal screws or rivets, to making sure all connections are secure and waterproof, following these steps will ensure your gutters are installed correctly and ready for years of reliable use. Don’t forget to also clean out your gutters and check for any damage regularly in order to keep them functioning properly and looking great!