509-201-4190

Standing seam metal roofing is an increasingly popular choice for homeowners looking to upgrade their roof. Not only is it a stylish and eye-catching option, but the long-term benefits make it well worth the investment. From its superior durability to its energy efficiency, metal roofs are becoming more and more popular for those looking for a reliable solution that stands the test of time. But before you dive into installing a standing seam metal roof, there’s some essential information you should know first. This guide will walk you through every step of the process so you can ensure your standing seam metal roof installation is flawless from start to finish.
Disclaimer: While this guide provides a general overview of the steps required to install a standing seam metal roof, it should not be used in place of professional instruction. We highly recommend seeking advice from an experienced contractor prior to starting any project, and if possible, consult with Advance Roofing LLC who has been proudly providing quality roofing services in the Spokane, WA area for many years. Installing a standing seam metal roof can be complicated and exact instructions may vary depending on the specific situation. As such, we strongly advise that you contact Advance Roofing LLC for personalized advice and assistance when completing your project.
Can you provide an explanation of Standing Seam Metal Roofing?
Standing seam metal roofing is a popular choice among homeowners looking to upgrade their roof. It’s an attractive solution that comes with plenty of long-term benefits, like superior durability and outstanding energy efficiency. This type of roof involves panels of metal being joined together on top of your existing roof decking. The panels overlap each other to form ridges and valleys, giving the roof its signature look and allowing it to shed water more effectively than flat roof designs. Standing seam metal roofs are also very low maintenance, making them ideal for homeowners who want a reliable solution that requires minimal upkeep. With all these advantages, it’s no wonder standing seam metal roofs are becoming increasingly popular!
Standing seam metal roofing is a fantastic solution for any homeowner who wants an attractive, durable and energy-efficient roof. Discover the many additional benefits of this stylish and dependable option – next up!
Benefits of Standing Seam Metal Roofing
Standing seam metal roofing is a great choice for homeowners looking to upgrade their home’s exterior. This type of roof offers several key benefits, such as superior durability and outstanding energy efficiency.
- Standing seam metal roofs are more resistant to damage caused by severe weather conditions like hail and high winds, making them ideal for areas with extreme weather.
- Furthermore, these roofs are designed with ridges and valleys which allows them to shed water more effectively than flat roof designs.
- The panels also feature overlapping seams that provide an added level of protection from the elements. In addition, standing seam metal roofs can help reduce energy costs since they reflect sunlight away from the home.
- Finally, this type of roof is low maintenance and designed to last for decades with minimal upkeep required.
With all these advantages, it’s easy to see why standing seam metal roofs are becoming increasingly popular among homeowners!
Common Types of Standing Seam Metal Roofs
Standing seam metal roofs come in a variety of types and styles, so it’s important to determine which type is best for your home. The most popular types of standing seam metal roofing include corrugated, striated, and interlocking panels.
- Corrugated metal roofs feature curved ridges and valleys that are designed to shed water effectively.
- Striated metal roofing features straight ridges and grooves that allow for maximum airflow.
- Lastly, interlocking panel systems have overlapping panels that create an even stronger seal against the elements.
Each option has its own benefits and drawbacks, so it’s important to consider all factors before making a decision about which type of standing seam metal roof is right for you.
Measurement and Estimating
Accurate measurement and estimating are essential for a successful standing seam metal roofing installation. Before beginning the project, take detailed measurements of the roof area to ensure all materials will fit correctly. Take into account any features, such as chimneys or skylights, that may impact the installation process. Additionally, an accurate estimate should be made for total material costs and labor expenses before starting the job. This will help you stay within budget and avoid any costly surprises down the road. Once you have your measurements and estimates in order, it’s time to start shopping around for materials and finding qualified professionals to help with the installation process.
Standing seam metal roofing is an excellent choice for those looking to upgrade their roof. With the right measurements, estimates, materials, and professionals in place, you’ll be well on your way to a successful installation. Now that you have all the information you need, let’s move onto the next step: gathering the necessary tools for measuring and estimation!
Necessary Tools for Measuring and Estimation
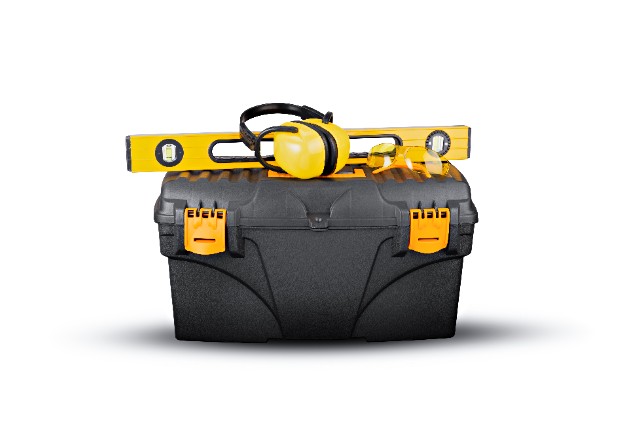
Before beginning the standing seam metal roofing installation, it’s important to have all the necessary tools for measuring and estimating. Depending on the size of the job, you may need a tape measure, level, carpenter’s square, chalk line, and other basic hand tools. For larger jobs, laser levels or total station equipment may be required to ensure accuracy. Additionally, you may need special tools such as a ridge cap crimper or seamer
to complete the job correctly. Make sure to check with local building codes before purchasing any specialty tools. With these tools in hand, you can move onto the next step: gathering materials and finding qualified professionals!
Calculating Square Footage for the Entire Roof

Calculating the square footage of your entire roof is an important step in measuring for your standing seam metal roofing installation. It’s essential to know the exact size of the area you’ll be covering so that you can order the right amount of materials. To calculate the total square footage, measure each side of the roof separately and then multiply its length by its width. Make sure to account for any slopes or ridges, as well as any dormers or chimneys that may protrude from the roof. Once you have calculated all these measurements individually, add them together to get a total square footage number. This number will help you determine how much material you need to purchase for your project.
Determining the Slope of the Roof
Determining the slope of your roof is an important part of installing a standing seam metal roof. The slope, or pitch, of the roof affects how much material you need to purchase and how long it will take to install. To calculate the slope, measure from the highest point on the roof down to its lowest point. Then divide this number by 12 inches (or 1 foot). This calculation will give you the pitch ratio – for example, 4:12 would mean that for every 4 inches in height, it goes out 12 inches horizontally. Knowing this ratio will help you decide which type of metal panels are best suited for your installation project. Additionally, some tools such as snow guards and gutter systems may require a minimum pitch before they can be installed properly. Make sure to account for any slopes when measuring and ordering materials for your project!
Preparing to Install a Standing Seam Metal Roof
Preparing to install a standing seam metal roof is an important step for any homeowner. Before you begin, there are several factors to consider to ensure a successful installation.
- First, make sure that the surface of your roof is completely clean and free of debris. This will help the panels adhere properly and prevent any damage or water infiltration issues down the road.
- Additionally, you’ll need to check the existing structure of your roof, including rafters and sheathing, to make sure they’re in good condition and able to support the weight of your new metal panels.
- Finally, be sure to measure accurately and order enough materials for the job – including flashings, fasteners, sealants, and more – so you know you have everything on hand when you’re ready to start installing.
With these considerations taken care of beforehand, you can rest assured that your new standing seam metal roof will be installed correctly and look beautiful for years to come!
By installing a standing seam metal roof, your residence can benefit both aesthetically and practically. Proper planning and preparation can ensure that the roof meets your needs. Now that you’ve prepared for the installation, it’s time to move on to the next step: preparing the existing roof surface!
Preparing the Existing Roof Surface
Preparing the existing roof surface is an essential step in any standing seam metal roof installation. It ensures that the panels will adhere properly and prevents possible damage or water infiltration issues down the road.
- To begin, remove any debris that may be present on your roof’s surface. This includes leaves, twigs, branches, and anything else that could interfere with proper installation.
- Next, check for any signs of wear-and-tear or damage to the existing structure of your roof – including rafters and sheathing – to make sure they’re strong enough to support the weight of your new metal panels.
- Finally, use a level to double-check that all surfaces are even before starting to install your new standing seam metal roof.
With these preparation steps taken care of beforehand, you can rest assured that your new metal roof will look beautiful for years to come!
Obtaining Necessary Supplies & Materials
Once you’ve completed the necessary preparations for your standing seam metal roof installation, it’s time to gather up the supplies and materials needed.
- Start by measuring the area of your roof in order to determine how much material is required.
- Then, consult with a local roofing supplier or contractor to make sure that you’re ordering the right type of panels, fasteners, and other equipment for your particular project.
- Finally, make sure you have all the tools needed for the job – including a chalk line, sawsall, hammers, pry bars, and drill bits – before starting your installation.
With these essential items gathered up ahead of time, you can be sure that your new standing seam metal roof will look amazing once it’s installed!
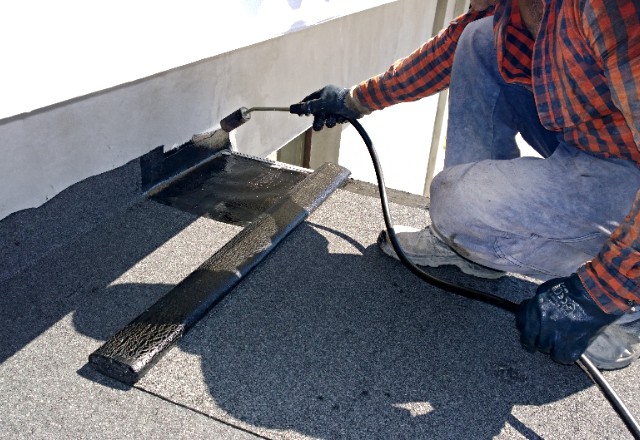
Installing an Underlayment Layer Before Installation Begins
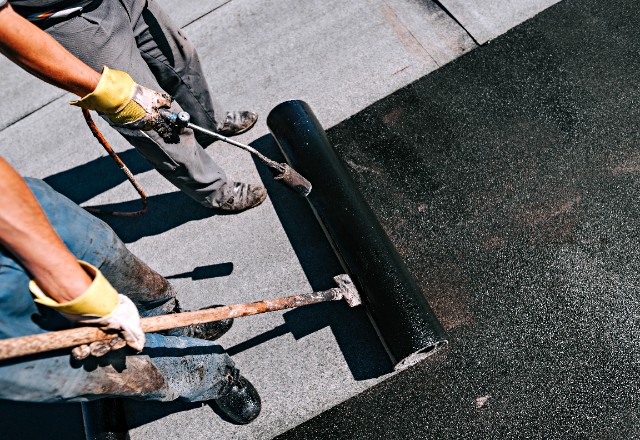
Installing an underlayment layer is an important step when installing a standing seam metal roof. This layer serves as a barrier between the metal and the roof deck, helping to protect against water leakage and promoting better air circulation. In order to ensure that the underlayment is properly installed, it should be laid down in straight horizontal lines and fastened securely with nails or staples at regular intervals. The underlayment should also extend beyond the edges of the roof by at least four inches on all sides. After the underlayment has been secured, you can then begin installing your standing seam metal roofing panels. Taking these steps will help ensure that your new roof looks great and lasts for years to come!
Installation Process
Installing a standing seam metal roof is an easy process that only requires basic tools. The first step is to install an underlayment layer over the roof deck. This layer serves as a barrier between the metal and the roof deck, helping to protect against water leakage and promoting better air circulation. Once the underlayment has been installed, you can then begin laying down your metal panels. Starting from one corner of the roof and working your way outwards, use clips or screws to secure each panel in place. Be sure to leave at least ½ inch of space between each panel for expansion and contraction due to temperature changes.
To finish off the installation, caulk any gaps or seams around vents or chimneys before applying paint or sealant to protect your new standing seam metal roof from rust and corrosion. Follow these simple steps and you’ll have a beautiful and durable metal roof that lasts for years!
The installation of a standing seam metal roof is a simple process that can easily be done by anyone with basic tools. After following these easy steps, you will have a beautiful and durable roof that will last for years to come! Now that the basics are out of the way, let’s move on to the next step – fastening panels to rafters or trusses.
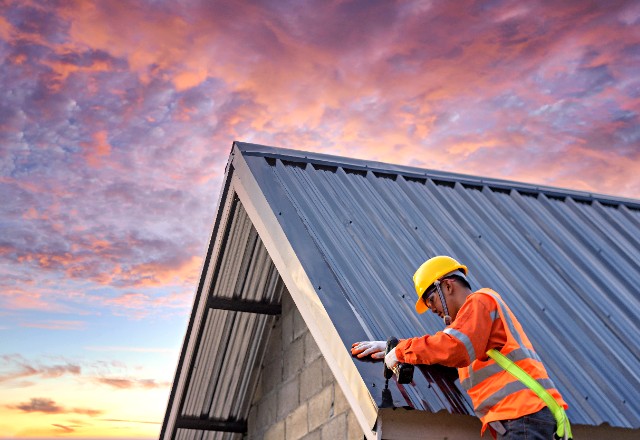
Fastening Panels to Rafters or Trusses
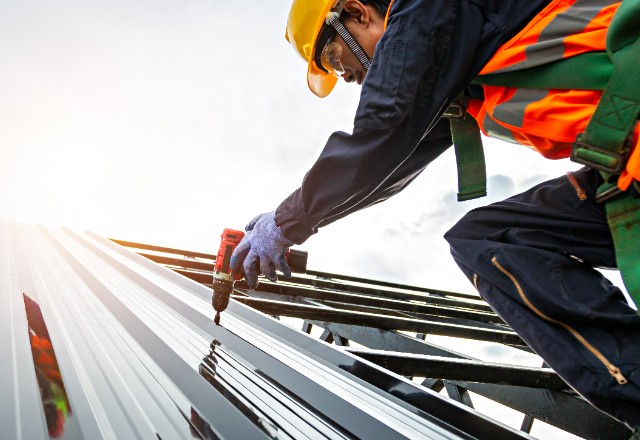
Fastening panels to rafters or trusses is the next step in installing your standing seam metal roof. This can be done with clips or screws, depending on what type of roof you are installing. When fastening metal panels to rafters, ensure that you follow all local building codes and regulations, as this will help ensure a safe and secure installation. To begin, pre-drill holes into each rafter or truss, being sure to leave at least 1/2 inch clearance for expansion due to temperature changes. Once the holes are drilled, attach the clips or screws to the rafters and then slide the panels into place. Be sure to double check each panel for secure attachment before moving onto the next one. With a bit of patience and attention to detail, your standing seam metal roof installation is sure to look great when it’s finished!
Special Considerations for Gable Ends & Special Trim Pieces
Gable ends and special trim pieces present some unique considerations when installing a standing seam metal roof.
- To begin, when installing panels to gable ends, it is important to make sure that the end panel overlaps the side panel by at least 3 inches. This will ensure that your roof is properly sealed from the elements.
- Additionally, when installing trim pieces such as ridge caps or rake edges, use silicone sealant along each edge to provide an extra layer of protection against water intrusion.
- Finally, pay close attention to flashing details around chimneys and other vertical obstacles. Make sure that all flashing is securely fastened with screws and that there are no gaps or spaces left for moisture to penetrate through.
By taking these special considerations into account, you can be sure that your standing seam metal roof will last for years to come!
Working Around Chimneys, Vents, and Valleys in the Roof Line
When installing a standing seam metal roof, it is essential to pay close attention to areas around chimneys, vents, and valleys. These parts of the roof can be particularly tricky to work with because they require extra flashing and caulking in order to ensure a watertight seal. When dealing with chimneys, make sure that all flashing is securely fastened and that there are no gaps or spaces for moisture to penetrate through. Additionally, you should use silicone sealant along each edge when installing trim pieces such as ridge caps or rake edges. Finally, when working in valleys or around other vertical obstacles, use extra care and caution to make sure that panels are properly overlapped by at least 3 inches in order to protect against water intrusion. By taking these special considerations into account, you can ensure that your standing seam metal roof will last for years to come!
Final Touches on the Install Job
Final touches are an important part of any standing seam metal roof installation job. First, it is essential to inspect the entire roof for gaps, holes, and other imperfections before moving on to the next step. Once all repairs have been made, you should then apply a sealant along the edges of each panel to provide an extra layer of protection against water intrusion. Finally, don’t forget to install trim pieces such as ridge caps and
rake edges in order to give the roof a finished look. By following these steps, you can ensure that your standing seam metal roof will look perfect once it has been installed!
Conclusion
Congratulations on completing your standing seam metal roof installation job! This type of roof is known for its durability and longevity, so you can rest assured that your roof will protect your home for years to come. Through careful planning, thoughtful preparation, and attention to detail, you have ensured a flawless installation that looks great and provides the highest level of protection against the elements. You should be proud of the work you have done, as it is sure to add both curb appeal and value to your home. Now all that’s left to do is sit back and enjoy the fruits of your labor!