509-201-4190

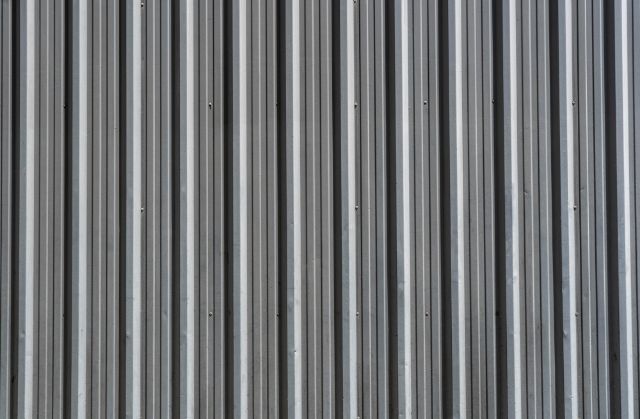
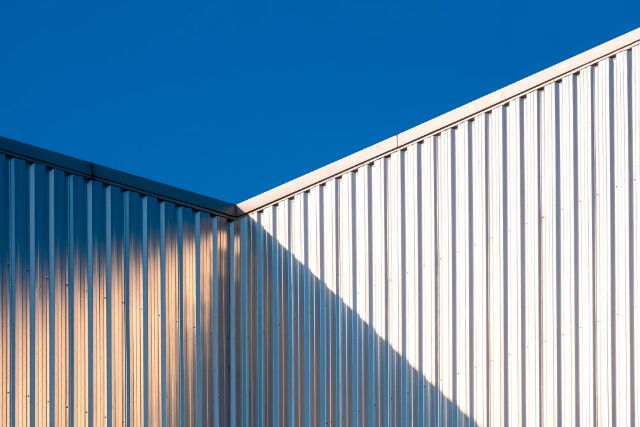
Are you looking to give your home or building a modern, sleek look while boosting its durability and energy efficiency? Consider installing vertical metal siding. This vertical metal siding installation guide will walk you through the process step-by-step, providing expert tips and techniques to ensure a successful project. Whether you’re a seasoned DIYer or a beginner, our guide will help you achieve professional-looking results.
Benefits of Vertical Metal Siding
Before diving into the installation process, let’s explore the advantages of choosing vertical metal siding:
- Durability: Metal siding is resistant to rot, pests, and extreme weather conditions, making it a long-lasting choice.
- Low maintenance: Unlike wood siding, metal siding doesn’t require regular painting or staining, saving you time and money on upkeep.
- Energy efficiency: Many metal siding options have insulating properties that can help reduce heat transfer, leading to lower energy bills.
- Modern aesthetic: Vertical metal siding offers a contemporary, streamlined look that can elevate your property’s curb appeal.
Tools and Materials Needed
To ensure a smooth installation process, gather the following tools and materials before starting your project:
Tools
- Measuring tape
- Carpenter’s level
- Chalk line
- Tin snips or a circular saw with a metal cutting blade
- Drill with appropriate bits
- Caulking gun
- Safety gear (gloves, goggles, and ear protection)
Materials
- Vertical metal siding panels
- Fasteners (nails, screws, or clips, depending on the siding type)
- Weather-resistant barrier (e.g., house wrap or building paper)
- Flashing and trim pieces
- Sealant and caulk
- Touch-up paint (if necessary)
Preparing for Installation
Proper preparation is key to a successful vertical metal siding installation. Follow these steps to get your project off to the right start:
Measuring and Calculating Material Needs
- Measure the height and width of each wall to be sided, accounting for openings such as doors and windows.
- Calculate the total square footage by multiplying the height and width of each wall and adding the results together.
- Add 10% to your total to account for waste and cut-offs.
- Use this final figure to determine the number of siding panels, fasteners, and other materials needed.
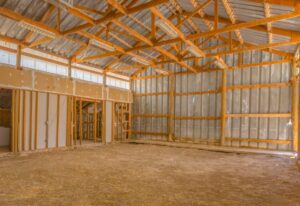
Wall Preparation
- Inspect the walls for any damage, rot, or unevenness. Repair as necessary.
- Remove any existing siding, trim, or obstacles that may interfere with the installation.
- Install a weather-resistant barrier, such as house wrap or building paper, to protect against moisture and air infiltration.
- Apply flashing around windows, doors, and other openings to direct water away from these areas.
Installing Vertical Metal Siding
Now that you’ve gathered your tools and materials and prepared your walls, it’s time to start installing your vertical metal siding. This vertical metal siding installation guide will take you through the process step-by-step.
Step 1: Establish a Starting Point
- Choose a starting point, typically a corner of the building or a door or window opening.
- Use a carpenter’s level to draw a vertical plumb line at this point, ensuring that your siding will be installed straight.
Step 2: Install the First Panel
- Place the first siding panel along the plumb line, leaving a 1/4-inch gap at the bottom for expansion and contraction.
- Check that the panel is level and plumb before fastening.
- Fasten the panel using the manufacturer’s recommended method (e.g., nails, screws, or clips) at the top, bottom, and center of the panel.
Step 3: Continue Installing Panels
- Place the next panel, overlapping the first panel according to the manufacturer’s specifications (usually 1 to 2 inches).
- Ensure that the panels are aligned and maintain a consistent overlap throughout the installation.
- Fasten each panel securely, checking for level and plumb as you go.
- Use a chalk line to maintain a straight line across the top of the panels.
Step 4: Cutting and Fitting Panels
- Measure and mark panels that need to be cut to fit around openings or at the ends of walls.
- Use tin snips or a circular saw with a metal cutting blade to make clean, straight cuts.
- For complex cuts, such as around outlets or light fixtures, use a jigsaw or nibbler tool.
- File or sand any sharp edges to prevent injuries.
Step 5: Installing Trim and Flashing
- Install J-channel trim around windows, doors, and the top and bottom of the siding to provide a neat, finished look and help direct water away from the building.
- Use drip cap flashing above windows and doors to prevent water from seeping behind the siding.
- Install inside and outside corner trim to create a polished appearance and protect the siding edges.
Step 6: Sealing and Caulking
- Apply a bead of sealant or caulk along the top and bottom edges of the siding, as well as around any openings or penetrations, to prevent water infiltration.
- Use a high-quality, exterior-grade sealant that is compatible with your metal siding material.
- Smooth the sealant with a caulking tool or your finger for a neat, professional finish.
Tips for a Successful Installation
To ensure the best results for your vertical metal siding installation, keep these tips in mind:
- Always follow the manufacturer’s instructions and recommendations for your specific siding product.
- Work in pairs when handling long siding panels to avoid bending or damaging the material.
- Use a slow, steady pace when cutting metal siding to minimize vibration and ensure a clean cut.
- Regularly check for level, plumb, and consistent overlap throughout the installation process.
- Protect your hands and eyes by wearing gloves and safety glasses when handling and cutting metal siding.
Cleaning and Maintaining Your Vertical Metal Siding
One of the greatest benefits of vertical metal siding is its low maintenance requirements. However, to keep your siding looking its best, follow these simple cleaning and maintenance tips:
- Regularly rinse your siding with a garden hose to remove dirt and debris.
- For tougher stains, use a soft-bristled brush and a mixture of mild detergent and warm water. Avoid using abrasive cleaners or scrubbers that may scratch the surface.
- Inspect your siding annually for any signs of damage, loose fasteners, or sealant failure. Address these issues promptly to prevent further damage.
- If your siding becomes scratched or chipped, use a touch-up paint specifically designed for your siding material to prevent rust and maintain a uniform appearance.
Common Mistakes to Avoid
To help you achieve the best results, here are some common mistakes to avoid during your vertical metal siding installation:
- Failing to properly prepare the walls: Skipping the weather-resistant barrier or flashing can lead to moisture problems down the road.
- Not allowing for expansion and contraction: Leaving insufficient gaps at the top, bottom, and sides of the siding can cause buckling or warping.
- Overtightening fasteners: This can dimple or distort the siding, compromising its appearance and performance.
- Neglecting to seal and caulk: Failing to seal around openings and edges can allow water to seep behind the siding, leading to damage and potential mold growth.
Conclusion
Installing vertical metal siding can be a rewarding and cost-effective way to transform your home or building’s exterior. By following this comprehensive vertical metal siding installation guide, you’ll be well-equipped to tackle the project with confidence. Remember to take your time, pay attention to detail, and always prioritize safety. With the right tools, techniques, and best practices, you can achieve a durable, attractive, and low-maintenance exterior that will stand the test of time.
Frequently Asked Questions About Vertical Metal Siding Installation
1. Can I install vertical metal siding over existing siding?
In most cases, it is recommended to remove existing siding before installing vertical metal siding to ensure a flat, stable base and allow for proper wall preparation. However, if your existing siding is in good condition and provides a level surface, you may be able to install metal siding over it. Always consult with the manufacturer’s guidelines and a professional installer before making this decision.
2. How do I choose the right gauge thickness for my vertical metal siding?
The gauge thickness of your vertical metal siding will depend on your specific needs and preferences. Thicker gauge siding (lower numbers) offers greater durability and impact resistance, while thinner gauge siding (higher numbers) is more affordable and easier to install. Here’s a general guide to help you choose the right gauge thickness:
| Gauge | Thickness (inches) | Best For |
|---|---|---|
| 24 | 0.0239 | Light-duty residential applications |
| 26 | 0.0179 | Standard residential applications |
| 28 | 0.0149 | Budget-friendly residential projects |
| 22 | 0.0299 | Heavy-duty residential or light commercial applications |
| 20 | 0.0359 | Commercial or industrial applications |
Consider factors such as your local climate, the type of building, and your budget when selecting the appropriate gauge thickness for your project.