509-201-4190

Installing a screw down metal roof can be an intimidating task, but it doesn’t have to be! With the right materials and a few helpful tips and tricks, anyone can learn how to install this durable roofing system like a pro. In this article, we will provide you with all the information you need to know about screw down metal roofing, including the benefits of installing it, the types of materials to use, steps for installation and finishing touches. So grab your tools and prepare to upgrade your home with this long-lasting and reliable roofing solution.
Disclaimer: Installing a screw down metal roof requires knowledge and skill. The tips provided in this article are for informational purposes only and should not be taken as professional advice. If you are unsure about any step of the installation process or need help with any aspect of the job, we recommend that you contact Advance Roofing LLC – we have been proudly serving the Spokane, WA area for many years with the highest standard of quality roofing solutions. No matter how large or small your project may be, they can provide you with the expert guidance needed to ensure a flawless installation.
What Is Screw Down Metal Roofing?
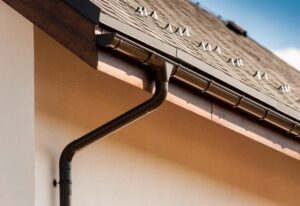
Screw down metal roofing is a popular choice for homeowners looking for a reliable and long-lasting roofing system. It consists of metal panels that are screwed into the roof deck, rather than being nailed down like traditional asphalt shingle roofs. This installation method provides greater durability in high winds and extreme weather, allowing the roof to withstand heavy snowfall or hail without damage. Additionally, installing screw down metal roofing requires fewer fasteners than other types of roofing systems, which can result in cost savings on labor and materials. As an added bonus, it’s also low maintenance and energy efficient, making it an ideal choice for any homeowner looking to upgrade their home with a durable and cost-effective solution.
Screw down metal roofing is an excellent way to protect your home and improve its value, while saving you money in the long run. With its superior durability and low-maintenance requirements, it’s a great choice for any homeowner looking for a reliable roofing system. And if that wasn’t enough, wait until you hear about the amazing benefits of installing a screw down metal roof!
Benefits of Installing a Screw Down Metal Roof
Installing a screw down metal roof is a great way to maximize your home’s value and protection. Not only does it provide superior durability and weather resistance, but it also requires fewer fasteners than other types of roofing systems, resulting in cost savings on
labor and materials. Additionally, metal roofs are low-maintenance, meaning you won’t have to worry about frequent inspections or repairs. Plus, metal roofs are energy efficient, helping you save money on your utility bills by reflecting the sun’s heat away from your home. All of these benefits make screw down metal roofing an ideal choice for any homeowner looking for a reliable and long-lasting roofing system.
Choosing the Right Materials for Your Roof
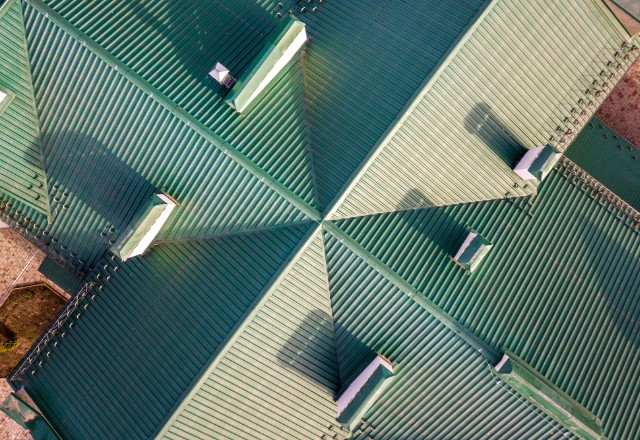
Installing a metal roof is an important investment, and it’s essential to choose the right materials to ensure that your roof will last for years to come. Before beginning your project, consider the type of environment you live in, as well as the climate in your area. For example, if you live in a coastal region with high humidity, you’ll need to choose corrosion-resistant materials such as stainless steel or galvanized steel for maximum protection. Additionally, think about the style of roofing that best suits your home and budget. While standing seam roofs are popular for their aesthetic appeal and durability, they can be more expensive than other types of metal roofs. On the other hand, corrugated panels are more affordable and easier to install but may not provide the same level of protection from harsh weather conditions. Ultimately, selecting the right metal roofing panel will help ensure that your new roof is able to withstand whatever Mother Nature throws its way!
A metal roof is a great way to protect your home from the elements and add value to your property. With so many different materials and styles available, it’s important to choose the right one for you. Now that you have the basics down, let’s explore the various types of metal roofing in more detail!
Determining the Square Footage of Your Roof
Accurately calculating the square footage of your roof is an important step in determining the total amount of metal roofing materials you’ll need for your project.
To get started, measure the length and width of each section of your roof and multiply those numbers together. This will give you the area (in square feet) for each section.
Next, add up all of these sections to get the total area of entire roof.
Finally, factor in any additional components such as eaves, drip edge, valleys, or hips and adjust your final measurement accordingly.
Taking this extra time to accurately calculate the size of your roof before purchasing materials can help ensure that you order exactly what you need – and nothing more!
Preparing for the Installation Process
Once you’ve calculated the square footage of your roof, it’s time to start preparing for the installation process. To ensure a successful install, it’s important to make sure that your roof is in good condition and ready for the project.
Start by inspecting the existing roof decking for any signs of damage such as rot, warping, or cracks. If any damage is found, be sure to repair it before moving forward with your metal roofing installation.
Additionally, you may need to add additional structural support if needed – especially if your roof has multiple levels or slopes.
Finally, make sure that all of the necessary tools and materials are on hand so that you can complete the project without interruption.
Preparing ahead of time will help ensure a smooth and efficient installation process!
Once your roof is in good condition and ready for the project, you can move forward with confidence knowing that a successful metal roofing installation is within reach. Now it’s time to focus on the next step: Sheathing and Ridge Cap – necessary components of any durable roofing system.
Sheathing and Ridge Cap
The components of sheathing and ridge cap are necessary for a durable and dependable roofing system. Sheathing is the first layer of defense against water infiltration, providing protection from the elements while also acting as an additional layer of insulation. It’s important to choose the right type of sheathing for your roof structure in order to get the best performance out of your metal roofing installation. Common materials used for sheathing include plywood, OSB board, and fiberboard.
Ridge cap is another important piece of metal roofing that serves both aesthetic and practical purposes. Not only does it provide a finished look to the top of your roof, but it also helps protect against wind uplift – an important safeguard during extreme weather. For optimal performance, make sure that you install ridge caps according to manufacturer specifications for your specific metal roof type. With these two components installed properly, you can rest assured knowing that your metal roof will be able to withstand all types of weather conditions!
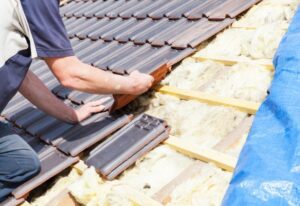
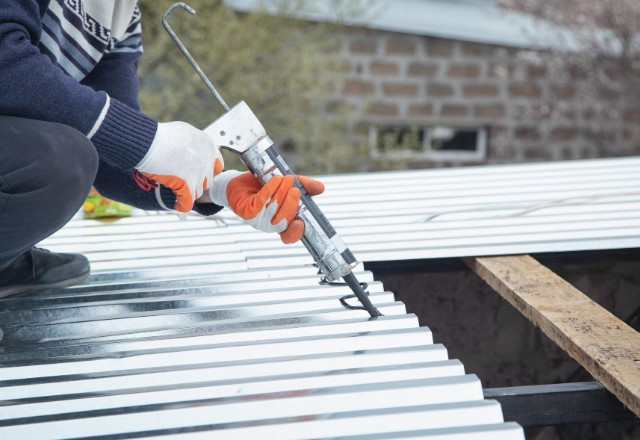
Installing the Screw Down Metal Panel System
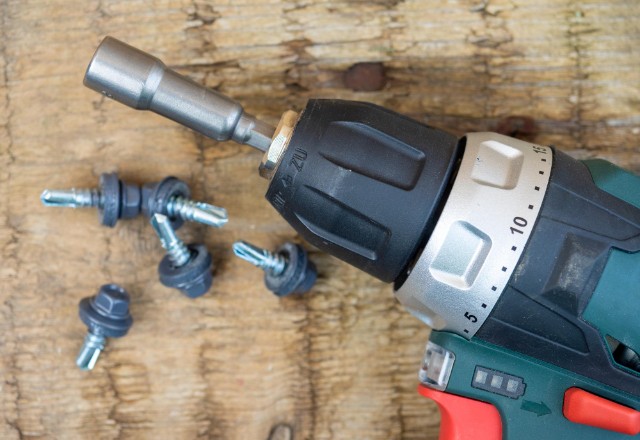
Using the screw down metal panel system can provide a secure and reliable roofing solution. This method allows you to install the panels quickly and easily, making it an ideal choice for DIYers. Before getting started, make sure that all the necessary components are on hand including screws, washers, sealant, and a flashing material such as butyl tape.
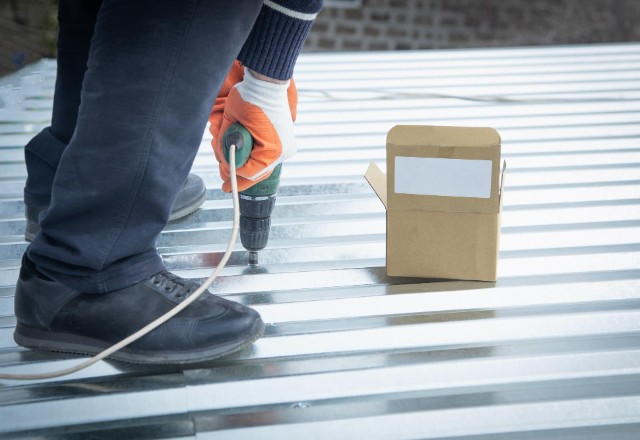
Begin by laying out the panels in their finished position on the roof and then use a drill to pre-drill holes into the panels for attaching screws.
Once all of the holes are drilled, attach each panel with washers and screws and then apply sealant around any exposed areas for extra protection against water infiltration.
Finally, finish off by applying butyl tape along any seams between the panels.
With these simple steps complete you’ll be able to rest easy knowing that your roof will be able to withstand whatever Mother Nature throws at it!
Installing a screw down metal roof is a great way to ensure that your roof is both secure and reliable. With the right materials and some careful planning, you can have peace of mind that your home will be protected from the elements. And now that you know how easy it is to install one, why not check out our step-by-step guide to learn more?
Step-by-Step Guide to Installing a Screw Down Metal Roof
Installing a screw down metal roof is a great way to make sure that your home is secure and reliable. It’s an easy process that can be completed in just a few simple steps, but it’s important to ensure you have all the necessary components before you begin. Our step by-step guide will help you get started and ensure that your roof is installed properly and securely.
To start, make sure you have the necessary materials including screws, washers, sealant and flashing material such as butyl tape.
Then lay out the panels in their finished position on the roof and use a drill to pre-drill holes into the panels for attaching screws.
Once all of the holes are drilled, attach each panel with washers and screws and then apply sealant around any exposed areas for extra protection against water infiltration.
Finally, finish off by applying butyl tape along any seams between the panels.
By following our step-by-step guide, you’ll be able to have peace of mind knowing that your roof will be able to stand up to whatever Mother Nature throws at it!
Securing Each Panel to Its Adjacent Panel With Fasteners
Attaching fasteners to secure panels to their neighboring panel is a crucial step for ensuring the correct installation of your screw down metal roof. The best way to ensure a secure connection between the panels is to use self-tapping screws, which are designed specifically for this purpose.
Start by pre-drilling holes into each panel, then drive the screws through both panels using a power driver or drill bit.
Make sure that the screws are driven deep enough so they don’t protrude from either side of the panel, and don’t forget to use washers to help create a tighter seal.
Finally, apply sealant around any exposed screw heads for extra protection against water infiltration.
Following these steps will ensure that all of your panels are securely connected and ready for whatever Mother Nature throws at them!
Tips and Tricks for Flawless Installation
Installing a screw down metal roofing system can seem daunting at first, but with the right tips and tricks you can have a flawless installation in no time.
Before beginning the project, make sure to measure your roof correctly to ensure that you have enough material for the job.
Once all of the panels are cut to size, begin laying them out from the bottom up ensuring that each panel is flush along its edges.
From there, use self-tapping screws to secure each panel to its adjacent panel – pre-drilling holes will help ensure a secure connection.
For extra protection against water infiltration, apply sealant around any exposed screw heads.
Finally, inspect your work carefully and make sure all of your fasteners are properly secured before moving on to the next step in your roofing project!
With these tips and tricks in mind, you’ll have a beautiful screw down metal roof installed in no time!
Finishing Touches After Installation is Complete
Once the installation of your screw down metal roof is complete, there are a few finishing touches you should add to ensure your roof lasts for years to come.
Start by applying a coat of paint that has been specifically designed for use on metal roofs. This will help protect against corrosion and keep your roof looking great.
Next, add flashing around any protrusions such as plumbing vents, chimneys, and skylights to create an additional barrier against water infiltration.
Finally, inspect all of the surrounding areas for any potential sources of leaks and make sure that the sealant applied earlier is still in place and intact.
With these finishing touches done correctly, you can rest assured that your new screw down metal roof will be strong, durable, and look great for many years to come!
By following these simple steps, your screw down metal roof will be ready to protect your home for many years to come. With a strong,in place, you can have peace of mind knowing that your new roof is ready for whatever Mother Nature throws at it. Keep an eye out for our next article where durable roof and the necessary finishing touches we discuss sealing all joints with rubber caulk or sealant – it’s essential for a long-lasting roof!
Sealing All Joints With Rubber Caulk or Sealant
It is necessary to seal all joints with rubber caulk or sealant when installing a screw down metal roof. This step helps to keep water out and protect your home from leaks and other damage. The most common type of sealant used is silicone, which is specially formulated to form an airtight bond between surfaces. However, other types of sealants such as acrylics and butyls may be used depending on the application. It’s important to make sure that the sealant is applied correctly and evenly so that it will last for years to come.
To apply the sealant, start by cleaning any dust, dirt, or debris from the joint before applying a generous bead of caulk or sealant around it.
Make sure that you are pressing firmly into each joint as you go along – this will ensure that the sealant makes good contact with both surfaces.
After applying the caulk or sealant, use a putty knife to spread it evenly across the entire joint.
Finally, allow it to dry completely before adding any additional layers of paint or finishing touches.
With proper application and maintenance, your screw down metal roof will be waterproofed and protected for many years to come!
Conclusion
Installing a screw down metal roof is an involved process that requires attention to detail and precision. From selecting the right materials to sealing all joints with rubber caulk or sealant, every step of the installation should be done correctly for the best results. With proper care and maintenance, your new screw down metal roof will provide you with years of protection against the elements and give your home a fresh look. Whether you’re tackling this project yourself or hiring a professional contractor, following these tips and tricks will ensure a flawless installation that you can be proud of for years to come!