509-201-4190

Are you ready to upgrade your roof, but unsure how much supplies you need? With a Roof Shingle Calculator, calculating the number of shingles you need for your home has never been easier. From measuring square feet to understanding different types of roofs to estimating the cost of materials and installation, this calculator can help homeowners estimate their roofing needs with ease. Read on to learn more about using a Roof Shingle Calculator and how it can help make your next roofing project a success!
The information provided on this site is for general informational and educational purposes only. It should not be considered professional advice, as it is not a substitute for consulting with a licensed roofing contractor in your area. Any estimates or calculations given are for illustrative purposes only and are not intended to be relied upon as an exact representation of the cost of materials or labor required for any particular job. Additionally, all safety measures should be taken before undertaking any roofing project; we therefore recommend that you contact a qualified professional to ensure that all safety precautions are taken into consideration before beginning work. Advance Roofing LLC has been providing top-notch roofing solutions to the Spokane, WA area since day one.
What is a Roof Shingle Calculator?
A Roof Shingle Calculator is a tool that allows homeowners to estimate the amount of shingles needed for their roofing project. By entering in various measurements and details about the roof, including its size, type, pitch, and other factors, the calculator can generate an estimate of how many shingles will be required. The calculator can also provide additional information such as estimated costs for materials and labor, making it easier to plan a budget. With this tool, homeowners can get a better idea of what they need before investing in supplies or hiring professionals to complete the job.
Using a Roof Shingle Calculator can help you get the most accurate estimate for your roofing project, saving you time and money in the long run. For even more savings and convenience, stay tuned to learn about the benefits of using a Roof Shingle Calculator!
Benefits of Using a Roof Shingle Calculator
Using a Roof Shingle Calculator is an easy and efficient way to plan a roofing project. By providing accurate estimates, the calculator helps homeowners budget their projects so they can purchase the right amount of materials and hire professionals who will do the job correctly. Additionally, with an estimate that takes into account all factors involved in a roofing project, DIYers can make sure they have the right supplies before getting started. The calculator also helps save time, since it eliminates the need for manual calculations or guesswork when estimating material costs. All in all, using a Roof Shingle Calculator is an essential tool for successful home improvement projects!
Determine the dimensions of your roof
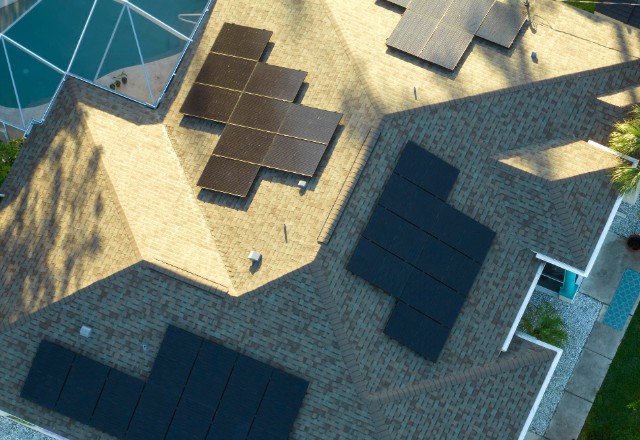
Calculating the size of your roof is an important step in any home improvement project. Knowing the square footage of your roof will help you determine the amount of material needed for the job and ensure that you get an accurate estimate from contractors. Luckily, calculating your roof’s size is a relatively simple process.
First, measure the length and width of each section of your roof.
Then multiply those two measurements together.
Finally, add all of these numbers together to get a total square footage number.
It’s also important to keep in mind that this calculation should include portions of your roof that are covered with other materials such as skylights or vents. With this information in hand, you’ll be able to accurately estimate costs for supplies and labor and ensure that you have all the materials necessary for the project!
Now that you know how to calculate the size of your roof, get ready to measure square feet and make sure all of your home improvement projects are well-executed! But first, stay tuned for our next section where we’ll explore the importance of measuring square feet in more detail.
Estimating Pitch and Slope
When it comes to roofing, estimating pitch and slope is an important step in getting accurate estimates for materials and labor. Pitch is the angle of the roof, while slope is the vertical rise of the roof divided by its horizontal run. To estimate pitch, use a level or clinometer and measure from the point closest to you on one side of the roof up to a point on the other side. For example, if it takes one foot of horizontal travel before reaching two feet in vertical rise, then your pitch would be 2/12 (2:12). Slope can be estimated by measuring the vertical drop over 12 inches; this ratio will tell you how many inches are dropped per foot traveled. It’s important to get accurate measurements whenever possible in order to ensure that contractors have all of the necessary information for their estimates. Taking these steps can save time and money in the long run!
Calculating Bundles of Shingles Needed
Calculating bundles of shingles needed for a roofing project can be daunting. Fortunately, there are some easy steps you can take to ensure that you get the right amount of materials.
First, measure the total square footage of the roof and divide it by 100 to determine how many squares are needed (1 square 100 sqft).
Next, calculate the number of bundles required based on manufacturer’s recommendations. As a general rule of thumb, 3 bundles of shingles will cover 1 square. For example, if your roof is 400 sqft, then you would need 4 squares and 12 bundles.
Finally, factor in any additional needs due to weather or other conditions; this may require more or fewer bundles than initially estimated.
With these simple calculations, you’ll have all of the information necessary to accurately estimate your materials needs and get started on your project!
Understanding Different Types of Roofs
When it comes to roofing, there are many different types to choose from. Each type has its own advantages and disadvantages, so it’s important to understand the differences before making a decision. The most common types of roofs include asphalt shingles, metal roofs, tile roofs.
Asphalt shingles are the most economical choice and have a good lifespan.
Metal roofs are strong and fire-resistant but can be more expensive upfront.
Tile roofs offer a classic look and great insulation but can be difficult to install.
Understanding these fundamental differences can help you make an informed decision about the best type of roof for your home or business.
Calculating the Cost of Your Roofing Materials
Choosing the right roofing materials for your home or business is an important decision. Not only do you need to consider the look and style of the material, but you also need to think about cost. Before making a purchase, it’s important to calculate how much of each material you will need for your roof. To do this, measure the dimensions of your roof and divide that number by the square footage of one unit of the material you are considering.
This will give you an approximate number of units needed and help you estimate how much money you will be spending on materials. Additionally, it’s important to factor in any additional costs such as delivery fees when determining your final budget. Calculating these costs ahead of time can help ensure that your roofing project stays within budget.
When it comes to roofing materials, there is no one size fits all solution. Taking the time to weigh all of your options and accurately calculate the costs can help ensure that you make a wise investment in your home or business. So be sure to do your research before making a purchase! And if you’re considering asphalt shingles, stay tuned for our next section which will explore the cost and quality variations between different types of asphalt shingles.
Asphalt Shingles Costs and Quality Variations
Asphalt shingles are one of the most popular roofing materials on the market, but when it comes to cost and quality variations between different types, it pays to do your research. Organic asphalt shingles offer a good balance between cost and durability, while fiberglass-based asphalt shingles offer superior durability at a higher price point. Laminated asphalt shingles are also a common choice for homeowners looking for an aesthetic boost with their roofing materials. But no matter which type of asphalt shingle you choose, all of them will require proper maintenance in order to keep them looking their best and lasting through the years. Additionally, many manufacturers offer warranties for their products so be sure to check what kind of warranty is offered before making your purchase. With a little bit of research and planning, you can find the perfect asphalt shingle for your needs at a price that works within your budget!
Other Types of Roofing Materials and Their Costs
Other types of roofing materials are available for homeowners who want to customize their home’s exterior.
Metal roofing is a great option for areas with extreme weather conditions, such as heavy snowfall or strong winds, since its durability and strength can withstand these conditions. It is also fire-resistant and relatively low-maintenance in comparison to other roofing materials. However, metal roofing does come at a higher cost than asphalt shingles.
Slate roofing is another popular choice for homeowners looking for an elegant look with long-lasting durability. It is fire-resistant and impervious to rot and insect infestations, but it also comes at a much higher cost than asphalt shingle roofing.
Clay tile roofing is a classic option that offers excellent protection from the elements and can last up to 100 years with proper maintenance; however, its installation costs are often quite high due to the need for specialized labor and materials.
Ultimately, the right type of roofing material will depend on your budget, aesthetic preferences, and local climate conditions!
Considerations for Larger or More Complex Roofs
As the size and complexity of a roof increases, so do the considerations that need to be taken into account when selecting materials and calculating costs. For roofs with multiple levels, valleys, dormers, or other features, it is important to factor in additional materials such as flashing and shingles for each unique area. When it comes to larger roofs, there is also an increased risk of wind damage due to greater surface area.
To help protect against this, consider opting for impact-resistant shingles or even a metal roofing system if budget allows. It’s also important to consider the slope of your roof when calculating costs; steeper slopes require more labor-intensive installation and may necessitate different materials than those used on flatter roofs. Lastly, special attention should be paid to ventilation requirements when selecting a roofing material; this is especially true for asphalt shingle roofs which require adequate attic ventilation in order to function properly.
Finding Quality Contractors in Your Area
Finding a quality contractor in your area is essential when it comes to roofing projects. Start by researching local contractors who specialize in roof installation and repair. Ask for references from friends or family members who have recently had work done, and read online reviews to get an idea of what other customers have said about the contractor’s services.
When you’ve narrowed down your options, talk with each potential contractor and ask questions about their experience, materials they use, licensing, insurance coverage, warranties offered, payment terms, and estimated completion date. Make sure to get
written estimates for both labor and materials so that you can compare costs between different contractors.
Finally, don’t be afraid to ask for a special discount or additional benefits if you’re looking for a more cost-effective solution – experienced contractors may be willing to negotiate these details. Remember that finding the right contractor is one of the most important steps in ensuring a successful roof installation or repair project.
It’s important to do your research and find the right contractor for your roofing project – one who can provide quality workmanship and excellent customer service. By taking the time to ask questions, get multiple estimates, and compare costs between contractors, you can be sure that you’re making an informed decision that will benefit both you and your home in the long run. Now let’s take a closer look at the process of researching local contractors in more detail.
Researching Local Contractors
When it comes to finding a quality roofing contractor in your area, research is key. Start by looking for local contractors who specialize in roof installation and repair. Ask your friends or family members for recommendations and read online reviews to get an idea of what other customers have said about their services.
Once you’ve narrowed down your options, talk with the potential contractors and ask questions about their experience, materials they use, licensing, insurance coverage, warranties offered, payment terms and estimated completion date. Make sure to get written estimates for both labor and materials so that you can compare costs between different contractors. If you’re looking for a more cost-effective solution don’t be afraid to ask for discounts or additional benefits – experienced contractors may be willing to negotiate these details.
By taking the time to ask questions, get multiple estimates and compare costs between contractors you can ensure that you’re making an informed decision that will benefit both you and your home in the long run.
Checking References and Reviews
When it comes to researching a potential roofing contractor, checking their references and reading online reviews is an important step. Ask the contractor for a list of references you can contact, as well as any recent customer reviews. This will allow you to get an unbiased opinion of their workmanship and customer service.
Checking online reviews can also be helpful but keep in mind that not all reviews are accurate. Make sure to read both positive and negative reviews and take them with a grain of salt – some customers may be more critical than others or try to use the review section to negotiate prices.
It’s a good idea to call past customers directly if possible, as this will give you an honest opinion without any potential bias from the contractor themselves. Ask questions about their experience, how long it took for the job to be completed, if they ran into any issues or delays during the process, and whether or not they would use the same contractor again in the future.
By taking these extra steps you can make sure that you’re making an informed decision when selecting your roofing contractor and that your investment is well protected.
Verifying Licensing, Insurance, and Warranty Information
Verifying licensing, insurance, and warranty information is an important part of the process when selecting a roofing contractor. Before you sign a contract, make sure to ask for proof of all three items.
A valid license shows that the contractor is legally qualified to do business in your area and has met any local requirements for training or certification. Insurance ensures that if something goes wrong during the course of the job then you won’t be liable for any resulting damages or injury. Lastly, a warranty guarantees that if there are any issues with the roof after it’s completed then they will be addressed free of charge.
Ask for copies of the documentation so that you can verify that it’s up-to-date and accurate before signing anything. Don’t hesitate to contact your local licensing board directly if you have any questions or concerns about a particular contractor. With these measures in place, you can rest assured knowing that your investment is protected and your roof will be built safely and professionally.
DIY vs. Professional Installation Options

When it comes to installing a new roof, you have two options: DIY or hiring a professional contractor. DIY installation is often more cost-effective and allows you to take on the project as your own. However, there are many risks involved with taking on such a large scale job yourself. Poorly installed shingles can lead to leaks and other structural damage, which can be costly to repair in the long run.
On the other hand, hiring a professional contractor means that you can rest assured knowing that the job will be done right the first time around. Professional roofers are highly trained and experienced in working with various types of materials, so they know exactly what needs to be done for optimal performance. Plus, they will usually provide warranties on their work so that you’re covered if anything goes wrong down the road.
Ultimately, it depends on your budget and how much time and effort you’re willing to put into the project. If you’re up for a challenge and want to save some money then DIY installation may be an option for you – just make sure you do your research beforehand! Otherwise, it’s best to go with a professional contractor who can guarantee quality results without any hassle or stress on your part.
No matter which route you choose, installing a new roof is an important investment that should be handled with care. Whether you decide to go the DIY route or hire a professional, make sure you do your research and weigh all of your options beforehand. Now let’s take a look at the pros and cons of taking on a DIY roofing project.
Pros and Cons of Doing it Yourself
The pros and cons of doing a DIY roofing project depend largely on your budget, skill level, and how much time you’re willing to invest. On the one hand, DIY installation can be more cost-effective and allows you to take on the project as your own. However, there are a few risks involved with taking on such a large-scale job yourself. Poorly installed shingles can lead to leaks and other structural damage which can be costly to repair in the long run.
On the other hand, professional contractors are highly trained and experienced in working with various types of materials so they know exactly what needs to be done for optimal performance. Plus, they will usually provide warranties on their work so that you’re covered if anything goes wrong down the road.
Ultimately, it’s important to weigh all of your options before deciding whether or not to go the DIY route. If you’re comfortable enough taking on the challenge then it may be an option worth considering – just make sure you do your research beforehand! Otherwise, it’s best to hire a professional contractor who can guarantee quality results without any hassle or stress on your part.
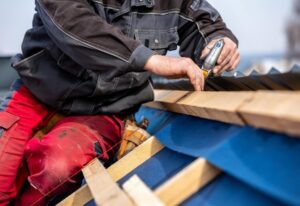
Roofer Basics: Tools & Equipment Needed for Installation
Installing a new roof can be an intimidating task, but with the right tools and equipment, it doesn’t have to be. There are several essential items you’ll need in order to complete the job correctly and safely. Here is a list of must-have tools and equipment for any roof installation project:
Roofing hammer – This is used for nailing down shingles or other materials. It should be lightweight, yet durable enough to stand up to the pressure of repeated hammering.
Roofing knife – A sharp utility knife is essential for cutting shingles, flashing, and other materials as needed during an installation project. Make sure you select one that has a comfortable grip and adjustable blade length.
Tape measure – Accurate measurements are key when installing a new roof so having a reliable tape measure on hand is important. Invest in one that has both metric and imperial measurements so you can work with any type of material.
Safety gear – Safety should always come first when working on any construction project so make sure you have all the necessary safety gear such as hard hats, gloves, eye protection, and reflective vests available before beginning your work.
With these basics in mind, you’ll be well-prepared to tackle any roof installation project! With the right tools and equipment at your disposal, you’ll be able to complete the job quickly and effectively – giving your home or business a brand new look in no time!
Prepping the Job Site: Safety Precautions for Installers
Preparing the job site for a roof installation is an important step that should never be overlooked. Without proper safety precautions in place, installers put themselves at risk of injury or worse. It’s essential to take the time to properly set up the job site before beginning any work.
First and foremost, it’s essential to identify any potential hazards such as power lines, trees, or other obstacles that could get in the way of your work. In addition, it’s important to mark off areas where materials will be stored as well as pathways that will be used for carrying supplies. Make sure all workers are aware of these designated areas and stay within them during the entire project.
Next, ensure all safety equipment is readily available and in good condition. This includes hard hats, gloves, eye protection, reflective vests, and anything else needed to keep everyone safe while on the job site.
Finally, make sure there is a first-aid kit nearby in case of any accidents or injuries that may occur during installation.
Taking these simple steps can make all the difference when it comes to having a safe and successful roofing project!
Installing Asphalt Shingles on Your Home
Installing asphalt shingles on your home can be a great way to protect and enhance the look of your roof. Asphalt shingles are durable, long-lasting, and come in a variety of colors and styles to suit any taste. Before you begin installation, make sure you have the necessary supplies such as shingle nails, felt paper, hammer or nail gun, chalk line, utility knife, measuring tape and ladder.
Start by removing any existing shingles from your roof and disposing of them responsibly. Once that’s done, lay down felt paper to provide a barrier between the shingles and the wood beneath them.
Next, use a chalk line to mark off straight lines for each row of shingles.
Starting at the bottom edge of your roof, place each shingle with its nailing strip aligned with the chalk line.
Secure each one with four nails placed in each corner.
Be sure to leave an overhang on both sides for proper water runoff. Continue this process until you reach the top row of your roof.
Finally, install ridge caps along the peak for added protection from wind and water damage.
With patience and attention to detail, installing asphalt shingles is a relatively straightforward job that can be completed in just a few hours!
Conclusion
Installing a new roof can be a daunting task for the average homeowner, but with the right tools and safety precautions in place, it can be an enjoyable project that will add value to your home. By following these simple steps and using a reliable roofing calculator to estimate your needs, you’ll be well-prepared to tackle any roof installation project with confidence.