509-201-4190

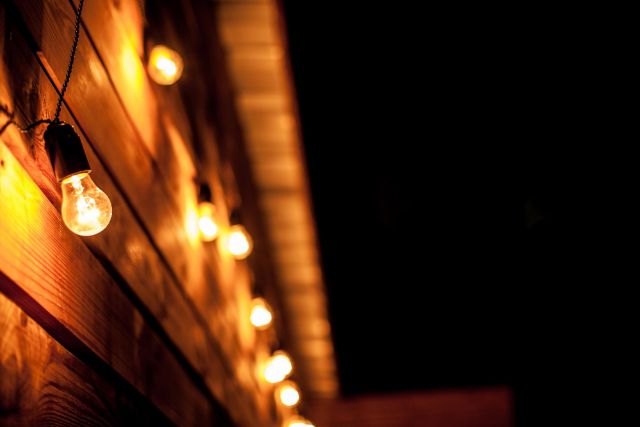
Adding an outdoor light to your vinyl siding can transform your home’s exterior and create a stunning display of light and beauty. Have you ever wanted your home to stand out from the rest? Installing an outside light on vinyl siding is a great way to do this! Imagine being able to admire your home’s unique architecture day and night, while also providing extra security with added visibility. With the right supplies, some patience, and helpful tips, you can easily light up your life and make your property shine.
Disclaimer: This article is for informational purposes only and should not be used as a substitute for the advice or guidance of a qualified professional. If you are considering installing an outside light on your vinyl siding, we recommend that you always consult with a qualified contractor or electrician first. Advance Roofing LLC has been proudly providing Spokane, WA with top-notch roofing services for many years and we’re more than happy to help in any way we can! Additionally, please note that when attempting any electrical work, safety must always be the number one priority.
What to Expect
Installing an outside light on vinyl siding is fairly easy, but it does require some preparation and patience. First, you’ll need to make sure your surfaces are clean and free of dirt or debris. You’ll also want to locate the right spot for the light fixture. Once you’ve got the location marked, you can begin measuring and cutting a hole in the vinyl siding to fit the light fixture. After that’s done, you’ll need to run wiring from the switch inside your home to the outside light. Finally, you can install the light fixture and enjoy your beautiful new lighting display!
If this all seems a bit daunting, don’t worry! With proper instruction and guidance, anyone can learn how to install an outside light on vinyl siding. Just make sure you have all of your tools ready before beginning any work, and be mindful of safety regulations when doing electrical work. With just a little effort and time, you’ll be able to create a beautiful lighting display that will stand out from all of your neighbors!
By taking the time to properly install an outside light on vinyl siding, you’ll be able to enjoy a beautiful lighting display that will add a touch of style and class to your home. Now that you know how to do it, why not take advantage of all the benefits an outside light can bring?
Benefits of Installing an Outside Light
Installing an outside light can offer a range of benefits to your home. Not only will it increase the security around your property, but it can also add a touch of style and class to your home. An outside light can help illuminate pathways at night, making it safer and easier for guests to navigate their way around your house. It can also be used to highlight particular features in your yard—think garden statues, trees, or shrubs—to create a stunning nighttime display. Plus, with so many designs out there, you’re sure to find one that will perfectly complement the aesthetic of your home. So why not install an outside light for added safety and beauty?
Gather Your Supplies
Gathering the necessary supplies for your outside light installation is a crucial step to making sure it’s done correctly. Start by checking with your local hardware store for any specific items you’ll need, such as screws and mounting brackets. You’ll also want to make sure you have the right tools on hand—a drill, level, ladder, and wire strippers are all essential. Finally, don’t forget to pick up some vinyl siding adhesive or sealant; this will help ensure that your light stays securely in place over time. Have everything ready? Great! Now you’re ready to start installing your outside light.
Now you’re ready to breathe life into your outdoor space with the perfect outside light! But don’t let that be the end of your lighting journey – there’s still more to come, including light fixtures and accessories.
Light Fixture and Accessories
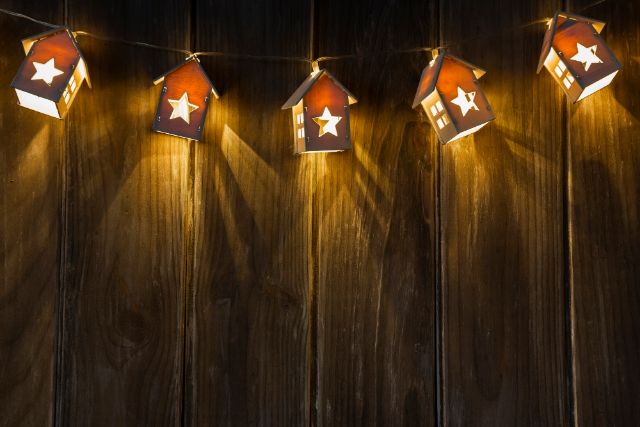
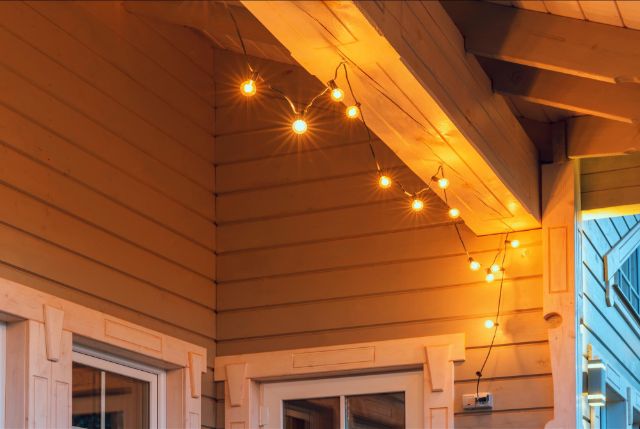
Once you’ve found the perfect outside light for your home, it’s time to consider adding some accessories and fixtures to complete the look. From pendants to sconces and lamps, there are many ways to add ambiance and style to your outdoor space. You can choose from a variety of materials, such as copper, brass, stainless steel, glass, or even ceramic. And if you’re looking for something a bit more decorative than functional, you can find a variety of hanging lanterns or string lights. With so many options available, it’s easy to create the perfect outdoor lighting look that will last for years to come.
Electrical Wires
The electrical wiring for your outdoor light is an important part of your lighting installation. If you’re installing a new light, the wiring will need to be done by a professional electrician. First, make sure that the circuit box is properly grounded and that the wiring is rated for outdoor use. Then, check that it’s connected to the right size breaker and that the wires are securely fastened. Finally, test all of your connections with a voltage tester before turning on the power. With proper electrical wiring in place, you can rest assured knowing that your outdoor light will stay safely powered up for years to come.
Electrical Outlet and Accessories
When it comes to installing an outdoor light on your vinyl siding, you’ll need to make sure that you have the proper electrical outlet and accessories in place. An exterior-rated electrical outlet is recommended as it can help protect against moisture and other elements. It should be connected to a circuit breaker of the right size for your light fixture, with secure connections. To complete the setup, don’t forget to pick up the appropriate accessories such as rain covers, wire connectors and mounting hardware. Finally, test all of your connections with a voltage tester before turning on the power. With everything in place and connected properly, you’re ready to light up your life!
Mounting Blocks, Caulk, and Other Accessories
Once you have all your electrical components in place, it’s time to move on to the mounting blocks, caulk, and other accessories needed for installing an outdoor light on vinyl siding. Mounting blocks provide a secure platform for your light fixture and should be securely mounted onto the siding. In order to ensure a watertight seal, use exterior grade silicone caulk around the perimeter of the mounting block. Additionally, make sure to pick up any additional hardware such as mounting screws or clips that are necessary for your particular light fixture. With all these pieces in place, you can now enjoy a safe and secure outside lighting setup!
Safety First!
Safety should always come first when installing an outside light on vinyl siding. Before you even begin, make sure to turn off the power at the circuit breaker, and then test for any electrical current. Wear protective clothing, eye protection, and gloves to protect yourself from potential electric shocks or other hazards. Additionally, double-check that all connections are properly grounded in order to avoid any shock risks. Finally, take extra caution when mounting the light fixture with a ladder – always have someone nearby to assist you for added safety. With these simple steps taken into account, you can rest assured that your outside lighting setup is safe and secure!
Always remember that safety comes first, no matter what the project may be! With these steps taken into account, you can feel confident in your outside lighting installation. Now that you’ve taken the proper precautions, it’s time to shut off the power supply and get started – stay tuned for more tips on how to do just that!
Shut off the Power Supply
Before you can begin installing an outside light on vinyl siding, the first step is to shut off the power supply. Make sure to locate the circuit breaker and turn it off before working with any wiring. Once the power has been turned off, double check for any electrical current by testing each connection point with a voltage tester. This is an important step to ensure your safety and avoid potential electric shocks or other hazards. Additionally, make sure to wear protective clothing, such as eye protection and gloves during installation. By following these simple steps, you can rest assured that your outside lighting setup is safe and secure!
Wear Protective Gear
Wearing protective gear is an important step to take when working on any electrical project. It helps to ensure your safety by avoiding the risk of electric shocks or other hazards. Protective gear includes items like eye protection, gloves, and long sleeves. Depending on the type of work you’re doing, special clothing such as flame-resistant
clothing may also be necessary. Additionally, make sure to tie back any hair that might get in the way and remove any jewelry that could become a potential hazard. By taking these measures, you can help protect yourself from potential harm while completing your project safely and securely!
Check for Metal Cladding in the Wall or Siding
Checking for metal cladding in the wall or siding is an important step when installing outside lighting. Metal cladding is typically installed as an additional layer of protection against moisture, wind, and other elements. Before beginning work, it’s important to check your wall or siding for metal cladding and make sure that it is properly sealed to prevent any water from entering the area. This can be done by inspecting the wall or siding visually or using a stud finder to locate any metal layers behind the surface. You should also check around windows and doors for any evidence of metal cladding since these areas are particularly vulnerable to water damage. Once you have located all potential sources of metal cladding, you can begin planning and installing your outdoor lighting safely and securely!
Prepare Your Work Area with a Ground Fault Interrupter (GFI) Outlet
When working with outdoor lighting, it’s important to make sure you have a safe workspace. One way to do this is by preparing your work area with a ground fault interrupter (GFI) outlet. A GFI outlet is designed to provide protection against electric shock and other potential hazards that can occur when working with electricity outside. To install one, begin by turning off the power at the breaker box before connecting the GFI outlet to an existing exterior power source. Make sure all connections are secure and tight before proceeding. Once you have installed the GFI outlet, you’ll be able to safely plug in any electrical tools you may need for your project. Following these steps will ensure that you have a safe work area and that your outdoor lighting installation will go smoothly!
Preparing the Vinyl Siding for Installation Cut Light Block to Correct Size
Once you’ve prepared your work area and gathered the necessary tools and materials, it’s time to begin installing your outside light on vinyl siding. Before you begin, you’ll need to cut a piece of light block to the correct size for your installation. Light block is a type of material that can help protect your exterior walls from moisture damage when installed properly. To cut the light block, use a utility knife or scissors to measure and mark it, then cut along the lines using a jigsaw or similar saw. Once you’ve trimmed the light block to size, remove any excess dust or debris before proceeding with installation. Following these steps will ensure that your outdoor lighting is securely attached and won’t cause any damage to your vinyl siding!
Apply Silicone Caulk Around the Hole Where Your Light Will Be Mounted
Once you’ve cut the light block to size and removed any excess dust, it’s time to apply silicone caulk around the hole where your light will be mounted. This will help create a watertight seal and prevent moisture from seeping in. To apply the caulk, start by using painter’s tape or masking tape to mark off a 1/4 inch border around the hole. Then, use a caulking gun to evenly spread a bead of silicone caulk all the way around. After you’re finished applying the caulk, use your finger or a damp rag to smooth out any rough edges or uneven spots. If necessary, repeat these steps for all other outside lights that you’ll be mounting on your vinyl siding. With this simple step, you can protect your walls from water damage and ensure that your outdoor lighting is installed securely!
Installing Porch Lights or Outdoor Lighting Attach Mounting Blocks to Vinyl Siding
Installing porch lights or outdoor lighting can be a great way to spruce up your home’s exterior and add curb appeal. But before you begin, one important step is attaching mounting blocks to the vinyl siding. These blocks create a secure base for the light fixture and keep it in place. Here’s how to do it:
Start by measuring the area where you want your light to go. Then use a hole saw or jigsaw to cut the shape of the mounting block into the siding. Be sure that all cuts are precise, as even small gaps can affect how securely your light will be held in place.
Once you have cut out the block, use construction adhesive to attach it tightly to the siding. Make sure that no air bubbles form and that there are no gaps between the block and siding. After waiting at least 24 hours for the adhesive to dry, double-check that everything is secure before moving on to installing your light fixture itself.
By taking these steps when installing porch lights or outdoor lighting onto vinyl siding, you can ensure that your lights stay securely attached for years to come!
Install Wiring for the Porch Lights or Outdoor Lighting
Now that your mounting block is securely attached, it’s time to install the wiring for your porch lights or outdoor lighting. This can be a tricky process, so it’s important to take the time to do it correctly and safely.
Start by turning off all power sources in your home. Then, use a voltage tester to double check that everything is completely disconnected from the electrical system before you begin wiring. Next, use special outdoor-rated wires—preferably copper—to run power from the switch to the light fixture itself. Make sure you are using wires that are thick enough for the amount of electricity being used and properly attach them with wire connectors or twist caps.
Finally, use waterproof caulking around any exposed connections or holes in order to keep out moisture and prevent corrosion. After waiting at least 24 hours for everything to dry, turn on all power sources and test your new light fixture!
By taking these steps when installing wiring for porch lights or outdoor lighting, you can ensure that your lights remain safe and secure for years to come!
Connecting Electrical Wires Identify Hot, Neutral, and Ground Wires in the Fixture Box
Connecting electrical wires can seem intimidating, but with the right knowledge and tools it’s easy to do. Before you start, it’s important to know the difference between hot, neutral, and ground wires in order to safely complete your wiring project.
The hot wire is a colored black or red wire that carries power from the switch to the fixture. The neutral wire is typically white and provides a return path for electricity. Finally, the ground wire is green and helps route electricity away into the earth if there’s an overcurrent situation.
When connecting electrical wires, first make sure that all power sources are off before beginning work. Then match up your hot, neutral, and ground wires according to their colors and attach them securely using twist caps or other appropriate connectors. It’s also important to use waterproof caulking around any exposed connections or holes in order to keep out moisture and protect against corrosion. Once everything has dried for at least 24 hours you can turn on all power sources and test your new wiring!
By following these steps when connecting electrical wires you can be sure that your project will be safe and successful!
Finishing Touches Securely Connect All Wires Together with Wire Nuts
Start by turning off all power sources and double-checking that everything is disconnected from the electrical system before beginning work. Next, take the exposed ends of each wire and twist them together clockwise to form tight connections. Once you have connected all of the wires, use wire nuts—capped pieces of plastic that look like miniature lids—to secure them into place. Make sure that each nut is tightened down firmly and sealed with waterproof caulking to prevent moisture damage or corrosion.
After waiting at least 24 hours for everything to dry, turn on all power sources and test your new light fixture! With these finishing touches you can rest easy knowing that your lighting project was done safely and properly!
Once everything is securely connected and tested, you can finish up by hiding any exposed wires with electrical tape or other appropriate materials. With all of these steps taken, your outdoor light fixture should now be safe and ready to use!
Wire nuts are an essential tool when it comes to finishing off any wiring project. They help ensure that all of your electrical connections are safe and secure – which is essential for protecting against potential hazards like shock and fire. With their easy installation process, you can be confident that your wiring will be done correctly every time!
Tips for a Flawless Finish Fill Screw Holes with Excess Caulk Before Painting
When you’re painting your vinyl siding, it’s important to make sure that all of the screws and other metal components are securely in place. This means filling any screw holes with a good quality caulk before you start painting. This will ensure that the paint adheres to the siding properly and won’t chip or peel away over time. It also helps keep moisture out which can be damaging to your siding.
To get the most flawless finish possible, use a silicone-based exterior caulk for this step. Start by applying a small bead of caulk around each screw hole and then use a putty knife or other tool to smooth it down into the hole. Allow the caulk to dry fully before you begin painting – usually about 24 hours is necessary. Once dry, your siding should be ready for a beautiful coat of paint!
Filling screw holes with caulk before you paint is an easy way to ensure that your finished project looks as good as possible. It’s an inexpensive step that can make all the difference in making sure your paint job lasts for years to come!
Conclusion
Installing an outside light on vinyl siding can be a great way to upgrade your home’s exterior and add a bit of extra security. It’s important to take the necessary steps before painting, such as making sure all screws are securely in place and filling any screw holes with caulk. Taking these measures will ensure that your paint job looks flawless and lasts for years to come. With some basic DIY knowledge and the right tools, you can have your new outside light up and running in no time!