509-201-4190

Replacing broken window glass in an aluminum frame doesn’t have to be intimidating. With the right tools and steps, you can tackle this project like a pro. This step-by-step guide will show you how to replace your broken window glass with ease so that you can get back to enjoying a nice view in no time. So grab your supplies, put on some safety glasses, and let’s get started!
Disclaimer: This article is for informational purposes only. We do not encourage any DIY repairs and suggest you seek professional help when replacing window glass in an aluminum frame. Contact the experienced professionals at Advance Roofing LLC if you need any assistance with your project. They’ve been proudly serving the Spokane, WA area for many years and offer the highest standard of quality roofing solutions.
Advantages of Using Alternative Materials for Window Frames
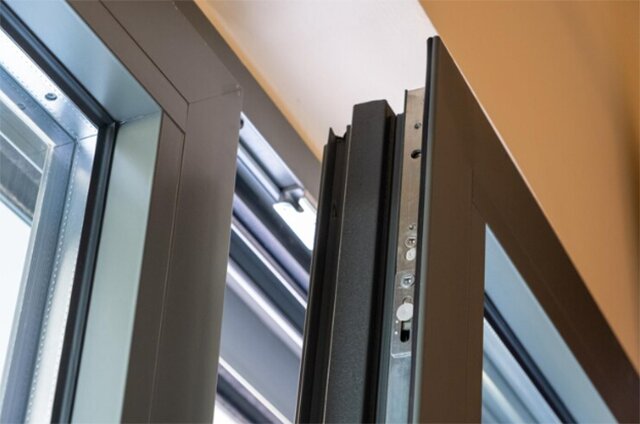
Replacing window glass in an aluminum frame may seem like a daunting task, but it can actually have a number of benefits. Whether you are trying to improve the energy efficiency of your home, repair a broken or damaged window, or simply update an older window, replacing the glass in an aluminum frame can make a big difference. Here are some of the key benefits of this process.
First and foremost, replacing the glass in an aluminum frame can improve the energy efficiency of your home. Older windows, especially those that have single-pane glass, can allow heat to escape and air to leak in, resulting in higher energy bills and decreased comfort during extreme weather. By replacing the glass with double-pane or low-e coated glass, you can reduce heat transfer and keep your home more comfortable throughout the year.
Additionally, replacing window glass in an aluminum frame can improve the overall appearance of your home. Broken or damaged glass can be unsightly and can detract from the overall aesthetic of your home’s exterior. By replacing the glass with clean, new panes, you can give your home a fresh, updated look.
Furthermore, replacing window glass in an aluminum frame can be a cost-effective solution compared to replacing the entire window. If the frame itself is still in good condition, simply replacing the glass can be a much simpler and less expensive project than a full window replacement. This can be especially beneficial if you have custom windows that would be difficult or expensive to replace entirely.
Finally, replacing the glass in an aluminum frame can improve the safety and security of your home. Broken panes of glass can pose a hazard, particularly if they are sharp or if there are small pieces of glass that could fall and cause injury. By replacing broken or damaged glass, you can reduce the risk of injury and make your home more secure.
Overall, replacing window glass in an aluminum frame can have a number of benefits, from improving energy efficiency to enhancing the appearance of your home. If you are considering this type of project, be sure to consult with a professional to ensure that you choose the right type of glass and perform the replacement correctly.
Tools You’ll Need

Before you begin the process of replacing the glass in your aluminum window frame, it is crucial to have all the necessary tools to make the job as smooth as possible. Here are some essential tools you will need to have on hand:
- Putty knife: You’ll need a putty knife to remove the old glazing compound and to scrape away any excess glass pieces.
- Safety goggles: Always wear safety goggles while working with glass to prevent any shards from entering your eyes.
- Sharp utility knife: You’ll need a utility knife to score the glazing compound around the window frame for easy removal.
- Heat gun: A heat gun will help loosen the glazing compound around the window frame, making it easier to remove the old glass.
- New pane of glass: It’s important to have the correct size and type of glass for your window frame.
- Glazing putty: This will help affix the new glass in place.
- Exterior trim: If your window has an exterior trim, be sure to have additional ones on hand to replace any damaged trim.
By having all the necessary tools ready beforehand, you’ll be able to efficiently replace your window glass with minimal fuss.
Step 1: Measure the Window
Before you begin replacing the glass in your aluminum window frame, it’s important to measure the size of the window accurately. Replacing a glass pane that is not the correct size may lead to air gaps or leaks, which can affect the energy efficiency of your home.
Gather the Correct Sizes
When it comes to replacing a broken window pane, one of the first steps you’ll need to take is measuring the correct size for your replacement glass. This step is crucial for ensuring that your new glass fits seamlessly into the frame and functions properly. Here are some key tips for gathering the correct sizes.
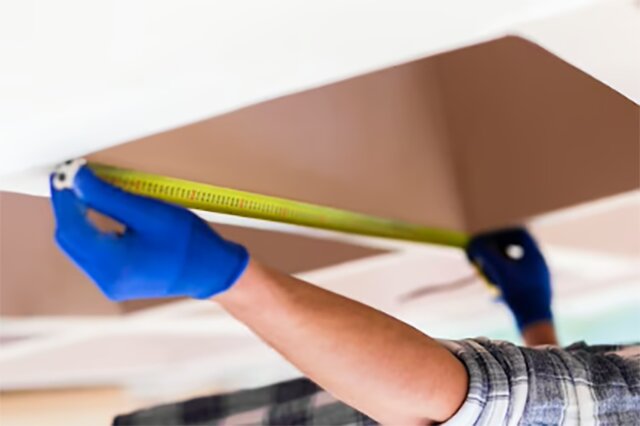
First, you’ll want to measure the width and height of the frame using a tape measure. Be sure to measure from the inside of the frame, not the outside. This is important because the frame may not be perfectly square, and measuring from the outside could result in inaccurate measurements.
To ensure accuracy, measure the width at the top, middle, and bottom of the frame. This will help you account for any variations in the frame’s shape or size. Additionally, make sure to measure the height at both the left and right sides of the frame, as the height may differ due to the frame’s structure or any settling that may have occurred over time.
Next, measure the thickness of the broken glass using a ruler. This will help you determine the correct type of replacement glass to order. If you’re not sure what type of glass to order, check the manufacturer’s label on the window or consult a glass professional for advice.
It’s important to note that if you’re replacing a single-pane window with a double-pane window, you’ll also need to measure the depth of the window frame. Double-pane windows require a deeper frame than single-pane windows, so be sure to account for this when measuring.
Once you have accurate measurements, you can order the correct size and type of glass for your window frame. Working with a reputable glass supplier or contractor can help ensure that you get the right products for your needs and that they are installed correctly for optimal energy efficiency and functionality.
Step 2: Remove the Existing Glazing Compound and Glass

After taking accurate measurements of your window frame and broken glass, it’s time to remove the old glazing compound and glass. This step is crucial to ensure a proper fit for the replacement glass and protect against any future damage or leaks.
Use a Putty Knife to Loosen the Glazing Compound
When it comes to replacing broken or outdated window glass, one essential step of the process is loosening the glazing compound that holds the pane in place. This is where a putty knife comes in handy.
The first step is to carefully remove any exterior trim around the frame that may be holding the glass in place. Once the trim is out of the way, you can easily see the glazing compound, which is a putty-like material used to seal the glass to the frame.
Using a putty knife, start by gently loosening the glazing compound from the window sashes or aluminum frame. Be sure to wear gloves during this process as the glazing compound can be sticky and difficult to handle.
Slowly work your way around the entire frame, using the putty knife to pry the glazing compound away from the frame. Take extra care to avoid damaging the frame during this process, as it is important for the longevity and energy efficiency of your new window.
If you notice any areas where the glazing has hardened and is difficult to remove, using a heat gun can soften the compound, making it easier to pry away. However, when using a heat gun, keep in mind that you should use low heat and take extra precautions to avoid damaging the window frame or any adjacent surfaces.
By using a putty knife to loosen the glazing compound, you can safely remove the old glass from the window frame and prepare it for the installation of new glass. This is an important step that should not be rushed, as it helps to ensure that your new window is properly installed and secure for years to come.
Carefully Remove the Old Glass Panes with a Utility Knife
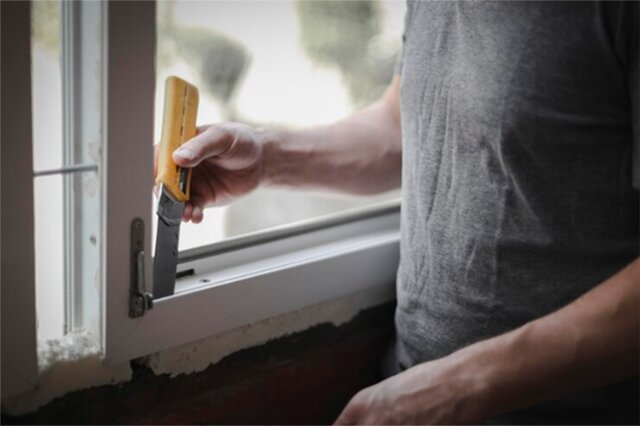
Once you have removed the exterior trim and loosened the glazing compound, it is time to carefully remove the old glass panes from the frame. To do this, you will need a sharp utility knife and a pair of safety goggles.
Start by carefully scoring along the edges of the glass pane with the utility knife. Apply enough pressure to score the glass but not enough to break it. Repeat the process on all sides of the pane until it is fully scored.
Once you have fully scored the pane, gently tap the center of the glass with your hand or a soft mallet to create a crack. Then, carefully start to pry the glass away from the frame using the utility knife. If you encounter any resistance, stop and reassess the situation. It may be necessary to score the glass again or apply a little more pressure to pry it away.
As you remove the glass, be sure to wear safety goggles to protect your eyes from any shards or pieces of glass that may break off. Also, take care not to damage the frame or any adjacent surfaces during the removal process.
If you are dealing with a broken pane, be sure to carefully remove all pieces of glass and clean the area thoroughly before proceeding with the replacement. Any remaining shards of glass can cause injury or damage to your new window.
When working with single-pane windows, it is important to measure the opening accurately before ordering your replacement glass. Single panes are often custom-sized, and getting the correct size is crucial for a successful replacement.
Take Note of Any Additional Trim Around the Window Pane That Needs to Be Removed
When replacing a window pane, it’s important to take note of any additional trim around the window pane that needs to be removed. This trim, also known as exterior trim, can be made of wood, metal, or vinyl and serves several purposes, including protecting the window frame from moisture and providing a finished look to the window.
If your window has exterior trim, carefully inspect it to determine if it needs to be removed before replacing the glass pane. In most cases, the trim will need to be removed to access the glass pane and properly install the replacement.
To remove the trim, start by using a putty knife or a sharp utility knife to cut through any caulk or sealant that is holding it in place. Be sure to take your time and work carefully to avoid damaging the surrounding surfaces or the trim itself.
Once the caulk or sealant has been cut, gently pry the trim away from the window frame using a flat pry bar or a similar tool. Take care not to bend or damage the trim, as it will need to be reinstalled after the replacement glass is in place.
As you remove the trim, be sure to keep track of any screws or nails that are holding it in place. You will need to remove these as well to fully detach the trim from the window frame.
Finally, after the glass pane has been replaced, reattach the exterior trim to the window frame using the same screws or nails that were removed. Apply a fresh coat of sealant or caulk around the edges of the trim to ensure a watertight seal and protect against moisture damage.
By taking note of any additional trim around the window pane and removing it carefully, you can ensure a smooth and successful window pane replacement that will enhance the energy efficiency and appearance of your home.
Step 3: Prepare for Replacement Window Glass Insertion
Step 3 in the process of replacing window glass in an aluminum frame involves preparing the frame for the insertion of the replacement glass. This step is crucial as it sets the foundation for a successful installation, ensuring the glass is properly secured and sealed to prevent any air or water leaks. Below are some tips to help you prepare for replacement window glass insertion:
- Clean the Frame: Before you insert the new glass, make sure the window frame is clean and free of debris such as dust, dirt, and old caulking. Use a rag or a soft cloth to wipe down the frame and remove any debris that may interfere with the installation process.
- Remove Old Glazing Compound: If the old glass was held in place by glazing compound, use a heat gun to soften the material and then carefully scrape it away with a putty knife. Take care not to damage the frame or any surrounding surfaces as you remove the old compound.
- Measure the Glass: Ensure that the replacement glass you have purchased is the correct size for the frame. Measure the length and width of the opening where the glass will be inserted, and make sure your replacement glass matches these measurements exactly. Improperly sized glass will not fit properly in the frame and could lead to air or water leaks.
- Purchase Foam Tape: Purchase foam tape that is the correct thickness to match the depth of the channel where the glass will rest. The foam tape will provide a cushion for the glass and help to create a seal between the frame and the glass.
- To create a seal and prevent air and water leaks, it is recommended to apply a thin layer of silicone caulk around the frame where the glass will be inserted.
By following these steps, you can ensure that your replacement window glass is properly inserted and sealed into your aluminum frame. A properly installed replacement glass will provide greater energy efficiency, reduce outside noise, and improve the overall appearance of your windows.
Clean Out All Remnants of Glazing Compound from the Frame Grooves
When it comes to replacing window glass in an aluminum frame, one crucial step is to ensure that all remnants of the old glazing compound are removed from the frame grooves. Failure to do so can result in an uneven surface that may cause the new glass to crack or break, or it could allow water and air to seep in, reducing the energy efficiency of the window.
To clean out all remnants of the glazing compound, you’ll need a putty knife, a heat gun, and patience. First, use the putty knife to gently scrape away as much of the old compound as possible. Be careful not to damage the frame or scratch the glass while doing so. It’s important to note that the glazing compound may be hardened or brittle, so warming it up with a heat gun can make it easier to remove.
Once you’ve removed as much of the old compound as possible, use the heat gun to soften any remaining compound in the frame grooves. Be careful not to overheat the frame or the glass as this can cause damage. Use the putty knife to gently scrape away the softened compound, working slowly and carefully to ensure you get every last bit.
Once you’ve removed all the remnants of the old compound, use a damp cloth to wipe down the frame grooves and remove any debris. Be sure to let the frame grooves dry completely before moving on to the next step in the process.
By taking care to clean out all remnants of the old glazing compound from the frame grooves, you’ll be able to create a smooth, even surface for the new glass to rest on. You’ll also help to ensure that your new window is energy efficient and will keep out unwanted drafts and moisture. While this step may take some effort and patience, it’s well worth it to ensure a successful window glass replacement.
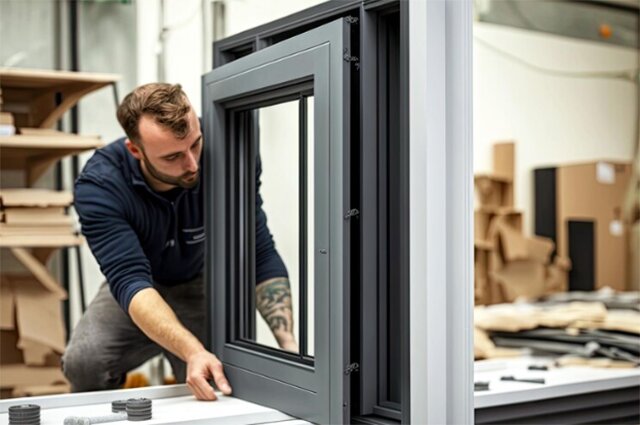
Make Sure Your New Glass Piece Fits Perfectly in The Aluminum Frame
Before purchasing a new piece of glass, be sure to measure the dimensions of the space where the old pane once sat. Measure both the height and width of the opening, taking into account any angles or corners that may affect the size of the glass. It’s crucial to purchase a piece of glass that is the correct size to ensure a proper fit and to avoid any unnecessary gaps or leaks.
When it comes time to install the new glass, you’ll want to make sure the frame is clean and free of debris. Use a damp cloth to wipe down the edges of the frame and remove any small particles or dirt that may be present.
Next, carefully slide the new glass piece into the frame grooves, making sure it fits snugly into place. Be sure to wear protective gloves and safety goggles while handling the glass to avoid any potential injuries.
If the glass seems too loose or doesn’t fit properly, don’t force it into place. This can cause the glass to crack or break, and may even damage the frame itself. Instead, take the time to adjust the frame or consider purchasing a new piece of glass that fits the opening more accurately.
Overall, taking the time to ensure a proper fit for your new glass piece will save you time and money in the long run. A well-fitted pane of glass will help to maintain energy efficiency and provide adequate protection from the elements, ensuring that your home stays comfortable and secure.
Step 4: Seal The Entire Frame with Glazing Compound
Now that the new glass is securely in place in the frame, it’s time to seal the entire frame with glazing compound. This is a crucial step to ensure that the glass is properly secured and to prevent any air or water leaks.
To begin, use a putty knife or a sharp utility knife to remove any old glazing compound from the frame. Be sure to remove all remnants of the old compound and clean the area thoroughly before applying the new coating.
Next, apply a thin layer of glazing compound around the entire perimeter of the frame, making sure to reach all edges and corners. Use the putty knife to smooth out the compound and ensure that it is evenly distributed.
Once the compound is applied, allow it to set and dry for at least 24 hours. This will give it time to harden and create a strong seal around the glass.
Finally, use a fresh coat of paint or sealant to protect the glazing compound and give the entire window frame a finished look. This will also improve the overall energy efficiency of your home and prevent any drafts or leaks from affecting the temperature inside.
Overall, replacing window glass in an aluminum frame is a simple process that can be completed in just a few easy steps. By following these guidelines and exercising caution when handling glass, you can improve the overall functionality and appearance of your windows while maximizing energy efficiency and minimizing the risk of damage or injury.
Using a Heat Gun, Soften The Glazing Compound and Apply It Evenly Along The Entire Frame
When it comes to replacing window glass in an aluminum frame, it’s important to ensure that the replacement glass is properly sealed in the frame. This is where glazing compound comes into play. Glazing compound is a putty-like substance that is used to fill gaps and create a seal around the edges of the glass and the frame.
One of the most effective ways to apply glazing compound is by using a heat gun. The heat gun can be used to soften the glazing compound, making it easier to apply and spread evenly along the entire frame. Before you get started, it’s important to gather all the necessary materials, including safety goggles, a heat gun, a putty knife, and of course, the glazing compound.
To begin, put on your safety goggles and use the putty knife to remove any old glazing compound from the frame. Be sure to remove all remnants of the old compound and clean the area thoroughly before proceeding.
Next, use the heat gun to soften the glazing compound. Hold the heat gun about 6 to 8 inches away from the compound and move it in a circular motion until the compound becomes soft and pliable. Be careful not to overheat the compound as this can cause it to dry out and become brittle.
Once the compound is softened, scoop it out of the container and apply it evenly along the entire frame using the putty knife. Be sure to apply enough pressure to ensure that the compound is pressed firmly against the frame and the glass. If there are any gaps or spaces, use the putty knife to fill them in with more glazing compound.
Continue to work your way around the entire frame until all edges and corners are covered. You may need to repeat the process of heating the compound with the heat gun if it begins to harden before you are finished applying it.
Once the glazing compound is applied, allow it to set and dry for at least 24 hours. This will give it time to harden and create a strong seal around the glass. After it has dried, you can apply a fresh coat of paint or sealant to protect the glazing compound and give the entire window frame a finished look.
Using a heat gun to soften the glazing compound can make the process of replacing window glass in an aluminum frame easier and more efficient. Take your time and be sure to apply the compound evenly along the entire frame to create a strong and secure seal.
Remember To Include All Edges Of The Aluminum Frame In The Sealing Process
One common mistake that many DIYers make when sealing an aluminum frame is neglecting to include all edges in the sealing process. It may be tempting to just focus on the exposed edges that are visible from the exterior of the window, but it’s important to remember that the aluminum frame is a complete unit that must be sealed as such.
To properly seal an aluminum frame, it’s essential to apply a generous amount of sealant around all edges and corners of the frame, including the interior edges that are not visible from the outside. This will create a comprehensive seal that will help to prevent air and water leaks, which can compromise the energy efficiency of your home and potentially lead to costly damage.
In addition to sealing all edges of the aluminum frame, it’s also important to choose the right type of sealant for the job. Silicone sealant is a popular choice for sealing aluminum frames as it provides a strong, flexible, and waterproof seal. It’s also important to use a sealant that is specifically designed for use with aluminum, as some sealants may be incompatible with this type of material.
When applying the sealant, be sure to follow the manufacturer’s instructions carefully, and use a steady hand to ensure that the sealant is applied evenly and thoroughly. Allow the sealant to dry completely before installing the glass, to ensure that it has fully cured and will provide a strong, long-lasting seal.
Conclusion
In conclusion, learning how to replace window glass in an aluminum frame can seem like a daunting task, but with the right tools and guidance, it can be a manageable DIY project. Hopefully, this step-by-step guide has provided you with a solid understanding of the process involved in replacing broken or damaged window glass in an aluminum frame.
It’s important to remember to prioritize safety throughout the process by wearing protective gear such as safety goggles and gloves, and using caution when handling sharp tools and broken glass. It’s also crucial to take accurate measurements to ensure that the replacement glass is the correct size and fit for your specific window.
By following the recommended steps and taking the necessary precautions, you can save money on costly professional repairs and improve the energy efficiency of your home. Remember to choose the right type of sealant for your aluminum frame and to seal all edges and corners thoroughly to prevent air and water leaks.
With these tips in mind, you can confidently tackle your window glass replacement project and enjoy the benefits of a clear, functional, and energy-efficient window.