509-201-4190

Are you looking to add a unique touch of classic charm to your home’s exterior? Lap siding can give any home an authentic and timeless look that is sure to turn heads. Installing this traditional siding yourself is not as di cult as it may seem, and can be done with just a few simple tools. In this guide, we will show you how to install lap siding for a traditional look that will last for years.
Disclaimer: This article is intended to provide general information about how to install lap siding for a traditional look. For specific advice regarding your particular situation, we recommend consulting with a qualified professional such as those at Advance Roofing LLC. They have been proudly serving the Spokane, WA area for many years with the highest standard of quality roofing solutions. If you need assistance in your particular case, please do not hesitate to contact them – they are always ready to help!
What is Lap Siding?
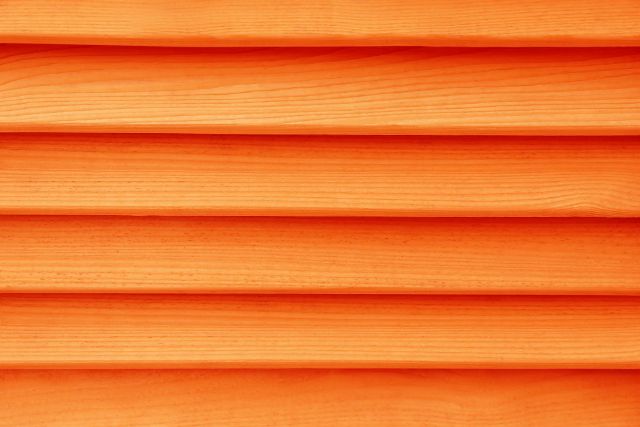
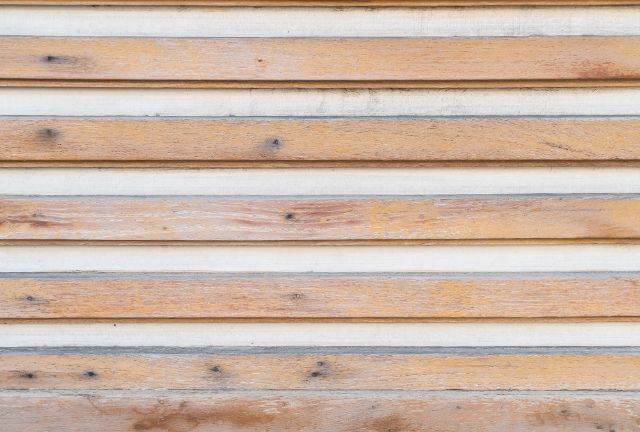
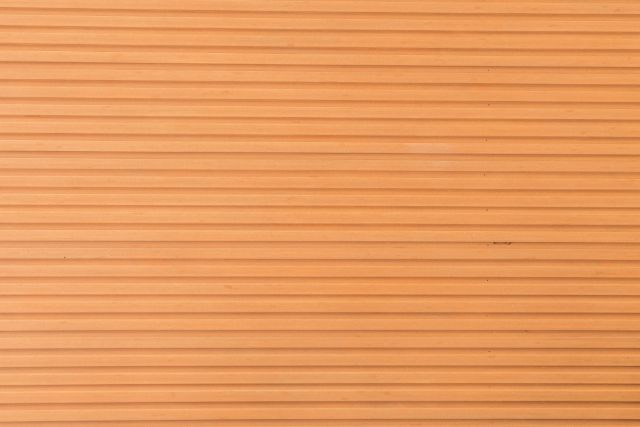
Lap siding is a traditional type of exterior cladding that has been popular for centuries. It is made up of horizontal boards that overlap each other to create a weatherproof barrier. The overlapping boards also provide an aesthetically pleasing look, and can be used on both sides of a wall or just one side.Each material offers unique benefits, so you can choose the one that best fits your needs and budget. No matter what material you choose, lap siding will add classic charm and timeless beauty to your home’s exterior.
Lap siding is a timeless and beautiful choice for every home, adding classic charm and character to your exterior. Get ready to learn more about the many benefits of installing lap siding in your home – it could be exactly what you’re looking for!
Benefits of Installing Lap Siding
Installing lap siding is a great way to add charm, character, and timeless beauty to your home’s exterior. The overlapping boards provide a weatherproof barrier that can help protect the interior of your house from water damage. Lap siding also requires minimal maintenance and is available in a variety of materials including wood, vinyl, aluminum – so you can choose the one that best fits your needs and budget. Additionally, it’s an affordable choice when compared to other types of cladding or siding options. Not only does lap siding look great but it can also increase the value of your home! So if you’re looking for a classic look with modern benefits, then lap siding may be the perfect choice for you.
Types of Lap Siding
When it comes to choosing a lap siding material for your home’s exterior, there are plenty of options available! Wood lap siding is the classic choice and can offer a timeless look. Vinyl lap siding is a great alternative because it’s durable and low-maintenance. Whichever material you choose, be sure to consider factors such as cost, maintenance requirements, and aesthetics before making your final decision. No matter what type of lap siding you choose, make sure that it is properly installed by an experienced contractor in order to ensure its longevity and maintain its beautiful appearance. With the right material and installation, your home will be sure to stand out with classic beauty!
Lap siding is a great way to add timeless beauty and style to your home’s exterior. With the right material and installation, you can look forward to a beautiful, long-lasting addition to your home! And if you’re looking for classic elegance, traditional wood lap siding may be just the thing for you…
Traditional Wood Lap Siding
Traditional wood lap siding has been around for centuries, and it’s one of the most popular types of exterior siding available! It adds a timeless appearance to any home, and there are plenty of varieties to choose from. Cedar is a great choice if you’re looking for something that will last a long time, while pine is perfect if you’re on a budget. You can also opt for composite wood siding, which combines the best qualities of both cedar and pine into one product. No matter what type you choose, be sure to have it installed by an experienced contractor in order to ensure its longevity and maintain its beautiful appearance. With traditional wood lap siding, you can look forward to classic charm and style that will last for generations – making it the perfect addition to any home!
Vinyl Lap Siding
Vinyl lap siding is quickly becoming a popular choice for homeowners who want a traditional look with the added benefits of modern technology. This type of siding is made from durable PVC and comes in a variety of colors and textures, so you can customize your home to match any style. Vinyl lap siding is also incredibly easy to install and maintain, making it an ideal choice for those who don’t have time or experience to take on more complicated projects. Plus, vinyl lap siding is highly cost-effective when compared to other types of siding, making it a great option if you’re looking to save money without sacrificing quality or style. So if you’re ready to upgrade your home with an attractive and long-lasting solution, vinyl lap siding could be the perfect choice for you!
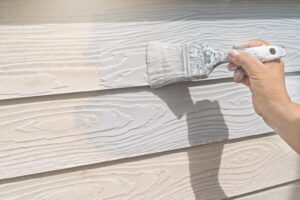
Pre-Treating the Surface Before Installing New Lap Siding
Before you can begin installing your new lap siding, it’s important to pre-treat the surface where it will be placed. This step is critical in ensuring a secure and long-lasting installation. Begin by giving the wall a thorough cleaning with a pressure washer or scrub brush and soapy water, making sure to scrub off any dirt or debris that may have accumulated over time. Afterwards, rinse the entire area with clean water and let it dry completely before moving on to the next step.
The next part of pre-treating involves painting or staining the wall in order to create an extra layer of protection between your home’s walls and the siding itself. Be sure to use paint or stain specifically made for exterior surfaces and follow manufacturer instructions carefully – it’s better to invest in quality materials than skimp out! Once this is done, you can finally move onto installing your lap siding with confidence knowing that you’ve taken every necessary precautionary measure beforehand.
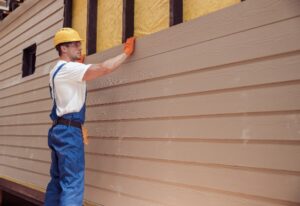
Setting up a Safe Working Environment
When it comes to installing lap siding, safety is of the utmost importance. Before you begin your project, take the time to set up a safe working environment that ensures your protection and the protection of anyone else helping you. Start by making sure the area is well-lit so that you can easily see what you’re doing without straining your eyes. Additionally, wear protective eyewear and gloves at all times while handling tools and materials. Make sure any ladders or scaffolding are stable and secure before climbing them as well. Finally, be sure to have first aid supplies on hand in case of an accident or injury. With these precautions in place, you can be confident that your lap siding installation will go smoothly and safely from start to finish!
Installation Process Step-by-Step Guide
Installing lap siding is not as di cult as it may seem, but it does require some attention to detail and careful work. With these easy steps, you’ll be able to create an attractive siding job that will last for years. Get ready to start your project with Step 1: Cutting the boards to the right lengths and make sure you measure twice before you cut once!
Step 1: Cutting the Boards to the Right Lengths
When you’re ready to begin the installation process for your lap siding, step one is to cut the boards to the right lengths. To do this, measure the area where you want to install your siding and use a circular saw or hand saw to cut each board precisely. It’s essential that all of your boards are cut evenly and lay ush against each other for a professional look. If you’re using multiple pieces, be sure to leave some space between them for additional strength when nailing them together. With careful measurements and accurate cutting, you’ll be able to create an attractive siding job that will last for years!
Step 2: Nailing the Pieces in Place
Once your boards are cut to the right lengths and you’ve given them some space between each piece, it’s time to start nailing them in place. Begin by nailing the bottom board into the studs of the wall and check to make sure that it is level. Use a spirit level or carpenter’s level for accuracy. Once this board is in place, begin nailing the boards above it one at a time. Make sure each board is firmly secured and lined up correctly with its neighbor before moving onto the next one. When you reach the top of the wall, use a finishing nail along the edge for a neat and professional look. With patience and careful attention to detail, your lap siding will be installed properly!
Step 3: Sealing Around Windows and Doors
Once your lap siding is installed, you’ll need to seal the gaps around windows and doors to ensure a weathertight t. Start by applying a bead of caulk along the top and sides of each window or door frame. Make sure that the caulk covers the entire gap between the frame and the wall. For extra protection, you can use a piece of self-adhesive ashing tape over the caulk to create an additional barrier against moisture. When finished, use a putty knife to smooth out any excess caulk or ashing tape for a neat edge. Now your windows and doors will be sealed off from any bad weather, giving you peace of mind that your lap siding job was done right!
Step 4: Finishing off with Trim Pieces
Once the gaps around windows and doors are sealed, it’s time to finish off the installation with trim pieces. Trim pieces can be used to cover up any gaps between siding panels, as well as give your home a more polished look. To begin, measure the length of each gap you need to cover and cut pieces of trim accordingly using a miter saw. Then, use a hammer or nail gun to attach the trim pieces along the edges of each gap. For extra protection against moisture, apply caulking around each piece of trim before nailing it in place. Once all of your trim pieces are installed, you’ll have a complete lap siding job that looks great and will last for years to come!
Maintenance Tips
Regular maintenance is key to keeping your lap siding in top condition. To keep your siding looking its best, be sure to give it a good cleaning once a year. Start by using a pressure washer on a low setting to remove dirt and debris from the surface of the panels. For more di cult stains, use a cleaning solution specifically designed for wood siding, such as an oxygen bleach cleaner. Finally, seal any exposed edges of the siding with a clear primer or sealant to help protect it from moisture damage. With these simple maintenance tips, your lap siding will stay looking like new for many years to come!
Conclusion
Installing lap siding is a great way to give your home a classic, traditional look. The installation process may seem intimidating at first, but with the right tools and some patience, you can easily complete the job yourself. Once the siding is up, be sure to give it regular maintenance to keep it looking its best. With proper care, your lap siding will provide your home with lasting beauty and protection for many years to come!