How to Install Hardie Board Siding: Expert Tips and Techniques

Are you looking for a low-maintenance, durable siding that can withstand the harshest of weather conditions? Hardie Board siding is an increasingly popular choice for homeowners who want to give their homes a facelift. This article will provide step-by-step instructions on how to install Hardie Board siding and some tips on proper maintenance. With a few tools and supplies, you can have your home looking like new in no time! So grab your hammer and get ready to give your home a fresh new look with Hardie Board siding!

Need a roofing contractor you can trust?

Call us (509)201-4190 or send the form

Disclaimer: The information provided in this article is for general educational purposes only and should not be taken as professional advice. We advise consulting with a qualified expert before taking any action related to the installation of Hardie Board siding. Advance Roofing LLC has been proudly serving the Spokane, WA area for many years with top-tier roofing services, and we are happy to provide you with any professional advice or assistance you may need.

What is Hardie Board Siding?

Hardie Board siding is a highly resilient product and durable option that provides excellent weather protection for exterior walls of homes. It is composed of a composite material made up of sand, cement, and cellulose fibers which makes it very resistant to extreme temperatures, mold and insects. This siding product comes in a variety of colors and textures to suit any style home and can last for many years when properly installed and maintained. It offers an attractive finish that will keep your home looking great for decades!

Hardie Board siding offers a stylish and durable solution for protecting your home from the elements. With its superior protection and longevity, Hardie Board is a great choice for any home. Get ready to learn about the many benefits of installing Hardie Board siding on your home, next!

Advantages of using Hardie Board Siding

Installing Hardie Board siding is a very durable material. It is a great way to protect your home from the elements and ensure it looks its best for years to come. The material itself is incredibly durable, able to withstand extreme temperatures without warping or cracking. It’s also insect-proof and mold-resistant, giving you peace of mind that your home will remain safe from damage caused by these pests. Additionally, Hardie Board siding comes in a variety of colors and textures so you can choose the perfect style for your home. No matter what look you’re going for, this exterior cladding offers an attractive finish that can last for years with proper installation and maintenance. With all these amazing benefits, it’s no wonder why so many people are choosing Hardie Board siding for their homes!

Advantages of using Hardie Board Siding

Preparations For Installing Hardie Boards

Preparing to install Hardie Board siding is an essential part of the process. Before you start, make sure your walls are in good condition and free from debris, cracks, or other damage. You’ll also need to inspect for any existing siding and remove it if necessary.

Once you have a clean surface, use a level to ensure the walls are straight and even. Make sure that all the edges match up before installing any panels or trim pieces. Finally, measure the area you want to cover with Hardie Board siding and calculate how much material you’ll need. With these steps out of the way, you can begin installing your Hardie Board siding!

Installing Hardie Board siding is a great way to give your home a beautiful and durable exterior. With the right preparation, you can make sure you get the best results possible. Now that you know how to prepare, stay tuned for our next section on choosing the right type of Hardie Board and tools needed!

Choosing the Right Type of Hardie Board and Tools Needed

When it comes to selecting the right type of Hardie Board for your project, there are a few factors you’ll need to consider. Firstly, think about what kind of look you want for your home – do you prefer a smooth, painted finish or are you looking for something more textured? Secondly, have a look at the different types of Hardie Board available. Different materials will give off different levels of insulation and protection from moisture. Lastly, don’t forget to get the right tools! Depending on your project, you may need saws, hammers, screws, nails and sealants. Once you’ve chosen the right type of Hardie Plank and have all the necessary tools ready to go, it’s time to start installing!

Calculating Square Footage of the Project

Calculating the square footage of your project is an important step before beginning installation. To do so, you’ll need to measure each wall that will be covered by Hardie Board siding and then add up all the measurements to get an overall total. It’s important to be as accurate as possible in this step, as it will help you determine how much Hardie Board you’ll need for the job. Once you’ve calculated the total square footage, multiply it by 1.25 for a 10% overage allowance – this will ensure that there are no issues with running out of material mid-project. Finally, divide this new number by 100 to get your final amount in terms of squares. This figure is what you’ll use when shopping for Hardie Board siding!

Selecting Color, Style and Finish of the Boards

It’s time to select the color, style and finish of your Hardie Board siding! This is a crucial step in creating the look you want for your home. When selecting the color, it’s important to choose one that will complement the exterior of your house, as well as any trim or accents that may be present.

When it comes to style, you have a few options. Hardie Board siding can come in either lap or panel form – depending on what type of look you are going for. Lap siding consists of long planks that overlap each other whereas panel siding provides a more uniform appearance.

Finally, you’ll need to decide on a finish for your boards. The most popular choices are primed gray, pre-finished and stained woodgrain. Primed gray gives the boards a neutral base that can be painted to any color desired while pre-finished offers an array of colors and textures from which to choose from and stained woodgrain adds texture and natural warmth to the space.

No matter what color, style or finish you choose for your Hardie Board siding project, make sure it works with both your overall design aesthetic and budget! Calculations of hardie boards are essential before implementing a project

Purchasing Materials and Supplies Necessary for Installation

It’s important to have all of the necessary materials and supplies for your installation project before starting. This will help ensure a smooth and successful installation. Here are some of the materials and supplies you’ll need:

  • Siding Panels: When selecting the color, style and finish of your Hardie Board siding, it is crucial to choose one that will compliment the exterior of your house, as well as any trim or accents that may be present.
  • Lap Siding: Lap siding consists of long planks that overlap each other, while panel siding provides a more uniform appearance.
  • Primed Gray Boards: The most popular choice when it comes to finishing boards is primed gray; this gives the boards a neutral base that can be painted to any color desired. Pre-finished boards offer an array of colors and textures from which to choose, and stained woodgrain adds texture and natural warmth to the space.
  • Plywood Sheathing: Plywood sheathing is a layer of thin wood veneer that is installed on top of wall studs and serves as a barrier between the wall and the roof or floor below. It is also often used in between roofing panels and siding to create a weathertight seal.
  • Tape Measure: A tape measure is essential for marking out the dimensions of your board siding project.
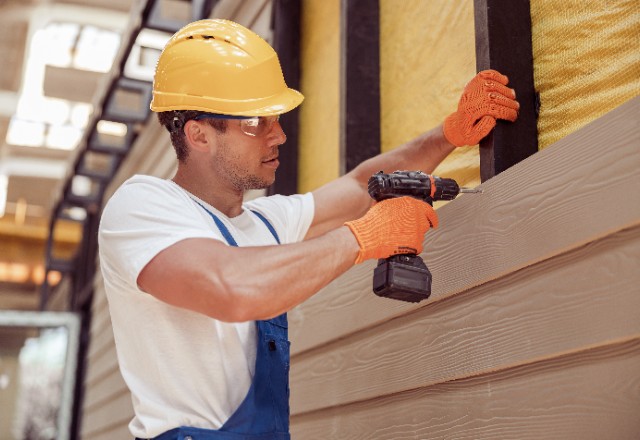
  • Cordless Drill: A cordless drill helps make drilling into walls easier and faster, especially if you are installing screws into hard surfaces like Hardie Board siding.
  • Circular Saw: A circular saw helps you cut boards exactly how you want them, eliminating errors along the way. Be sure to use a safety guard when using this tool!
Purchasing Materials and Supplies Necessary for Installation

Pre-Installation Steps

Hardie Board Siding is a popular choice for exterior home renovations, and for good reason. Not only does this siding provide a sleek, stylish finish, but it’s also weatherproof and easy to maintain. If you’re ready to install Hardie siding panels on your home, there are a few important steps you’ll need to take before starting.

First, you’ll need to select the color, style and finish of your siding. There are many options available, so it’s important to choose one that will look great on both the exterior of your house and any trim or accents that may be present. Once you’ve chosen your colors, it’s time to get started with the preparation work.

One of the first steps in installing Hardie Board siding is priming the boards. This process allows the siding to bond properly to the wall framing and roofing materials below it. Once primed, you can start painting or staining your boards any color you want!

Finally, you’ll need to install plywood sheathing on top of the studs in your wall. This layer of wood veneer acts as a barrier between your home and the elements outside, and it can also be used in between roofing panels and siding to create a weather tight seal. With these simple pre-installation steps completed, installing Hardie Board siding on your home should be a breeze!

Installing Hardie Board siding is a great way to give your home a stylish, weatherproof finish. With the right preparation and materials, you’ll be able to complete the project with ease – leaving you with a beautiful and lasting exterior. But don’t forget: before you begin installation, you’ll need to remove any existing siding and clean up the area first. Stay tuned for more information on that!

Removing Existing Siding and Cleaning Up Area Before Installation Begins

Removing existing siding and cleaning up the area before installation begins are important steps in installing Hardie Panels. In order to ensure that your new siding is properly installed and sealed, it’s essential to first remove any existing siding and clean up the area of any dirt, debris or other materials that may be present.

This can often be done with a pressure washer and some elbow grease, but if you’re dealing with stubborn materials like paint or caulk, you may need additional tools such as scrapers or chemical strippers. Once all of the old siding is removed, use a broom or leaf blower to clear away any remaining dust, dirt or debris.

Finally, inspect the walls for signs of water damage or rot. If any is found, address these issues before continuing with your installation project. Taking the time to properly prepare your space will save you headaches down the road – so don’t forget these key pre installation steps!

Removing Existing Siding and Cleaning Up Area Before Installation Begins

Preparing Walls for Installation by Applying House Wrap or Insulating Foam Sheathing Underneath Boards

Preparing the walls for installation of Hardie Board siding is an important step in ensuring that your siding will last for many years to come. Before installing boards, you should consider using a house wrap or insulating foam sheathing underneath them. This will help protect the boards from moisture and provide additional insulation.

To install house wrap, start by measuring and cutting it to the appropriate size, then use a staple gun to secure it to the walls. Once all of the pieces are attached, use plastic or metal fasteners around windows and doors and seal any seams with caulk or tape.

For insulating foam sheathing, measure each board carefully before cutting it to size. Then attach it directly to the wall studs using screws or nails and make sure that there is no gap between the insulation and the wall surface. Finally, seal any seams with caulk or tape just as you would with house wrap installation.

By taking these extra steps when installing Hardie Board siding, you can rest assured that your new siding will be protected from moisture damage while providing additional insulation benefits.

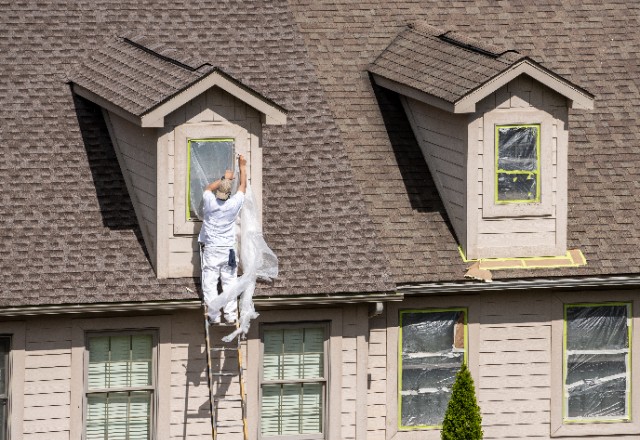
Installing Trim Boards Around Windows, Doors and Corners for a Professional Look

Adding trim boards around windows, doors and corners is an important step in giving your Hardie Board siding a professional look. Trim boards help to cover any gaps or uneven spaces between the siding and window/door jambs, as well as give your home a finished appearance.

To install trim boards, start by measuring and cutting them to the appropriate sizes for each window/door jamb. Then, secure the trim boards using either screws or nails into the wall studs surrounding the frame of each window/door opening. Make sure that there are no gaps between the end of each board and the jamb so that water won’t get behind it and cause damage.

Once all of your trim boards are in place, use caulk to seal any seams between them and the jamb. This will help ensure that water doesn’t get through any cracks or gaps in your siding. You can also use a caulking gun with silicone caulk to fill any small holes or gaps around nails or screws used to attach the trim boards for an extra layer of protection.

By taking this extra step when installing Hardie Board siding, you can be sure that your home will have a finished look while also providing an extra layer of protection from moisture damage.

Instructions on how to install siding - layout of planks

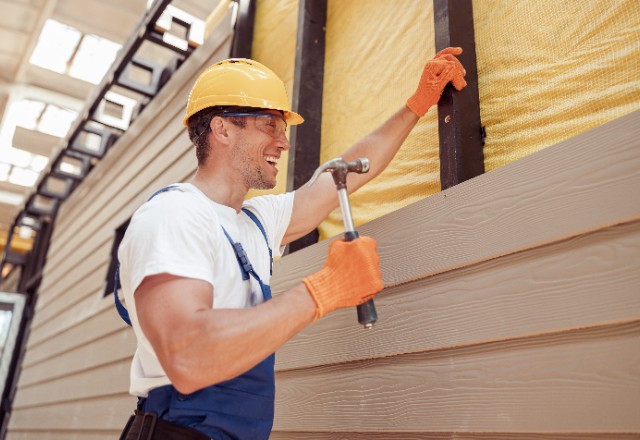
Step-by-Step Instructions for Installing Hardie Board Siding

Installing Hardie Board siding is a great way to give your home an attractive and durable exterior. To ensure correct installation of Hardie Board siding, it is advised to refer to a detailed installation guide. Here is a guide that outlines the necessary steps.

  1. Start by measuring the area where you plan to install the siding and cut the boards to size accordingly.
  2. Begin at the bottom of the wall and work your way up, securing each board to the studs with galvanized nails or screws. Make sure that each board overlaps slightly with the one below it for proper installation.
  3. After all of the boards have been installed, use caulk around all of the seams to prevent water from getting behind them and causing damage.
  4. Finally, add trim boards around windows, doors and corners for a finished look. Measure and cut these pieces as necessary before attaching them with nails or screws into existing studs in your wall frame. Caulk any seams between trim boards and window/door jambs for extra protection from moisture damage.

By following these simple steps, you can be sure that your Hardie Board siding will look great while also providing long-lasting protection against weathering elements like rain and snow.

By following this step-by-step guide, you can be sure that your Hardie Board siding will look great and provide long-lasting protection against the elements. Now that you know how to properly install your siding, it’s time to start at the bottom of the wall and work your way up – cutting pieces for the bottom row with proper overlap in mind.

Starting at the Bottom – Cutting Pieces for Bottom Row with Proper Ove

Starting at the bottom of your wall is an important step when it comes to installing Hardie Board siding. This is because the boards must overlap slightly with each other in order to provide a waterproof seal and prevent moisture from seeping in. To ensure that the boards are cut to the proper size and that they overlap properly, always measure your area before cutting. This will help you get a more exact fit for each piece that you’re working with. When cutting pieces for the bottom row, be sure to leave about 1/4-inch of extra space so that there is enough room for the upper pieces to overlap. With careful measurement and precise cutting, you can be sure that your Hardie Board siding will look great and provide protection against any weathering elements.

Nailing Pieces in Place from Bottom to Top Working from Left to Right

Nailing pieces of Hardie Board siding in place is the next step in installing your siding. It’s important to start from the bottom and work your way up, nailing each piece in place as you go. Additionally, always work from left to right when nailing pieces into place. This will help ensure that each piece has a secure hold and that the boards are perfectly aligned for a seamless look. With a hammer and nails, begin at the bottom corner on the left side of your wall and slowly move along, ensuring that each nail is firmly driven into the wood or studs beneath it. Additionally, be sure to leave about 1/4-inch between each nail so that you don’t drive them too close together and risk splitting the board. Once all of your boards have been nailed in place, you’ll be ready to move onto the next step of finishing off your Hardie Board siding installation!

Nailing Pieces in Place from Bottom to Top Working from Left to Right

Interlocking Top Edge Piece with Tab Lock Feature if Available in Prod

Installing the top edge piece of your Hardie Board siding is an important step to ensuring a seamless look. To do this, you’ll want to look for an interlocking tab lock feature on the boards – if available in your product. This tab lock feature will help keep the boards securely fastened and aligned. To get started, measure the size of your wall and cut the top edge piece to fit. Once that’s done, slide the top edge piece over the vertical boards so that it fits snugly against them. You should also ensure that there is about 1/4 inch of space between each board for expansion purposes. Finally, use a hammer and nails to secure the top piece into place. Make sure each nail is firmly driven into place, leaving about 1/4 inch between each one so that you don’t split any boards. With this final step completed, you can now enjoy your newly installed Hardie Board siding!

Filling Any Gaps Between Pieces with Caulk or Joint Compound

Once your Hardie Board siding is installed, you may notice small gaps between the pieces. To ensure a seamless and professional look, these gaps should be filled with caulk or joint compound. Start by preparing the gap by cleaning it with a wire brush or sandpaper to remove any dirt or debris. Next, use a caulking gun to apply a bead of silicone caulk along the length of the gap. For larger gaps, use a joint compound instead. Smooth out the caulk or joint compound with a putty knife as you go and make sure to wipe away any excess material. Allow this to dry completely before painting over it for an even better finish. With these simple steps completed, you can now enjoy your newly installed Hardie Board siding!

Adding Corner Posts, Trim Pieces Around Windows and Doors as Desired

Adding corner posts, trim pieces around windows and doors, and other accents can help to give your Hardie Board siding a personalized look. When installing corner posts, be sure to use a level and mark the center point of the wall where you will attach the post. You can then use a miter saw to cut the Hardie Board siding at a 45-degree angle on each side so it fits snugly against the post. Trim pieces around windows and doors should also be cut with a miter saw for a precise fit. If desired, you can also add decorative molding or other accents for an even more customized look. Depending on what type of project you are doing, these accents may need to be pre-painted before installation. With these finishing touches in place, your Hardie Board siding will have that professional touch you were looking for!

Completing Final Touches such as Painting or Staining As Needed

Painting or staining your Hardie Board siding is the final step in completing your installation. Depending on what type of look you are going for, you can choose from a variety of paints and stains to customize your siding. Many homeowners opt for light colors that match the existing trim and accents of their home, while others prefer darker shades that stand out more. If you decide to paint or stain your siding, make sure to use an outdoor-grade paint or stain that is specifically designed for use with Hardie Board siding. This will ensure it lasts as long as possible and provides the best protection against the elements. Once you have completed this final step, enjoy the beautiful new look of your Hardie Board siding!

Safety Issues When Installing James Hardie Siding

Installing Hardie Board siding is a job best left to the pros, but if you’re comfortable taking on the task yourself, here’s what you should know. Before starting the installation process, make sure you have all the necessary tools and materials on hand such as a pneumatic nail gun, building paper, dust mask, etc. After that it’s time to begin!

The installation process will vary depending on whether you are doing a new construction or retrofitting an existing house. If it’s a new build, cover your walls with building paper before installing the siding boards. For retrofitting an existing home, start by removing any old siding and then install the new Hardie Board siding. Regardless of which type of project it is, be sure to measure each wall carefully before beginning so that you get accurate cuts and proper spacing between boards.

When installing Hardie Board Siding across an entire house it is best done by professional installation services since they have experience and expertise in this area. They will also provide expertise in choosing the right trim pieces for corners and other areas. This can help enhance your home’s beauty while ensuring that your siding remains secure over time. Lastly, always wear safety equipment such as gloves and safety glasses when installing Hardie Board siding to protect yourself from any possible hazards.

Safety Issues Wnen Installing James Hardie Siding

Maintenance Tips for Hardie Board Siding Clean

Hardie Board siding is incredibly durable and low-maintenance, but it does require some upkeep in order to keep it looking its best. To keep your beautiful siding clean, use a soft brush and warm water with mild dish soap or a general purpose cleaner. Avoid using harsh abrasives or chemicals on your siding as these can damage the surface of the material. You should also rinse your siding with a hose after each cleaning session to ensure all of the soap has been removed.

Repairs

In addition to regular cleaning, you may need to perform occasional repairs on your siding boards. Minor damages such as chips, cracks, and dents can be easily repaired by sanding down the affected areas and filling them in with an appropriate filler material. If more serious damage occurs, it is best to replace the affected pieces rather than trying to repair them.

With the right care and maintenance, your Hardie Board siding will look great for years to come! Now that you know how to keep it in tip-top shape, let’s look at the conclusion of this topic.

Conclusion

In conclusion, James Hardie Siding is an excellent choice for homeowners looking for a durable, low-maintenance siding material. With regular cleaning and the occasional repair, you can ensure that your home’s exterior looks its best for years to come. If you follow these maintenance tips, your Hardie Board siding will stay in great condition and add beauty and value to your home. Thanks for reading!

FAQs About Installing Hardie Board Siding

Q1: How many square feet of Hardie Board siding are needed to cover an average house?

A1: The amount of Hardie Board siding you will need depends on the size and shape of your house, but the average is usually around 500-600 square feet.

Q2: What is the difference between wood siding, vinyl siding and Hardie Plank siding?

A2: Vinyl siding is made from plastic which has a shorter lifespan than James Hardie’s fiber cement siding. Fiber cement also offers superior insect resistant and fire resistant properties.

Q3: How many pieces of siding does one box of Hardie Plank contain?

A3: One box of Hardie Plank contains approximately twenty pieces, depending on the width and length of each piece.

Q4: What steps should I take to select a qualified contractor for the installation of Hardie Board siding?

A4: It’s important to research potential contractors before hiring them. Look for reviews online, ask friends and family if they have any recommendations, and contact references provided by the contractor.

Q5: Do I need special trim pieces when installing Hardie Board siding on corners?

A5: Yes. To make sure your home looks its best, you will need corner trim pieces specifically designed for Hardie Board siding.

Q6: What kind of tools do I need to install Hardie Board siding?

A6: You will need basic tools such as a hammer, drill, jigsaw, and a level. You may also need additional items such as screws and nails depending on your specific project.