509-201-4190

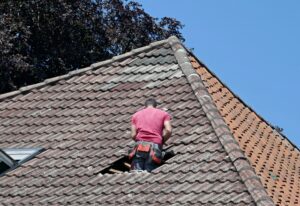
Installing corrugated metal roofing on a shed may seem like an intimidating task, but with the right materials, tools, and a few helpful tips, it can be a relatively straightforward project. Below you’ll find a step-by-step guide to help you successfully install corrugated metal roofing on your shed.
Disclaimer: This guide is for informational purposes only. Installing corrugated metal roofing on a shed is a complex process that requires skill and experience. If you are not confident in your abilities, it is highly recommended that you seek the assistance of a professional roofer. Advance Roofing LLC has been proudly serving the Spokane, WA area for years with the highest standards of quality roofing solutions and would be happy to help with any questions or concerns you may have during installation.
What is Corrugated Metal Roofing?
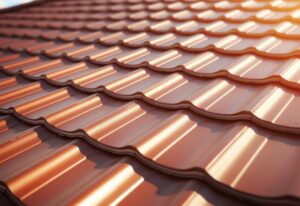
Corrugated metal roofing is a type of roofing material made up of large, flat sheets of steel that have a wavy pattern. This type of roofing has been used for many years because of its durability, toughness, and ease of installation. When installed correctly, a corrugated metal roof can provide you with many benefits, including energy efficiency, longevity, low maintenance, and excellent protection against the elements. In this guide, we will walk you through the steps of installing corrugated metal roofing on your shed and help you maximize the benefits of this roofing material.
Advantages of Using Corrugated Metal Roofing for a Shed
When it comes to roofing options for a shed, a corrugated metal roof is a wise choice due to the numerous benefits it provides. If you’re looking for a roofing material that can last for decades and withstand harsh weather conditions, then corrugated metal roofing should be at the top of your list.
One of the most significant advantages of this type of roofing material is its durability. Unlike traditional roofing options like asphalt shingles, corrugated metal roofing can handle high winds, heavy rainfall, and extreme temperatures. This material doesn’t crack, split, or rot, meaning it can provide you with long-lasting protection for your shed.
Another benefit of installing a corrugated metal roof on your shed is its recyclability. Metal roofing materials are highly recyclable and can be repurposed or reused at the end of their lifespan, which makes them more environmentally friendly than other roofing materials.
In addition to its durability and environmental benefits, corrugated metal roofing also offers several style options to choose from, making it an aesthetically pleasing choice for homeowners. Metal roofs come in different colors and styles, including traditional standing seam panels and metal shingles, creating a unique look for your shed.
Moreover, installing a corrugated metal roof provides a higher return on investment for homeowners. This type of roofing material is nearly maintenance-free, meaning you won’t need to spend money on frequent repairs or replacements like you would with other roofing options. The longevity of a corrugated metal roof also reduces the need for frequent roof replacements, which can save you money in the long run.
By choosing this type of roofing material, you’re investing in a long-lasting and reliable solution that can secure your shed for years to come.
Materials Needed for Installation
Before installing corrugated metal roofing on your shed, there are several materials you’ll need to gather for a successful installation. You’ll need the right tools to ensure that the metal panels are installed correctly, and you’ll also need to calculate the square footage of your shed to purchase the appropriate amount of materials. In this section, we’ll cover the tools required for installation and the process of calculating square footage and purchasing the appropriate amount of materials. By following these steps, you can ensure that you have everything you need for a seamless installation process.
Tools Required for Installation
When installing corrugated metal roofing on your shed, it’s crucial to have all the necessary tools on hand to prevent any interruptions during the process.
Besides the standard tools like a hammer and tape measure, you’ll need specialized items like snips, rivets, and a caulking gun to ensure that the installation runs smoothly.
Snips are ideal for cutting metal sheets, while rivets are useful for securing metal pieces in place. A caulking gun will help you seal any gaps to prevent water leakage. It’s also essential to have a sturdy ladder to reach the roof and move around safely.
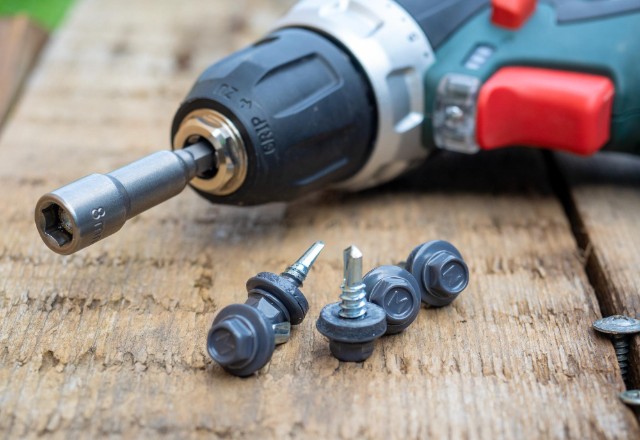
Additionally, you’ll need an adjustable-torque handheld drill to drive screws or fasten metal pieces. These drills allow you to select the torque setting, which ensures the screws are not overdriven and that the metal panels remain intact.
By ensuring that you have all the necessary tools, you can get the job done correctly and efficiently.
Calculating Square Footage and Purchasing Appropriate Amounts of Materials
Before you begin the metal roofing installation on your shed, it’s important to calculate the square footage of your roof and purchase the appropriate amount of materials needed. This will help ensure that you have enough materials to complete the project and avoid any unnecessary trips to the hardware store.
To calculate the square footage of your roof, start by measuring the length and width of your roof in feet. Multiply these two numbers to get the total square footage. Keep in mind that corrugated metal roofing typically comes in 26-inch panels, so you’ll need to divide the total square footage of your roof by the square footage of each panel to determine the number of panels needed.
In addition to the metal panels, you’ll also need to calculate the total linear footage of ridge cap and eaves trim needed for your roof. It’s important to add extra material for cutting and waste. Once you have these measurements, you can determine the total amount of ridge cap and eaves trim needed for the job.
When it comes to purchasing materials for your metal roofing installation, it’s important to consider the type of metal roofing you’ll be using. For example, if you choose aluminum, galvalume, or copper, the materials needed for installation may vary slightly.
In general, the materials needed for your metal roofing installation may include the metal panels, ice and water shield, roofing nails, eave trim, gable trim, ridge cap, sidewall flashing, self-tapping roofing screws, metal roofing sealant, inside foam closure strips, outside foam closure strips, butyl tape, and roofing vent boots.
By taking the time to calculate the square footage of your roof and purchasing the appropriate amount of materials needed, you can ensure that your metal roofing installation goes smoothly and without any unnecessary interruptions.
Preparing the Shed
Before you begin the installation process for your new corrugated metal roofing on your shed, it’s important to ensure that the existing structure is stable and free of any debris. This step will not only ensure your safety during the installation process but will also help prevent any potential damage to your new roofing system. In this section, we’ll discuss two crucial steps to prepare your shed for your metal roofing installation: removing old roof coverings and debris and inspecting and repairing the shed structure as necessary.
To start, you’ll need to remove any old roof coverings and debris from the existing shed structure. This step will give you a clean surface to work with and will ensure the new metal roofing panels will lay flat on the roof deck. If there are old shingles that need to be removed, be sure to use a pry bar or shovel to gently lift the shingles and remove the nails or screws holding them in place. Make sure to dispose of all debris properly and responsibly.
Once the roof is cleared of any old roof coverings and debris, it’s time to inspect the shed structure for any potential damage. While this may seem like a time-consuming step, it’s essential to make sure that the installation of your new metal roofing system will be supported by a stable and structurally sound shed. Inspect all the structural components of the shed, like the rafters, decking, and any joints, for any signs of wear and damage. Any damaged components should be replaced or repaired before proceeding with the installation of your new metal roofing system.
Removing Old Roof Coverings and Debris
The first step in installing your new corrugated metal roofing on your shed is to remove any old roof coverings and debris, creating a clean surface for your new metal roofing panels to lay flat on your roof deck. Here are some step-by-step instructions to help you navigate this process:
- To replace the roof, begin at the highest point and carefully remove the old shingles, flashing, underlayment, and vents in a systematic manner to avoid harming the underlying roof sheathing. Make sure to dispose of all old materials properly and responsibly.
- While removing the old roof coverings, take the time to inspect the underlying roof sheathing for any signs of damage or weakness. Replace any damaged sections with new plywood or OSB and use sealants and roofing adhesive to make repairs as necessary.
- Once all of the old roof coverings are removed and any necessary repairs are made, use a dumpster or other appropriate waste disposal method to haul away all waste from the disposal of the old roof. This will create a clean workspace for your new installation.
- Before starting the new installation, make sure the workspace is clear of all debris and any nails that may be sticking out. This will prevent any damage or safety hazards during the installation process.
By following these steps and thoroughly removing any old roof coverings and debris, you’ll have a solid foundation and smooth surface to work with for your new corrugated metal roofing installation.
Inspecting and Repairing the Shed Structure as Necessary
Before proceeding with the installation of the new corrugated metal roof on your shed, it’s important to ensure that the shed’s structure is in good condition. Inspecting and repairing as necessary will not only ensure the longevity of your new roof but also keep the shed safe and stable for years to come. Here’s what you need to do:
- Start by inspecting the roof decking. Look for signs of rot, sagging, or damage, and replace any sections that are weak or compromised. The roof decking should be level and secure, providing a solid foundation for your new roof.
- Check the structural support beams that hold up the roof. Make sure they are straight, level, and securely bolted to the shed’s walls. If any support beams are damaged or unstable, replace them before proceeding with the metal roof installation.
- In addition to the roof, inspect the shed’s walls and door frames. Look for signs of rot or damage and make repairs as necessary. It’s important
that the entire shed structure is solid and in good condition to ensure the safety and stability of the shed.
- Finally Final , remove any debris from the shed and clean the area thoroughly. This will create a clean workspace for your new installation and ensure that no debris interferes with the structure or roof.
By following these steps and inspecting and repairing the shed’s structure as necessary, you’ll have a strong and stable foundation for your new corrugated metal roof. This investment in the safety and longevity of your shed will pay off in the long run and ensure that your new roof has a solid foundation to last for years to come.
How to Install Metal Roofing Panels?
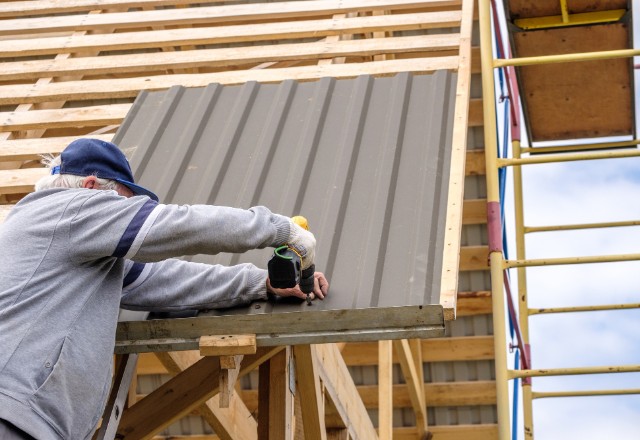
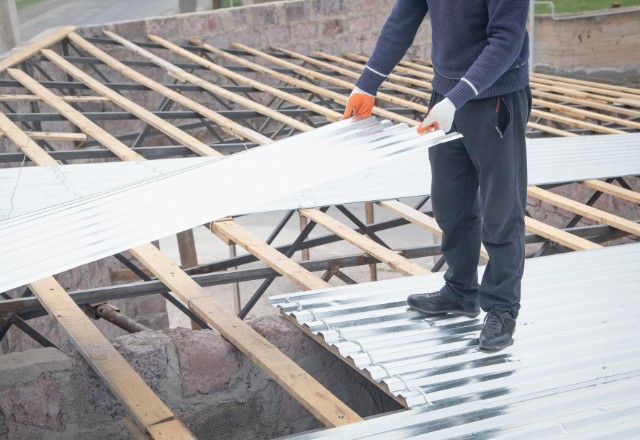
Now that the shed structure is prepped and ready, it’s time to begin installing the new corrugated metal roofing panels. First, lay out and position the first panel at the eave line, ensuring that it is correctly aligned with the edges of the roof. Secure the panel using roofing nails and sealant tape to create a strong bond and prevent any water from seeping through the installed metal panels. Make sure to overlap each panel adequately to provide maximum coverage and protection for the shed. As you move along, you might need to trim excess material with tin snips to ensure the panels fit perfectly and create a clean finish. Just be careful not to damage the panels in the process.
Laying Out and Positioning the First Panel at the Eave Line
One of the critical steps in installing a metal roof on your shed is laying out and positioning the first panel at the eave line. You should always start at the bottom corner of the shed roof and work across for metal panel installation.
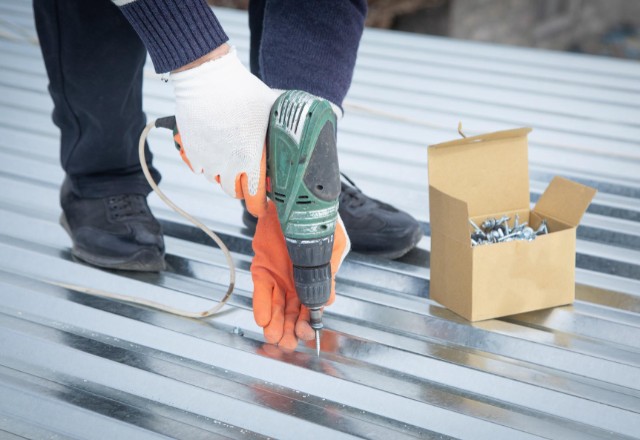
To get started, make sure you have the first panel cut to size and ready to go. Begin by positioning the panel at the eave line, ensuring that it overhangs the edge of the shed by at least 4 inches. This overhang will help divert any water away from the structure and prevent it from seeping underneath the panel. In this position, secure the metal panel in place using 1 ½-inch wood screws.
When adding these screws, be sure to tighten them just enough to hold the panel in place without dimpling the metal. A general rule of thumb is to stop tightening the screws when you begin to feel resistance. Over-tightening the screws can cause the panel to wrinkle and potentially damage the metal material.
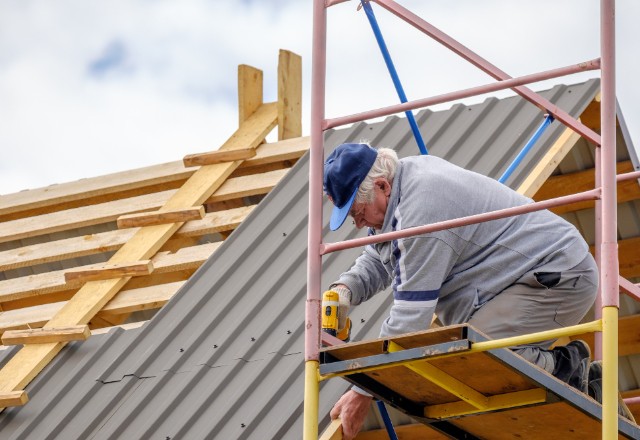
To ensure the panel is properly secured, it is recommended to add screws to both the outside edge and the bottom of the panel, spaced approximately every 8 inches. This practice will keep the metal panel from buckling, especially in windy conditions.
With the first metal panel securely in place, you are ready to add the subsequent panels and create a seamless, waterproof roof. Keep in mind that each metal panel installation may vary depending on your specific shed and material choice. However, starting at the bottom corner of the shed roof, ensuring a proper overhang, and securing each panel with screws will set you up for success.
Securing the Panels with Roofing Nails and Sealant Tape
Once you have secured the first panel in place, it’s time to begin overlapping the metal panels around the shed roof using roofing nails and sealant tape. Here are the steps:
- Align the first panel with the roof edge, ensuring that it overlaps the existing edging or sits flush with the rake edge and goes at least one inch past the eave. This step is crucial as the overlap will prevent water from seeping under the panels and into the shed. Secure the panel with screws through the metal’s rib, avoiding overtightening and denting the rib or compressing the neoprene washer.
- When adding the next panel, place it in line with the previous one and ensure that the drainage channels align. Overlap the panels adequately to maintain the waterproof seal. A minimum overlap of six inches is recommended for corrugated metal roofing.
- To secure the overlapping edge, use roofing nails approximately six inches apart, inserted through the flat metal surface. This practice will prevent the panels from shifting over time, especially in high wind conditions.
- After inserting the roofing nails, press sealant tape over each nail head. This step will waterproof the nail holes and prevent any leakage.
- Continue positioning and overlapping the panels until you complete the roof surface. It’s crucial to ensure that each panel overlaps adequately to maintain the waterproof integrity of the roof.
In summary, overlapping the metal panels around the shed roof with roofing nails and sealant tape is a crucial step in installing a corrugated metal roof. Adequate overlapping will prevent water from seeping under the panels and causing damage to the structure. By following these steps, you can ensure a long-lasting and waterproof roof for your shed.
Trimming Excess Material with Tin Snips as Needed
Once you have installed the corrugated metal roofing on your shed, you may need to trim excess material to ensure a clean and professional look. The process of trimming excess material from your metal panels is simple and can be accomplished using tin snips and a speed square.
Here are the steps to follow:
- Measure and mark the areas that require trimming using a speed square. It’s important to take precise measurements as you want to avoid trimming too much material, which can lead to leaks and other issues.
- Place the metal panels on a flat, stable surface, such as a workbench or sawhorse. This step will help you get a clean cut without damaging the panel’s surface or bending it out of shape.
- Using the tin snips, make strategic cuts along the marked lines. Take your time and make sure that the snips are cutting through the metal smoothly and evenly. You don’t want to rush this step and accidentally make uneven or rough cuts.
- Protect your hands by wearing gloves. The edges of the metal can be sharp and can cause injuries or cuts. Wearing gloves will help you to prevent such injuries.
- After trimming, take some time to inspect the edges of the metal. If you notice any burrs or sharp edges, use sandpaper to dull them down. Dulling any exposed edges or burrs will prevent injury and protect against rust.
In summary, trimming excess material from your corrugated metal roof panels is an essential part of achieving a clean and professional look. By following these simple steps using tin snips and a speed square, you can make precise cuts and create a finished product you’ll be proud of. Remember to wear gloves and use sandpaper to dull any exposed edges to protect against injury and rust.
Finishing Touches on The Corrugated Metal Roof Installation
Once you’ve completed the installation of corrugated metal roofing on your shed, there are a few finishing touches that can help enhance its durability and appearance. These steps include installing ridge caps or closure strips at the peak of the entire roof, adding drip edge flashing to control runoff, caulking all seams to prevent leaks, and applying a protective coating or paint if desired by the homeowner. These final touches will provide additional protection against the elements while also ensuring that your corrugated metal roof looks great for years to come. Let’s take a closer look at each step.
Installing Ridge Caps or Closure Strips at Peak of Entire Roof
One of the most important steps in installing a corrugated metal roofing system on a shed is properly sealing and protecting the roof’s peak. This can be achieved by adding ridge caps or closure strips at the peak of the entire roof to prevent water and debris from entering and causing potential damage.
To install ridge caps or closure strips, you will need the following materials: ridge caps or closure strips,
metal to metal fasteners,
silicone sealant,
tin snips.
Begin by positioning the first piece of ridge cap or closure strip at one end of the roof’s peak. Make sure to fasten it securely by inserting metal to metal fasteners through the high seam of the metal roofing panel and into the ridge cap or closure strip. Continue this process until you have reached the other end of the peak.
Overlap each subsequent piece of ridge cap or closure strip by 6 inches and apply silicone sealant to the inside lap to ensure a waterproof seal. Use tin snips to trim any excess material as needed.
A properly installed ridge cap or closure strip should be tightly secured and not allow any water or debris to penetrate. To achieve the best results, seal all seams between the metal roofing panels and the ridge cap or closure strip by applying silicone sealant to prevent any leaks.
Finally Final , add any necessary finishing touches by caulking all seams to prevent additional leakage and applying a protective coating or paint if desired by the homeowner. By following these steps, you can effectively install ridge caps or closure strips on your corrugated metal roofing system and ensure a long-lasting roof for your shed.
Adding Drip Edge Flashing Where Necessary to Control Runoff
The installation of drip edge flashing is a necessary measure in managing runoff on a corrugated metal roof. This type of flashing acts as a barrier that seals the edges of the roof, preventing water from seeping into the attic and potentially causing damage to the roof’s structure.
To install drip edge flashing, you will need 1 1/4-inch galvanized roofing nails and a sealing tape. Begin by nailing the flashing to the sheathing every 16 inches along the eaves and rake of the roof. Be sure to overlap the sections of flashing by 1/4 to 1/2-inch and keep it back from the lapped joint.
The drip edge flashing should also overhang the lip of the gutter by approximately 1/2- inch. This way, the water from the roof can fall into the gutter without damaging the fascia board. Once the flashing is in place, apply a strip of sealant tape along the top of the flashing.
Next, add an inside closure strip on top of the tape. It’s important not to stretch the closure strip since it may cause alignment issues with the panel. Make sure to align the closure strip properly with the panel. This arrangement of drip edge flashing, sealant tape, and closure strip creates a waterproof barrier that effectively seals the edges of the roof and prevents water seepage.
By adding drip edge flashing where necessary on your corrugated metal roof, you can control runoff and keep your roof in good condition for years to come. Don’t overlook this essential step in your roofing installation project. Your roof and your attic will thank you.
Caulking All Seams to Prevent Leaks
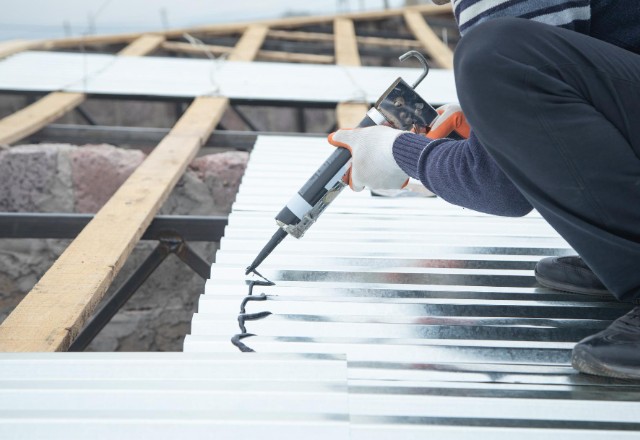
Caulking all seams is an essential step when installing a corrugated metal roof. Even the smallest gap or exposed seam can lead to water or air infiltration, which can cause significant damage to the roof, attic, and the overall structure of the shed.
To prevent leaks and ensure the longevity of your corrugated metal roof, you will want to use the right sealant. The two most common types of sealant used for corrugated metal roofing are roofing caulk or silicone sealant. Both of these sealants provide a waterproof barrier that seals gaps and stop water infiltration.
When applying the sealant, start by cleaning the surface of the roofing panel, so the sealant will adhere correctly. Then, place the sealant on the seam or gap and use a caulk gun to apply it evenly along the length of the seam. Make sure to apply enough pressure to ensure the sealant fills the gap entirely.
Once you have applied the sealant, allow it to dry completely before allowing any kind of walking or movement on the roof. Drying time will depend on the sealant you use, but the recommended time is around 24 hours. After the sealant has dried, inspect the roof to ensure that all the seams are appropriately sealed without any gaps or exposed areas.
By following these simple steps, you can effectively prevent leaks and keep your corrugated metal roof in excellent condition for years to come. Don’t overlook the importance of caulking all seams to ensure the integrity of your shed’s roof.
Applying Protective Coating or Paint, if Desired by Homeowner
After completing the installation of your corrugated metal roof, you may consider applying a protective coating or paint to enhance its durability and aesthetics. Here are some steps to follow when applying a protective coating or paint:
- Wait Until the Roof Installation Project is Complete: Ensure that your project is complete and your roof is clean and free of debris. Wait until the weather is clear before applying a protective coating or paint to your roof.
- Choose the Right Clear-Coat Polyurethane Sealer: High-quality clear coat polyurethane sealer can protect your roof from external factors like harsh weather, UV light, and moisture. It also helps to extend the life of your roof significantly.
- Apply the Protective Coating: You can apply the clear-coat polyurethane sealer with a brush or sprayer, depending on your preference and the size of the roof. Before applying the sealer, ensure that all roof edges at the peak, eaves, and gables are correctly caulked to prevent any water dripping or penetration.
- Be Careful with the Sprayer: If you decide to use a sprayer, be careful not to overspray the product. Use a steady hand and an even technique to prevent gaps and uneven coverage.
- Allow the Protective Coating or Paint to Dry: After applying the protective coating or paint, allow your roof to dry according to the manufacturer’s recommended drying time before allowing any foot traffic or movement on the roof.
By following these steps, you can effectively apply a protective coating or paint to your corrugated metal roof, making it more durable and visually appealing. Remember to choose the right clear-coat polyurethane sealer and caulk all roof edges before applying any sealant or paint.
Conclusion
In conclusion, installing corrugated metal roofing on a shed is a great way to provide superior durability and weather resistance. It is important to carefully select materials and closely follow the manufacturer’s instructions for best results. Additionally, applying protective coatings or paint can enhance the roof’s functionality and aesthetics. When selecting a metal panel for your shed, consider factors such as the materials used, size and shape of the panels, and overall cost. With the right metal panel and careful installation, you can create a long-lasting and functional roof that will provide years of protection. Remember to always follow the manufacturer’s instructions closely and use appropriate materials to ensure the best results.