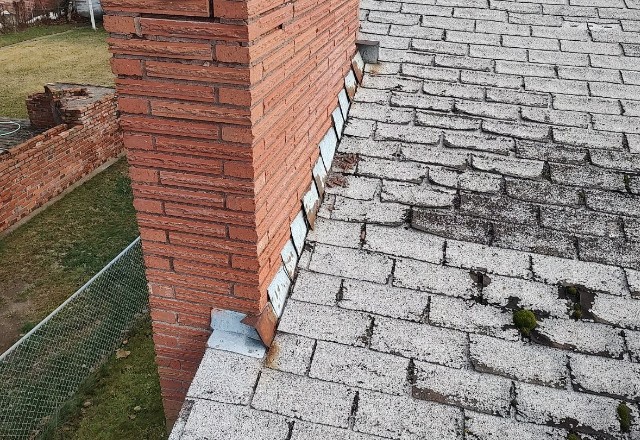
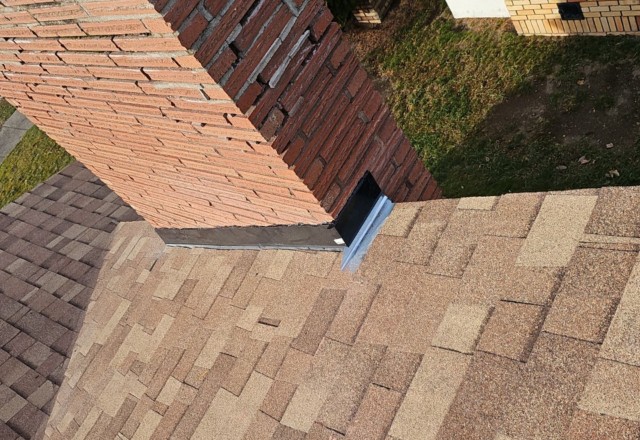
Is your roof leaking around your chimney? If so, you’re not alone. Many homeowners face this common problem, which can lead to serious damage if left unaddressed. In this comprehensive guide, we’ll walk you through the steps on how to fix roof leak around chimney, providing you with expert tips and insights to help you tackle this issue with confidence.
Identifying the Source of the Leak
The first step in fixing a roof leak around your chimney is to identify the source of the problem. Common causes of chimney leaks include:
- Damaged or improperly installed flashing
- Cracked or deteriorated mortar joints
- Loose or missing bricks
- Cracked chimney crown
To pinpoint the exact location of the leak, follow these tips:
- Inspect the chimney flashing for signs of damage, such as cracks, gaps, or rust.
- Check the mortar joints between the bricks for cracks or crumbling.
- Look for water stains or mold growth on the ceiling or walls near the chimney.
- Perform a water test by running a hose over the chimney and watching for leaks inside your home.
Gathering Tools and Materials
Before you begin fixing your roof leak around the chimney, make sure you have the necessary tools and materials:
| Tools | Materials |
|---|---|
| Caulking gun | High-quality, flexible roof sealant |
| Masonry trowel | Mortar mix |
| Putty knife | Chimney flashing (if replacing) |
| Wire brush | Waterproof membrane (if needed) |
| Safety glasses | Heavy-duty work gloves |
When selecting materials, opt for high-quality, weather-resistant products specifically designed for use on roofs and chimneys to ensure a long-lasting repair.

Repairing Flashing Around the Chimney
Flashing is the metal material that seals the gap between your chimney and roof, preventing water from seeping through. If the flashing is damaged or improperly installed, it can lead to leaks. Here’s how to fix roof leak around chimney by repairing or replacing the flashing:
- Remove the old flashing, being careful not to damage the surrounding roofing material or bricks.
- Clean the area thoroughly, removing any debris or old sealant.
- If the flashing is in good condition, reuse it. If it’s damaged, replace it with new flashing.
- Apply a bead of high-quality, flexible roof sealant along the edge of the flashing where it meets the chimney.
- Press the flashing firmly against the chimney and roof, ensuring a tight seal.
- Apply additional sealant along the top and sides of the flashing for added protection.
Sealing Cracks in the Chimney Crown
The chimney crown is the concrete slab that sits atop your chimney, protecting it from water damage. Over time, the crown can develop cracks, allowing water to seep into the chimney and cause leaks. To fix this issue, follow these steps:
- Clean the chimney crown thoroughly with a wire brush, removing any dirt or debris.
- Use a masonry trowel to apply a generous amount of mortar mix to the cracks, filling them completely.
- Smooth the surface of the mortar with a putty knife, ensuring it is level with the surrounding crown.
- Allow the mortar to dry completely, following the manufacturer’s recommended curing time.
Waterproofing the Chimney
To prevent future leaks, it’s essential to waterproof your chimney. This can be done using a waterproof membrane or a high-quality masonry sealer. Here’s how:
- Clean the entire chimney surface, removing any dirt, debris, or loose mortar.
- Apply the waterproof membrane or sealer according to the manufacturer’s instructions, using a brush or roller.
- Make sure to cover all surfaces of the chimney, including the crown, bricks, and flashing.
- Allow the waterproofing material to dry completely before exposing it to moisture.

Maintaining Your Chimney to Prevent Future Leaks
Regular chimney maintenance is crucial for preventing leaks and ensuring the longevity of your roof. Follow these tips to keep your chimney in top shape:
- Schedule annual chimney inspections and cleanings with a professional chimney sweep.
- Check the chimney flashing and crown regularly for signs of damage or deterioration.
- Repair any cracks or gaps in the mortar joints promptly to prevent water infiltration.
- Keep tree branches trimmed away from the chimney to avoid damage from falling limbs.
By following these maintenance tips, you can help prevent chimney leaks and avoid costly repairs down the road.
When to Call a Professional
While many chimney leak repairs can be done by handy homeowners, there are some cases where it’s best to call in a professional. Consider hiring a roofing contractor or chimney specialist if:
- The leak is severe or has caused significant damage to your home’s interior.
- You’re uncomfortable working on your roof or lack the necessary tools and expertise.
- The chimney requires extensive repairs or rebuilding.
A professional can assess the situation, recommend the best course of action, and ensure that the repair is done correctly and safely.
Frequently Asked Questions (FAQ)
Can I use regular caulk to seal my chimney flashing?
How often should I have my chimney inspected?
Can I waterproof my chimney myself, or do I need to hire a professional?
By following this comprehensive guide on how to fix roof leak around chimney, you can address this common problem and protect your home from water damage. Remember to identify the source of the leak, gather the necessary tools and materials, and take a systematic approach to repair the flashing, seal cracks in the crown, and waterproof the chimney. Regular maintenance and prompt repairs will help keep your chimney and roof in top condition for years to come.


 509-201-4190
