509-201-4190

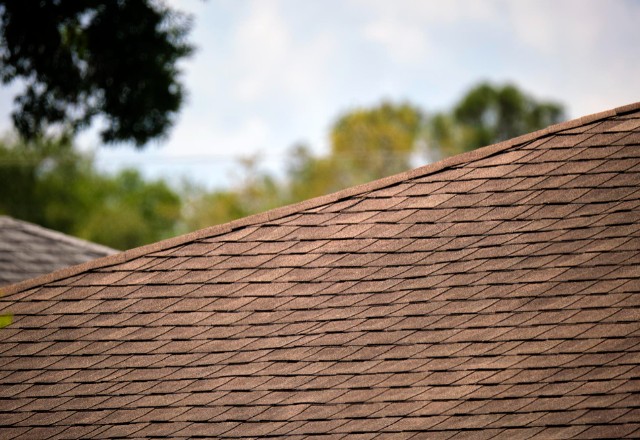
As a homeowner, maintaining the integrity of your roof is essential to protect your home and ensure its longevity. One of the most common roofing issues you may encounter is damaged or worn shingles, which can lead to leaks, energy loss, and structural problems if left unaddressed. In this comprehensive guide, we’ll walk you through the process of how to repair roof shingles, so you can tackle minor issues before they turn into major headaches.
Identifying Different Types of Roof Shingle Damage
Before you begin any roof repair project, it’s crucial to identify the type of damage affecting your shingles. Here are some common issues to look out for:
- Cracked or broken shingles: These can be caused by impact from falling branches, hail, or foot traffic on the roof.
- Curling or cupping shingles: This occurs when the edges or corners of the shingles turn upward or downward, often due to age, exposure to heat, or improper installation.
- Missing shingles: High winds, severe storms, or improper installation can cause shingles to come loose and fall off the roof.
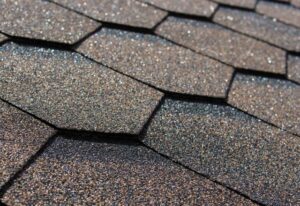
- Bald spots or granule loss: As shingles age, they may lose the protective granules that shield them from UV rays and weather damage, leading to bald spots or exposed asphalt.
- Algae or moss growth: While not always directly related to shingle damage, the presence of algae or moss can indicate moisture issues and lead to premature shingle deterioration.
Understanding the type of damage affecting your roof shingles will help you determine the best course of action for repairs.
Safety Precautions and Tools Required
Before starting any roof repair project, it’s essential to prioritize safety. Working on a roof can be dangerous, so take the following precautions:
- Wear non-slip shoes with good traction
- Use a sturdy ladder that extends at least three feet above the roofline
- Avoid working on the roof in wet, windy, or extreme weather conditions
- Consider using a safety harness, especially when working on steep slopes or near the edges of the roof
In addition to safety gear, you’ll need the following tools and materials to repair roof shingles:
- Hammer
- Roofing nails
- Pry bar
- Utility knife
- Roofing cement
- Caulking gun
- Replacement shingles (matching the existing ones as closely as possible)
- Granules (for bald spots or small repairs)
Having the right tools and materials on hand will make your roof repair project go more smoothly and efficiently.
Preparing for the Repair
Before beginning your roof shingle repair, take the time to properly prepare for the project:
- Assess the extent of the damage: Determine whether the repair is a DIY-friendly task or if it requires the experience of a professional roofing contractor. If you’re unsure or uncomfortable with any aspect of the repair process, it’s best to consult a roofing professional.
- Check the weather forecast: Choose a dry, calm day with mild temperatures to perform your repairs. Avoid working on the roof in extreme heat, cold, or wet conditions, as this can compromise the quality of the repair and pose safety risks.
- Gather necessary tools and materials: Collect all the required tools and materials before beginning the repair to avoid unnecessary trips up and down the ladder.
- Prepare the work area: Remove any debris or loose materials from the repair area and ensure the roof surface is clean and dry. Place your ladder on stable ground and ensure it extends at least three feet above the roofline.
Step-by-Step Guide to Repairing Different Types of Shingle Damage
Now that you’ve identified the type of damage, gathered your tools, and prepared your work area, it’s time to start repairing your roof shingles. Follow these step-by-step instructions for addressing common shingle issues:
Cracked or broken shingles
- For minor cracks, apply a generous amount of roofing cement or sealant over the crack using a caulking gun. Smooth the cement with a putty knife and allow it to dry completely.
- For severely damaged or broken shingles, you’ll need to replace them:
- Carefully lift the edges of the surrounding shingles and remove any nails securing the damaged shingle.
- Slide out the damaged shingle and dispose of it properly.
- Insert a new shingle into the gap, ensuring it aligns with the surrounding shingles.
- Secure the new shingle with roofing nails, applying a dab of roofing cement over each nail head to seal them.
- Apply roofing cement to the edges of the new shingle and the surrounding shingles to create a watertight seal.
Curling or cupping shingles
- For slightly curled or cupped shingles, you can often flatten them using roofing cement or a heat gun:
- Apply a generous amount of roofing cement under the curled edges of the shingle and press it down firmly.
- Alternatively, use a heat gun to gently warm the curled shingle, making it more pliable. Be careful not to overheat the shingle, as this can cause damage.
- Once the shingle is flat, apply roofing cement to the edges to seal them in place.
- If the curling or cupping is severe or the shingle is brittle and breaks when flattened, you’ll need to replace it following the steps outlined for replacing broken shingles.
Missing shingles
- Measure the gap left by the missing shingle to ensure you have a replacement that fits properly.
- Carefully lift the edges of the surrounding shingles and remove any remaining nails or debris.
- Slide the new shingle into place, ensuring it aligns with the surrounding shingles.
- Secure the new shingle with roofing nails, applying a dab of roofing cement over each nail head to seal them.
- Apply roofing cement to the edges of the new shingle and the surrounding shingles to create a watertight seal.
Bald spots or granule loss
- For small bald spots or areas with minor granule loss, you can apply roofing cement or sealant to the affected area to protect it from further damage.
- If the granule loss is extensive or the bald spot is large, it’s best to replace the affected shingle(s) to ensure proper protection and extend the life of your roof.
Algae or moss growth
- To clean algae or moss from your roof shingles, use a soft-bristled brush or low-pressure garden sprayer to apply a mixture of equal parts water and bleach or a specialized roof cleaning solution.
- Allow the solution to sit on the affected area for 15-20 minutes before gently scrubbing the algae or moss away.
- Rinse the area thoroughly with clean water and allow the shingles to dry completely.
- To prevent future growth, consider installing zinc or copper strips along the ridge of your roof, as these metals create a natural barrier against algae and moss.
Post-Repair Maintenance and Prevention Tips
Once you’ve completed your roof shingle repairs, it’s essential to take steps to maintain your roof and prevent future damage:
- Conduct regular roof inspections: Inspect your roof at least twice a year (spring and fall) and after severe storms to identify potential issues early. Look for any signs of damage, such as missing or curled shingles, and address them promptly.
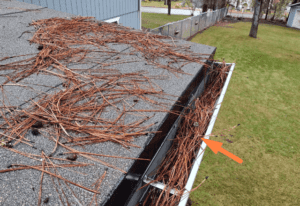
- Keep your gutters clean: Clogged gutters can cause water to back up and seep under your shingles, leading to leaks and damage.
- Trim overhanging branches: Remove any tree branches that hang over your roof to prevent damage from falling limbs and reduce the accumulation of leaves and debris.
- Ensure proper attic ventilation: Adequate ventilation helps regulate temperature and moisture levels in your attic, which can extend the lifespan of your roof shingles and prevent issues like curling or cupping.
- Consider applying a protective coating: Specialized roof coatings can help reflect UV rays, improve water resistance, and extend the life of your shingles.
Regular maintenance and timely repairs can save you thousands of dollars in the long run by preventing more severe damage and extending the lifespan of your roof.
When to Call a Professional Roofing Contractor
While many minor roof shingle repairs can be tackled by handy homeowners, there are situations where it’s best to call in a roofing professional:
- If the damage to your roof is extensive or affects a large area
- If you’re unsure about the proper repair techniques or lack the necessary tools and safety equipment
- If your roof has a steep slope or complex design that makes repairs dangerous or difficult
- If you suspect underlying issues, such as rot or structural damage, that may require more extensive repairs
When choosing a roofer, look for a licensed, insured, and experienced roofing professional with a proven track record of quality work. Don’t hesitate to ask for references, read reviews, and get multiple quotes before making a decision.
Conclusion
Learning how to repair roof shingles is a valuable skill for any homeowner, as it can help you address minor issues before they escalate into costly problems. By following the step-by-step instructions and expert tips outlined in this guide, you can safely and effectively repair damaged, curling, or missing shingles and maintain the integrity of your roof. Remember to prioritize safety, work methodically, and don’t hesitate to call in a roofing professional when needed. With proper maintenance and timely repairs, your roof will continue to protect your home and family for years to come.
FAQs
Can I repair roof shingles in cold weather?
While it’s possible to repair roof shingles in cold weather, it’s generally more challenging and may not yield the best results. Asphalt shingles become brittle and more prone to cracking in cold temperatures, making them harder to work with. Additionally, roofing cement and other adhesives may not seal as effectively in cold weather, compromising the repair’s long-term durability. If possible, wait for a warmer day (above 40°F or 4°C) to make your repairs. If you must repair your roof in cold weather, take extra care when handling the shingles and allow more time for the adhesives to set and cure properly.
How long can I expect my roof shingle repairs to last?
The longevity of your roof shingle repairs will depend on several factors, including the quality of the materials used, the skill of the person making the repairs, and the overall condition of your roof. In general, a properly executed repair using high-quality materials can last for several years, often matching the remaining lifespan of the surrounding shingles. However, if your roof is nearing the end of its expected lifespan or has widespread damage, a complete roof replacement may be a more cost-effective solution in the long run.
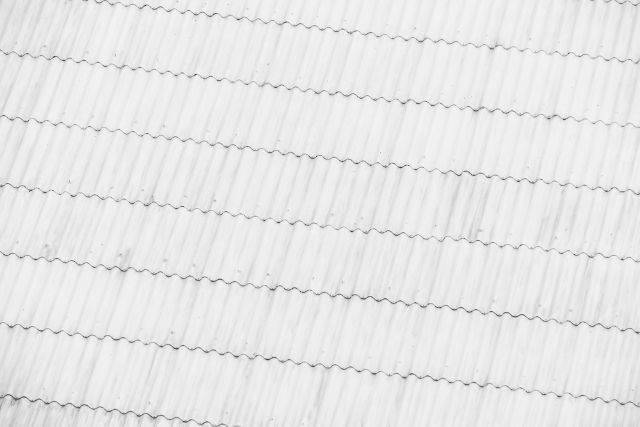
Can I repair my roof shingles if I have a metal roof?
The repair process for metal roofs differs from that of asphalt shingle roofs. Metal roofs are generally more durable and long-lasting than asphalt shingles but may require specialized tools and techniques for repairs. Common issues with metal roofs include loose or missing fasteners, dents, or punctures. If you have a metal roof and notice signs of damage, it’s best to consult a roofing professional experienced in working with metal roofing systems to ensure proper repairs and maintain the integrity of your roof.
Will my homeowners insurance cover the cost of repairing roof shingles?
Whether or not your homeowners insurance will cover the cost of repairing roof shingles depends on the specific terms of your policy and the cause of the damage. Most standard homeowners insurance policies cover roof damage caused by sudden, accidental events like severe storms, hail, or falling trees. However, damage resulting from normal wear and tear, age-related deterioration, or lack of maintenance is typically not covered. If you believe your roof damage may be covered by insurance, document the damage thoroughly with photos and contact your insurance provider as soon as possible to file a claim. Your insurance company will send an adjuster to assess the damage and determine if it’s covered under your policy. If your claim is approved, your insurance will cover the cost of repairs, minus your deductible. It’s essential to keep your roof well-maintained and address any issues promptly to minimize the risk of damage and ensure your insurance coverage remains valid. Regular inspections and timely repairs can help you avoid more extensive and costly damage down the line.
How much does it typically cost to repair roof shingles?
The cost of repairing roof shingles can vary widely depending on several factors, such as the extent of the damage, the type of shingles, the pitch and accessibility of your roof, and your geographic location. On average, minor repairs, such as replacing a few damaged shingles or patching small leaks, can cost between $150 and $600. More extensive repairs, like replacing a large section of shingles or addressing widespread damage, can cost anywhere from $500 to $2,000 or more. If your roof requires a complete replacement, the cost can range from $5,000 to $10,000 or more, depending on the size of your roof, the materials used, and the complexity of the job. To get an accurate estimate for your specific roof repair needs, it’s best to consult with a local roofing professional. They can assess the damage, recommend the appropriate course of action, and provide a detailed quote based on your unique situation. Obtaining multiple quotes from reputable roofers can help you compare prices and ensure you’re getting a fair deal. Remember, while it may be tempting to put off repairs to save money in the short term, addressing roof damage promptly can ultimately save you money by preventing more extensive and costly issues from developing in the future.
Type of Damage | Repair Method | Tools Required |
Cracked or broken shingles | Apply roofing cement for minor cracks; replace severely damaged shingles | Roofing cement, caulking gun, pry bar, utility knife, roofing nails, hammer |
Curling or cupping shingles | Flatten using roofing cement or a heat gun; replace if severely damaged | Roofing cement, caulking gun, heat gun, pry bar, utility knife, roofing nails, hammer |
Missing shingles | Replace with new shingles that match the existing ones | Replacement shingles, pry bar, utility knife, roofing nails, hammer, roofing cement |
Bald spots or granule loss | Apply roofing cement or sealant for small spots; replace shingles for extensive damage | Roofing cement, caulking gun, granules, pry bar, utility knife, roofing nails, hammer |
Algae or moss growth | Clean with a bleach solution or specialized roof cleaning product; install zinc or copper strips to prevent future growth | Soft-bristled brush, low-pressure garden sprayer, bleach or roof cleaning solution, zinc or copper |
Conclusion
In conclusion, repairing roof shingles like a pro requires a careful and systematic approach. To summarize the key steps and techniques discussed in this article, it is essential to start by identifying the type of shingles you have – whether it be asphalt, wood, metal, slate, or tile.
Using the correct materials and safety equipment, such as roofing nails, an extension ladder, and a safety harness, is crucial to ensure a successful repair job. Removing damaged shingles should be done carefully in order to prevent further damage to surrounding ones. When replacing broken shingles, it is important to align them correctly and secure them with appropriate roofing nails.
It’s worth noting that this article also provides information on fixing cracked or split shingles. This alternative option can be beneficial in prolonging the lifespan of your shingles and preventing further damage to your roof.