As a homeowner, one of the most common roofing issues you may encounter is roof shingles blown off during severe weather events or due to age-related wear and tear. Addressing this problem promptly is crucial to prevent further damage to your roof and home. In this article, we’ll walk you through the process of how to repair roof shingles blown off, so you can restore your roof’s integrity and protect your property.
Disclaimer: The information provided in this article is for demonstration purposes only and should not be considered professional advice. Always prioritize safety and consult with a licensed roofing contractor for the best results and to ensure compliance with local building codes and regulations.
Assessing the Damage
Before you begin any roof repair project, it’s essential to assess the damage and determine the extent of the problem. Here’s how to safely inspect your roof:
- Use a ladder to access the roof: Place the ladder on stable ground and ensure it extends at least three feet above the roofline. Always have someone hold the ladder steady for you.
- Wear proper safety gear: Put on non-slip shoes, gloves, and a safety harness if necessary to minimize risks of a fall.
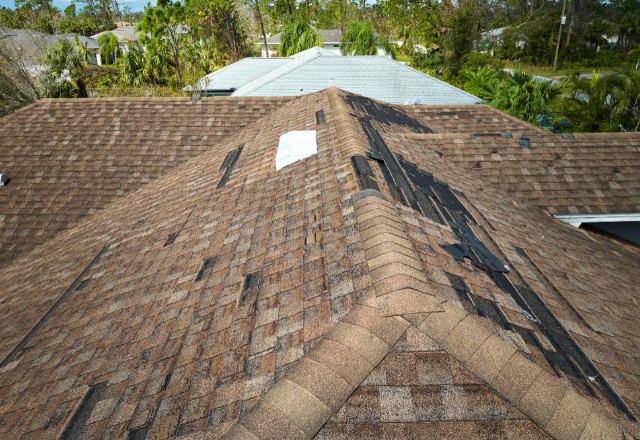
- Inspect the damaged area: Look for missing, cracked, or torn shingles, as well as any exposed underlayment or roof decking. Be sure to check for any bald spots where the shingle granules may have worn away, as this can also lead to leaks and other problems.
- Check the surrounding shingles: Examine the shingles adjacent to the damaged area for any signs of wear, loose roofing nails, or other issues that may need to be addressed.
- Determine the scope of the repair: If only a few shingles are missing or damaged, a DIY repair may be possible. However, if the damage is extensive or you’re unsure about your ability to make the repair, it’s best to contact a professional roofing contractor.

Tools and Materials Required
Before you start your roof shingles blown off repair, gather the following tools and materials:
- Ladder
- Safety gear (non-slip shoes, gloves, safety harness)
- Replacement shingles (matching the existing ones as closely as possible)
- Roofing nails
- Hammer
- Pry bar
- Utility knife
- Roofing cement
- Caulking gun
- Putty knife
- Broom or leaf blower
Having all the necessary tools and materials on hand will make your repair process more efficient and help you avoid unnecessary trips up and down the ladder.

Step-by-Step Guide to Repairing Blown Off Shingles
Step 1: Remove the Damaged Shingle
- Using the pry bar, carefully lift the edges of the damaged shingle and the surrounding shingles to access the nails.
- Slide the pry bar under the damaged shingle and gently pry out the nails, taking care not to damage the underlayment or adjacent shingles.
- Remove the damaged shingle and dispose of it properly.
Step 2: Prepare the Area for the New Shingle
- Clean the area where the new shingle will be placed, removing any debris or remaining nails.
- Check the underlayment for any damage or tears. If the underlayment is damaged, repair it with a piece of self-adhering ice and water shield or roofing felt before proceeding.
- Ensure the area is smooth and free of any obstructions that may prevent the new shingle from lying flat.
Step 3: Install the New Shingle
- Align the new shingle with the surrounding ones, ensuring it fits snugly into place.
- Secure the new shingle with roofing nails, placing them in the same pattern as the existing shingles (typically four nails per shingle).
- Drive the nails straight and flush with the shingle’s surface, taking care not to over-drive or under-drive them.
- Apply a small dab of roofing cement over each nail head to seal them and prevent leaks.
Step 4: Seal the Edges and Ensure Proper Adhesion
- Apply a bead of roofing cement along the edges of the new shingle, as well as the edges of the surrounding shingles that were lifted during the repair process.
- Use the putty knife to spread the cement evenly and remove any excess.
- Press the shingles down firmly to ensure proper adhesion and create a tight seal.
- Allow the roofing cement to dry and cure according to the manufacturer’s instructions.

Tips for Preventing Future Shingle Loss
To minimize the risk of roof shingles blown off in the future, consider the following tips:
- Schedule regular roof inspections: Have a professional roofing contractor inspect your roof annually to identify and address any potential issues before they escalate. This can save you time, money, and hassle in the long run.
- Invest in high-quality, wind-resistant shingles: When replacing your roof or making repairs, choose shingles with a high wind resistance rating to better withstand severe weather conditions.
- Ensure proper installation: Proper shingle installation, including correct nailing techniques and adequate overlapping, can significantly reduce the likelihood of shingles being blown off. If you’re unsure about your ability to install shingles correctly, it’s best to leave the job to a professional.
- Address underlying issues: Identify and fix any problems that may cause shingle loss, such as improper attic ventilation, damaged flashing, or loose drip edges. These issues can allow water and moisture to seep under your shingles, leading to damage and premature aging.
When to Call a Professional Roofing Contractor
While repairing roof shingles blown off can be a manageable DIY project in some cases, there are situations where it’s essential to call a professional roofing contractor:
- Extensive damage: If a large number of shingles are missing or damaged, or if the damage extends to the underlayment or roof decking, a professional repair is necessary.
- Complex roof design: If your roof has a complex design, multiple valleys, or steep slopes, it’s best to leave the repair to a trained professional.
- Lack of experience or safety concerns: If you’re not confident in your ability to safely and effectively repair the damage, it’s better to hire a professional to avoid potential injuries or further damage to your roof.
When choosing a roofing contractor, look for a licensed, insured, and experienced professional with positive reviews and references. A reputable contractor will provide a detailed estimate, use high-quality materials, and stand behind their work with a warranty.

Conclusion
Repairing roof shingles blown off is a crucial task that homeowners should address promptly to prevent further damage and ensure their home’s protection. By following the step-by-step guide outlined in this article and taking the necessary safety precautions, you can successfully repair minor shingle damage on your own. However, if the damage is extensive or you’re unsure about your ability to make the repair, don’t hesitate to contact a professional roofing contractor. Regular roof maintenance and inspections can help prevent future shingle loss and keep your roof in top condition for years to come.


 509-201-4190
