509-201-4190

If you’re like many homeowners, you may be feeling overwhelmed by cracked, faded or otherwise damaged vinyl siding on your home’s exterior. But don’t despair—with the right information and a bit of know-how, it’s possible to repair and revitalize your property’s façade. In this article, we’ll provide you with some simple but effective techniques to help get the job done and get your house looking like new again. Read on to learn how to become a vinyl siding savior.
Disclaimer: The information provided in this article is intended to be used as a reference guide only. It should not be taken as professional advice or used as a substitute for consulting with qualified professionals such as contractors, architects, or other experts in the field of home repair and renovation. While we make every effort to provide accurate information, Advance Roofing LLC cannot guarantee its accuracy. Additionally, any repairs made to your home’s exterior should be done according to all applicable local building codes. If you have questions regarding the best practices for repairing or restoring your vinyl siding, it is recommended that you consult with qualified professionals at Advance Roofing LLC for further guidance. For many years, Advance Roofing LLC has been proudly offering high-quality roofing services to homeowners throughout the Spokane, WA area.
Definition of Vinyl Siding

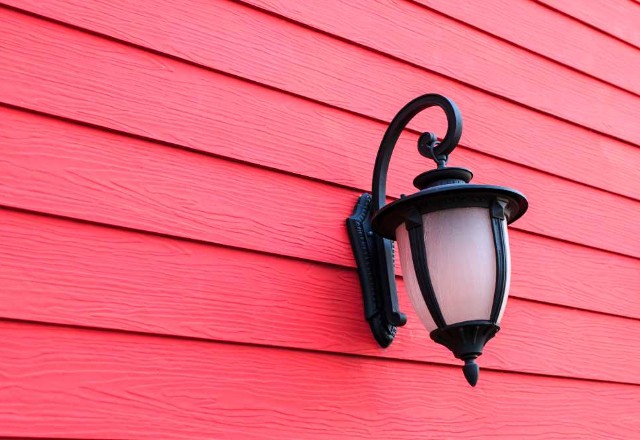
Vinyl siding is a type of exterior cladding made from polyvinyl chloride (PVC) resin. It is a popular choice for homeowners due to its durability, low maintenance, and affordable cost. It is available in various colors, textures, and styles that can mimic the look of other materials such as wood, stone, or brick. However, like any other exterior material, vinyl siding can sustain damages from harsh weather conditions, natural aging, or accidents. In this guide, we will unlock proven techniques to repair and revitalize your siding, leaving you with a beautiful and durable exterior that will last for years to come.
Benefits of Using Vinyl Siding
Vinyl siding is an excellent option for homeowners who want a durable, low maintenance, and energy-efficient product that can be customized to fit their design preferences. Unlike other types of siding, vinyl is resistant to cracking, warping, fading, and pests, making it an ideal solution for homeowners who want a long-lasting and functional exterior that requires minimal upkeep.
One major benefit of vinyl siding is how durable it is. When properly installed, it can last for decades without needing to be replaced. Not only is it resistant to weather damage, but it is also tough enough to
withstand the impact of any flying debris during a storm. This ensures your investment is protected for years to come.
Another advantage of vinyl siding is how low maintenance it is. Unlike traditional wood siding, vinyl doesn’t require painting or staining, which makes upkeep minimal. Simply washing the siding with a mild detergent and water, and it will look as good as new.
Furthermore, vinyl provides added insulation to your home, reducing energy bills and keeping your home at a more comfortable temperature all year round.
Vinyl siding also offers an incredible array of design options. With various colors, textures, and styles available, you can create a unique and personalized look that stands out in your neighborhood. Designer options include woodgrain and stone textures, all at a lower cost than using actual wood or stone. With limitless customization possibilities, vinyl siding ensures your home’s exterior will reflect your aesthetic preferences.
Preparing for a Vinyl Siding Project
Vinyl siding is a popular choice for homeowners looking to update the exterior of their homes. However, a successful siding project requires proper preparation to ensure the best results. From selecting the right materials to measuring accurately, there are several steps homeowners need to take to achieve a flawless vinyl siding installation. In this article, we’ll explore the essential aspects of preparing for a siding project, and unveil the proven techniques that will help you repair and revitalize your home’s exterior.
Assessing the Damage and Establishing Goals for Repair or Replacement
When it comes to revitalizing your home’s exterior, it’s important to start by assessing the damage and establishing your goals for repair or replacement. Thoroughly inspect each section of your vinyl siding, looking for any signs of cracks, holes, fading, or warping.
Keep a detailed record of which areas need repair or complete replacement, and decide on your goals for the project. Are you looking to simply fix any aesthetic issues, or are you hoping to make improvements to the structural integrity of your siding? Determine a timeline and budget for the project, taking into account the extent of the damage and your overall goals.
In addition to taking notes during your inspection, it can be helpful to take pictures or make sketches of the affected areas. This will allow you to reference specific areas during the repair process and ensure that everything is addressed properly.
By following these steps and thoroughly assessing the damage and establishing your goals for repair or replacement, you’ll be well on your way to revitalizing your home’s exterior and ensuring that it remains protected for years to come.
Gathering Necessary Materials and Tools for the Project
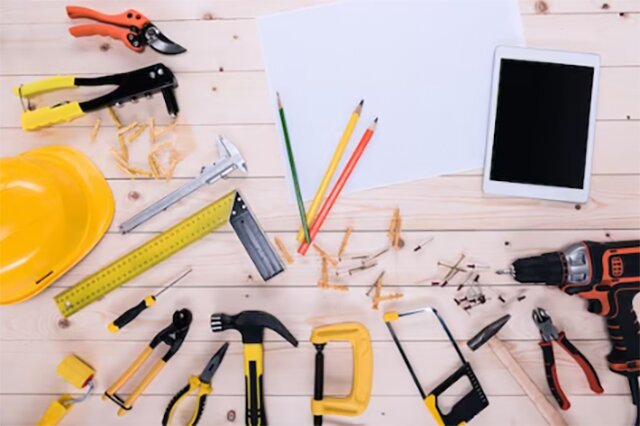
Are you gearing up for a vinyl siding repair or revitalization project for your home’s exterior? As you plan to embark on this task, it is essential to gather all the necessary materials and tools to ensure you have everything you need to complete the project successfully. Here’s a breakdown of what you need to do to gather the essential materials and tools needed for the project.
Firstly, it is important to have a detailed list of the materials and tools that you’ll need for the project. It will help prevent you from forgetting anything or making unnecessary trips to the hardware store. Your list should include the following:
Vinyl siding panels
Starter strips
Mounting blocks
Vents
J-channels
Corner posts
A circular saw
A chalk line
A utility knife
A ladder
A level
A nail gun
A power drill
Safety gear: gloves, eye protection, dust mask
When heading out to purchase these items, ensure they match the color and style of your existing vinyl siding. This will help maintain a uniform and cohesive look throughout your home’s exterior.
To ensure you stay safe during the project, it’s also important to have safety gear on hand. Gloves and eye protection will safeguard you from debris, while a dust mask will prevent you from inhaling hazardous particles.
Gathering the necessary materials and tools for your vinyl siding project is a crucial first step towards successfully repairing and revitalizing your home’s exterior. Start by creating a detailed list of materials and tools to ensure you have everything you need before heading to the hardware store, and don’t forget to grab safety gear before commencing the project. With all the necessary items on hand, you’ll be equipped to complete your vinyl siding project like a pro.
Choosing an Appropriate Type of Vinyl for Your Home’s Exterior
When it comes to revamping your home’s exterior, vinyl siding is an excellent option that can give it new life. However, choosing the right siding for your home can be a daunting task with so many options available. It’s crucial to consider factors such as durability, thickness, color availability, and overall aesthetic appeal before making a decision.
One essential factor to consider is the type of vinyl you want to use. There are various types of vinyl siding, including horizontal, vertical, and shake, each with its unique characteristics. Horizontal siding is the most commonly used vinyl type, while vertical siding is an excellent choice for modern or contemporary architecture styles. Shake siding, on the other hand, reproduces the look of a cedar shake and adds a rustic touch to your home.
Additionally, the thickness of the vinyl is crucial as it affects its durability and overall quality. High-quality vinyl siding can last up to 50 years and is usually thicker than low-grade products. Thick vinyl siding also offers better insulation than thin vinyl, making it an excellent choice for homes in cooler climates.
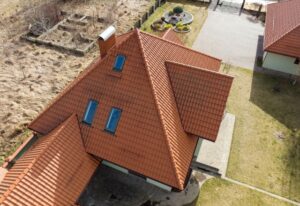
The color availability of vinyl siding varies among manufacturers, so ensure you select an option that complements your home’s architecture and enhances its overall appearance. It’s vital to take into account the color of your roof, doors, and windows when selecting vinyl siding colors to maintain a visually cohesive look.
Climate is another factor to consider when selecting vinyl siding. Areas with high wind speeds may require thicker vinyl siding, while humid regions may require specific types of vinyl that can resist moisture. Similarly, the age and architectural style of your home should also play a role in your decision-making process.
Several manufacturers produce vinyl siding, each offering unique options that vary in quality, price, and styles. It’s important to research reviews and ratings of different brands before making a final decision.
Finally, consulting with professionals can ensure a high-quality outcome of your project. Experts can provide valuable advice on selecting appropriate types of vinyl siding based on your needs and preferences, as well as the installation process.
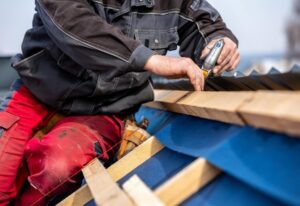
Removing Damaged Vinyl Sections
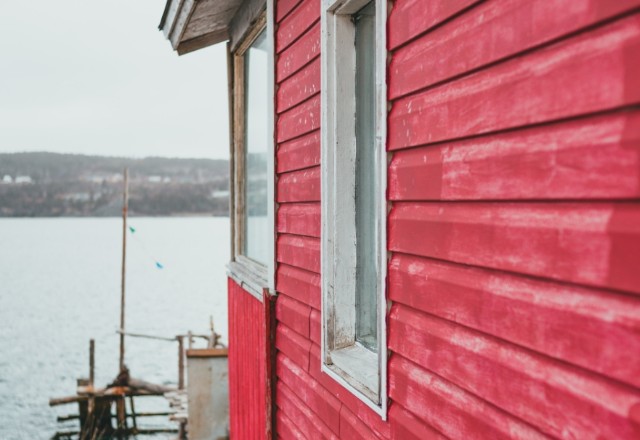
Removing damaged vinyl sections is a crucial step in repairing and revitalizing your home’s exterior. Over time, vinyl siding may become damaged due to severe weather conditions, falling debris, or improper installation. If left unattended, damaged sections may affect the overall appearance of your home, compromise its insulation, and lead to more significant problems down the line. Therefore, it’s essential to learn how to remove damaged vinyl sections properly and replace them with new ones. In this article, we’ll share essential tips and techniques to help you accomplish this task with ease.
Steps to Take Before Removing Damaged Sections of Vinyl Siding
Vinyl siding is a popular choice for many homeowners due to its durability and low maintenance nature. However, like all exterior materials, it can become damaged over time from various factors such as harsh weather conditions or accidental impact. When this happens, it’s important to take the necessary steps before removing damaged sections to ensure a successful repair or replacement process.
The first step is to inspect the damage thoroughly to determine whether the entire panel needs to be replaced or just a portion. This will help you determine the scope of the repair job and the correct materials needed for the job.
Next, properly remove any attachments such as electrical outlets or light fixtures from the section of siding to be worked on. This will not only prevent damage to the attachment itself but also makes it easier to work on the damaged section and avoid any potential accidents.
It’s important to take safety precautions during the repair process. Ensure there are no obstacles or safety hazards nearby such as power lines or unstable ladders. Be sure to wear the appropriate personal protective equipment like gloves and goggles while working on the damaged area.
Before starting the removal process, it’s advisable to have all the necessary tools within reach. These tools could include a zip tool, circular saw, and replacement pieces of siding. This will help you work efficiently and complete the job without any unnecessary delays.
Taking these steps before removing damaged sections of vinyl siding can mean the difference between a quick and efficient repair process or one that is potentially dangerous and time-consuming. By following these guidelines, homeowners can save time and money while ensuring their homes’ exterior remains robust and revitalized.
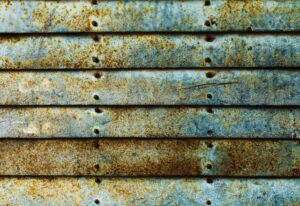
Safety Precautions to Consider When Working with Old or Broken Pieces of Vinyl
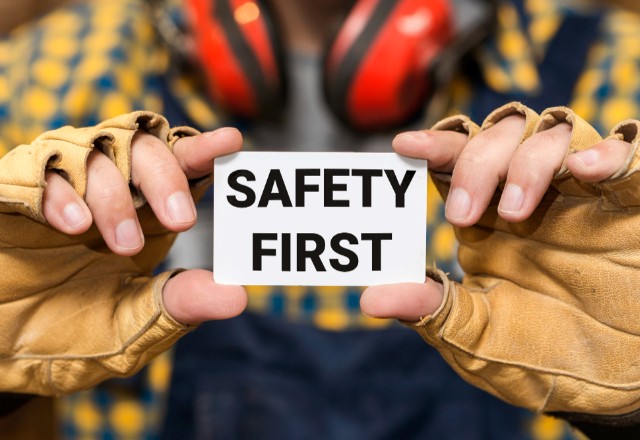
When it comes to repairing or replacing old or broken pieces of vinyl siding, safety should always be the number one priority. Working with sharp edges and debris can be dangerous, but by taking the proper precautions and following safe handling techniques, you can ensure a successful project outcome.
To start, it is crucial to wear appropriate safety gear when working with vinyl siding. This includes eye protection, gloves, and long-sleeved clothing to protect from sharp edges and debris. Vinyl siding can break easily and create jagged edges, so it’s important to safeguard yourself from any potential injury or harm.
In addition to wearing safety gear, you should exercise caution when using tools such as hammers and utility knives. These tools can easily slip, especially if they are dull or improperly used. Always use a flat bar for removal and be sure to keep your tools sharp to minimize resistance and reduce the risk of injury.
Another important factor to consider is the need to never pull or twist the vinyl when removing or replacing it. This can cause damage to the remaining siding and create an even bigger issue. Instead, use proper handling techniques and remove the siding carefully and with precision.
By taking the necessary safety measures and following safe handling techniques, you can ensure a successful outcome and prevent any potential damage or injury. Remember to always wear appropriate safety gear, handle tools with caution, and approach the project with care to successfully repair or replace your vinyl siding.
Installing New Pieces of Vinyl Siding
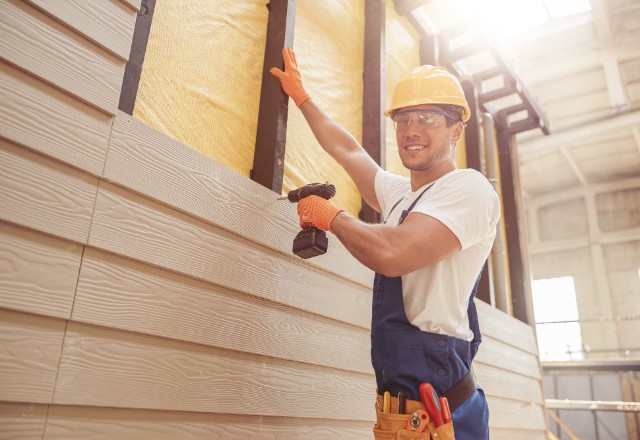
Installing new pieces of vinyl siding can seem like a daunting task for those who are new to home repair and renovation. However, with the right techniques and tools, it is a task that can be easily accomplished by even the most inexperienced DIYer. By following these proven techniques for installing new pieces of vinyl siding, you can revitalize your home’s exterior and improve its overall appearance.
Steps to Follow When Replacing Damaged Sections of Your Home’s Exterior with New Pieces of Vinyl
Vinyl siding has become a popular alternative to traditional wooden exteriors for homes. Not only is it lower in maintenance, but it is also cost-effective and durable. However, even vinyl siding can become damaged due to harsh weather conditions or accidental damage. When this happens, it is crucial to replace the broken or damaged section immediately to maintain the integrity and aesthetic of your home’s exterior. Here are the steps to follow when replacing damaged sections of your home’s exterior with new pieces of vinyl.
- Step: Inspection. The first step in replacing a damaged section of vinyl siding is to inspect the area. Check the extent of the damage and ensure that the damage is limited to a particular section. If the damage has spread or affected other areas, it is essential to address those as well.
- Step: Determine the Type of Vinyl. Identify the type of vinyl siding that has been used in your home. This is important because it will help you acquire the correct replacement pieces. Not all vinyl siding is the same, and not all siding will fit perfectly with your existing installation. Purchase replacement materials that match the type and color of your original siding.
- Step: Remove Damaged Section. Start by removing the damaged section of vinyl siding. This will require that you prepare the area by detaching any parts that are still attached to the damaged section’s edges and removing any mounting nails holding the damaged section in place. Then, with caution, pull the damaged piece away from the wall.
- Step: Safety Precautions. Be sure to take safety precautions throughout the entire replacement process. Wear gloves and protective glasses to prevent injuries and be careful when handling old or broken vinyl. Nails and screws may still be holding onto it, so make sure to remove them safely and dispose of them properly.
- Step: Install New Vinyl. Once the damaged section has been removed, install the new vinyl piece, ensuring that it snaps into place. Be sure to align it correctly with the existing pieces of siding and secure it by fastening it to the studs of your home’s exterior walls.
- Step: Clean and Care. After the installation process is complete, clean any smudges or dirt from the newly replaced vinyl siding section. Additionally, as a general rule, always clean and care for your vinyl siding regularly to maintain its longevity and beautiful appearance. Use mild detergent and a soft cloth to avoid any damage.
By following these straightforward steps, you can replace any damaged vinyl siding section successfully. Remember to take all necessary precautions and acquire the appropriate-sized pieces to match your existing installation perfectly. Replacing damaged sections will help keep your home’s exterior in good condition, saving you money in the long run and improving overall curb appeal.
Cleaning and Caring For Your Newly Installed Or Repaired Exterior
Vinyl siding can be a beautiful addition to any home’s exterior, but without proper care and maintenance, it can deteriorate quickly. Whether you have just installed new vinyl siding or have recently repaired your existing siding, it is important to keep it clean and well maintained to extend its longevity and keep your home looking its best.
Here are the necessary steps to properly clean and care for your newly installed or repaired vinyl siding:
Step 1: Remove Loose Debris. Begin by removing any loose debris or dirt from your vinyl siding. You can use a hose or pressure washer to spray away dirt, leaves, or any other debris that may have accumulated on your siding. Be sure to use a gentle spray setting to avoid damaging the vinyl.
Step 2: Scrub With Mild Soap Solution. Next, use a soft-bristled brush and mild soap solution to clean any remaining dirt or stains on your vinyl siding. The solution can be made with a few drops of dish soap mixed in a bucket of warm water. Be sure to test the solution in a small inconspicuous area before applying it to the entire surface of your vinyl siding. Scrub gently to avoid scratching the surface.
Step 3: Avoid Abrasive Materials and Harsh Chemicals. It is important to avoid using abrasive materials or harsh chemicals that could damage the surface of your vinyl siding. This includes steel wool, bristle brushes, and chemicals such as bleach or ammonia. These substances can cause discoloration or even weaken and crack the vinyl.
Step 4: Inspect Annually. To prevent further problems, it is important to inspect your siding annually. Check for any signs of damage, such as cracks, chips, or warping. Address any damage immediately to prevent it from getting worse and potentially affecting the integrity of your home’s exterior.
Step 5: Prevention is Key. The best way to care for your vinyl siding is to prevent damage from occurring in the first place. Trim overhanging branches or bushes to prevent scratches or other damage to your siding. Additionally, be cautious when using grills or other heat sources near your siding to avoid melting or warping.
By following these steps and being proactive with your vinyl siding care and maintenance, your home’s exterior will look great for years to come. Clean and well-maintained vinyl siding not only looks beautiful, but it can also protect your home from the elements and potentially save you money on costly repairs.
Conclusion
In conclusion, vinyl siding can be a great addition to any home’s exterior if it is properly maintained and cared for. Cleaning your vinyl siding regularly and inspecting it annually will help prevent damage from occurring and keep your home looking beautiful for years to come. Taking the necessary steps to clean and care for your siding will ensure that you get the most out of this exterior feature.