509-201-4190

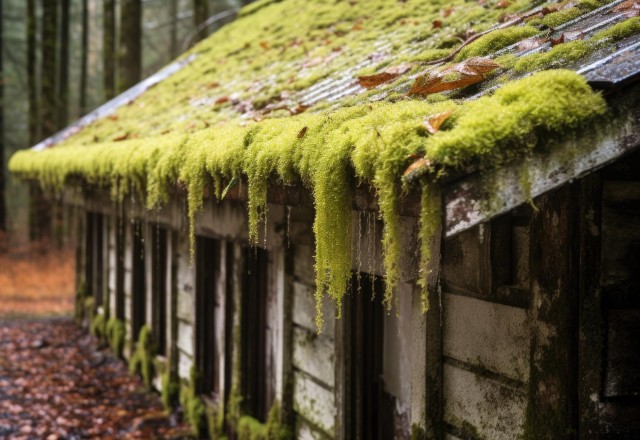
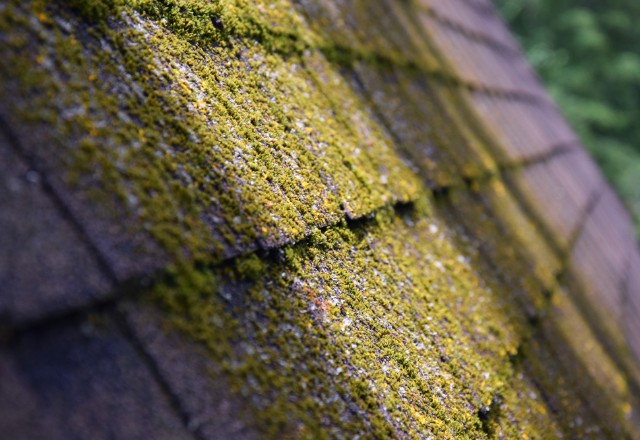
Understanding the Impact of Moss on Roofs
Moss growth on roofs may seem harmless at first, but it can actually compromise the
structural integrity of the entire roofing system if left unchecked. When moss takes root
and spreads on the roof, it absorbs and retains moisture. This can lead to water damage,
especially in areas with heavy rainfall or high humidity.
One of the biggest risks associated with moss growth is its ability to trap moisture on the
roof. When moisture is trapped, it can seep under the roofing materials, causing them to
deteriorate. For example, if you have asphalt shingles, the moss can lift the shingles and
create gaps where water can penetrate. Over time, this can lead to leaks and costly
repairs.
Moreover, moss can create a slippery surface on the roof, making maintenance and any
future repairs dangerous. It can also cause damage to nearby plants and gutters if it falls
or spreads from the roof.
To ensure the durability and longevity of your roof, it is important to address moss growth
promptly. Regular inspections and preventive measures can help identify and eliminate
the conditions that promote moss growth. By understanding the impact of moss on roofs,
you can take proactive steps to prevent any damage and preserve the structural integrity
of your roof.
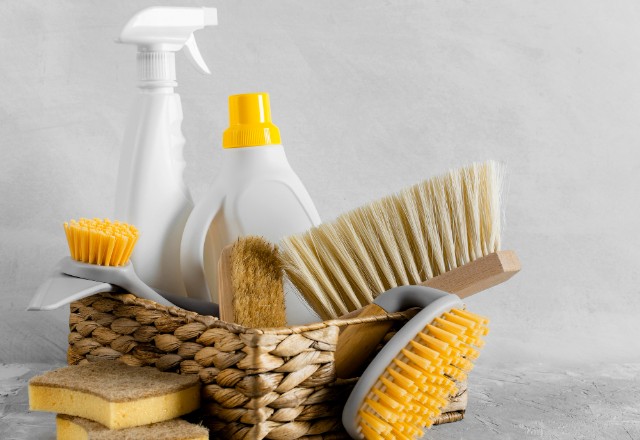
Tools and Safety Precautions
When it comes to removing moss from your roof, there are a few essential tools that you
will need to ensure a successful removal process. The first tool you will need is a soft-
bristle brush. This will help to gently scrub away the moss without damaging the roof
surface. Additionally, a scraper can be useful for stubborn patches of moss that cannot
be easily brushed away.
It is also important to have a garden hose on hand. This will allow you to rinse off any
loose moss or debris after brushing or scraping.
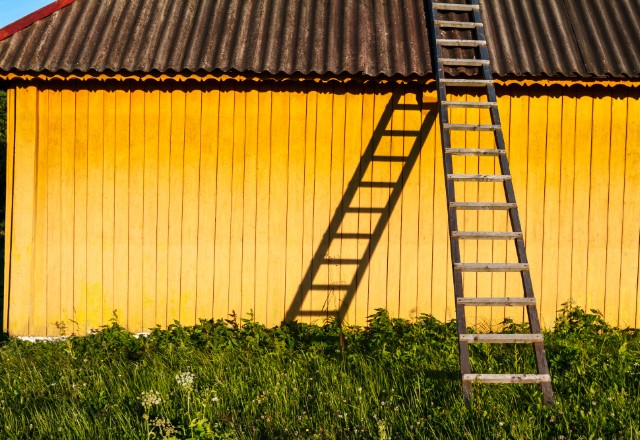
In terms of safety precautions, there are a few key measures to keep in mind. First, be
sure to wear the appropriate safety gear, including gloves and goggles, to protect yourself
from any debris that may fall during the removal process. Additionally, always use a
stable ladder with proper placement to ensure your safety while working at heights.
It is also important to exercise caution on the roof, as moss can create a slippery surface.
Wear proper footwear with good traction and avoid working on the roof when it is wet or
raining.
By using the right tools and following these safety precautions, you can effectively
remove moss from your roof and prevent any potential damage or health risks.
Preparing for Moss Removal
Before you tackle the task of moss removal from your roof, it is crucial to take some time
to prepare properly. Here are a few important steps to take before starting the moss
removal process.
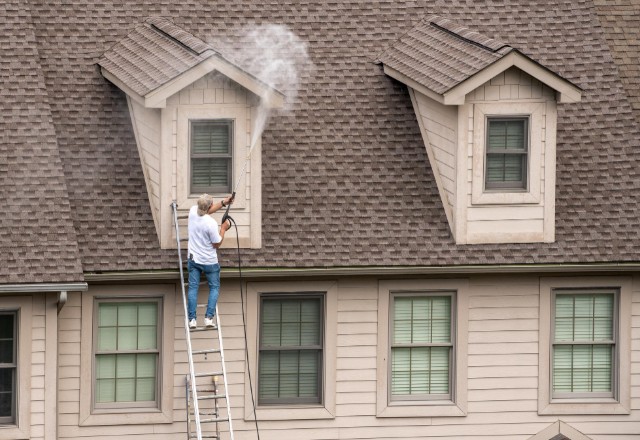
- Gather your tools and equipment: To effectively remove moss from your roof, you will
need a few essential tools and equipment. These may include a pressure washer or
garden hose, a sturdy ladder, safety gear such as gloves and goggles, a soft-bristle brush
or scraper, and a cleaning solution. - Assess the roof condition: Before beginning the moss removal process, carefully
inspect your roof to assess the extent of the moss growth and any potential damage it
may have caused. Look for any loose or damaged roofing materials and make note of any
areas that require extra attention. - Clear the area: Ensure that the area around your home is clear of any obstacles or
valuable items that could be damaged during the moss removal. Move any patio furniture,
potted plants, or other outdoor items away from the immediate vicinity of the roof. - Make necessary repairs: If you notice any loose or damaged roofing materials during
your inspection, it is essential to address these issues before removing the moss.
Repairing any structural damage or leaks will not only improve the effectiveness of the
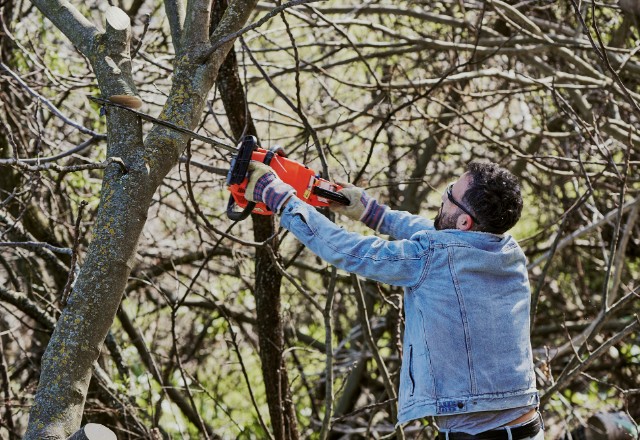
moss removal process but also prevent further damage to your roof. - Trim nearby plants: Overhanging tree branches, shrubs, or vines can contribute to the
growth of moss on your roof by blocking sunlight and providing moisture. Before
removing the moss, trim back any vegetation that comes into contact with or shadows
your roof to prevent future moss growth. Prepare the cleaning solution: Depending on your preference, you can choose between
homemade solutions or commercially available moss-killing products. For a homemade solution, a mixture of water, dish soap, and chlorine bleach or zinc strips can be effective
in killing and removing moss. Be sure to follow the manufacturer’s instructions if using a
moss-killing product.- Practice safety precautions: Safety should be a top priority when working on your roof.
Ensure you have the proper safety gear, including gloves, goggles, and appropriate
footwear with good traction. Use a stable ladder and ensure it is securely placed before
climbing onto your roof. Avoid working on the roof when it is wet or raining, as this can
create a more hazardous environment.
By preparing adequately for moss removal, you will be setting yourself up for a successful
and efficient process. Taking the time to gather the necessary tools, assess the roof’s
condition, make repairs, and practice safety precautions will help you achieve a moss-free
and well-maintained roof in no time.
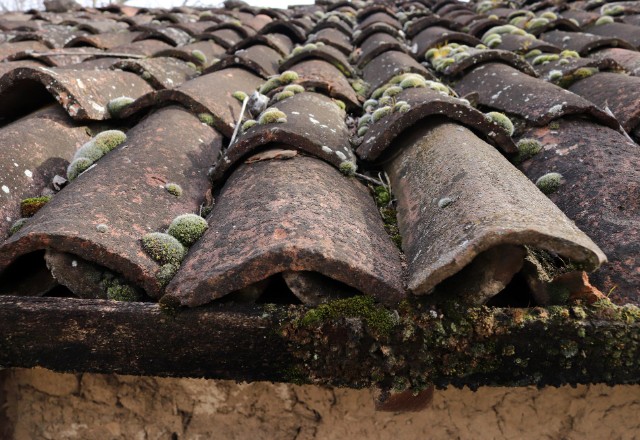
Assessing Moss Coverage
To effectively assess the extent of moss growth on your roof, start by visually inspecting
the entire surface. Look for areas where the moss is visibly thick, dark green, or covering
a large portion of the roof. Pay attention to sections where the roof plane is heavily
shaded or receives less sunlight, as these areas tend to have more moss growth.
Additionally, check for moss growth in the crevices between roof shingles or tiles, as
moss can easily take hold in these areas. Gently run your hand over these sections to feel
for any signs of moss or other organic matter.
Another way to assess moss coverage is to use a ladder to access the roof and inspect it
up close. Take note of any patches where the moss is tightly attached to the surface or
deeply rooted within the roofing material.
By carefully evaluating the moss coverage across your roof, you can determine the
severity of the problem and plan your removal process accordingly. Remember to
document any areas that require extra attention or repairs to ensure a thorough and
effective moss removal.
Choosing the Right Time
When it comes to removing moss from your roof, it is crucial to choose the right time to
ensure maximum effectiveness and safety. One important factor to consider is the
weather, specifically the moisture levels in the air. The best time to remove moss is on a
dry day, when the roof surface is not wet or damp.
Moss thrives in moist conditions, so attempting to remove it while the roof is wet can
actually spread the moss spores and make the problem worse. Moisture also makes the
roof surface slippery, increasing the risk of accidents and injuries. By waiting for a dry
day, you can ensure that the moss is not viable and that the roof is safe and stable for
cleaning.
In addition to considering the weather conditions, it is also important to choose the right
time of year for moss removal. Moss tends to be more active and prevalent during the
cooler and wetter months. By tackling the moss problem during the drier months, such as
late spring or early summer, you can prevent further moss growth and minimize the need
for frequent cleaning.
Taking the time to choose the right time for moss removal will not only improve the
effectiveness of the process but also help maintain the integrity of your roof. By waiting
for a dry day and targeting the right season, you can successfully remove moss and
prevent its return.

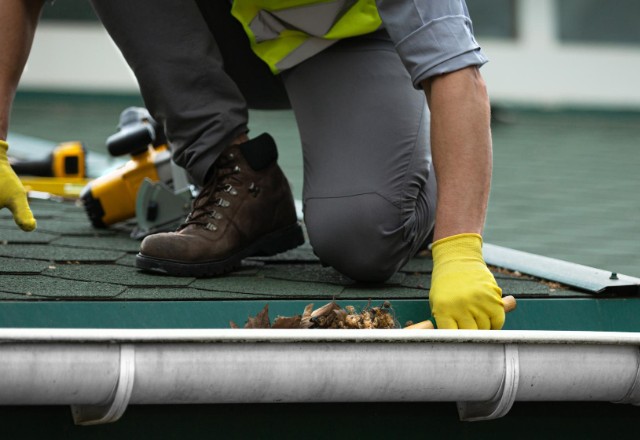
Clearing Roof Debris
Before you begin the process of removing moss from your roof, it is important to first
clear any leaves and debris that may have accumulated. Debris such as fallen leaves,
branches, and twigs can provide a fertile environment for moss growth and can hinder
the effectiveness of the moss removal process.
Start by using a garden hose or a leaf blower to gently remove any loose debris from the
roof surface. Be careful not to apply too much pressure as it can cause damage to the
roofing material. If there are any stubborn debris that cannot be removed by a hose or
blower, you can use a soft-bristle brush to gently scrub them away.
Clearing roof debris not only allows for better access to the moss for removal, but it also
helps prevent any further damage to the roof. Leaves and other debris can trap moisture
on the roof surface, which can promote moss growth and lead to structural damage over
time.
By taking the time to clear any debris before beginning the moss removal process, you
can ensure that the roof is clean and prepared for effective moss removal.
Manual Moss Removal
One effective way to remove moss from your roof is by manually removing it. Manual
moss removal involves physically scraping or brushing off the moss from the roof
surface. While it may require more time and effort compared to other methods, it can be
highly effective and less damaging to the roof.
- To manually remove moss from your roof, start by equipping yourself
with the necessary safety gear. Wear sturdy work gloves to protect your
hands and goggles to shield your eyes from debris. You may also
consider wearing a safety harness if your roof has a steep slope or if you
feel more secure with additional support. - Next, use a ladder to safely access your roof. Take extra caution when
climbing up and down the ladder to avoid accidents. Once on the roof,
assess the extent of the moss growth and focus on the affected areas.
You can use a handheld brush or a long-handled brush with stiff bristles
to gently scrub the moss away. - When brushing, start at the top of the roof and work your way down,
using light strokes to avoid damaging the roofing material. Be mindful of
any fragile or delicate areas, such as flashings or roofing tiles, and take
extra care to avoid causing any harm. While manual removal requires
physical effort, it allows you to have more control and precision over the
process. - After removing the moss, collect and dispose of it properly. Moss can be
slippery, so it’s crucial to keep the roof surface clean to prevent
accidents. Clear any debris that may have accumulated as a result of the
removal process, such as twigs or leaves. Regularly cleaning your roof
can help prevent future moss growth and extend its lifespan.
Remember, manual moss removal is best done on a dry day when the moss is not wet or
damp. Wet moss can be more challenging to remove, and may require additional scraping
or brushing. It’s also essential to note that manual removal is most suitable for roofs with
mild to moderate moss growth. If the moss growth is extensive or if you’re uncomfortable
working at heights, it’s advisable to seek professional help.
In conclusion, manual moss removal allows you to physically remove moss from your
roof, providing a more targeted and precise approach. It is a labor-intensive process but
can be highly effective in removing moss without causing damage to the roof. Regular
cleaning and maintenance, along with proactive preventive measures, can help keep
moss at bay and protect the integrity of your roof.
Brushing Off Moss
To remove moss from your roof, you can use a soft-bristle brush to gently brush it off.
Here’s a step-by-step guide on how to do it:
- Safety first: Wear gloves and safety glasses to protect yourself from any debris or
falling moss. - Choose the right brush: Opt for a soft-bristle brush to avoid damaging the shingles
while effectively removing the moss. - Start at the top: Begin brushing at the top of the roof and work your way down. This
ensures that any dislodged moss will be brushed off the roof and not fall onto lower
surfaces. - Use gentle strokes: Apply light pressure and use long, sweeping motions to brush off
the moss. Avoid scrubbing too hard, as it could damage the shingles. - Be cautious of fragile areas: Pay extra attention to delicate areas like flashings or
roofing tiles. Use a lighter touch around these areas to prevent any damage. - Clear away debris: As you brush off the moss, collect and dispose of it properly. Clear
any fallen debris, such as twigs or leaves, to prevent them from accumulating and
causing future moss growth. - Regular maintenance: By keeping your roof clean and performing regular maintenance,
you can help prevent moss growth in the future and extend the lifespan of your shingles.
Remember, brushing off moss is most effective for roofs with mild to moderate moss
growth. If the moss growth is extensive or if you’re uncomfortable working at heights, it’s
best to seek professional help to ensure your safety and the integrity of your roof.
Using a Scraper
Using a scraper can be an effective method to loosen stubborn moss patches on your
roof. Here’s how to do it:
- Assess the moss growth: Determine if the moss on your roof can be easily brushed
away or if it requires a scraper. If the moss is densely packed or deeply rooted, a scraper
may be necessary. - Choose the right scraper: Opt for a scraper that is specifically designed for roof moss
removal. Look for a scraper with a long handle to ensure you can reach all areas of the
roof safely. - Safety precautions: Before using the scraper, make sure to wear gloves and safety
glasses to protect yourself from any debris or falling moss. Loosen the moss: Gently slide the scraper under the moss patches and use a back-
and-forth motion to loosen them. Be careful not to apply too much pressure, as it could damage the shingles.- Brush off the loosened moss: Once the moss is loosened, use a soft-bristle brush to
sweep away the debris. Start from the top of the roof and work your way down to ensure
that any dislodged moss falls onto lower surfaces and can be easily collected and
disposed of. - Dispose of the moss: Collect the loosened moss and dispose of it properly. Avoid
letting the moss fall into the gutters, as it can clog them and cause water damage. - Regular maintenance: To prevent future moss growth, perform regular roof
maintenance such as keeping the gutters clean and trimming any nearby plants that can
provide shade or capture moisture.
By following these steps, you can effectively use a scraper to remove stubborn moss
patches from your roof and maintain its structural integrity.
Gentle Water Rinse
One effective method for removing moss from your roof is to utilize a gentle water rinse.
This approach is particularly useful when the moss growth is not heavily compacted or
deeply rooted. To accomplish this, you will need a garden hose with a low setting.
- Start by following the steps mentioned earlier to loosen the moss using
a specialized scraper. Once the moss is loosened, take your garden hose
and set it to a low pressure setting. Position yourself at the top of the
roof and gently rinse away the loosened moss, working your way
downward. - Be cautious not to use excessive water pressure, as it can damage the
roofing materials. The goal is to wash away the moss without
compromising the structural integrity of the roof. Additionally, avoid
aiming the hose directly at the shingles, as this could cause them to
become dislodged or damaged. - As you rinse, pay close attention to ensure that the moss is completely
removed. If necessary, use a soft-bristle brush to aid in the rinsing
process. It is important to clean off all the moss to prevent future
regrowth and maintain the longevity of your roof. - Remember, regular maintenance and preventive measures are crucial to
keep moss from reappearing. Trim any nearby plants that can provide
shade or create a moisture-rich environment. Clear out the gutters
regularly to maintain proper drainage and prevent water damage.
By utilizing a gentle water rinse, you can effectively remove moss from your roof while
preserving its structural integrity. Following these steps will help keep your roof moss-free
and prevent costly repairs in the long run.
Preventive Measures
While the process of removing moss from your roof can help restore its appearance and
prevent further damage, it’s also important to take preventive measures to keep moss
from growing back in the first place. By implementing these preventive steps, you can
maintain the longevity of your roof and save yourself from future cleaning efforts. Here
are some effective preventive measures to consider:
Trimming Overhanging Branches
Overhanging branches can contribute to moss growth on your roof by creating excess
shade and moisture. Moss thrives in shady and moisture-rich environments, making it
more likely to take hold on roofs with tree branches casting shadows. To prevent this, it is
important to trim any overhanging branches that may be obstructing sunlight from
reaching your roof.
Trimming overhanging branches not only helps to prevent moss growth but also reduces
the risk of other issues such as fallen leaves and debris clogging your gutters. By
allowing more sunlight to reach your roof, you create an environment that is less
favorable for moss to grow.
Regularly inspect your roof for any overhanging branches and use appropriate tools and
safety equipment to safely trim them. If you are unsure about how to safely trim branches
or if they are too high for you to reach, it may be best to consult with a professional
arborist.
Taking the time to trim overhanging branches is a simple yet effective preventive measure
to keep moss from growing on your roof. By allowing more sunlight to reach your roof
and reducing excess shade and moisture, you can help maintain the longevity of your roof
and minimize the need for future moss removal efforts.
Zinc or Copper Strips
One effective way to prevent moss growth on your roof is by installing zinc or copper
strips along the ridgeline. These metal strips work by releasing ions that inhibit the
growth of moss and other organic debris.
To install the zinc or copper strips, follow these steps:
- Measure the length of your roof’s ridgeline and purchase enough strips to cover the
entire area. - Use a ladder to access the roof safely. Ensure the ladder is secure and on a level
surface. - Clean the area where the strips will be installed to ensure proper adhesion. Remove any
existing moss or debris with a soft-bristle brush or a garden hose. - Cut the metal strips to the appropriate length using a pair of tin snips. Be sure to wear
safety gloves and glasses when handling the strips. - Attach the metal strips to the roof’s ridgeline using roofing nails or adhesive. Space the
nails or adhesive according to the manufacturer’s instructions. - Repeat the process for each strip, ensuring they are evenly spaced along the ridge.
- Check the strips periodically to make sure they are still securely in place.
By installing zinc or copper strips on your roof, you can help prevent moss growth and
prolong the life of your roof. Additionally, these strips are a low-maintenance and
environmentally friendly solution to moss problems.
Natural Solutions for Moss Removal
If you’re dealing with moss growth on your roof, you may be interested in finding natural
solutions to remove it. Fortunately, there are several methods you can try that don’t
involve harsh chemicals or expensive roof cleaning services. Here are some natural
solutions for moss removal.
Baking Soda Mixture
Baking soda is a safe and eco-friendly solution for removing moss from your roof. To
create the baking soda mixture, simply sprinkle a generous amount of baking soda
directly onto the mossy areas. Allow the baking soda to sit for a few hours or overnight.
This will help to loosen and break down the moss.
After the baking soda has had time to work its magic, use a brush or broom to scrub
away the moss. The gentle abrasiveness of the baking soda will help to remove the moss
without causing damage to your roof. Once the moss is scrubbed away, rinse the roof
thoroughly with water to remove any residual baking soda.
Using a baking soda mixture is an effective and environmentally friendly way to remove
moss from your roof. It is safe for surrounding plants and won’t cause any harm to the
environment. Plus, baking soda is a readily available and affordable solution that can be found in most households. So, give this baking soda remedy a try to keep your roof moss-
free and in good condition.
Vinegar Spray
One effective method to discourage moss growth on your roof is by using a diluted
vinegar solution. Vinegar, particularly white or distilled vinegar, contains acetic acid, which has antimicrobial properties that make it a natural alternative to chemical moss-
killing products. Here’s how to use vinegar to discourage moss growth:
- Dilute the vinegar: Mix equal parts of water and vinegar in a spray bottle. For example,
combine one cup of water with one cup of vinegar. - Apply the vinegar solution: Spray the diluted vinegar solution onto the areas of your
roof where you see moss growth or where it tends to accumulate. Ensure that the entire
moss-infested area is covered with the solution. - Let it sit: Allow the vinegar solution to sit on the moss for at least 15 minutes. The
acidity of the vinegar will help to kill and discourage moss growth. - Rinse with water: After the vinegar has had time to work, rinse the roof thoroughly with
clean water using a garden hose or a pressure washer on a gentle setting. This will
ensure that any remaining moss or vinegar residue is washed away. - Repeat if necessary: Depending on the severity of the moss growth, you may need to
repeat the vinegar treatment periodically to prevent regrowth.
Remember to always take proper safety precautions, such as wearing safety glasses and
using a ladder or safety rope if necessary, when accessing your roof. Additionally, vinegar
may not be suitable for all types of roofing materials, so it’s best to consult with a
professional or test the solution on a small, inconspicuous area first.
Professional Help
If you have a severe moss infestation on your roof or if you have delicate roofing
materials, it may be best to seek professional help for roof moss removal. Professional
roof cleaning services have the expertise and equipment to safely and effectively remove
moss from your roof without causing damage.
When it comes to extensive moss growth, it is important to address the problem promptly
to prevent further damage to your roof. Professional roof cleaners have the knowledge
and experience to assess the extent of the moss growth and determine the best course
of action.
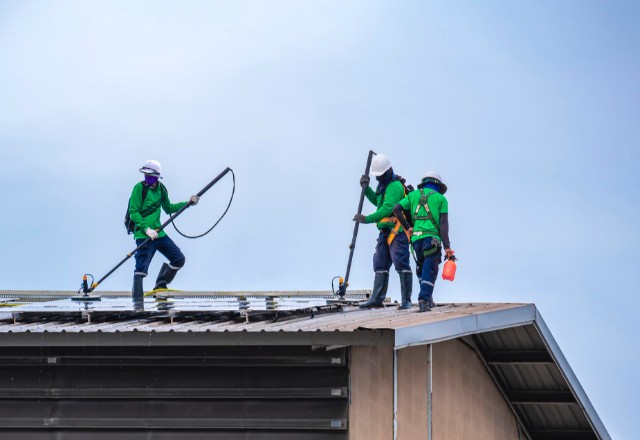
Additionally, professional roof cleaning services have access to specialized equipment
such as pressure washers or soft-bristle brushes that can effectively remove moss
without causing structural damage. They also have the necessary safety gear to protect
themselves during the cleaning process.
By seeking professional help, you can ensure that your roof is thoroughly cleaned and
protected against future moss growth. Professionals may also offer preventive measures
such as the installation of zinc strips to discourage moss growth.
Remember, while DIY methods can be effective for minor moss growth, it is always
recommended to consult with professionals for extensive moss infestations or delicate
roofing materials. Their expertise will help you preserve the structural integrity of your
roof and prevent costly repairs in the long run.
Conclusion
In conclusion, removing moss from your roof is crucial to extend its lifespan and prevent
costly repairs. Regular maintenance, such as keeping gutters clean and trimming nearby
plants, can help prevent moss growth in the first place. However, if moss does appear, it
is important to address it promptly to protect your roof’s structural integrity.
Professional roof cleaning services have the knowledge and specialized equipment to
effectively remove moss without causing damage to the roof. They can also recommend
preventive measures such as the installation of zinc strips to discourage future moss
growth.
Taking proactive steps to remove moss and prevent its recurrence will not only improve
the aesthetic appeal of your roof but also save you from potential water damage and
structural issues. So, whether you choose to hire professionals or tackle the job yourself,
it is essential to prioritize the removal of moss to maintain the longevity and functionality
of your roof.