509-201-4190

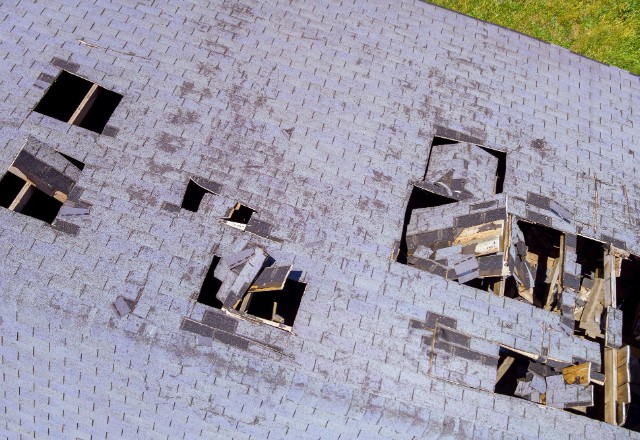
Assessing the Roof Leak
When dealing with a roof leak, the first step is to assess the source and extent of the
damage. Look for any signs of water stains or discoloration on the ceiling or walls inside
your home, as these can indicate the point of entry for the leak. Inspect your attic or crawl
space for any wet spots, mold growth, or signs of water damage on the roof decking or
insulation.
Once you have identified the leak, you need to determine if immediate tarp placement is
necessary. Factors to consider include the severity of the leak, the weather forecast, and
the availability of a professional roofer. If you notice a large amount of water entering
your home or if severe weather is expected, it’s crucial to act quickly to prevent further
damage.
In some cases, a small leak can be temporarily fixed using simple DIY methods, such as
sealing it with roofing tape or applying a roof patching compound. However, if the leak is
significant or if you are unsure about how to properly repair it, it’s best to consult a
professional roofing contractor.
Remember, addressing a roof leak promptly can minimize the risk of additional damage
to your home and potentially save you from costly repairs in the long run.
Gathering Necessary Tools and Materials
When it comes to temporarily repairing a leaky roof with a tarp, it’s essential to gather all
the necessary tools and materials before you begin. Having everything ready will ensure a smoother and more efficient process. Here’s a list of what you’ll need:
- Tarp: Choose a tarp that is strong, waterproof, and large enough to cover the damaged
area on your roof. Make sure it is made of durable material such as polyethylene or
canvas. - Rope or bungee cords: These will be used to secure the tarp in place. Make sure they
are strong and can withstand strong winds or bad weather. - Tarp nails or clips: These will help you anchor the tarp to the roof and prevent it from
being blown away. Use roofing nails or specialized tarp clips for a secure hold. - Ladder: A sturdy ladder is crucial for accessing the roof safely. Choose a ladder that is
the appropriate height and is in good condition. - Gloves and safety gear: Protect your hands with gloves to prevent any injuries while
handling the tarp or nails. Additionally, wearing safety gear such as goggles and a helmet
is advisable, especially if you’ll be working at heights.
By gathering these tools and materials in advance, you’ll be well-prepared to tackle your
temporary roof repair and protect your home from additional damage caused by leaks.
Remember to always prioritize safety by using proper safety equipment and taking
necessary precautions.
Preparing for Tarp Installation
Before you begin installing a tarp on your roof for temporary leak repair, it’s important to
take the time to properly prepare for the task at hand. By doing so, you can ensure a safer
and more effective installation process. Here are some essential steps to follow when
preparing for tarp installation:
- Assess the damage: Before you start, carefully examine the damaged area of your roof.
Identify the source of the leak and assess the extent of the damage. This will help you
determine the size and location of the tarp you’ll need. - Gather the necessary materials: As mentioned earlier, you’ll need a tarp, rope or bungee
cords, tarp nails or clips, a ladder, gloves, and safety gear. Make sure you have all these
items readily available before you begin. - Properly Measure the damaged area: To do this, use a tape measure to determine the
dimensions of the affected section of your roof. This will assist you in selecting the
appropriate size tarp and ensuring adequate coverage. - Trim the tarp if necessary: If your tarp is too large, trim it to fit the damaged area.
Cutting the tarp to the appropriate size will make installation easier and prevent excess
tarp from flapping in the wind. - Clear the roof: Before you climb up, remove any debris, loose shingles, or tree limbs
from the roof. This will help create a clean and safe working environment. - Securely anchor an anchor board: If you have a flat roof, it’s a good idea to attach a
sturdy anchor board to the roof. This will provide a secure anchor point for the tarp and
help distribute the weight evenly. - Put on your safety gear: Before you climb the ladder, put on your gloves, goggles, and
helmet. Safety should always be a top priority, especially when working at heights.
By following these steps and properly preparing for tarp installation, you’ll be setting
yourself up for a successful temporary leak repair. Remember to take your time, be
cautious, and prioritize safety throughout the entire process.
Safety Precautions
When it comes to putting a tarp on a roof for temporary leak repair, safety should always
be your top priority. Here are some essential safety precautions to follow:
- Ladder safety: Ensure that you use a sturdy and stable ladder that is securely
positioned on level ground. Always maintain three points of contact while climbing and
descending the ladder, and never lean too far to either side. - Wear appropriate safety gear: Before you start working on the roof, put on your safety
gear. This includes gloves to protect your hands and a helmet to safeguard your head
from potential falling objects. - Proper footwear: Wear sturdy, non-slip footwear with good traction to minimize the risk
of slipping while on the roof. Avoid wearing loose or open-toed shoes as they may cause
accidents or injuries. - Check working conditions: Before going up on the roof, assess the weather conditions.
Avoid working during bad weather, such as strong winds or heavy rain, as it can make the
roof slippery and increase the risk of accidents. - Use a safety harness: If you’re working on a steep or tall roof, it’s advisable to use a
safety harness or fall protection system. This will provide an additional layer of safety and
prevent serious injuries in case of a fall.
By following these safety precautions, you can minimize the risk of accidents and ensure
a safe working environment while repairing your roof with a tarp temporarily. Remember,
if you’re unsure about your abilities or if the damage is extensive, it’s best to contact a
professional roofing contractor for assistance.
Choosing the Right Tarp
When it comes to choosing the right tarp for temporary roof repair, it’s important to select
a durable and waterproof option that will provide effective protection against leaks and
further damage. Here are some tips to help you choose the right tarp for your needs:
- Size: Measure the dimensions of the damaged area on your roof to determine the size
of the tarp you will need. It’s important to choose a tarp that is large enough to cover the
entire damaged section, including any surrounding areas to ensure proper coverage and
protection. Material: Look for a tarp made from durable and waterproof material such as heavy-
duty polyethylene or canvas. These materials are designed to withstand harsh weatherconditions and provide reliable protection against water infiltration.
Reinforcements: Check that the tarp has reinforced edges, grommets, or loops. These
features will allow you to securely fasten the tarp to your roof using nails or ropes, ensuring that it stays in place during inclement weather.- UV Resistance: Consider choosing a tarp that is UV resistant to protect against sun
damage. This will help prevent the tarp from deteriorating over time and ensure its
effectiveness as a temporary solution. - Thickness: Opt for a tarp with a sufficient thickness to provide durability and resistance
to tearing. Thicker tarps are generally more robust and less prone to damage, providing
long-lasting temporary roof protection.
By considering these factors and choosing the right tarp for your temporary roof repair,
you can minimize the risk of further damage and ensure effective protection against
water infiltration until a permanent roof repair can be made.
Measuring and Cutting the Tarp
After selecting a tarp that meets the above criteria, the next step is to measure the size of
the damaged area on your roof. Using a tape measure, carefully measure the length and
width of the damaged section. Be sure to include any surrounding areas that may also
need coverage.
Once you have determined the measurements, you may need to cut the tarp to ensure a
proper fit. Use a utility knife or sharp scissors to trim the tarp to the appropriate size. It is
important to make clean, straight cuts to avoid any excess tarp that may cause additional
damage or be vulnerable to wind uplift.
When cutting the tarp, it is recommended to leave a few extra inches on all sides to
ensure adequate coverage. This will help to prevent any water from finding its way under
the tarp and causing further damage to your roof or home.
Remember, the goal is to completely cover the damaged area and any areas at risk of
water infiltration. Taking the time to measure and cut the tarp accurately will help to
ensure a tight and secure fit, providing effective temporary protection for your roof until
permanent repairs can be made.
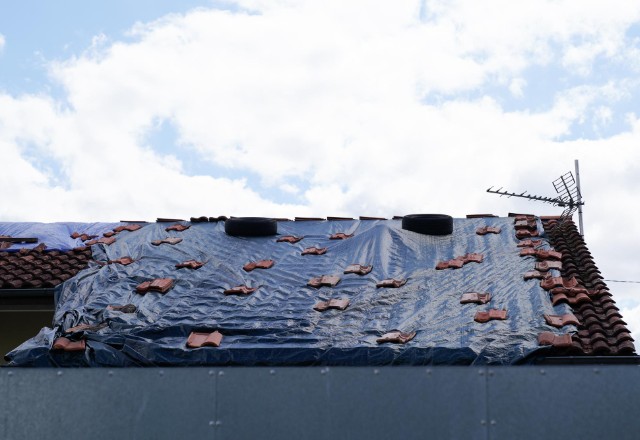
Placing and Securing the Tarp
Once you have the properly sized tarp, it’s time to place and secure it to your roof. This
process requires careful attention to ensure a tight and secure fit that will protect your
home from further damage.
First, position the tarp over the damaged area, making sure it extends beyond the
damaged section and covers any surrounding areas that may be at risk. If you have a flat
roof, place the tarp flat across the damaged area. For a peaked roof, carefully drape the
tarp over the peak, allowing it to cover both sides evenly.
Once the tarp is in position, it’s important to secure it properly. One option is to use
wooden boards, also known as anchor boards. Place the boards along the edges of the
tarp, overlapping both the tarp and the roof’s edge. Secure the boards to the roof using
roofing nails or screws. This will provide extra stability and prevent the tarp from shifting
or tearing in harsh weather conditions.
For added security, you can also use roofing nails or screws directly through the tarp and
into the roof decking. Space the nails or screws about every 12-18 inches along the edges and seams of the tarp. Be careful not to hammer them in too forcefully, as this can cause
damage to the tarp or the roof itself.
If you don’t have access to wooden boards or nails, you can also use rope or bungee
cords to secure the tarp. Simply tie the rope or attach the bungee cords to sturdy points
on the roof, such as chimneys or vents, and then loop it through the grommets or holes in
the tarp. Tighten the rope or cords to create tension and keep the tarp securely in place.
Remember to take proper safety precautions during this process. It is recommended to
have a safety harness and be secured with a lifeline while working on the roof.
Additionally, wear appropriate protective clothing and use a roofing shovel or other tools
designed for roof repair to avoid any accidents or injury.
While tarping your roof is a temporary solution, it’s important to understand that it’s not a
permanent fix. It is still crucial to contact a professional roofer as soon as possible to
assess the damage and provide a permanent roof repair. They have the expertise and
experience to determine the best course of action and prevent further problems in the
future.
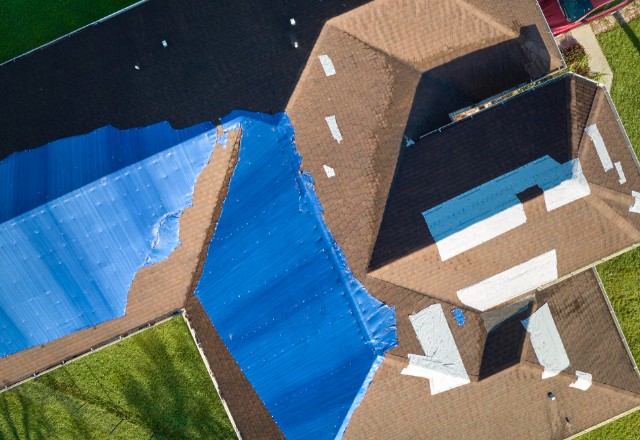
Placing and securing a tarp on your roof for temporary leak repair can help prevent
additional damage to your home during bad weather or while waiting for roof repairs. By
following these steps and taking the necessary safety precautions, you can provide a
quick and effective solution to protect your home from water damage caused by a leaky
roof.

Tarp Placement
When it comes to tarp placement for temporary leak repair, there are a few key steps to
follow. First, it is important to accurately identify the affected area and ensure that the
tarp extends beyond the damaged section. This will help to prevent any additional
damage caused by water penetration.
If you have a flat roof, place the tarp flat across the damaged area, making sure it covers
any surrounding areas at risk. For a peaked roof, carefully drape the tarp over the peak,
allowing it to evenly cover both sides. Secure the edges of the tarp using wooden boards,
also known as anchor boards, overlapping both the tarp and the roof’s edge.
To provide extra stability and prevent shifting or tearing in harsh weather conditions,
secure the anchor boards to the roof using roofing nails or screws. Space the nails or
screws about every 12-18 inches along the edges and seams of the tarp. Be careful not to
hammer them in too forcefully to avoid damage to the tarp or the roof itself.
If wooden boards are not available, you can also use rope or bungee cords to secure the
tarp. Attach the rope or cords to sturdy points on the roof, such as chimneys or vents, and
loop them through the grommets or holes in the tarp. Tighten the rope or cords to create
tension and keep the tarp securely in place.
It is important to remember that tarp placement is only a temporary solution. It is crucial
to contact a professional roofer as soon as possible to assess the damage and provide a
permanent roof repair. They have the expertise and experience to determine the best
course of action and prevent further problems in the future.
Using Tarp Nails or Clips
To securely attach a tarp to a roof, you can use tarp nails or clips. Here’s a step-by-step
guide on how to do it:
- Start by positioning the tarp over the damaged area of the roof. Ensure that it fully
covers the damaged section and extends over the edges of the roof. - Choose a corner of the tarp and fold it back over itself, creating a reinforced edge.
- Place a tarp nail or clip through the reinforced edge of the tarp, positioning it about 3-4
inches from the edge. - Hammer the tarp nail into the roof, making sure it goes through the tarp and securely
into the roof decking. If using clips, carefully clip them onto the edge of the tarp and the
roof. - Repeat this process along the entire edge of the tarp, spacing the nails or clips about
every 12-18 inches. For larger tarps, you may need to add additional nails or clips along
the middle for added support. - For extra protection against wind and rain, consider adding an extra row of tarp nails or
clips along the outside edge of the tarp. - Once all the nails or clips are in place, inspect the tarp to ensure it is taut and securely
fastened to the roof.
By using tarp nails or clips, you can securely attach the tarp to the roof, providing
temporary protection against leaks and further damage. Remember to exercise caution,
especially when working at heights, and use proper safety equipment such as a safety
harness and gloves. If possible, it’s always recommended to seek the assistance of a
professional roofing contractor for repairs and maintenance.
Alternative Methods to Secure Without Nails
When it comes to securing a tarp to a roof for temporary leak repair, nails are the
traditional method. However, there are alternative options that can be just as effective
without causing any damage. Here are a few methods to consider:
- Rope: Tie one end of a strong rope to a secure anchor point on the roof, such as a
chimney or sturdy railing. Position the tarp over the damaged area, making sure it fully
covers the section and extends over the edges of the roof. Secure the opposite end of the
rope to another anchor point, pulling it tight and tying a secure knot. Repeat this process
along each edge of the tarp, ensuring it is taut and securely fastened. - Bungee cords: Use bungee cords with hooks on either end to secure the tarp. Position
the tarp over the damaged area, ensuring it is fully covering the section and extending
over the edges of the roof. Attach one end of a bungee cord to a stable point on the roof
and hook the other end to an eyelet or grommet on the tarp. Repeat this process along
each edge of the tarp, adjusting the tension as needed to ensure a secure fit.
Remember, these alternative methods may be suitable for temporary leak repairs but are
not a permanent solution. It’s always recommended to seek the assistance of a
professional roofer for a permanent roof repair. Additionally, always prioritize safety by
using proper safety equipment like a safety harness and following all necessary
precautions when working at heights.
Ensuring Proper Tarp Tightness
When securing a tarp to a roof for temporary leak repair, achieving proper tension is
crucial to prevent water accumulation and minimize flapping. Here are some tips to
ensure your tarp is tightly secured:
- Start at the center: Begin by positioning the tarp over the damaged area, making sure it
fully covers the section and extends over the edges of the roof. Secure the center of the
tarp first, using either ropes or bungee cords, and then work your way outwards. - Use enough anchor points: To prevent excessive flapping, use multiple anchor points
along each edge of the tarp. This will distribute the tension evenly and keep the tarp
securely in place. Chimneys, railings, or any stable points on the roof can be used as
anchor points. - Adjust tension as needed: Check the tarp regularly to ensure it is taut and properly
tensioned. If you notice any sagging or excess flapping, adjust the tension by tightening
the ropes or bungee cords. This will help to maintain a secure fit and prevent water from
pooling on the tarp. - Consider weather conditions: In severe weather or high winds, it’s important to ensure
the tarp is tightly secured. Strong gusts can easily dislodge a loosely attached tarp,
causing further damage. Regularly monitor the tarp and make adjustments whenever
necessary to maintain its tightness.
By following these tips and regularly checking the tension of the tarp, you can minimize
the risks of water damage and ensure that your temporary leak repair is effective.
Remember to consult a professional roofing contractor for a permanent solution as soon
as possible.
Securing the Edges and Corners
When securing a tarp to a roof for temporary leak repair, properly fastening the edges and
corners is crucial to prevent wind lift and ensure the tarp stays securely in place. Here are
some methods to consider:
- Use tarp nails: Tarp nails are specifically designed to secure tarps to various surfaces,
including roof decking. Hammer the nails through the grommets or reinforced corners of
the tarp and into the roof, providing a secure hold. Place nails approximately one foot
apart along the edges and corners of the tarp to distribute the tension evenly. - Utilize wooden boards: Wooden boards can act as anchor points for the tarp’s edges
and corners. Place the boards along the edges of the tarp and secure them to the roof
using screws or nails. This method provides additional stability and prevents wind from
getting underneath the tarp. - Consider using rope or bungee cords: For added flexibility and ease of installation, use
ropes or bungee cords to secure the tarp’s edges and corners. Thread the ropes or cords
through the grommets or reinforced corners of the tarp and tie them tightly to stable
points on the roof, such as chimneys or railings. Regularly check and reinforce: It’s important to regularly check the tarp for any signs of
loosening or lifting. In case of high winds or inclement weather, reinforce the tarp’s edges and corners by tightening the ropes, cords, or adding additional tarp nails.
By following these methods and regularly monitoring the tarp, you can help prevent wind
lift and ensure that the tarp remains securely in place, providing temporary leak protection
until permanent roof repairs are made. Remember to prioritize safety by using proper
safety equipment and considering hiring a professional roofer if needed.
Weatherproofing the Tarp Installation
Weatherproofing the tarp installation is essential to prevent any additional damage and
ensure that water cannot seep under the tarp. Here are some steps to follow:
- Check for gaps: Once the tarp is securely fastened to the roof using tarp nails, wooden
boards, or ropes, inspect the edges and corners for any gaps. Gaps can allow water to
penetrate and cause further damage. Make sure there are no loose or lifted areas. - Seal gaps: If you find any gaps, use tape, adhesive, or a waterproof sealant to seal
them. This will ensure that water cannot seep under the tarp and cause leaks. Pay close
attention to the edges and corners where the tarp meets the roof. - Add extra layers: In areas prone to heavy rain or strong winds, consider adding an
additional layer of tarp for extra protection. Overlapping tarps and securing them together
can provide added strength and prevent water from infiltrating. - Reinforce with ropes or bungee cords: To further strengthen the tarp installation,
consider reinforcing it with ropes or bungee cords. This can provide additional anchoring
and prevent any lifting or movement during bad weather conditions. - Regularly monitor and maintain: Throughout the temporary repair period, regularly
check the tarp for any signs of loosening or lifting. In case of high winds or severe
weather, tighten the tarp nails, ropes, or bungee cords and inspect for any potential
damage.
By following these steps and ensuring proper weatherproofing, you can effectively protect
your roof from further damage and minimize the risk of water leakage. However, it’s
important to remember that temporary tarp installation is just a temporary solution and
should be followed up with permanent roof repairs by a professional roofing contractor.
Regular Monitoring and Maintenance
Regularly monitor and maintain the tarp on your roof to ensure its effectiveness and
prevent any further damage. Periodically check the tarp for any signs of loosening, lifting,
or damage. High winds or severe weather can cause the tarp to shift or become
compromised, so it’s important to inspect it regularly.
Tighten the tarp nails, ropes, or bungee cords if necessary to secure the tarp firmly in
place. Inspect the edges and corners of the tarp to ensure there are no gaps where water
can seep through. If you find any gaps or loose areas, use tape, adhesive, or a waterproof
sealant to seal them.
In areas prone to heavy rain or strong winds, it’s advisable to add an additional layer of
tarp for extra protection. Overlapping the tarps and securing them together can provide
added strength and prevent water infiltration.
It’s crucial to regularly check and adjust the tarp as needed, especially during inclement
weather. Strong winds and harsh conditions can cause the tarp to shift or become
damaged, potentially leading to leaks or further roof damage. By promptly addressing any
issues, you can maintain the temporary repair and minimize the risk of additional
damage.
Remember to prioritize safety throughout the monitoring and maintenance process. If
you’re uncomfortable or inexperienced with roof repairs, it’s always best to contact a
professional roofing contractor who can perform the necessary inspections and repairs.
Seeking Professional Help
When it comes to extensive roof damage or complex repairs, it’s always best to seek the
help of a professional roofing contractor. While temporary tarping solutions can provide
some relief in emergency situations, they are not meant to be a permanent fix.
Experienced roofing professionals have the knowledge, skills, and specialized equipment
to assess the extent of the damage and provide appropriate solutions. They can
thoroughly inspect your roof, identify underlying issues, and recommend the best course
of action for long-term repairs.
A professional roofer will also have the expertise to work safely at heights and adhere to
proper safety precautions. Roofing can be a hazardous task, especially during inclement
weather or when dealing with loose shingles or storm damage. Professional roofers use
safety harnesses, protective clothing, and other safety equipment to minimize the risk of
accidents or injuries.
Additionally, consulting a roofing professional is essential for insurance claims. They can
document the damage, provide accurate assessments, and assist with the claim process.
Insurance companies typically prefer to work with reputable roofing contractors due to
their expertise and knowledge of industry standards.
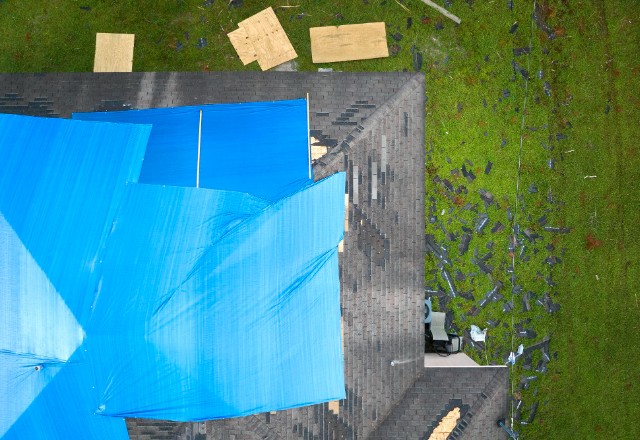
In conclusion, while temporary tarping can offer temporary relief, it’s crucial to consult
experienced roofing professionals for extensive damage or complex repairs. Proper
safety equipment, knowledge, and insurance claim assistance are among the benefits of
seeking professional help.
Removing the Tarp
Once the roof repair is complete and the leak has been fixed, it is important to properly
remove the tarp from the roof. Here are the steps to safely remove the tarp:
- Inspect the roof: Before removing the tarp, carefully inspect the roof to ensure that the
repairs have been successful. Look for any signs of remaining damage or leaks. - Prepare the area: Clear the area around the roof of any debris or obstacles. This will
make it easier to access the tarp and prevent any potential safety hazards. - Secure the tarp: If the tarp was secured with nails or other fasteners, carefully remove
them using a pry bar or hammer. Take caution not to damage the roof or any surrounding
structures. Fold the tarp: Once the fasteners are removed, fold the tarp carefully to prevent any dirt
or debris from falling off. Begin folding from one corner and work your way towards the center, repeating this process for each side.- Dispose of the tarp: Properly dispose of the tarp in accordance with local regulations.
Consider recycling options if available. Do not leave the tarp lying around as it can be a
safety hazard and may cause environmental damage.
Removing the tarp after the roof repair is important to prevent any further damage and to
maintain the aesthetics of your property. By following these steps, you can safely and
effectively remove the tarp and restore your roof to its original condition.
Conclusion
In conclusion, when it comes to addressing roof leaks and protecting your home from
further damage, using a tarp as a temporary solution is a practical and effective
approach. By following the step-by-step guide outlined in this article, you can successfully
install a tarp on your roof and prevent water from entering your home during inclement
weather.
It is important to remember that while a tarp can provide temporary relief, it is not a
permanent solution. To ensure the long-term integrity of your roof, it is recommended to
consult with a professional roofing contractor who can assess the damage and provide
expert advice on the best course of action.
At [Advance Roofing LLC, we understand the importance of prompt roof repairs and offer
comprehensive roofing services to address any type of roof damage. Our experienced
roofing team is equipped with the proper safety equipment and expertise to handle
emergency repairs and permanent roof solutions.
Don’t let roof leaks or damage go unaddressed. Contact our company today to schedule a
roof inspection and receive professional assistance in resolving any roofing issues you
may be facing. Remember, addressing roof issues promptly can help you avoid costly
repairs and potential insurance claims in the future.