509-201-4190

Welcome to your comprehensive guide on how to install a vinyl siding mounting block! This article will provide you with all the knowledge and tools you need to successfully complete this task. Whether you are a seasoned DIY enthusiast or a first-time homeowner taking on a new project, this article will make sure you have the information needed to confidently tackle this installation. We’ll show you the materials needed, offer guidance on how to properly mount the block, and answer any questions that may arise along the way. By the time you’ve finished reading this article, you’ll be ready to get started and add an aesthetic and functional component to your home. Let’s get started!
Disclaimer: Although this article provides a comprehensive guide on how to install a vinyl siding mounting block, it is important to note that care must be taken when carrying out any home improvement projects. If you are unsure about the safety and quality of your installation we recommend consulting an expert such as Advance Roofing LLC. With over many years of experience in providing the highest standard of roofing solutions to the Spokane, WA area, they can ensure that all your home improvement projects are carried out safely and accurately.
What is a Vinyl Siding Mounting Block?
Vinyl siding mounting block is a crucial component for installing exterior light fixtures, electrical outlets, and other accessories to the siding of a house. It serves as a mounting point for these items, allowing them to be easily and securely attached to the house’s siding. Mounting blocks come in various sizes and shapes to accommodate different types of fixtures and siding panels. In this comprehensive guide, we will discuss everything you need to know about installing vinyl siding mounting blocks, including tools and materials needed, step-by-step instructions, and useful tips for a successful installation.
Benefits of Installing Vinyl Siding Mounting Blocks
Vinyl siding mounting blocks are a convenient and essential accessory for many applications on a homeowner’s property. They offer several benefits to homeowners, including adding a professional look to the exterior of the house and preventing damage to the sidings. In this comprehensive guide, we will describe in detail the advantages of installing vinyl siding mounting blocks.
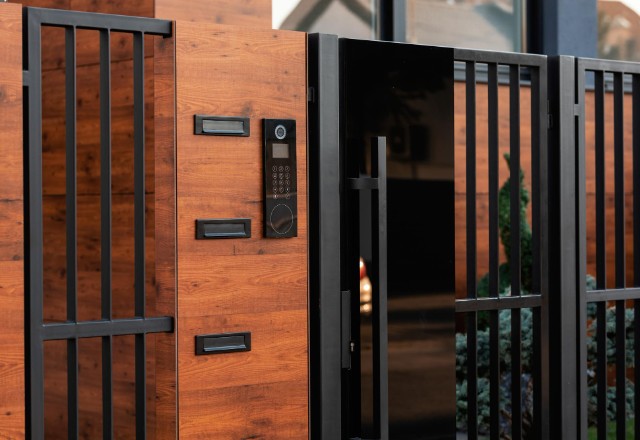
One of the major benefits of mounting blocks is the professional look it adds to the exterior of the house. Using vinyl siding mounting blocks to hold up exterior lights, hose bibs, and other fixtures in vinyl siding helps create a polished and finished look. The blocks provide a uniform base for fixtures and do away with unsightly gaps between the fixture and the siding. This clean and tidy appearance enhances the aesthetic appeal of the house and adds value to the property.
In addition to a professional look, mounting blocks are crucial for preventing damage to the sidings. When sidings are damaged by the installation of fixtures like lights and hose bibs, it poses a risk of water penetration, bugs, and other outdoor elements. When these damages go unchecked, it can cause significant structural damage to the house. Vinyl siding mounting blocks come in handy here. They have pre-cut holes for the fixtures and attach to the siding without causing any damage to the structure, thus preventing the accumulation of moisture, and enhancing the lifespan of the sidings.
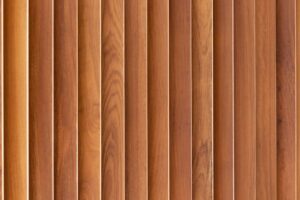
Mounting blocks come in different materials, with vinyl and aluminum being the most common. Vinyl blocks are lightweight, easy to install, and easy to cut. They come in various colors that match with the siding to help maintain the aesthetic appeal of the house. Aluminum blocks are more durable and have a longer lifespan than vinyl blocks. The material is also fire-resistant, making them ideal for fire-prone areas.
Finally, there are several types of mounting blocks available, each designed for a specific application. For instance, there are standard mounting blocks which are suitable for a variety of horizontal and vertical sidings. Specialty blocks are perfect for applications like dryer vents, water faucets, and hose bibs. Snap-lock blocks require no special tools and snap securely into place, while electrical blocks are specifically designed for exterior electrical applications.
In summary, the benefits of vinyl siding mounting blocks are undeniable. They add a professional look to the exterior of the house, prevent damage to the sidings, and increase their lifespan. With various types of mounting blocks available, there is a suitable application for every homeowner. By installing vinyl siding mounting blocks, homeowners can advocate for vinyl siding and make significant upgrades to their property.
Preparing for Installation
Before installing a vinyl siding mounting block, it’s essential to prepare the siding and the block itself. This involves taking measurements, selecting the appropriate mounting block, and gathering the necessary tools and materials. In this section, we’ll provide a detailed guide on how to prepare for the installation of a vinyl siding mounting block.
Check Local Building Regulations
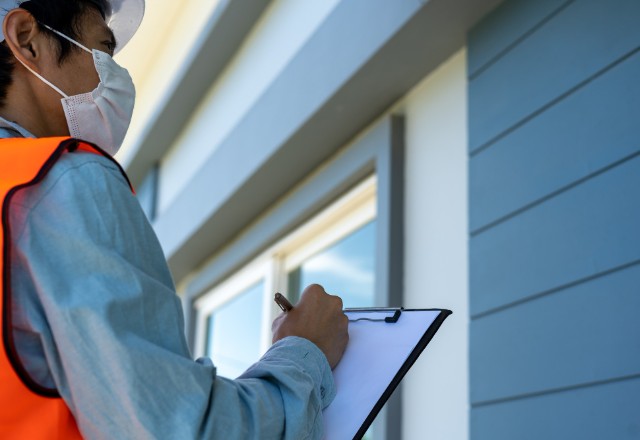
When it comes to installing a vinyl siding mounting block, it is essential to be aware of local building regulations and codes. These regulations vary depending on the state, county, or city where the house is located. Some communities require a building permit, while others may exempt it for non-structural siding replacements. Failure to follow these regulations may result in legal or safety issues.
Before installing a vinyl siding mounting block, homeowners must first research local building regulations. This research should include reviewing the local building codes and determining whether a building permit is necessary for the installation. In some cases, a permit may be required even for minor repairs or alterations. If a permit is required, homeowners should obtain it before starting the installation process.
However, some localities may exempt building permits for non-structural siding replacements. These exemptions usually apply to residential homeowners and may depend on the height of the mounting block above the ground, its overall size, and the type of vinyl siding product in use. Homeowners must confirm these exemptions thoroughly and ensure that they adhere to all other local building codes.
In addition to the building permit and local building code requirements, homeowners must also adhere to safety regulations. Safety regulations may include requirements for insulation, electrical wiring, and fire protection measures. Ignoring these safety regulations may lead to unsafe conditions and may also result in legal issues.
In summary, before installing a vinyl siding mounting block, homeowners must review local building regulations to avoid any legal or safety issues. This research should include checking for building permits, reviewing local building codes, and adhering to safety regulations. By following these guidelines, homeowners can ensure that their vinyl siding installation is a lawful and safe process.
Gather Necessary Materials and Tools

To install a vinyl siding mounting block, homeowners will need specific materials and tools. Let’s take a look at the various items that are required for the installation process.
Materials:
Vinyl mounting block: This block will be used to provide a stable surface for light fixtures or other items to be attached to the house’s exterior.
Starter strip: This strip is used to hold the first course of siding panels in place along the bottom of the wall.
Inside and outside corners: These corners allow for neat and tidy finishes around corners. They come in various sizes to suit the thickness of the siding panels.
Siding panels: The vinyl siding panels will cover the exterior walls of the house.
Exterior-grade caulk: This is used as a sealant around the perimeter of the mounting block to prevent water damage.
Window flashing: This protects the window from water penetration and guides water to the exterior surface of the siding.
J-channel: This is installed around the windows and doors to create a finished look and secure the siding panels.
It is essential to use a water-resistive barrier, such as house wrap, beneath the mounting block to prevent any water damage.
Tools:
Hammer: Used to drive nails or screws into the siding.
Square: This tool is used to ensure that the mounting block is level.
Chalkline: Used to mark a straight line along the wall for the starter strip placement.
Level: Used to ensure that the mounting block is installed straight.
Tape measure: Required to measure the size of the mounting block and siding panels.
Safety glasses: Used to protect your eyes during installation.
Utility knife: Used to trim the panels to fit around windows, doors, and corners.
When cutting insulated vinyl siding panels, it is vital to use a table saw or radial-arm saw fitted with a fine-tooth plywood blade.
In summary, homeowners will need a vinyl mounting block, starter strip, inside and outside corners, siding panels, exterior-grade caulk, window flashing, and J-channel, along with a variety of tools to install a vinyl siding mounting block. Remember to use a water-resistive barrier, like house wrap, for added protection against water damage.
Installing the Mounting Block
Installing a vinyl siding mounting block can be a simple process if you have the correct tools and materials. In this guide, we will provide you with step-by-step instructions on how to correctly install a vinyl siding mounting block. From preparing your materials to finishing with trim, we’ve got you covered. Follow these instructions carefully, and you’ll be able to add any exterior accessory onto your vinyl siding with ease.
Measure and Mark the Wall Where the Mounting Block Will Be Installed
Before you begin installing the vinyl siding mounting block, the first important step is measuring and marking the wall where you’ll install the block. This part of the process is crucial in ensuring that the mounting block is installed accurately and will securely hold your exterior light fixtures.
To start, you will need a measuring tape and a pencil. These are the two basic tools that you will need to use for this step. Accuracy is key, so be sure to use a high-quality measuring tape to obtain precise measurements.
Next, you need to determine the exact placement of the mounting block. Hold the mounting block up to the wall and determine where it needs to be installed in relation to the light fixture and other surrounding objects.
Once you have decided on the exact placement, you need to measure the exact location on the wall.
Start by measuring the width of the mounting block to know exactly how much space on the wall it requires. Using your measuring tape, measure the width and mark the two corners of the mounting block with a pencil to indicate the positioning on the wall.
Then, measure the height of the mounting block. Mark the height on the wall with a pencil using similar methodology. Be sure that both vertical lines are level and are square with the horizontal line.
In addition, it’s best to take into account the mounting block’s nail slots and square snap-lock punch when marking. With this, you can ensure the right placement during the final process.
The accuracy of the measurements is important as it will influence the rest of the installation process. Precise marking will also guarantee that your siding stays in the right place ensuring that your end product is flawless.
In conclusion, measuring and marking the wall where the mounting block will be installed is a crucial step in the installation process. Use your measuring tape and pencil to measure and mark the accurate placement and positioning of the block. By following this step, you will ensure that your exterior light fixtures are safely and securely installed on your vinyl siding mounting block.
Install Drive Nails to Secure the Mounting Block in Place
After accurately marking the position of the mounting block on the wall, the next step in installing a vinyl siding mounting block is to secure it in place using drive nails. This step involves ensuring that the mounting block is level and securely fastening it to the wall with drive nails.
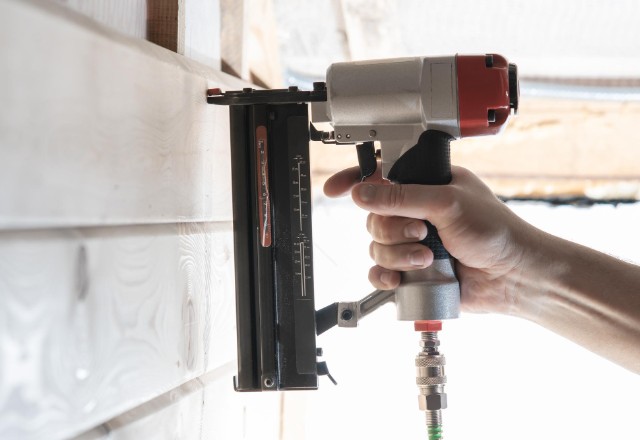
You will need a nail gun and nails to install the drive nails for securing the mounting block.
Before starting, be sure to use a level to verify that the mounting block is level. This is important because an uneven mounting block could cause problems during the remainder of the installation process.
Once you have confirmed that the mounting block is level, use your nail gun to drive nails into the nail slots on the block. To ensure a proper hold, it is recommended to use at least two nails on each side of the mounting block.
As you secure the mounting block, make sure that the screw flanges face the back, while the mounting block part faces the front. This not only guarantees that the block is secured properly in place, but it also ensures that no damage is caused to the vinyl siding panel.
Double-check that your mounting block is still level and securely attached to the wall before moving on to the next step. With the mounting block in place, you can now continue installing the light fixture or other vinyl siding accessories.
In summary, to install drive nails to secure the mounting block in place, ensure that the mounting block is level using a level and then drive nails into the nail slots on the block with a nail gun. Use at least two nails on each side of the block for a secure hold. Confirm that the screw flanges face the back and recheck that the block is level and properly secured before moving on to the next step.
Cut Starter Strips to Fit Around the Mounting Block
To prepare for the installation of vinyl siding panels, starter strips must be placed around the base of the exterior walls. These strips provide a flat surface for the bottom edge of the panels to rest on and support the first row of siding panels. But what about the mounting block? Here’s how to cut starter strips to fit around the mounting block:
- First, measure the length of the mounting block and add an inch to each side. This will ensure that the starter strip covers the mounting block as well as the gap left by the siding panel’s removal.
- Next, cut a piece of starter strip to this length using a siding tool or an oscillating tool. Make sure to cut it straight and even, so that it fits snugly against the mounting block.
- Now, position the starter strip so that it covers the bottom edge of the mounting block and the gap left by the siding panel’s removal. You can use a level to ensure that it is straight and even.
- Once the starter strip is in place, use a nail hole slot punch to create nail slots in the starter strip, spaced about 12 inches apart. This will allow you to secure the starter strip in place with drive nails.
By following these steps, you can cut starter strips to fit around the mounting block and ensure a proper and secure installation of your vinyl siding panels. Remember to use a siding tool or an oscillating tool to make clean and precise cuts, and to space nail slots about 12 inches apart for a strong hold.
Attach Corner Posts to Securely Connect the Wall with the Vinyl Siding Panels
When it comes to securely connecting the wall with the vinyl siding panels, attaching corner posts is essential. Here’s a step-by-step guide to help you do just that:
- Measure and cut each corner post according to the height of the wall that needs to be covered by the vinyl siding panels. Ensure they have the right height to be aligned with the top and bottom of the wall correctly.
- Snap a chalk line along the edge of the wall where the corner post will be installed. This will guide you on where to position the corner posts.
- Starting at the bottom, nail one corner post to the wall at the chalk line using drive nails or screws. Make sure to secure it firmly by driving the nails into a flat surface of the wall and furring strip.
- Next, nail the other corner post to the wall at the same height as the first post and make sure it is level and secure as well.
- Attach horizontal furring strips to the top and bottom of the corner posts. This will create a stable support system for the vinyl siding panels.
- Once everything is in place, slide a vinyl J-channel trim over the corner post. The J-channel is used to hold the first piece of vinyl siding in position.
- Slide the siding panel into the J-channel, ensuring it is level and fits snugly.
By following these steps, you can securely install corner posts to connect the vinyl siding panels with the wall. Remember to measure and cut the posts correctly, snap a chalk line to guide you, make sure everything is level and secure, and use a J-channel trim to hold the first piece of siding in place.
Finishing Touches
Once you have successfully installed the vinyl siding panels using the guide above, it is time to give your home the perfect finishing touches. This will not only enhance the overall look of your home but also ensure that the installation is weather-resistant and durable. Read on to learn more about the finishing touches that will complete your vinyl siding installation project.
Apply House Wrap Around the Perimeter of the Wall and Overlapping Areas of Siding Panels
When installing vinyl siding mounting block, it’s important to ensure that your home’s exterior is properly protected from moisture penetration. That’s where house wrap comes in. House wrap acts as a barrier between your home’s exterior sills and the siding, keeping the wall cavity dry.
To apply house wrap around the perimeter of the wall and overlapping areas of siding panels, begin by cutting the wrap to size and removing the existing siding to expose the sheathing below. Next, apply the house wrap to the sheathing, extending it at least one inch past the wall’s edges. It’s important to overlap each layer of house wrap, starting from the bottom and working upwards. This will create a weather-resistant barrier that will protect your home from moisture penetration.
When securing the house wrap to the sheathing, use roofing nails to avoid tearing the wrap. Place the nails in an overlapping pattern to ensure that the wrap is securely fastened. By taking the time to properly apply house wrap, you can ensure that your home’s exterior is protected and that your vinyl siding mounting block is properly installed.
Align Nail Slots on Siding Panel with Nail Heads on Drive Nails
When it comes to the installation of vinyl siding panels, one important aspect to keep in mind is proper alignment of the nail slots on the panel with the nail heads on the drive nails. This ensures that the panel is secured in place and won’t shift or come loose over time.
To achieve this, it’s crucial to first ensure that the drive nails are installed in the middle of the nailing slots on the sheathing below. This will allow for proper expansion and contraction of the siding during temperature changes as well as prevent water from seeping in.
Next, when installing the siding panel, take care to align the nail slots on the panel with the nail heads on the drive nails. This will ensure that the panel is secured in place and won’t shift or come loose.
It’s also important to leave a small gap between the nail head and the slot on the panel to allow for thermal expansion. This will prevent warping or damage to the panel as it adjusts to temperature changes.
By taking the time to properly align the nail slots on the siding panel with the nail heads on the drive nails, homeowners can ensure a secure and long-lasting installation of their vinyl siding panels.
Cut Utility Knife along Window Sills or Other Trim Pieces
When it comes to trimming vinyl siding around window sills or other trim pieces, a utility knife can come in handy. However, it’s important to follow the right steps to ensure a proper fit.
To begin, position the utility knife in the desired trimming location.
Apply moderate pressure and score the area with the blade to create a guideline.
Gradually deepen the cut on a second pass until you reach the desired depth.
Be careful not to cut too deeply or you may damage the siding.
When trimming the external perimeter adjacent to the window trim, it’s helpful to use a J-channel. This will provide a clean and polished finish while also helping to hold the siding in place.
Finally, create a cut line as the final step, using slow and steady strokes with the utility knife. Be sure to follow the previously scored guideline to ensure a clean and precise cut.
By using these steps and being mindful of the desired depth and placement of the utility knife, you can achieve a seamless fit for your vinyl siding.
Slide Vinyl Products into Vertical Siding Slot or J-Channel Trim around Exterior Walls
Installing vinyl products into a J-Channel trim is an excellent way to add a polished finish to the exterior walls of your home. Follow these easy steps to properly slide your vinyl products into the vertical siding slot or J-Channel trim:
- Select the Appropriate J-Channel Size. Before installing your vinyl products, ensure that you have the appropriate size of the J-Channel. Measure the length and width of your product and compare it to the size of the J-Channel to ensure that it is a perfect fit. If the J-Channel needs any alteration, make your cuts before proceeding with installation.
- Install the J-Channel onto the Surface of the Wall. Nail the J-Channel into place on the wall surface where you want to install the vinyl product. Make sure that the J-Channel is level and securely attached to the wall.
- Slide the Vinyl Product Inside the J-Channel. Gently slide the vinyl product into the J-Channel and ensure that it is adequately secured. Depending on the type of vinyl product you are using, you may need to apply some force to lock it into place. Take care not to cause any damage to the vinyl product or J-Channel during installation.
- Repeat the Process. Repeat the process with each vinyl product that you want to install on the wall. Be sure to measure each product carefully and ensure that it is a proper fit in the J-Channel before sliding it into place.
By following these simple steps, you can easily slide your vinyl products into the vertical siding slot or J-Channel trim around exterior walls to achieve a professional and polished look.
Conclusion
By following this comprehensive guide and taking the proper precautions, one can successfully install a vinyl siding mounting block that looks great and functions properly for years to come. So go ahead and add some fantastic vinyl accessories to your exterior walls with confidence!