509-201-4190

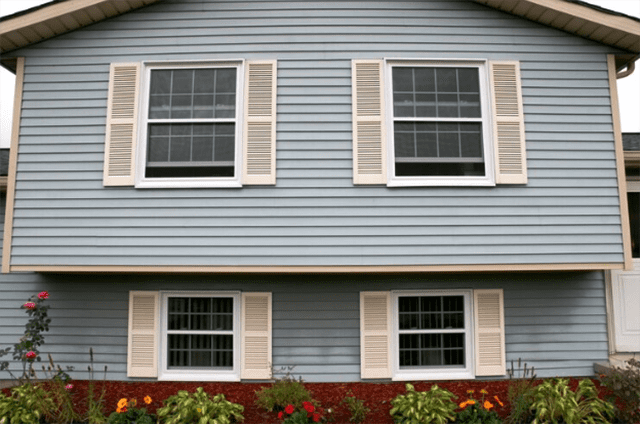
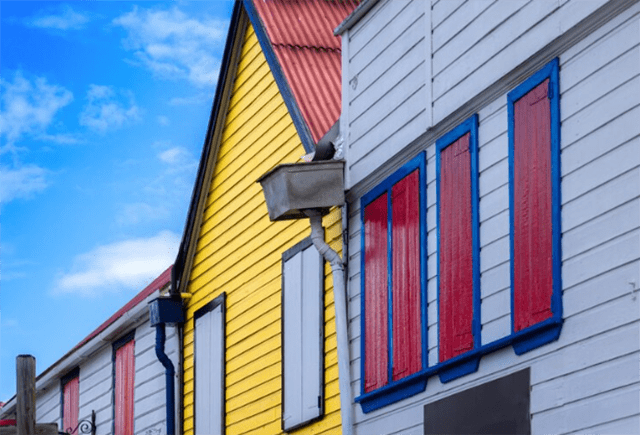
Installing vinyl siding is one of the most cost-effective ways to update the exterior of your home, but it can seem daunting. If you’re a beginner looking to take on DIY siding installation, this guide will provide you with all the steps you need to know. From measuring and calculating square footage, to nailing down corner pieces and posts – we have everything you need right here. So put on your work gloves and get ready for a rewarding project that will transform your home’s look!
Disclaimer: This article is intended to be used as a general guide for DIY siding installation. Although we have provided detailed instructions and tips, it is important to understand that there are many variables in any installation, including the type of house, local weather conditions, and even your own level of experience. Therefore, we strongly recommend that you consult with a professional before starting any siding installation project. Our experienced team has proudly been providing quality roofing solutions in the Spokane, WA area for many years and we’re always happy to help!
Purpose of the Guide
Installing vinyl siding is an easy and cost-effective way to update the exterior of your home. But for first-time DIYers, it can seem like a daunting task. That’s why we’ve put together this guide – to give you all the steps you need to transform your home with new siding. We’ll walk you through measuring and calculating square footage, nailing down corner pieces and posts, and more. With our helpful tips, you’ll be able to tackle this project with confidence – and enjoy the results of your hard work! So don’t delay – get started today on transforming your home’s exterior with DIY siding installation!
Now that you know the basics of siding installation, you’re ready to get started! With the right supplies and a little patience, you’ll be able to transform your home’s exterior with ease. But first – what do you need? Stay tuned for our next section on what materials you’ll need for vinyl siding installation!
What You’ll Need
Before you start any siding installation project, it’s important to make sure you have all the right supplies on hand. To install vinyl siding, you’ll need a few basic tools and materials. You’ll need a tape measure, level, chalk line, utility knife, hammer drill or screw gun, and of course – the vinyl siding itself. Depending on the size of your job and the type of siding you’re using, you may also need corner pieces and posts for extra support. For larger projects, consider renting an electric compressor or nail gun. Now that you know what materials to gather up – let’s get started!
Preparing to Install Vinyl Siding
Preparing to install vinyl siding is an important step in any DIY siding installation project. Before you get started, make sure your area is prepped and ready for installation.
- First, remove any existing siding or trim from the wall. Be sure to wear protective gloves when handling old materials.
- Next, inspect the substrate – the material that your new siding will be installed over – to make sure it’s in good condition and free of mold, mildew and rot. If needed, use a pressure washer to clean and prep the wall before moving on.
- Finally,check for any electrical wiring or plumbing that may be behind your siding before starting the installation process. Following these steps will help ensure a successful project!
With all the necessary preparation complete, you are ready to begin the vinyl siding installation process. Now is the time to measure your exterior wall and get ready for a beautiful new look!
Measuring Your Exterior Wall
Measuring your exterior wall is an important step in any DIY vinyl siding installation project. Before you begin, make sure you have the right tools: a measuring tape, a level, and a pencil or marker. Begin by measuring the vertical height of your wall from the ground up, then measure the horizontal width across the top of your wall. If you are working with multiple walls, be sure to measure each one separately and note down all measurements. Once all measurements are taken, double check them for accuracy before moving on to ordering materials.
To get an accurate measurement of individual pieces of siding, add 1/8 inch to each side of your wall measurement to allow for trimming and overlapping. For example, if your wall measures 8 feet wide by 10 feet high, you will want to order siding that is 8 1/8 feet wide by 10 1/8 feet high so you can customize it to fit perfectly on your exterior wall.
With these tips in mind, measuring and ordering materials for your vinyl siding installation should be easy and hassle-free!
Calculating the Square Footage of Your Home’s Exterior
Calculating the square footage of your home’s exterior is an important step in any DIY vinyl siding installation project. To get started, measure the length and width of each wall in feet and then multiply them together to determine the square footage of that wall. Do this for all walls on the outside of your house and add them together to calculate the total square footage. For example, if you have a wall that measures 8 feet wide by 10 feet high, it would be 80 square feet. Once you have calculated the individual wall sizes, add them all together to determine the total square footage of your home’s exterior.
Keep in mind that you should also factor in any windows or doors when calculating your total exterior square footage. When measuring these features, simply subtract their size from the overall measurements of each wall they are located on to get an accurate comparison.
Once you have determined the total square footage for your home’s exterior walls, use this number to order enough siding materials for your project. Remember to add 1/8 inch to each side of your wall measurement so you can trim and overlap accordingly! With these tips in mind, calculating and ordering materials for your vinyl siding installation should be easy and hassle-free!
Prepping the Surface You’re Installing On
Prepping the surface you are installing your new vinyl siding on is an important step in any DIY project.
- Before beginning, be sure to clean and clear away debris, dirt, and grime from the walls of your home. This will help ensure that your new siding will adhere properly.
- Next, check for any holes or cracks in the existing surface and repair them as needed with caulking or spackle. Make sure to allow any repairs to dry completely before proceeding with the installation process. If necessary, use a pressure washer to remove any remaining dirt or debris from the walls prior to installation.
- Finally, inspect for any loose boards or exposed nails and fill them with wood putty before attaching your siding panels. This will help provide a secure base for your siding material and prevent future damage from occurring. Following these steps will help ensure that your vinyl siding is securely attached and looks great for years to come!
Purchasing the Right Type and Amount of Vinyl Siding Panels
Purchasing the right type and amount of vinyl siding panels is a crucial step in any DIY project.
- Start by taking measurements of the walls you are installing on and make sure to include any windows, doors, or other features that will require additional panels. It’s important to take into account the size, shape, and materials of each wall when making your purchase.
- Next, choose a style of siding that will match the aesthetic of your home. Your options may include horizontal or vertical panels, shakes, shingles, lap siding, and more. Be sure to pick one that complements your home’s exterior design while still providing the necessary protection from bad weather.
- Finally, be sure to have enough material for the entire job. Vinyl siding can often be cut to fit smaller areas but it’s important to have extra material in case of mistakes or unexpected repairs. Planning ahead with these tips will help ensure that your DIY siding installation goes smoothly without any costly surprises!
Installing Corner Pieces & Posts
Installing corner pieces and posts is an important step in any vinyl siding project. To begin, you’ll need to purchase the appropriate corner pieces and posts that match the style of siding you’ve chosen. Corner pieces are designed to fit perfectly at the corners of your home while posts can be used to transition between different wall sections.
Once you have your materials, start by installing corner pieces first. Make sure they are securely fastened with screws or nails so they won’t come loose later on. Next, install the posts according to their designated locations. Posts should be placed along every seam or transition in your siding as well as near windows and doors for extra support. Finally, secure all pieces with screws or nails and caulk around them if needed for a neat finish.
With these tips in mind, your DIY siding installation will go off without a hitch!
Installing corner pieces and posts is an important step in any vinyl siding project, so take your time and be sure to do the job right. But that’s not all – now you’ll need to examine them for any damage or defects before you can finish the job!
Examining Corner Pieces and Posts for Damage or Defects
Examining corner pieces and posts for damage or defects is a crucial step in any vinyl siding project. Before you begin installation, be sure to check each piece for any cracks, chips, dents, or other signs of wear and tear. If any pieces are damaged, it’s best to replace them with new ones rather than trying to repair them. Also examine the edges for any sharp points that could cause injury. Once all the pieces are checked and approved, you can proceed with installation.
Remember that proper inspection and care of your materials is essential to ensure a successful siding project. Take your time to inspect each piece before you install it and don’t be afraid to get creative with your repairs – even if it means replacing the entire piece! With these tips in mind, you’ll have a beautiful new siding job in no time.
Cutting Corner Moldings with Tin Snips or a Snap-Lock Punch Tool
Cutting corner moldings is a necessary step in any vinyl siding project. Depending on the type of vinyl siding you have chosen, you may need to use either special tin snips or a snap-lock punch tool to cut the corner pieces. Both tools will work well for this task, but it’s important to remember that the tin snips are sharper and will give you a cleaner cut than the punch tool.
When using tin snips, be sure to wear protective gloves and goggles as you work. You’ll also want to make sure that your cutting edge is lined up with the edge of the siding before making your cut. When using a snap-lock punch tool, make sure to line up the blade and press firmly down so that it cuts cleanly through the material.
No matter which method you choose, take extra care when cutting your corner moldings as they are an integral part of your finished job! Remember – measure twice, cut once!
With these tips in mind, you’ll be able to create perfect corner pieces for your vinyl siding project every time.
Nailing Down Corners & Posts Using Nail Heads
Nailing down corners and posts is one of the most important steps in a vinyl siding installation. To ensure that your siding is secured properly, it’s best to use nail heads with special galvanized nails.
Start by measuring the length of your corner and post pieces, then cut them to size using either tin snips or a snap-lock punch tool. Next, use a hammer to drive the nails into the nail heads at an angle of 45 degrees from the surface. Make sure to leave about 3/8 inch between each nail for extra stability. Then, use a level to make sure that your corner and post pieces are straight before nailing them in place.
Once all of your corners and posts are securely nailed down, you can move on to installing the rest of your vinyl siding panels. With careful measurements, precise cuts, and quality galvanized nails, you’ll be able to achieve professional results every time!
Placing Starter Strips at the Bottom of Each Wall Section
Placing starter strips at the bottom of each wall section is an important step of any vinyl siding installation project. Starter strips are designed to help keep water out by providing a base for your siding panels. To ensure that they are installed correctly, make sure that you start on the bottom and work up as you go.
Begin by finding the bottom corner of your wall and measuring up from there. Mark the spot where you want your starter strip to begin and cut it to size with either tin snips or a snap-lock punch tool. Take special care when cutting around doors and windows. Once everything is ready, attach the starter strip to the wall using galvanized nails at an angle of 45 degrees from the wall surface. Make sure that you leave 3/8 inch between each nail for extra stability.
With proper installation, starter strips will provide extra protection against moisture infiltration while making your DIY siding project look professional! So don’t skip this important step in order to achieve long-lasting results!
Attaching Pieces of Vinyl Siding to Your Walls
Attaching pieces of vinyl siding to your walls is an easy process, as long as you have the right tools and supplies! Before you start, make sure that you have galvanized nails and a siding hammer. Measure out the length of your panel pieces and cut them to size with either tin snips or a snap-lock punch tool.
Once everything is cut and ready to go, begin nailing the panels into place with the siding hammer at an angle of 45 degrees from the wall surface. Make sure that you leave about 3/8 inch between each nail for extra stability. To ensure evenness, use a level across each panel before moving on to the next one.
When all of your panels are securely attached to the wall, you can move on to installing corner pieces, posts, or trim for a polished look. With careful measuring and precise cuts, you can achieve professional results every time! Good luck with your DIY vinyl siding project!
Now that you know the basics of how to install vinyl siding, you are ready to start sprucing up your home!
Conclusion
Installing vinyl siding can be a great DIY project for any homeowner and with the right tools and tips, it’s easy to achieve a professional looking result. The key is to take your time and pay close attention to detail. Taking the time to properly install starter strips at the bottom of each wall section will give you an extra layer of protection against moisture infiltration while ensuring that your project looks amazing. With a few simple steps and some basic knowledge, you can easily complete any DIY siding installation project and update the look of your home!