509-201-4190

Preparing for Solar Panel Installation
Before you can begin the process of installing solar panels on your roof, there are a few
important steps you need to take to ensure a smooth and successful installation. Proper
preparation is key to maximizing the efficiency and longevity of your solar system. Here
are some tips on how to prepare for solar panel installation:
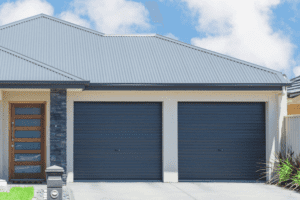
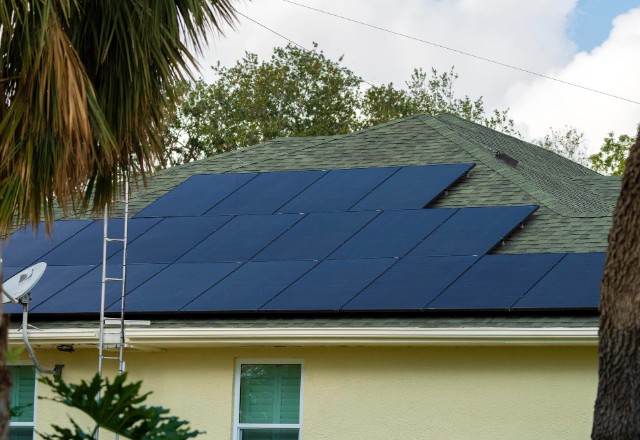
- Assess your roof: The first step is to assess the condition and suitability of your roof
for solar panel installation. Look for any signs of damage, such as leaks or weak spots,
as these issues should be addressed before installation. Additionally, consider the
orientation and angle of your roof. Ideally, the roof should have a southern-facing
exposure with minimal shading to optimize sunlight exposure throughout the day. - Consult with a professional: It is highly recommended to consult with a professional
solar installer or a roofing contractor before proceeding with the installation. They will be
able to evaluate the structural integrity of your roof and advise you on any necessary
repairs or modifications. They can also help you determine the best location for the solar
panels and design a system that meets your energy needs. Check building permits and regulations: Depending on your location, you may need to
obtain permits or adhere to specific regulations before installing solar panels. Research local building codes and contact your utility company to understand any requirements or
restrictions. It is important to comply with these regulations to ensure the safety and
legality of your solar installation.- Evaluate your electrical system: Solar panels generate electricity that is connected to
your home’s electrical system. Before installation, it is important to assess the capacity
of your electrical service panel to accommodate the additional energy generated by the
solar system. In some cases, an upgrade may be required. - Determine the type of mounting system: There are different types of mounting systems
available for solar panels, depending on your roof type and preferences. Consider whether
a roof-mounted system or a ground-mounted system is more suitable for your property.
Roof-mounted systems are more common and cost-effective, while ground-mounted
systems offer greater flexibility and easier maintenance. - Trim trees and vegetation: To ensure maximum sunlight exposure for your solar panels,
trim any trees or vegetation that may cast shade on the roof. This step will help optimize
the energy production of your solar system. - Review your insurance coverage: Before installing solar panels, review your
homeowner’s insurance policy to ensure coverage for potential damages or losses
related to the solar installation. Some insurance companies offer specialized policies for
solar systems, so it may be worth exploring those options.
By properly preparing for solar panel installation, you can minimize any issues or delays
and set the foundation for an efficient and effective solar system. If you are unsure about
any aspect of the preparation process, don’t hesitate to seek professional guidance. With
a well-prepared roof, you can soon start enjoying the benefits of clean and renewable
solar energy.
Energy Assessment
Before investing in solar panels, it is crucial to assess your energy needs to determine the
appropriate size and capacity of the solar system. This energy assessment will ensure
that your solar panels can generate enough electricity to meet your household
requirements.
To start, gather your monthly electricity bills to understand your current energy
consumption. Look for patterns and fluctuations in usage, such as higher energy
demands during certain seasons or appliances that consume a significant amount of
power. This information will help you estimate the amount of electricity your solar panels
should produce.
Consider your future energy needs as well. Are you planning to expand your home or add
new appliances that will increase your electricity consumption? Anticipating future
changes will help you select a solar system with the appropriate capacity to
accommodate these additional energy needs.
Assessing your energy needs also involves evaluating your energy-saving habits and
implementing energy-efficient measures. By adopting practices such as using energy-
efficient appliances, optimizing insulation, and reducing unnecessary energy
consumption, you can lower your overall electricity demands and potentially reduce the
number of solar panels required.
By conducting a thorough energy assessment, you can ensure the solar panel system you
install is aligned with your energy requirements. This will maximize the benefits of solar
energy, reduce your reliance on fossil fuels, and potentially save you money on your
energy bills in the long run.
Structural Assessment
Before installing solar panels on your roof, it is crucial to assess the structural integrity of
your roof. The weight of solar panels can add a significant load to your roof, so it’s
necessary to ensure that it can support this additional weight.
- Start by examining the condition of your roof. Look for signs of damage,
such as sagging, rotting, or cracked areas. These issues can
compromise the stability of your roof and may require repairs before
installing solar panels. Additionally, consider the age and type of your
roof. Older roofs may not be as strong or durable as newer ones, and
certain roofing materials may not be suitable for solar panel installation. - Next, evaluate the strength of your roof’s rafters. They are the framework
that supports your roof, and they need to be capable of supporting the
weight of solar panels. Consult a professional roofing contractor or
structural engineer to assess your roof’s load-bearing capacity and
determine if any reinforcements or modifications are needed. - Lastly, check local building codes and regulations. Some jurisdictions
have specific requirements for solar panel installations, including load
capacity and structural standards. Adhering to these guidelines will
ensure the safety and compliance of your solar panel system.
By conducting a thorough structural assessment, you can determine if your roof is
suitable for solar panel installation and avoid potential issues that may arise from an
inadequate roof structure.
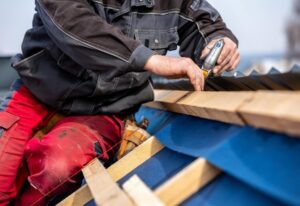
Gathering Tools and Materials
To install solar panels on your roof, you will need a few essential tools and materials.
Here is a list to help you gather everything you need:
- Solar panels: These are the key components that convert sunlight into electrical energy.
- Mounting brackets: These brackets securely hold the solar panels in place on your roof.
- Rails: These long, metal bars provide additional support for the solar panels.
- Hardware: You will need screws, nuts, and bolts to fasten the mounting brackets and
rails. - Drill: A drill will be necessary to create holes for attaching the mounting brackets and
rails to your roof. - Ladder: Since the installation process takes place on your roof, a ladder is essential for
accessing and maneuvering around the installation area.
In addition to the tools, you will also need certain materials for a successful solar panel
installation:
- Flashings: Flashings are used to seal any gaps or openings around the mounting
brackets, preventing water leaks. - Waterproof sealant: This sealant is applied to ensure a watertight seal and prevent
water damage. - Wiring: Proper wiring is necessary to connect the solar panels to your electrical
system. - Junction boxes: These boxes safeguard the electrical connections and allow for easy
access, maintenance, and troubleshooting.
By gathering all these tools and materials beforehand, you will be well-prepared to start
the installation process and enjoy the benefits of solar energy on your roof.
Steps for Solar Panel Installation
Installing solar panels on your roof is a great way to harness the power of the sun and
reduce your reliance on fossil fuels. While the process may seem daunting, it can be
broken down into a series of simple steps to ensure a successful installation. Here are
the steps for solar panel installation:
Step 1: Assess your roof and energy needs
Before diving into the installation process, it’s essential to assess your roof’s suitability
for solar panels and determine your energy needs. Consider factors such as the
orientation of your roof, its angle, and any shading that may affect the panel’s efficiency.
Additionally, evaluate your energy consumption to determine the number and size of solar
panels required to meet your electricity needs.
Step 2: Obtain necessary permits and approvals
Installing solar panels typically requires permits and approvals from local authorities or
homeowners’ associations. These permits ensure your installation complies with building
codes and safety standards. Contact your local government or consult with a solar
installer to obtain the necessary permits and approvals before proceeding.
Step 3: Purchase the right equipment
Once you’ve determined your energy needs, it’s time to purchase the solar panels and the
necessary equipment. Choose high-quality solar panels, mounting brackets, rails, and
other hardware from reputable suppliers. Consider factors such as durability, efficiency,
and warranties to make an informed decision.
Step 4: Prepare your roof
Before installing solar panels, it’s crucial to prepare your roof by ensuring it is clean and in
good condition. Repair any damaged or weak areas, and make necessary adjustments to the roof structure if required. Remove any debris or obstacles that may hinder the
installation process.
Step 5: Install the mounting brackets and rails
Start by positioning and attaching the mounting brackets on your roof. Use a drill to
create holes for the screws, ensuring a secure and stable placement. Once the mounting
brackets are in place, attach the rails onto the brackets. These rails will provide support
and facilitate the attachment of the solar panels.
Step 6: Attach the solar panels
Carefully lift and position the solar panels onto the rails, aligning them properly for
optimal sunlight exposure. Secure the panels onto the rails using the provided hardware, such as screws and bolts. Ensure the panels are tightly fastened but avoid over-
tightening, which could damage the panels.
Step 7: Connect the wiring and junction boxes
Connect the wiring from the solar panels to the junction boxes, ensuring proper polarity
and following the manufacturer’s instructions. These junction boxes protect the electrical
connections and allow for easy maintenance and troubleshooting. Consult with a
professional electrician if needed for safe and proper wiring connections.
Step 8: Finalize the installation
Once the solar panels are securely attached and the wiring is properly connected, finalize
the installation by sealing any gaps or openings around the mounting brackets with
flashings. Apply waterproof sealant to ensure a watertight seal and prevent water
damage.
Step 9: Test and monitor the system
Before celebrating your successful installation, it’s essential to test and monitor the solar
panel system. Ensure that the system is generating electricity as expected and that the
energy production aligns with your energy needs. Keep an eye on the system’s
performance and monitor it regularly to identify any potential issues or maintenance
needs.
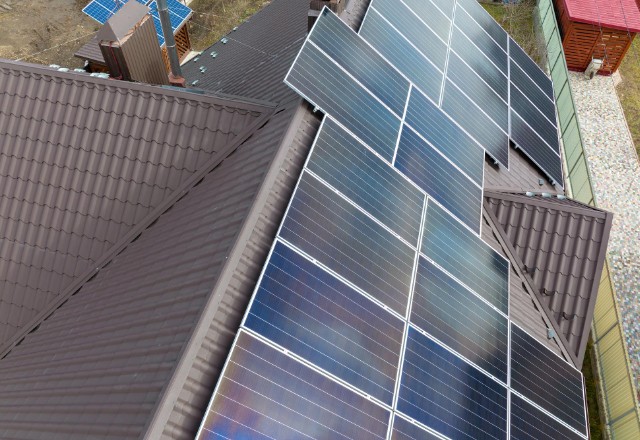
Site Evaluation and Panel Placement
Before installing solar panels on your roof, it’s crucial to evaluate your site and carefully
plan the panel placement. Here’s a step-by-step guide to help you choose the optimal
location:
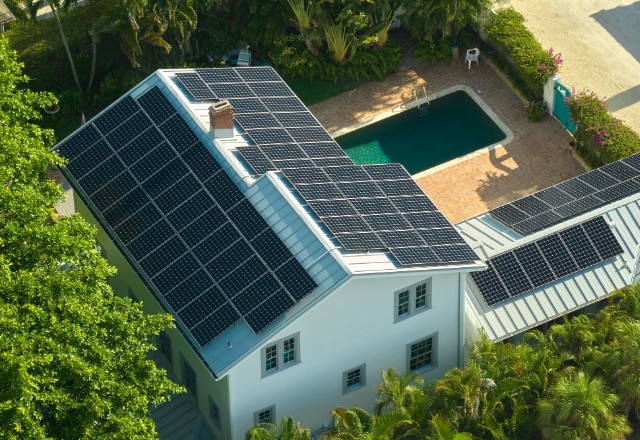
- Assess sunlight exposure: Start by identifying areas on your roof that receive
maximum sunlight throughout the day. Ideally, your solar panels should be installed on a
section of the roof that is not shaded by trees, buildings, or other obstructions. The more
direct sunlight the panels receive, the more energy they will generate. Consider roof orientation and tilt: The orientation and tilt of your roof can significantly
impact the performance of your solar panels. In North America, south-facing roofs
generally receive the most sunlight. However, east and west-facing roofs can still be suitable for solar panel installation, depending on your location and energy needs.
Additionally, the angle of tilt should be adjusted according to your latitude for optimal
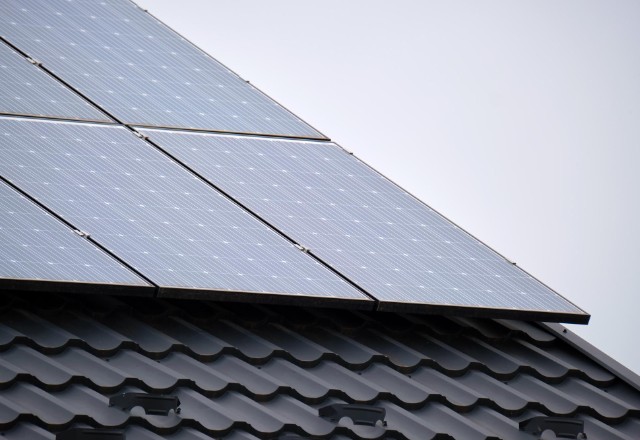
energy production.- Roof condition and structural integrity: Make sure your roof is in good condition and
can support the weight of solar panels. Have a professional assess the roof’s structural
integrity to determine if any repairs or reinforcements are necessary. - Space availability and aesthetics: Evaluate whether you have enough space on your
roof to accommodate the desired number of panels. Consider your aesthetic preferences
as well, as some homeowners may want to place the panels in inconspicuous areas to
maintain the appearance of their home.
By carefully evaluating your site and considering these factors, you can determine the
best location for placing your solar panels, maximizing their energy production and
ensuring the longevity of your roof.
Installing Mounting Brackets and Rails
To install solar panels on your roof, you’ll need to attach mounting brackets and rails.
Here’s a step-by-step guide to help you with the process:
- Choose the correct mounting system: Depending on your roof type and structure, there
are various mounting systems available. Consult with a professional or refer to the
manufacturer’s guidelines to select the appropriate system for your specific roof. - Locate and mark the rafters: The mounting brackets need to be secured to the roof
rafters for maximum stability. Use a stud finder or a flashlight to locate the rafters
beneath the roofing material. Mark their locations on the roof with a pencil or marker. - Attach the mounting brackets: Secure the mounting brackets to the roof rafters using
lag bolts or specialized roof fasteners. Make sure to follow the manufacturer’s
instructions for proper installation. - Install the rails: Once the mounting brackets are securely in place, attach the rails to the
brackets. These rails will provide a stable base for the solar panels. Align the rails
according to your desired panel configuration and secure them using the provided
hardware. - Check for levelness and alignment: Use a level to ensure that the rails are installed
horizontally and aligned properly. This will ensure that your solar panels are positioned
correctly for optimal energy production.
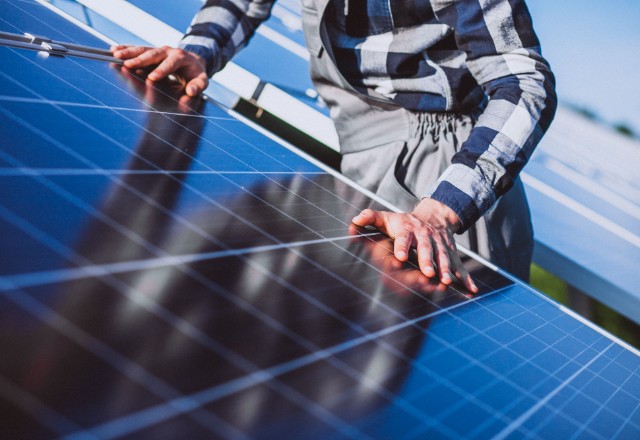
Mounting Solar Panels
- Attach the solar panels to the mounting brackets: Once the rails are installed and
properly aligned, it’s time to attach the solar panels. Carefully lift each panel onto the rails,
lining up the panel’s mounting holes with the corresponding brackets. Securely bolt the
panels to the brackets, ensuring that they are tightly fastened. - Connect the panels: After all the solar panels are mounted, it’s important to connect
them together to create a functional system. Follow the manufacturer’s instructions to
properly connect the panels using the provided connectors or wiring. It’s crucial to ensure
the correct polarity and tight connections to maximize energy production. - Connect to the inverter: The inverter is a key component that converts the DC electricity
generated by the solar panels into usable AC electricity for your home. Connect the
inverter to the panels using the appropriate wiring and connectors, again following the
manufacturer’s instructions. Make sure all connections are secure and well-insulated. - Secure loose wires: After all the connections are made, neatly secure any loose wires
or cables with clips or cable ties. This will help prevent damage and ensure a clean
installation. - Final checks and inspections: Once everything is securely mounted and connected,
double-check all the connections and wiring to ensure they are properly installed. Inspect
the entire system for any loose parts or potential hazards.
It’s important to note that installing solar panels on your roof can be complex and
potentially dangerous if not done correctly. It’s highly recommended to consult with a
professional solar installer or roofing contractor to ensure a safe and efficient installation.
Wiring and Junction Boxes
Wiring is a crucial step in installing solar panels on your roof. Properly connecting the
solar panels to the junction boxes ensures that electricity flows smoothly and safely
throughout the system.
Start by identifying the positive and negative terminals on each solar panel. Typically, the
positive terminal is marked with a “+” sign. Connect the positive terminal of one panel to
the negative terminal of the next panel using the provided connectors or wiring. Repeat
this process until all the panels are connected in series.
Next, locate the junction boxes. These boxes are typically installed near the solar panels
and are used to connect the panels to the inverter. Open the junction boxes and expose
the wiring terminals inside.
Connect the positive wire from the last solar panel in the series to the positive terminal of
the junction box. Similarly, connect the negative wire to the negative terminal. Fasten the
wires securely to the terminals and ensure the connections are tight.
Once the connections are made, carefully close the junction boxes and ensure they are
properly sealed to protect against moisture. Inspect all the wiring to ensure it is neatly
organized and free from any damage or loose connections.
Remember, it’s important to follow the manufacturer’s instructions and consult a qualified
electrician if you are unsure about any step in the wiring process. A correctly wired
system will ensure optimal performance and safety for your solar panel installation.
Connecting to Inverter and Electrical System
To connect the solar panel system to the inverter and the home’s electrical system, follow
these steps:
- Locate the inverter, which is typically installed near the main electrical panel. Open the
inverter’s cover to access the wiring terminals inside. Connect the positive wire from the junction box to the positive terminal of the inverter.
Make sure the connection is secure and tight. Repeat the same process for the negative wire.- Once the connections are made, carefully close the inverter’s cover and ensure it is
properly sealed. - Now, move to the main electrical panel of your home. Identify the spot where the solar
system’s electrical energy will be connected. This can be done by adding a dedicated
circuit breaker for the solar system. - Install the dedicated circuit breaker by turning off the main power switch, removing the
panel cover, and following the manufacturer’s instructions. Connect the positive wire from
the inverter to the breaker’s terminal and tighten the connection. Repeat the same
process for the negative wire. - Make sure all the connections are secure and tight. Close the panel cover and turn the
main power switch back on. - Lastly, contact your utility company to get the necessary approvals and permits for
connecting your solar panel system to the electrical grid.
By following these steps and ensuring all connections are properly made, you can
successfully connect your solar panel system to the inverter and your home’s electrical
system.
Grounding the System
Grounding is a crucial aspect of installing a solar panel system on your roof. It helps
protect your system and ensures the safety of those in and around your home. Grounding
creates a secure electrical connection between your solar panels and the ground,
allowing for the safe dissipation of any excess electricity.
To ground your system correctly, follow these steps:
- Locate the grounding lug on your solar panel array. This is usually found on the main
panel or inverter. It will be marked with a ground symbol. - Connect a grounding wire to the lug. This wire should be the appropriate size and meet
local electrical code requirements. It is typically made of copper or aluminum. - Securely attach the other end of the grounding wire to a metal rod or ground plate that
is buried in the ground. The rod or plate should be made of non-corrosive material and
must be properly grounded. - Ensure that the grounding wire is tightly connected at both ends and that there is no
loose or exposed wiring.
Proper grounding is essential for the safe and effective functioning of your solar panel
system. It helps protect against electrical faults and also provides a path for lightning
strikes. If you are unsure about the grounding process, it is advisable to consult with a
professional solar installer to ensure the job is done correctly.
Ensuring Proper Sealing and Weatherproofing
When installing solar panels on your roof, it is crucial to ensure proper sealing and
weatherproofing. This step is essential to protect your solar panel system from the
elements and prevent any water leakage or damage to your roof.
Here are some important tips to follow during the installation process:
- Choose the Right Sealing Material: Select a high-quality sealing material that is
specifically designed for solar panel installations. Silicone-based sealants are commonly
used as they provide excellent weather resistance and flexibility. - Inspect the Roof Surface: Before installing the panels, inspect your roof for any existing
damage or leaks. Repair any issues and ensure that the surface is clean and flat,
providing a solid base for the solar panels. - Install Flashing: Flashing is a vital component for weatherproofing. It is generally made
of metal and is placed around any openings or penetrations on the roof, such as vent
pipes or chimneys, to prevent water intrusion. Make sure the flashing is securely attached
and properly sealed. - Apply Sealant to Attachment Points: As you mount the solar panels onto the roof, apply
sealant to the attachment points. This includes any holes, brackets, or clamps used to
secure the panels to the roof. The sealant creates a watertight barrier and prevents any
leaks from occurring. - Use Waterproofing Membrane: Consider using a waterproofing membrane beneath the
solar panels for added protection. This membrane acts as an extra layer of defense
against water infiltration and enhances the overall weatherproofing of the system. - Properly Seal Electrical Connections: Along with sealing the physical attachment
points, it is crucial to adequately seal all electrical connections. This includes the
connections between solar panels, wiring, and electrical conduits. Use waterproof sealant
and electrical tape to ensure a tight seal and prevent moisture from penetrating the
system. - Regular Maintenance and Inspections: Once the solar panels are installed, it is
important to regularly inspect and maintain the system. Check for any signs of wear or
damage to the sealing materials and address any issues promptly. Performing routine
inspections will help identify any potential problems early on and prevent costly damages
in the long run.
By following these steps, you can ensure that your solar panel system is properly sealed
and weatherproofed, providing maximum efficiency and protection against the elements.
It is always advisable to consult with a professional solar installer or roofing contractor to
ensure the correct installation techniques and materials are used for your specific roof
type. So, go ahead and harness the power of the sun while keeping your roof safe and
secure.
Flashing Installation
During the installation of solar panels on a roof, it is crucial to properly install flashings to
ensure waterproofing and prevent water intrusion. Here is a step-by-step guide on how to
install flashings around the panels:
- Measure and cut the flashing material: Take measurements of the area around the
penetrations, such as vent pipes or chimneys, and cut the flashing to the appropriate size.
Ensure that the flashing extends at least six inches beyond the penetration to provide
adequate coverage. - Position the flashing: Place the flashing over the penetration, aligning it with the roof
surface. Make sure it is centered and level before proceeding. - Secure the flashing: Use screws or nails to secure the flashing to the roof, driving them
through the flashing and into the roof deck. Be sure to follow the manufacturer’s
instructions for the appropriate fasteners and spacing. - Apply sealant: Apply a generous amount of roofing sealant around the edges of the
flashing to create a watertight seal. Make sure to cover any gaps or openings to prevent
water from seeping in. - Check for leaks: Once the flashings are installed, conduct a thorough inspection to
ensure there are no leaks. Use a hose or water spray to test the flashings, paying close
attention to the areas around the penetrations.
By following these steps, you can properly install flashings around the solar panels,
promoting waterproofing and protecting your roof from potential water damage.
Remember to consult a professional or refer to manufacturer guidelines for specific
instructions related to your solar panel system and roof type.
Applying Sealant
Applying a waterproof sealant is a crucial step in the installation of solar panels on a roof
to prevent leaks and ensure a watertight seal. Here’s how to apply sealant effectively:
- Choose the right sealant: Use a high-quality roofing sealant that is specifically designed
for the type of roofing material you have, such as asphalt shingles, metal roofs, or tile
roofs. Consult with a roofing professional or the sealant manufacturer for the most
suitable product. - Clean the area: Before applying the sealant, clean the surface thoroughly to remove any
dirt, debris, or old sealant. Use a broom or brush to sweep away loose particles and a
suitable cleaning solution for more stubborn stains. Ensure that the surface is dry before
proceeding. - Apply the sealant: Use a caulking gun or a trowel to apply the sealant evenly over the
target area. Start from the bottom and work your way up, making sure to cover any gaps,
openings, or edges of the flashing. Apply a generous amount of sealant to create a strong
and durable seal. - Smooth and shape the sealant: Use a putty knife or your finger to smooth and shape
the sealant. This will help ensure a neat and professional finish while also ensuring that
all areas are adequately covered. - Inspect for leaks: Allow the sealant to dry as per the manufacturer’s instructions. Once
dry, inspect the area for any signs of leakage. If you spot any gaps or areas where the
sealant has not adhered properly, apply an additional layer of sealant as needed.
By following these steps, you can successfully apply a waterproof sealant during the
installation of solar panels, providing long-lasting protection against leaks and preserving
the integrity of your roof.
Safety Considerations
Safety Considerations for Installing Solar Panels on the Roof
When installing solar panels on your roof, it is important to prioritize safety to avoid
accidents or damage. Here are some essential safety considerations to keep in mind:
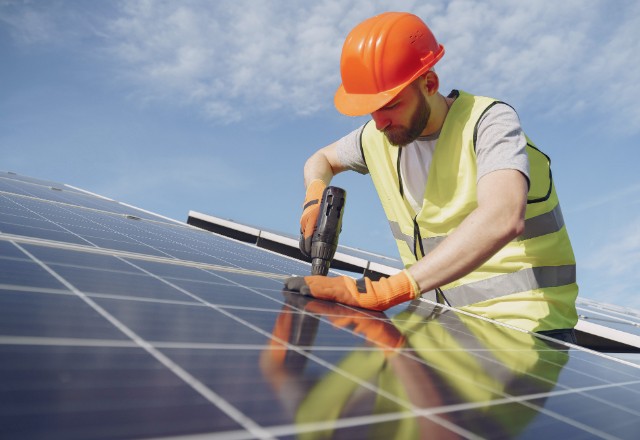
- Safety Gear: Always wear the necessary safety gear, including gloves, safety glasses,
and a hard hat, to protect yourself from potential hazards. Additionally, use appropriate
footwear with good traction to prevent slipping. - Optimal Weather Conditions: Install solar panels on a clear and dry day to minimize the
risk of accidents. Avoid working during extreme weather conditions such as heavy rain,
strong winds, or icy conditions, as they can pose serious safety risks. - Roof Structural Integrity: Before installing solar panels, ensure that your roof is in good
condition and can support the additional weight. Consult a professional to assess the
integrity of your roof structure and make any necessary repairs or reinforcements. - Electrical Safety: Solar panel installation involves working with electrical components.
It is crucial to turn off the electrical supply to your home or work with a qualified
electrician to ensure your safety during the installation process. - Professional Assistance: If you are not confident in your abilities or lack experience in
solar panel installation, it is recommended to hire a professional solar installer. They have
the necessary skills and knowledge to safely and efficiently install solar panels on your
roof.
By following these safety considerations, you can ensure a safer installation process for
your solar panels and protect both yourself and your property from potential risks.
Connecting to the Grid and Incentives
Connecting to the grid is an essential step in the solar panel installation process. It allows
your solar system to generate electricity and feed it back into the electrical grid, enabling
you to earn credits for the excess energy produced.
To connect your solar system to the grid, you will need to work with your local utility
company. They will install a special bi-directional meter that measures both the electricity
you consume from the grid and the electricity you export from your solar panels. This
meter ensures that you are properly credited for the excess energy you generate.
Additionally, many regions offer incentives or rebates for installing solar panels. These
incentives can help offset the upfront costs of installation and make solar energy more
financially accessible. Some common incentives include federal tax credits, state-level
rebates, and performance-based incentives.
It is important to research and understand the incentives available in your area before
installing solar panels. Consult with your solar installer or visit government websites to
learn about the eligibility criteria and application process.
By connecting to the grid and taking advantage of available incentives, you can maximize
the benefits of your solar panel installation and further reduce your reliance on fossil
fuels while saving money on your energy bills.
Maintenance and Monitoring
Maintenance and monitoring are crucial for ensuring optimal performance and longevity
of your solar panels. Here are some tips to keep in mind:
- Regular Cleaning: Clean your solar panels at least twice a year to remove dirt, dust, and
debris that can block sunlight. Use a soft brush or sponge and a gentle, non-abrasive
cleanser. Avoid using harsh chemicals or abrasive tools that can damage the panels. - Inspect for Damage: Regularly inspect your panels for any signs of damage, such as
cracks or loose connections. Addressing these issues promptly can prevent further
damage and ensure efficient energy production. - Monitor Performance: Keep a close eye on your solar system’s performance using
monitoring software provided by your installer. This will help you identify any drop in
energy production and troubleshoot any potential issues. - Check Inverter: The inverter converts the DC electricity generated by your panels into
AC electricity for use in your home. Regularly check the inverter’s status lights and
monitor its performance to ensure it is functioning optimally. - Consult with Professionals: If you notice any significant drop in energy production or
suspect any issues with your solar panels, contact your solar installer or a professional
technician. They have the expertise and tools to diagnose and resolve any problems.
By following these maintenance and monitoring tips, you can maximize the efficiency of
your solar panel system and enjoy the benefits of renewable energy for years to come.
Professional Assistance
When it comes to installing solar panels on your roof, it’s important to prioritize safety
and accuracy. While there are many resources available for DIY installation, it is strongly
recommended to seek professional assistance, especially if you are unsure about any
step of the process.
Professional solar installers have the knowledge and experience to ensure that your
system is installed correctly and efficiently. They are familiar with local regulations and
building codes, and can help you navigate any paperwork or permits that may be required.
Additionally, they have access to the right tools and equipment to properly install the
panels and ensure they are securely mounted on your roof.
By hiring a professional, you can have peace of mind knowing that your solar panels are
being installed in a way that maximizes energy production and minimizes potential
issues. They can also provide guidance on system design, maintenance practices, and
answer any questions you may have along the way.
Remember, when it comes to installing solar panels on your roof, it’s better to be safe
than sorry. Invest in professional assistance to ensure a successful and hassle-free
installation process.
Conclusion
In conclusion, the installation of solar panels on the roof is a significant step towards
harnessing renewable energy and reducing dependence on fossil fuels. It offers
numerous benefits, including lower energy bills, reduced carbon footprint, and potential
federal tax credits. However, it is crucial to follow proper installation procedures to ensure
optimal energy production and system performance.
Professional solar installers possess the expertise and experience necessary to install
solar panels correctly and efficiently. They can navigate local regulations and obtain the
required permits, resulting in a hassle-free installation process. Moreover, they have
access to specialized tools and equipment to secure the panels to your roof, ensuring
their longevity and safety.
While hiring a professional installer is advisable, individuals can also install solar panels
on their roofs with the right knowledge and resources. DIY installations are feasible, but it
is essential to educate oneself on system design, maintenance practices, and safety
measures. By understanding the installation process, individuals can maximize the
benefits of solar energy and contribute to a sustainable future.
Whether you choose to hire a professional or install solar panels on your own, the
decision to go solar is an investment in a cleaner and more sustainable future. It not only
benefits your wallet but also the environment. So, take the first step towards renewable
energy and start enjoying the advantages of solar power today.