509-201-4190

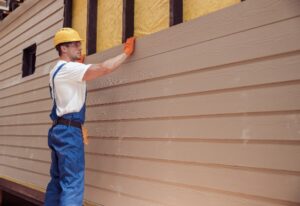
Welcome homeowners! Are you looking to improve the look of your home by installing siding panels? Installing siding can be an intimidating task if you’re not familiar with it, but it doesn’t have to be. In this guide, we’ll walk you through the step-by-step process of installing siding panels so that even a beginner can do it. We’ll cover everything from selecting the right materials and tools to actually putting up the panels. So if you’re ready to get started, let’s dive in!
Disclaimer: This article is intended to provide general guidelines and tips on how to install siding panels. However, it should not be regarded as a comprehensive guide or definitive advice. Before beginning any siding project, homeowners are encouraged to seek professional assistance in order to ensure proper installation and safety. For specific questions and concerns regarding your DIY siding project, we recommend consulting with the knowledgeable team at Advance Roofing LLC who have been proudly serving the Spokane, WA area for many years with the highest standards of quality roofing solutions.
What Is Vinyl Siding?
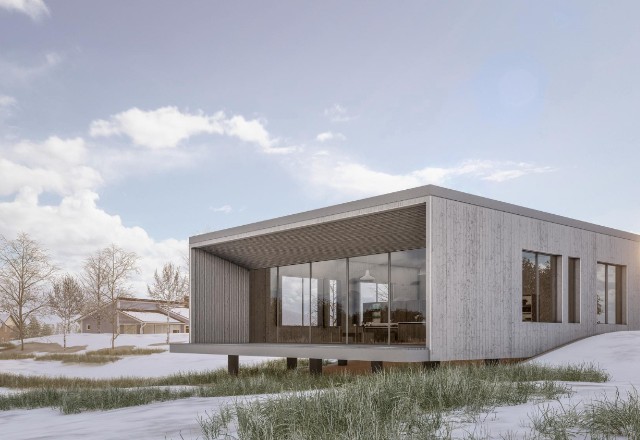
Vinyl siding is an increasingly popular choice among homeowners looking to improve the curb appeal and value of their homes. It is a type of exterior cladding that is made from PVC (polyvinyl chloride) resin, which is a highly durable and weather-resistant material. Vinyl siding is designed to mimic the look of traditional wood siding, while providing a longer lifespan and easier maintenance.
- One of the key benefits of vinyl siding is its low maintenance requirements. Unlike wood siding, which requires regular staining or painting to prevent decay and damage from the elements, vinyl siding is virtually maintenance-free. It doesn’t require painting or staining, and it is resistant to rot, insects, and other common issues that affect traditional wood siding.
- Another advantage of vinyl siding is its versatility. It comes in a wide variety of colors and styles, including those that mimic the look of other types of siding, such as cedar shakes or board and batten. Vinyl siding can also be easily customized with trim pieces and accents, allowing homeowners to create a unique look for their homes.
- Installing vinyl siding is also relatively easy and straightforward, making it a popular choice for DIY homeowners. The panels are lightweight and can be easily cut to size with a utility knife or specialized cutting tool. They are installed on the exterior walls of the home using starter strips and corner posts, which provide a secure base for the siding panels to be attached.
It offers a low-maintenance alternative to traditional wood siding, while still providing the same classic look and feel. With its easy installation and range of styles and colors, vinyl siding is an excellent choice for any siding project.
Benefits of Vinyl Siding Panels

Vinyl siding is a popular choice for homeowners looking to update the exterior of their homes. There are many benefits to using vinyl siding panels, including affordability, energy efficiency, ease of maintenance, and long-lasting durability.
- One of the most notable benefits of vinyl siding is its affordability. It is often less expensive than other siding options, such as wood and metal siding, making it a great choice for budget-conscious homeowners. Additionally, the installation process for vinyl siding is relatively simple and straightforward, meaning that homeowners can save money on installation costs by doing it themselves.
- Another key benefit of vinyl siding is its energy efficiency. When installed correctly with a proper moisture barrier and house wrap, vinyl siding can help to improve the insulation of the home, reducing heating and cooling costs. Some vinyl siding is even designed to reflect sunlight and prevent heat absorption, further increasing its energy efficiency.
- Vinyl siding is also incredibly easy to maintain. It only requires occasional cleaning with soap and water to keep it looking new, and it is resistant to common issues that plague other types of siding, such as insect damage, decay, and weathering. When properly installed with corner pieces, j-channel trims, and soffit lengths, vinyl siding can last for decades without needing to be replaced.
- Finally, vinyl siding is a highly durable option. It is designed to withstand harsh weather conditions, including strong winds, heavy rain, and extreme temperatures. Vinyl siding panels are also less prone to denting or chipping, ensuring that they maintain their appearance and structural integrity for years to come.
Overall, vinyl siding is an excellent choice for homeowners looking for an affordable, energy-efficient, and low-maintenance siding option. Its durability and easy installation make it a long-lasting and attractive choice for any home. Moreover, the variety of colors and styles available allows homeowners to personalize their homes to their liking, adding curb appeal and enhancing their home’s value.
Tools You Will Need

Before you begin installing vinyl siding panels, it’s important to make sure you have all the necessary tools. Having the right tools on hand can make the installation process much smoother and easier. Here are some of the key tools you’ll need:
Utility Knife:
A utility knife is an essential tool for any siding project. You’ll use it to accurately cut the vinyl siding panels to the correct length and shape.
Corner Posts:
Corner posts are used to create a finished edge around the corners of your home. Make sure you have enough corner posts for each corner of your house.
Starter Strips:
Starter strips are used to give your first row of siding something to attach to. Make sure you have enough starter strips for the length of the first row.
Nail Head:
You’ll need to make sure your nails are securely in place. Use a nail head to make sure that your nails are driven in at the correct depth.
Zip Tool:
A zip tool is used to unlock the bottom of a piece of siding that is already in place, so that you can easily slide it out and replace it if needed.
Square Feet:
To accurately measure the amount of siding you’ll need, you’ll need to know the square footage of the area you’re covering.
Snap-Lock Punch:
A snap-lock punch is used to punch holes in the siding panels so that they can be snapped into place.
Galvanized Shingle Nails:
Use these corrosion-resistant nails to securely attach the siding panels to your home. J-Channel Trim:
J-channel trim is used to finish the edges of doors and windows and create a clean look. Soffit Pieces:
Soffit pieces function as a finished ceiling for the underside of the roof’s overhang. You will need soffit lengths and soffit panels to properly install the siding.
It’s important to have all of these tools on hand before you begin any siding project. By having these tools ready, you’ll be able to complete the job quickly and efficiently, ensuring a high-quality and long-lasting installation.
Utility Knife
A utility knife is a crucial tool for any siding project. Whether you’re installing vinyl siding or wooden panels, the utility knife will help you accurately cut the panels to the correct shape and size.
When choosing a utility knife, look for one with a retractable blade for safety and ease of use. Keep extra blades on hand, as the blade can become dull quickly after cutting through multiple panels.
To use the utility knife, carefully measure the panel you need to cut and mark the line with a pencil. Hold the panel securely and use the utility knife to cut along the marked line. Apply firm pressure and make multiple passes if necessary to ensure a clean, accurate cut.
Be careful when handling the utility knife, as the blade is razor sharp and can easily cause injury. Always use it with caution and keep it out of reach of children.
In summary, a utility knife is a necessary tool for any siding project. With the right safety precautions and technique, it can help you achieve precise cuts and a professional looking installation.
Corner Posts
Corner posts play an essential role in the installation of siding panels. These integral components are necessary to form crisp, clean corners and provide stability and support to your entire siding project.
When beginning your siding project, plan to install corner posts first. These pieces are typically made of vinyl and are available in different sizes to accommodate varying wall thicknesses. They are also available in different shapes, such as square or decorative styles, to add curb appeal to your home.
To install corner posts, begin by placing a starter strip at the bottom of the wall where the corner post will be installed. This strip will provide a level surface for the corner post and ensure proper alignment.
Next, measure the height of the corner post and cut it to size, allowing a 1/4-inch gap at the top for expansion and contraction. Place the corner post over the starter strip and secure it with corrosion-resistant nails. Galvanized shingle nails are a good option for this task.
When installing the next row of siding, leave a 1/4-inch gap between the edge of the siding panel and the corner post. This gap will allow for expansion and contraction of the siding panels over time.
If decorative corner pieces or corner moldings are being used, these are typically installed after the corner posts and before the siding panels. These pieces can be snapped into place using a snap-lock punch tool.
Proper installation of corner posts is essential to the overall success and longevity of your siding project. Take the time to ensure accurate measurements, use quality materials and tools, and follow manufacturer instructions for the best results.
Starter Strips
Starter strips are an essential component to installing vinyl siding panels on your home. These strips are made of vinyl and are designed to secure the base of the first row of siding panels. They ensure a level surface for the siding panels and provide a secure attachment point, preventing them from shifting or becoming damaged.
When installing starter strips, it’s important to ensure that the surface is clean and free of debris. This will ensure a smooth and level surface for the first row of siding panels to rest on. Additionally, make sure the starter strip is attached securely to the wall, using galvanized nails or siding screws.
To install the siding panels, simply snap them into place onto the starter strip with the factory edge facing up. It’s important to ensure that the siding panels are level and straight, as this will ensure a professional-looking finished product.
Remember to leave a 1/4-inch gap between the end of each siding panel and any adjoining structure such as corners, window frames, or doors. This allows for expansion and contraction of the siding panels due to weather conditions.
In addition to serving as an attachment point for the first row of siding panels, starter strips also help to prevent water infiltration and can help to ensure your home remains free from moisture damage. They act as a moisture barrier between the siding panels and the house wrap or any existing siding.
Overall, starter strips are a critical component of any siding project. Proper installation of these strips can help to ensure that your siding panels are securely in place for years to come. If you’re considering a siding project for your home, be sure to consult with a professional or refer to manufacturer instructions to ensure that your starter strips are installed correctly.
Nail Head
When installing siding panels, one of the most important aspects to consider is nailing. The nails used should be of top-quality to ensure that they hold the panels in place without damaging them. This is where the importance of nail heads comes into play.
The nail head is the part of the nail that is visible on the surface of the siding panel. You don’t want the nail to be too big or too small, as either of these extremes can have negative consequences. If the nail head is too small, it won’t hold the siding panel as securely, and may even become loose and cause the panel to sag or buckle over time. On the other hand, if the nail head is too big, it may split or crack the siding panel, potentially leading to costly repairs.
To avoid any potential issues with nailing, it’s important to use the proper nail lengths and types, as well as ensure that the nail heads are of adequate size. Commonly used nails for vinyl siding installation include corrosion-resistant nails and galvanized shingle nails. It’s also recommended to use a siding nail slot or utility knife to ensure that the nail is inserted at a proper angle and doesn’t damage the surface of the panel. Pro Tip: Always check with the manufacturer’s recommendations for the specific type of siding panels you are installing.
Remember, the success of your siding project can depend on the little details like nail heads. Taking the time to properly nail each siding piece can not only ensure the longevity of your siding project, it can also provide your home with the curb appeal it deserves.
Zip Tool
If you are planning on installing vinyl siding on your home, then it’s essential to have the right tools on hand. One tool that is particularly handy for installing vinyl siding panels is the Zip Tool.
The Zip Tool is a small, handheld tool that allows you to unlock and remove vinyl siding panels quickly and easily. Its primary purpose is to help you remove a siding panel from the upper row without having to lift the panels above it or take out any nails or fasteners. This makes repairing or replacing damaged siding panels much more manageable and less time-consuming.
To use the Zip Tool, insert its pointed end into the bottom of the siding panel you want to remove and lift upward. You will feel the panel disengage from the upper panel. Next, slide the tool horizontally along the seam of the panel to unlock it fully, then pull the panel straight out towards you.
It’s important to note that the Zip Tool is not recommended for use with wood sidings or higher-end siding materials. It’s specifically designed for vinyl siding panels, and using it on other types of siding may cause damage.
Overall, the Zip Tool can be an incredibly useful tool to have when installing or repairing vinyl siding. It can save you time and effort, allowing you to complete your siding project more efficiently and effectively. So, be sure to add this handy tool to your list if you’re planning on tackling a siding project yourself.
Snap-Lock Punch Tool
If you’re planning on installing vinyl siding panels for your home, then chances are you’ll need to use a snap-lock punch tool at some point in the process. This handy tool is used to create snap-lock punches in the panels’ nailing hem, allowing for secure attachment to the wall without any visible nail heads.
To use the snap-lock punch tool, start by measuring the length of the panel and marking out where the punches need to be made. Typically, snap-lock punches are made around 8-12 inches apart, depending on the specific panel and manufacturer’s recommendations.
Next, position the tool at the desired location and apply pressure to punch a hole through the nailing hem. Repeat this process along the length of the panel, creating a series of evenly spaced snap-lock punches.
When installing the panels, simply slide the newly punched panel into the previous panel’s nailing hem, snapping it securely into place without needing to use any nails or fasteners. This not only creates a clean and professional look, but also helps to prevent any water or moisture from getting behind the siding and causing damage to your home.
While a snap-lock punch tool is an essential tool for any vinyl siding installation project, it’s important to note that they can vary in quality and durability. Look for a high-quality tool made from durable materials that will last through your entire siding project and beyond.
In summary, if you’re installing vinyl siding panels, be sure to add a snap-lock punch tool to your arsenal of tools. With this simple and easy-to-use tool, you can create secure snap-lock punches in your panels and achieve a clean, professional, and long-lasting siding installation.
Measuring and Planning Your Project
Measuring and planning are key aspects of any successful siding project. Without proper measurements and planning, your project may not turn out as you hoped. Here are some tips for measuring and planning your siding project:
Measure the Exterior Walls
The first step in any siding project is to measure the exterior walls of your home. You’ll need to calculate the total area of the walls to determine how much siding you’ll need. To do this, measure the height and width of each wall and multiply the two numbers together to get the square footage.
Consider the Type of Siding
Different types of siding have different installation requirements. For example, wood siding may require additional preparation such as sealing and painting, while vinyl siding is relatively easy to install. Consider the type of siding you plan to use and research installation instructions before beginning your project.
Plan for Corners and Trim
When installing siding, you’ll need to plan for corners and trim pieces. This includes corner posts, J-channel trim, and soffit pieces. Make sure to measure these areas carefully and plan for the correct amount of materials.
Choose the Right Tools
Having the right tools is essential for a successful siding project. This includes a snap lock punch tool, a utility knife, a zip tool, and corrosion-resistant nails. Make sure to have all the necessary tools before beginning your project.
Consider the Condition of Current Siding
Before installing new siding, consider the condition of your current siding. If there are loose boards or damaged areas, you may need to replace or repair them before installing the new siding. This can affect the amount of materials you’ll need for your project.
By taking the time to properly measure and plan your siding project, you’ll ensure a successful outcome and a beautiful, durable exterior for your home.
Measuring the Square Footage of Your Home’s Exterior
Measuring the square footage of your home’s exterior is an essential first step in any siding project. Knowing the total area of the walls will help you determine how much siding you need and create a budget for your project. Here are some tips for accurately measuring the square footage of your home’s exterior:
Break the Walls Into Rectangles
To make measuring easier, break the exterior walls into rectangles. This means measuring the height and width of each section of the wall individually and multiplying the two numbers together. Add up the square footage of each rectangle to get the total square footage of the wall.
Measure Including Doors and Windows
It’s important to measure the area of doors and windows as well since these spaces will not require siding. To do this, measure the height and width of each door and window and multiply them together. Subtract this square footage from the total square footage of the wall to get the amount of siding needed for the remaining space.
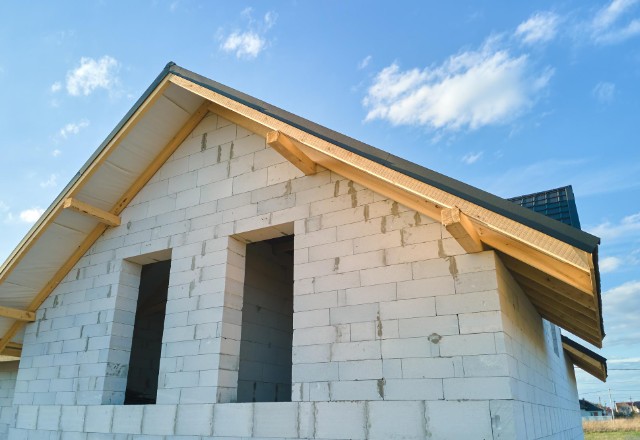
Account for Pitched Roofs
If your home has a pitched roof, you’ll need to account for the vertical walls above the roofline. Measure the height and width of these walls and add their square footage to the total square footage of the exterior walls.
Be Accurate
Measuring accurately is key to a successful siding project. Use a metal square or straight edge to ensure that your measurements are straight and level. Also, make sure to measure to the nearest inch to avoid unnecessary waste or shortage of materials.
In conclusion, measuring the square footage of your home’s exterior is an important first step in any siding project. Breaking the walls into rectangles, including doors and windows, accounting for pitched roofs, and being accurate with your measurements will all help ensure that you have the correct amount of materials needed for your project.
Estimating How Many Vinyl Siding Panels You Need for Your Project
If you’re planning on installing vinyl siding panels on your home, one of the first steps is to figure out how many panels you’ll need to purchase. Estimating the amount of siding required can be a daunting task, but with the right tools and techniques, it can be easily accomplished. Here’s a step-by-step guide to help you estimate how many vinyl siding panels you need for your project:
Measure the Walls:
The first step is to measure the height and width of each wall that requires siding. Use a metal square or straight edge to ensure that your measurements are straight and level. Be accurate and measure to the nearest inch to avoid waste of materials.
Calculate the Area of Each Wall:
Next, multiply the height and width of each wall to calculate the area. For example, if a wall is 20 feet wide and 10 feet high, the area will be 200 square feet (20×10).
Add Up the Areas:
Once you have calculated the area for each wall, add them up to get the total square footage of the walls that require siding. For instance, if you have four walls that require siding, and each wall measures 200 square feet, the total square footage will be 800 square feet.
Exclude the Area of Doors and Windows:
It’s important to exclude the area of doors and windows, as these spaces will not require siding. Measure the height and width of each door and window and multiply them together to calculate their area. Then, subtract this area from the total square footage of the walls that require siding to get the final square footage of siding needed.
Consider the Siding Panels Width:
Siding panels come in different sizes and widths. The size of a panel will determine how many panels are necessary to cover a particular area. To estimate the number of panels required, divide the final square footage by the width of a single siding panel. For instance, if each siding panel is 12 inches wide, you’ll need 100 panels to cover 1,200 square feet (12×100).
Add Extra Panels:
It’s always a good idea to purchase a few extra siding panels to account for waste, cuts, or unforeseen errors during the installation process. Adding about 10% to the total number of panels will ensure that you have enough material to complete the project.
In conclusion, calculating the amount of vinyl siding panels required for your project can be done quickly and effectively by following these steps. It’s important to be accurate, measure carefully, and purchase a few extra panels to ensure that your project runs smoothly from start to finish.
Preparing the Area for Installation
Before starting the installation process, it’s crucial to prepare the area thoroughly. Proper preparation will help ensure that the siding panels are installed correctly and look great for years to come. Here are some essential steps to take:
Remove Loose Boards:
Before installing new siding panels, it’s essential to ensure that the underlying surface is sturdy and in good condition. Remove any loose boards or debris from the area where the panels will be installed. If any boards are particularly damaged, replace them before continuing with the installation process.
Install Moisture Barrier:
Moisture barrier is an essential element for any siding installation. It helps prevent water from seeping behind the siding panels, which can cause rot and other damage to the walls. Install a moisture barrier on the entire house before starting with the siding installation. Make sure to overlap the edges of the barrier and secure it in place with corrosion-resistant nails.
Install House Wrap:
After the moisture barrier, install house wrap on the walls where the siding panels will be installed. House wrap helps prevent air from entering or leaving the walls. It also helps to eliminate drafts and improve energy efficiency. To install the house wrap, start at the bottom of the wall and work your way up, making sure to overlap the edges and secure them with corrosion-resistant nails.
Install Starter Strips:
Starter strips are essential for ensuring that the first row of siding panels is level. They also help to provide a base for the panels to rest on. Install starter strips at the bottom of the wall, making sure to nail them securely in place. The strips should be level with each other and aligned with the rest of the panels.
Install Corner Posts and Corner Moldings:
Corner posts and corner moldings are used to cover the corners of the house where two walls meet. They provide a finished look and help to protect the edges of the panels from damage. Install corner posts and corner moldings on all corners of the house, making sure they are securely in place before continuing with the installation process.
By properly preparing the area for the installation of siding panels, homeowners can help ensure that the process goes smoothly and that the finished product looks great for years to come. Proper preparation can also help prevent damage to the walls and save homeowners time and money in the long run.
Ensuring That Surfaces Are Flat and Cleaned Beforehand
Before installing any siding panels, it’s important to ensure that the underlying surface is flat and free of debris. Failure to follow this step can result in poorly installed siding panels, a botched siding project, and a loss of curb appeal for your home.
- The first thing you should do is to examine the current siding on your home. Are there any loose boards or panels? If so, remove them and replace them with new ones before proceeding with the installation process.
- Next, make sure the surface is clean and free of dirt, dust, and grime. You can prep the surface by using a power washer or a strong hose to blast away any dirt or debris. Afterward, use a cloth or scrub brush to remove any remaining dirt or grime.
- Don’t forget to make sure the surface is flat. You can use a metal square or level to determine if there are any high or low spots. If there are any high spots, remove them with a piece of plywood and a hammer. If there are any low spots, use a piece of plywood to fill them in.
Ensuring the surface is flat and clean allows for a proper angle of the siding to be installed. Additionally, it prevents the siding panels from warping or becoming damaged over time due to uneven surfaces.
Conclusion
Installing siding panels is a great way to give your home an updated and attractive look. With the right preparation, tools, and guidance, any homeowner can successfully install siding panels with minimal difficulty. By taking time to ensure the underlying surface is
flat and free of debris, determine the correct angle of installation, and use the appropriate tools for accuracy, you will be well on your way to enjoying a beautiful new exterior finish for years to come.