509-201-4190

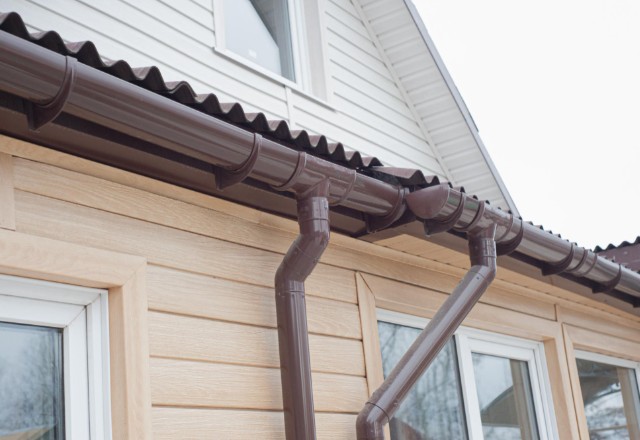
Installing siding on your house is a great way to give it an updated look and make it more weatherproof. But if you’ve never done it before, the process of installing siding may seem intimidating. Don’t worry–we’re here to help! In this article, we’ll provide a step-by step guide for homeowners who want to tackle this project themselves. We’ll cover everything from prepping the house and choosing materials to properly installing the siding and finishing touches. With our guide, you can have your new siding in place in no time!
Disclaimer: This article is provided for informational and educational purposes only. It is not a substitute for professional advice of any kind, and should not be relied upon as such. If you have any questions or concerns about installing siding on your home, please consult a qualified professional at Advance Roofing LLC (advanceroofingllc.com). We are always available to answer your questions and help out in any way we can. For years, Advance Roofing LLC has been providing the Spokane, WA area with unparalleled quality roofing services.
Overview of the Steps Involved in Installing Siding on Your House

Installing siding on your house is an important home improvement project that can enhance your home’s curb appeal and protect it from the elements. With proper installation techniques, vinyl siding can last for decades, making it a low maintenance and cost-effective solution for homeowners. In this step-by-step guide, we will walk through the process of installing vinyl siding on your house, taking you from start to finish and helping you achieve a beautiful and long-lasting result.
What Materials You Will Need to Install Siding on Your House
When it comes to installing siding on your house, having the right materials is key. With the following items, you’ll be equipped to complete the job with precision and efficiency.
- Utility Knife: Used for cutting the siding material to size.
- Corner Posts: Essential for creating a neat and tidy finish around the corners of your house.
- Soffit Pieces: Install under the eaves of your roof to provide ventilation and prevent moisture buildup.
- Starter Strips: These ensure that your first row of siding is level and secure.
- Vinyl Siding Panels: The main material used for your siding installation.
- Under-Sill Trim: Installed below the windows to create a finished look and added protection against the elements.
- Wood Trim: Placed around doors and windows to frame them and add a decorative touch.
- Nail Heads: Needed to secure the siding panels in place.
- Fascia Pieces: Installed on the roofline to create a seamless finish between the roof and siding.
- Snap-Lock Punch: Used to create holes in the siding panels for them to be hung on the nails.
- Zip Tool: Used to unlock the panels if they need to be adjusted or removed.
- Galvanized Nails: Essential hardware for securing the siding in place.
- Locking Edge: The interlocking feature of the siding panels that create a weatherproof seal.
- 1/4-inch Foam Sheathing Strips: Placed beneath the starter strip to create an insulation barrier.
- Metal Starter Strip: Used to secure the first row of siding panels to the house.
- Metal Square: A tool used to ensure a clean, straight edge on the panels.
Overall, by having all of these materials prepared ahead of time, you’ll be setting yourself up for a smooth and successful siding installation process.
Step 1: Prepare Your Home for Installation
Before diving into the installation process, it’s crucial to ensure your home is properly prepared. Taking the time to complete these steps will ensure a smooth and successful installation of your new siding. Here’s what you need to do:
Check Building Codes and Permits

When it comes to installing vinyl siding on your home, it is essential to check the building codes and permits in your area to ensure compliance with local regulations. Building codes and permits are put in place to ensure safety, proper construction techniques, and a high standard of workmanship.
To begin, research the building codes and permit requirements for installing vinyl siding in your area. The best place to start is by contacting your local building inspector or permit department. They will provide you with all the necessary information on requirements and advise on which permits you need to purchase for your project. Make sure to check the cost of these permits so that you can budget accordingly.
It is crucial to follow all the regulations and codes to avoid any potential legal issues. Failure to comply with building codes and permit requirements can result in fines, penalties, or even the removal of the siding.
If you are unsure or have any questions, it is always best to consult a professional or do additional research until you are confident in your knowledge of the regulations. Having a thorough understanding of the building codes and permits is crucial before starting any installation project to ensure your safety and the safety of your home.
Clear Away Any Loose Boards or Trim Pieces

Before installing new siding on your house, it is essential to clear away any loose boards or trim pieces that may interfere with the installation process. Begin by inspecting the area where you will be installing the new siding. Look for any loose boards or missing trim pieces and remove them carefully.
If you encounter any damaged or rotted wood trim, make sure to replace it before installing the new siding. This will ensure that the new siding will adhere correctly and prevent any further damage to your home.
Once all loose boards and trim pieces have been removed, be sure to nail any loose boards back into place securely. This will ensure that the new siding has a solid surface to attach to and prevent any potential shifting or movement once the new siding is installed.
After the area has been cleared of any loose boards or trim pieces, thoroughly scrape off any old caulk on the doors and windows. This will ensure that the new siding is flush with the surface and prevent any potential water damage.
Prior to starting the project, it is recommended to eliminate any external attachments such as downspouts, moldings, lights, or decorations as they may hinder the installation process.
Clean the Exterior Surfaces of Your Home
Before beginning the installation of new siding on the exterior of your home, it is essential to thoroughly clean the surface. This step is crucial to ensuring that the new siding adheres properly and eliminates any potential for dirt, grime, or old paint to cause damage.
One of the easiest and most efficient ways to clean the surface of your home is by using a pressure washer. This tool can blast away any accumulated dirt, grime, or old paint with ease. Begin by choosing a cleaning solution that is safe for use with your pressure washer. Mix the solution as directed and apply it to the surface using the pressure washer.
Be sure to pay attention to any hard-to-reach areas of the surface that may require additional effort. Use a stiff-bristled brush or sponge to scrub these areas to remove any dirt or grime.
If there are any areas of peeling paint, it is important to scrape it off completely before proceeding. Peeling, chipping, or flaking paint can cause the new siding to adhere poorly, leading to potential damage to your home. Once the surface is completely clean and free of debris, let it dry thoroughly before proceeding.
Cut a Piece of Plywood to Fit the Area You Are Working On
When installing siding on your house, it’s important to have a solid base to attach the starter strip to. One way to achieve this is by cutting a piece of plywood to fit the area you are working on. Follow these steps to cut a piece of plywood for your siding installation project:
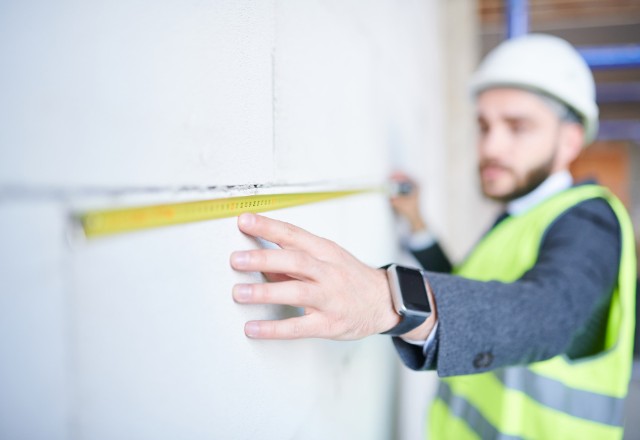
- Measure the dimensions of the area you will be working on using a tape measure. This will ensure you have accurate measurements to transfer to the plywood.
- Next, transfer the measurements to a piece of plywood using a metal square. A metal square will help you achieve straight and precise cuts. Use a pencil to mark the measurements on the plywood.
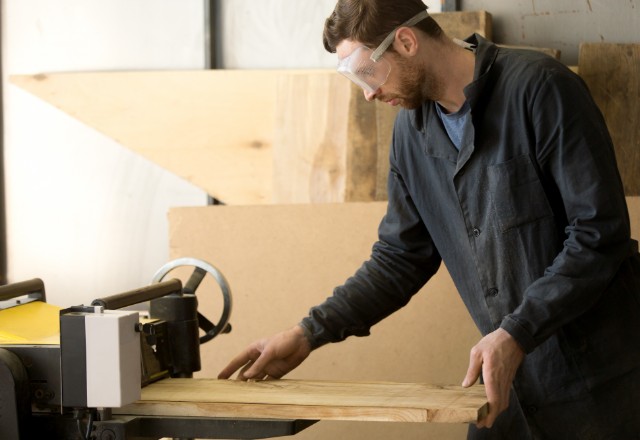
- Before cutting the plywood, put on safety goggles and ear protection to protect yourself from potential harm. A circular saw or table saw can be used to cut the plywood. Using a saw blade with at least 60 teeth will reduce the chances of splintering or chipping the plywood.
- Carefully cut the plywood according to the markings you made. It’s important to make precise cuts to ensure a perfect fit in the area you are working on.
- After cutting the plywood, make sure it fits snugly into the area you are working on. This piece of plywood will serve as a base for the starter strip that you will be attaching in the next step.
By following these steps and taking the proper safety precautions, you can cut a piece of plywood to fit the area you are working on for your siding installation project.
Attach a Starter Strip at the Bottom of the Exterior Wall
To properly install siding on your house, you will need to begin by attaching a starter strip at the bottom of the exterior wall. Here’s how:
- Choose where you want the siding to begin on the house and drive a nail through a point on the chosen starting height.
- Snap a chalk line around the perimeter of the house using the nail as an anchor point. This will ensure that your siding will be level all the way around.
- Nail a piece of plywood along the top of the chalk line. This piece of plywood will serve as a base for the starter strip that you will be
attaching in the next step. Make sure it fits snugly into the area you are working on.
- Now, attach the starter strip to the plywood using galvanized nails. Be sure not to nail it too tightly that it restrains the strip’s movement.
- To avoid warping or buckling of the siding, it is recommended to leave a 1/4-inch gap between each starter strip to allow for expansion.
By following these steps and using the proper materials, you’ll be able to attach a starter strip at the bottom of the exterior wall and begin installing your siding with ease.
Step 2: Measure and Mark Out Where to Place Each Piece of Siding
Before beginning to install siding on your house, it’s crucial to make sure that it will be level throughout the installation. This can be achieved by properly measuring and marking out where the siding will be placed. In this step-by-step guide, we will walk you through how to measure and mark the placement of each piece of siding, ensuring a successful and aesthetically pleasing installation.
Determine How Many Pieces You Will Need for Each Wall Section

Installing siding on your house is a great way to increase its durability and improve its curb appeal. One of the first things you need to do before starting the installation process is to determine how many pieces of siding you will need for each wall section. Here is a step-by-step guide to help you out:
- To ensure adequate coverage of any dips or uneven surfaces, measure the length of each wall section from the eaves to the bottom of the existing siding, starting from the highest point of the wall.
- To determine the number of vinyl siding panels needed for each wall section, divide the length of the section by the width of a panel.
- If the result is not a whole number, round up to the nearest whole number and cut the last piece of siding to fit the remaining space. It’s important to have a 1/4-inch gap between the last panel and any adjacent trim pieces or openings to allow for expansion and contraction.
- For wall sections that require an odd number of panels, you can use vertical trim pieces to cover the remaining space. There are different types of trim pieces that can be used for this purpose, including j channel face, corner trim, and decorative trim.
- To properly measure and cut the vertical trim pieces, start by measuring the length of the space that needs to be covered. For example, if you need to cover a space that is 20 inches wide, cut a piece of trim that is 20 inches long.
- Use a snap-lock punch tool to create locking edges on the top and bottom of the trim piece. This will allow it to snap into place with the panels.
- Attach the vertical trim piece to the wall using galvanized nails that are long enough to penetrate the trim piece and the wall underneath. Use a metal square to make sure the piece is level.
By following these steps, you can determine exactly how many pieces of siding you will need for each wall section and ensure that the installation process goes smoothly. Remember to always follow building codes and obtain any necessary building permits before starting your project.
Measure and Mark Out Where Each Piece Should Go on the Wall Surface
Before you begin installing vinyl siding on your house, it is vital to measure and mark out where each piece of siding should go on the wall surface. This step is crucial in ensuring that your siding looks neat, uniform, and professional.
The first thing you need to do is measure the length of each wall section from eaves to the bottom of the existing siding using a tape measure. It will help you determine the number of panels needed for each section.To determine the amount of vinyl siding panels needed, calculate the ratio of each wall’s length to the width of the panels. If the final panel is not a whole piece, cut it to size accordingly.
Next, you need to snap a chalk line to mark the top of the starter strip. The starter strip is the first strip of siding that goes along the bottom edge of your wall to hold the first row of panels in place. The chalk line will act as a guide for the starter strip’s placement, ensuring that it is level and straight.
After that, measure and mark out the position of the first panel next to a corner post or window trim. It is important to ensure that there is a ¼- inch gap between the edge of the first panel and any adjacent surfaces, such as the corner post or window trim. The gap allows the vinyl siding to expand and contract with temperature changes and prevents it from buckling or warping.
When measuring and marking out subsequent panels, make sure that each panel has a ¼-inch gap. You can use a metal square to ensure that each panel is perfectly aligned and vertical to the starter strip. It is also crucial to overlap panels by at least an inch to avoid water intrusion and drafts.
Measuring and marking out where each piece of siding should go on the wall surface is an essential step in vinyl siding installation. It ensures that your siding looks neat, uniform and is installed correctly. Use a tape measure, chalk line, and metal square to ensure that
your measurements are accurate and straight. Remember to maintain a ¼-inch gap between panels and overlap them by at least an inch to prevent water ingress and drafts.
Step 3: Install Under-Sill and Fascia Trim Pieces
Now that you have measured and marked out the position for each panel, it’s time to move on to installing the under-sill and fascia trim pieces. These trim pieces will give the walls a finished look and will ensure that no gaps are left between the siding and the roof. Here are the steps to follow:
Cut Under-Sill and Fascia Trim Pieces
Cutting under-sill and fascia trim pieces is a crucial step in correctly installing siding on your house. These trim pieces cover the edges of the roof and the area underneath the eaves, respectively. To ensure a secure and professional-looking installation, it’s important to cut the pieces to the appropriate length using the correct cutting method.
Aviation or tin snips are the preferred cutting tools for under-sill and fascia trim pieces. These tools allow for a precise cut and minimize the risk of damaging the pieces.
When cutting the pieces, be sure to leave a ¼ inch gap between each fascia length. This gap allows for expansion and contraction behind the vinyl siding panel and prevents the trim from warping or buckling.
Once the pieces are cut, secure the trim using galvanized nails. It’s important to leave 1/16 of an inch of the shank exposed to allow for movement of the trim.
If you are installing corner trim, ensure that all corners are square using corner posts if necessary. This will ensure a seamless and professional look.
Finally, fill any gaps between the trim pieces with caulk as needed. This will prevent moisture from penetrating the trim and causing damage.
By following these steps, you are well on your way to a successful under-sill and fascia trim installation. Remember, proper cutting methods, allowing for expansion and contraction, and using the right nails are key to a secure and lasting installation.
Check That All Corners Are Square Using Corner Posts if Necessary
When installing corner trim, it’s essential to ensure that all corners are square to achieve a seamless and professional look. This can be achieved by using corner posts if necessary. Here’s how to check that all corners are square using corner posts:
- Install the inside corner pieces using the appropriate method and secure them using nails or screws.
- Next, drop your plumb bob vertically down the corner posts to make sure they are perfectly straight. Any deviations will be noticeable on future rows of siding.
- Once the corner posts are straight, check that all corners are square using the 3-4-5 rule.
- Measure 3 feet from the corner along one wall and mark it with a pencil.
- Then measure 4 feet from the same corner along the intersecting wall and mark it with a pencil.
- Lastly, measure the diagonal distance between these two marks using a tape measure.
- If the distance measures exactly 5 feet, then your corner is square. If not, adjust either the corner post or the adjacent starter strip until the corner is square.
By following these steps, you can ensure that all corners are square and your vinyl siding installation looks professional and seamless. Remember to use corner posts for added stability if necessary and to drop your plumb bob to check that they are straight. The 3-4-5 rule is a reliable method to ensure that corners are square and can help you avoid problems down the road.
Fill Any Gaps Between Trim Pieces With Caulk as Needed
When installing trim pieces on your house, you may find that they don’t fit snugly together, leaving gaps that need to be filled. To fill these gaps, you can use caulk, which is a flexible, waterproof sealant that can be painted over once it dries. Follow these steps to fill any gaps between trim pieces with caulk:
- Identify any areas where the pieces don’t fit snugly together, leaving gaps that need to be filled.
- Apply caulk to the gap, making sure it covers the entire area that needs filling and is at least 1/4 inch thick. The caulk should be applied in a continuous bead along the length of the gap.
- Use a caulking gun to apply a steady, even pressure. This will ensure that the caulk is applied evenly and fills in the gap completely.
- Smooth the caulk with a caulk-smoothing tool or your finger (wearing gloves). This will help to create a neat, even finish and ensure that the caulk is evenly distributed in the gap.
- Allow the caulk to dry for at least 24 hours before painting over it, but follow the caulk manufacturer’s instructions. The drying time may vary depending on the type of caulk you use and the weather conditions.
By filling gaps with caulk, you can ensure that the trim pieces on your house are securely fitted and that your home has a neat and finished look. Remember to always follow the
manufacturer’s instructions when using caulk and other building materials, and to check your local building codes and regulations before starting any home improvement projects.
Conclusion
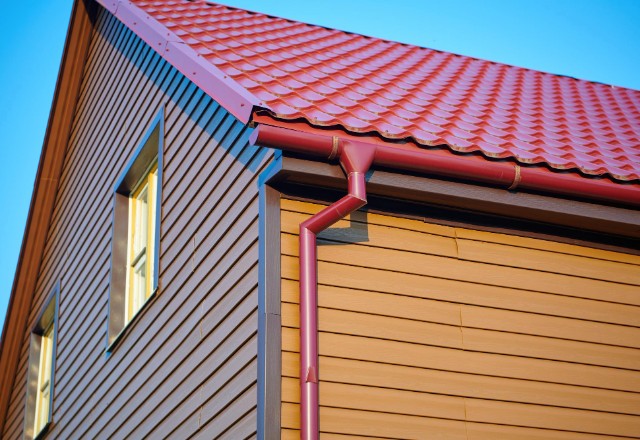
In summary, attention to detail is key when installing siding. By following the right steps, using quality materials and tools, and doing finishing touches with care, your house will have a beautiful and long-lasting exterior.