509-201-4190

Welcome to the world of metal siding. If you’re a homeowner looking to add extra protection and appeal to your home’s exterior, metal siding is an excellent choice. This guide will walk you through the steps of installing metal siding on your home, so you can do it yourself with confidence. We’ll cover the essential tools and supplies, the installation processes for different types of metal siding, and tips for making sure everything looks great in the end. So let’s get started!
Disclaimer: This article is designed to provide general information about installing metal siding and should not be used as a substitute for professional advice. While the information provided in this article is believed to be accurate, it is important to note that every installation situation is unique and that installation of metal siding can be a complex process. For more detailed instructions, we recommend speaking with an experienced contractor or designer who can provide customized solutions and recommendations tailored to your specific needs. Advance Roofing LLC has been proudly offering clients in Spokane, WA the highest standard of quality roofing solutions for many years.
What is Metal Siding?
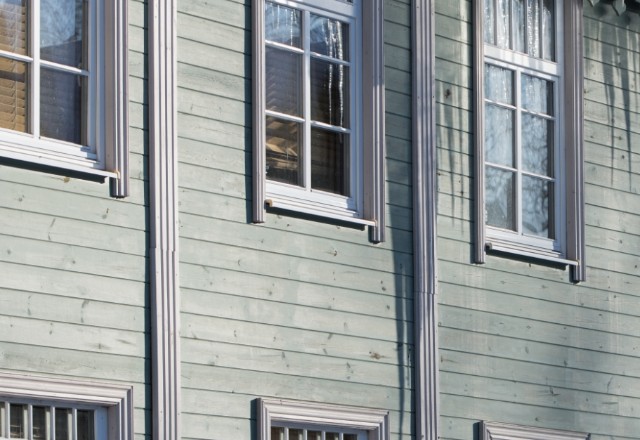
Metal siding is a popular type of siding for homeowners who are looking for a durable and long-lasting option. Made from various types of metals, including steel, aluminum, and copper, metal siding is available in a range of colors and styles. Unlike other types of siding, metal siding is highly resistant to damage, such as insects, water, and fire. It also offers excellent protection against extreme weather conditions such as storms and high winds.
When it comes to metal siding, homeowners have plenty of options to choose from. For example, homeowners can opt for metal roofing panels, ridge caps, corner trim pieces, and starter strips. Additionally, metal siding is also available in various textures and finishes such as ribbed, embossed, and smooth. With so many choices, homeowners can easily find the perfect metal siding to match their home’s style and aesthetic appeal.
Aside from its aesthetic benefits, metal siding also offers numerous practical benefits. For instance, metal siding has been shown to lower energy bills by helping to regulate indoor temperatures. This can be especially beneficial for homeowners in areas with extreme weather conditions. Additionally, metal siding is a cost-effective choice because it requires minimal maintenance and can last for decades with proper care.
Overall, metal siding is a great choice for homeowners looking for a durable option that delivers both aesthetic and practical benefits. With its long-lasting protection against various forms of wear and tear, metal siding can provide homeowners with peace of mind and eventually increase the overall value of their home.
Benefits of Metal Siding
Metal siding has become increasingly popular among homeowners in recent years. This is primarily due to its numerous benefits that make it a great option for enhancing the curb appeal of a home while also providing practical advantages.
- One of the most significant benefits of metal siding is its durability. Unlike other types of siding materials such as vinyl or wood, metal siding
- is made from highly durable materials that can withstand harsh weather conditions, such as high winds, hail, and heavy rain. This means that homeowners who opt for metal siding can rest assured that their home will be protected from costly water damage caused by harsh weather conditions.
- Another advantage of metal siding is its ability to save homeowners money on energy costs. Metal siding is highly reflective, which helps to regulate indoor temperatures by reflecting the sun’s rays away from the home. This is especially beneficial for homeowners living in warmer climates, as it helps to keep their homes cool during the summer months, reducing reliance on air conditioning.
- In addition to its practical benefits, metal siding is also aesthetically pleasing. It is available in a variety of textures and finishes, including ribbed, embossed, and smooth, allowing homeowners to choose the perfect style to match their home’s exterior. Metal siding can also be
- painted and pre-finished in a wide range of colors, making it a versatile option for homeowners who want to customize the look of their home.
- Finally, metal siding is a cost-effective option for homeowners who want a low-maintenance option that will last for years to come. Metal siding requires minimal maintenance, and it is not susceptible to pests, rot, or decay, which can be costly to repair or replace. Homeowners who choose metal siding can expect it to last for decades with proper care.
In conclusion, there are many benefits to installing metal siding on your home. From its durability and energy-saving properties to its versatility and aesthetic appeal, metal siding is a practical and cost-effective option that provides homeowners with long-lasting protection and enhanced curb appeal.
Tools and Materials Needed for Installation
When it comes to installing metal siding, having the right tools and materials is essential for a successful project. Here are some of the tools and materials you will need:
- Tape measure and level: These tools will help ensure that the siding is installed correctly and level.
- Circular saw or snips: A circular saw or snips can be used to make cuts in the siding panels and trim pieces.
- Nail gun or hammer: Depending on your preference and budget, you can use a nail gun or hammer to attach the siding to the house.
- Drill: A drill will be needed to make starter holes for screws or nails.
- Roofing nails or screws: Use roofing nails or screws specifically designed for metal siding to attach the panels and trim pieces to the house.
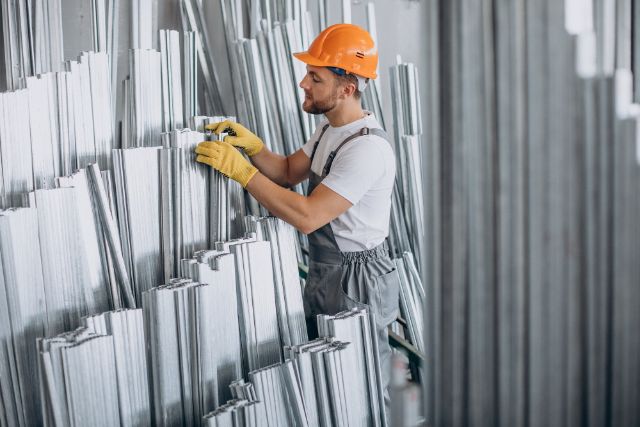
- Metal siding panels: Purchase metal siding panels that are the right size for your home. You’ll want to measure the height and width of each wall to determine how much siding you’ll need.
- Trim pieces: Purchase trim pieces, such as corner pieces and gable trim, to finish off the edges of the siding.
- Ridge caps: If you’re installing metal roofing panels, you’ll need ridge caps to cover the peak of the roof.
- Starter strip: Use a starter strip to begin the first row of siding panels.
- Sealant: Use a sealant to ensure that the siding is waterproof and prevent water damage.
When it comes to installing metal siding, you’ll want to make sure you have all these tools and materials on hand before beginning your project. Having the right tools and materials will not only make installation easier, but it will also ensure that the finished product looks great and stands up to harsh weather conditions.
Preparing the Surface
Before starting your metal siding installation project, it’s essential to prepare the surface and ensure that it’s ready for the siding. This step is crucial as it will help to ensure that your siding is properly installed and will last as long as possible. Here are some tips to help you prepare your home’s surface for metal siding installation:
- Clean the surface: The first step in preparing the surface for metal siding installation is to clean it properly. Any dirt, debris, or other materials on the surface can cause the siding not to adhere properly, so it’s essential to clean the surface thoroughly. You can use a pressure washer or a garden hose to wash away any dirt and debris, and allow the surface to dry completely.
- Repair any damage: After cleaning the surface, it’s important to check for any damages, including cracks, holes, or other imperfections. Repairing any damages before installing the siding will help ensure that the metal siding is attached securely and can last for a longer period. Use a caulking gun to fill any gaps and cracks, and replace any damaged sheathing to prevent any water damage.
- Check for level and plumb: Before installing the siding, it’s crucial to ensure that the surface is level and plumb. If the surface isn’t level, you may need to adjust and correct it before attaching the siding. You can use a level and plumb line to ensure that the surface is straight and level.
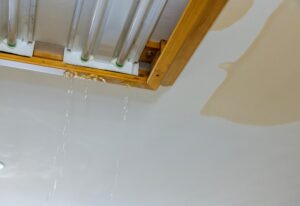
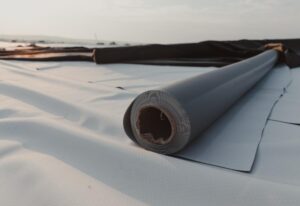
- Install a moisture barrier: One final step to prepare for metal siding installation is to install a moisture barrier layer. This barrier helps to prevent moisture from getting behind the siding, making it easier to prevent water damage. You can use a house wrap or a moisture barrier tape to seal around the openings like windows and doors.
By taking the time to prepare your home’s surface before installing metal siding, you are setting yourself up for success. With clean and properly repaired surfaces, it will be easier for metal siding to be securely installed and last for a long time.
Removing Existing Siding

Removing existing siding can be a challenging task, but it’s essential to ensure that your home’s surface is prepared correctly for new siding installation. The following step-by step guide will help make the process more manageable for homeowners who want to replace their old siding with metal siding.
Step 1: Inspect the Siding
Before removing the existing siding, inspect it carefully to determine the condition. Check for any signs of rot, damage, or wear and tear, as these issues can indicate structural damage underneath the siding. If you notice any significant problems, it may be best to consult with a professional contractor to evaluate and address the issues before installing new siding.
Step 2: Gather Your Tools
To begin the removal process, you’ll need some essential tools, including a crowbar, hammer, flathead screwdriver, pliers, and a utility knife. Wear protective gear, including gloves and goggles, to avoid injuries.
Step 3: Remove the Start Strip
The start strip is the first layer of the siding, typically located at the bottom of the wall. Use a crowbar to pry it loose from the wall gently. Make sure to avoid damaging the starter strip, as you’ll need it for the new siding installation.
Step 4: Remove the Rest of The Siding
Once the start strip is removed, use a flathead screwdriver or pliers to remove any exposed nails or screws in the siding. Gently pry the siding away from the surface using a crowbar, starting from the top and working your way down. Be careful not to damage the underlying sheathing or the flashing.
Step 5: Inspect the Sheathing
After removing the siding, inspect the sheathing for any signs of wear or damage. If necessary, replace the damaged sheathing to ensure that the new siding can attach securely.
Step 6: Clean and Prep the Surface
The final step is to clean the surface thoroughly to remove any remnants of the old siding and debris. After cleaning, make sure the surface is dry and level before installing the new siding.
In conclusion, removing existing siding may seem like a daunting task, but with the right tools and techniques, homeowners can prepare their surfaces for new metal siding installation. Remember to take your time and follow the proper steps to ensure a successful project.
Step 6: Clean and Prep the Surface
Cleaning the surface area is a crucial step in the process of installing new metal siding. Any remnants of the old siding or debris left on the surface can affect the new siding’s integrity, causing weak spots that could become a breeding ground for mold, mildew, and algae. Here are some critical steps to take while cleaning the surface:
- Remove any remaining debris – Start by sweeping away or using a leaf blower to remove any remaining debris, such as dirt, dust, pebbles, or leaves.
- Power wash the surface – After removing the debris, it’s time to clean the surface using a power washer. A pressure washer produces a powerful stream of water that can remove built-up grime, grease, mold, and other contaminants. Make sure to use the appropriate nozzle for the power washer, as some metal sidings could dent or warp due to extreme pressure.
- Scrub the surface – After power washing, there could be some areas that require a little extra cleaning. For example, rust stains, oil stains, and heavy dirt buildup might not come off with a pressure washer alone. In these scenarios, you can use a stiff brush and a cleaning solution made for removing rust and heavy stains.
- Let the surface dry – After cleaning and scrubbing the surface, let it dry completely before installing the new siding. Any moisture left on the surface could cause the metal siding to corrode and weaken over time.
- Inspect for damage – While cleaning the surface, inspect it for any signs of damage or wear and tear. If you find any areas that need repair, fix them before installing the new siding to ensure a smooth installation process.
By following these steps, you can ensure a clean and level surface area to install your new metal siding. A clean surface not only improves the overall aesthetic appeal of the siding but also prevents water damage and ensures the durability of the siding.
Checking for Damage or Rotting Wood
When it comes to installing metal siding, it’s important to ensure that the surface underneath is sound and secure. Checking for damage or rotting wood is a crucial step in this process as it can affect the integrity of the siding, and potentially lead to further issues down the line.
Here are some steps to take when checking for damage or rotting wood:
- Check for signs of damage – Start by examining the surface underneath the existing siding for any visible signs of damage. Look for cracks, dents, or holes in the wood, as well as any water stains or discoloration. If you notice any issues, mark them off so you can address them later.
- Tap the wood – Next, use a hammer or mallet to tap on the surface underneath the existing siding. Listen for any hollow sounds, which can indicate rotting wood. You may also notice that the wood feels spongy or soft to the touch in certain areas, which can also indicate rot.
- Remove the existing siding – If you suspect there is any damage or rotting wood underneath the existing siding, it’s important to remove it before installing the new metal siding. This will allow you to thoroughly inspect the surface and make any necessary repairs.
- Address any issues – If you find any issues with the surface, such as rotting wood or water damage, it’s important to address them before installing the new siding. This may involve replacing portions of the wood with fresh lumber, or applying a sealant or preservative to prevent further damage.
By taking the time to thoroughly check for damage or rotting wood before installing metal siding, you’ll be able to ensure a secure and long-lasting finish that will protect your home for years to come.
Installing Batten Boards (Optional)
Installing batten boards is an optional step when it comes to installing metal siding but it can add an extra layer of protection and aesthetic appeal to your home.
Batten boards are thin strips of wood or metal that are mounted vertically on the exterior walls of your home. They are installed over the sheathing and under the metal siding panels. These boards create a small gap between the siding and the wall, allowing air to circulate and prevent moisture buildup.
To install batten boards, start by measuring the height of your wall and cutting your boards to the correct size. Then, mark the locations where you want to install the boards on the wall to ensure they are spaced evenly. You can use a chalk line or a level to ensure that your lines are straight.
Once you have your markings, begin mounting the batten boards onto the wall using screws or nails. Be sure to use the appropriate size and type of fasteners for your chosen batten board material. Space the screws or nails about 16-20 inches apart vertically down the board and make sure they are driven in securely.
After securing the boards to the wall, it’s time to install the metal siding panels. Begin at the bottom of the wall and work your way up, making sure each panel overlaps with the previous one to create a watertight seal. Use roofing nails or screws to secure the panels to the batten boards and the sheathing beneath.
Installing batten boards can provide benefits beyond just aesthetic appeal. Not only do they add an extra layer of insulation to your home, but they can also help prevent moisture buildup that can cause rotting or warping of your siding and sheathing. It’s important to note that this step is optional and may not be necessary for every home, so be sure to consult with a professional before you begin the installation process.
Calculating Siding Needs
If you’re planning on installing metal siding on your home, one of the first steps you’ll need to take is calculating how much material you need. This can be a little overwhelming, especially if you’re not familiar with the process. But don’t worry – it’s actually quite simple once you know what to do.
The first thing you’ll want to do is measure the height and width of each side of your home. You can do this using a tape measure or a measuring wheel. Make sure to measure from the ground to the eaves for the height and from corner to corner for the width. Once you have these measurements, you can calculate the square footage of each side by multiplying the height by the width.
Next, add up the square footage of all the sides together to get the total square footage of your home’s exterior. This number will be a good starting point for figuring out how much siding material you need.
However, it’s important to note that most manufacturers recommend adding an extra 10% to your total square footage to account for waste and cutting. This means you’ll need to purchase more than just the exact amount of material you need to cover your home.
It’s also a good idea to consider the specific type of siding you plan to install. Metal siding panels come in different lengths, widths, and thicknesses, so you’ll need to factor this into your calculations. Research the type of metal siding you want to install and check the manufacturer’s instructions for guidance on how much extra material you need to purchase.
Calculating your siding needs might seem like a daunting task, but with a little bit of basic math and some careful planning, you’ll be able to confidently order the right amount of material for your home. Remember to add extra material to your calculations to account for waste and cutting, and consider the specific type of siding you plan to install for a more accurate estimate. With these tips in mind, you’ll be one step closer to a successful siding installation.
Calculating Square Footage Needed for Each Piece of Siding

Calculating the square footage needed for each piece of siding is an important step in the installation process. This is because it helps you determine the exact amount of material you need to purchase and ensures that you won’t run out of siding halfway through the project.
To start, you’ll need to measure the height and width of each section of your home’s exterior. This includes the walls, gables, and any other areas that will require siding. Once you have these measurements, you can multiply the height by the width to determine the square footage of each section.
For example, let’s say that one section of your home’s exterior is 12 feet high and 20 feet wide. To calculate the square footage, you would multiply 12 by 20, which equals 240 square feet.
It’s important to note that not all sections of your home’s exterior will be square or rectangular in shape. Some may have irregular shapes or cutouts for windows and doors. To calculate the square footage for these sections, you’ll need to break them down into smaller, more manageable shapes. For instance, you could break down a section with a cutout for a window into two separate rectangles and add the square footages together.
Once you’ve calculated the square footage for each section, you’ll need to factor in any waste or cutting. Manufacturers typically recommend adding an extra 10-15% to your total square footage to account for waste and cutting. This means that if your total square footage is 1,000 square feet, you’ll need to purchase at least 1,100-1,150 square feet of siding material.
Calculating the square footage needed for each piece of siding may seem like a daunting task, but it’s essential to ensuring a successful installation. By taking the time to measure each section of your home’s exterior and factoring in waste and cutting, you can be confident that you’ll have enough siding material to complete the job without any hiccups.
Measuring and Marking Areas to be Covered with Siding Panels
When it comes to installing metal siding on your home, measuring and marking the areas that will be covered with siding panels is crucial. This step is essential in ensuring that you purchase enough material and that the installation process goes smoothly.
To begin, you’ll need a measuring tape, pencil, paper, and a calculator. Start by measuring each wall’s height and width, including doors and windows. Use the measurements to calculate the square footage of each section, as we outlined in the previous section.
Next, make a rough sketch of each section of your home and label the dimensions. This will help you keep track of each section and avoid confusion later on. You can also use colored pencils or markers to differentiate between sections or areas that require special attention.
Now that you have your measurements and sketches, it’s time to mark the areas. Use a pencil to lightly mark the boundaries of each section of your home that will be covered with siding. This will give you a clear visual representation of where the siding panels will go and help you avoid mistakes during installation.
If you have irregular-shaped sections or areas that require special attention, use tape or string to outline the boundaries. This will ensure that you don’t accidentally cover up windows, vents, or other important features.
Once you’ve marked your areas, double-check your measurements and calculations to ensure that you have enough material. Manufacturers typically recommend adding an extra 10-15% to your total square footage to account for waste and cutting. This means that if your total square footage is 1,000 square feet, you’ll need to purchase at least 1,100-1,150 square feet of siding material.
Installing the Starter Strip and Trim Pieces
Now that you’ve selected your metal siding material, it’s time to start the installation process. One of the first steps in the process is installing the starter strip and trim pieces. These components are crucial in ensuring a smooth and successful installation.
The starter strip is a thin piece of metal that is installed at the bottom of the wall. It’s essential for providing a straight and level surface for the first row of siding panels. Many starter strips also feature a drip edge that helps to prevent moisture from seeping behind the siding and causing water damage to the structure of the house.
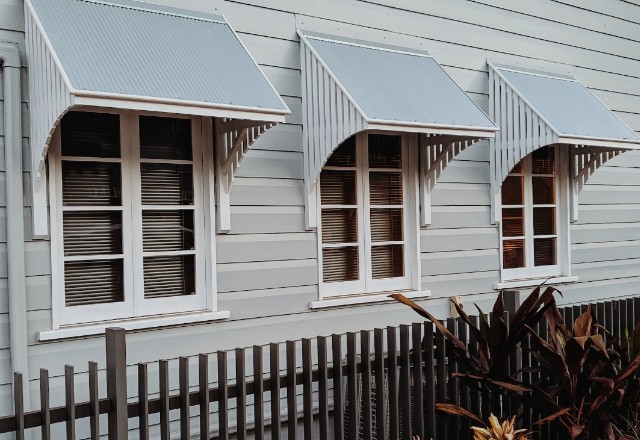
Trim pieces are another important element of metal siding installation. They are utilized to cover the edges and corners of the siding panels, creating a clean and polished look. Corner trim pieces are used at the corners of the house, while gable trim is installed on the roof line. Trim pieces can be purchased in a variety of styles and colors to match your desired aesthetic.
When installing the starter strip, ensure that it’s level and straight. Use roofing nails or screws to secure it to the sheathing of the house. Make sure to leave a small gap between the bottom of the starter strip and the ground to allow for proper ventilation.
Trim installation is also critical. Begin by measuring the length of the area you need to cover and cut the trim to size. Make sure to leave a small gap (approximately 1/8 inch) between the trim and the siding panels to allow for natural expansion and contraction of the metal. Use roofing nails or screws to secure the trim in place, taking care to place the fasteners in the pre-drilled holes.
Overall, installing the starter strip and trim pieces may seem like a small task, but it’s a crucial component to ensure a successful and long-lasting metal siding installation. Take your time during this step of the process, and don’t hesitate to enlist the help of a professional if necessary.
Cutting the Starter Strip to Fit Around Doors and Windows
One crucial step in installing metal siding is cutting the starter strip to fit around doors and windows. This task can be a bit tricky, but with the right tools and techniques, it can be done with ease.
- First, measure the distance between the door or window frame and the bottom of the starter strip. You’ll need to add an additional ¼ inch to this measurement to allow for expansion and contraction of the metal. Use a straight edge to mark the measurement on the starter strip.
- Next, use a pair of tin snips or a circular saw with a metal cutting blade to cut the starter strip. Take your time and use a steady hand to ensure a clean and straight cut. Be sure to wear protective gloves and eyewear while cutting the metal to avoid injury.
- After you’ve cut the starter strip to the correct length, it’s time to install it. Position the strip underneath the door or window, making sure it’s level and straight. Use roofing nails or screws to secure it to the sheathing of the house, ensuring that the fasteners are placed in the pre-drilled holes.
- It’s crucial to leave a small gap between the bottom of the starter strip and the ground. This gap allows for proper ventilation and prevents moisture from seeping behind the siding and causing water damage to the structure of the house.
Cutting the starter strip to fit around doors and windows is an essential step in installing metal siding. With the right tools and techniques, you can achieve a professional-looking finish while ensuring the longevity and durability of your siding. Take your time and follow these tips, and you’ll have a beautiful and functional metal siding installation in no time.
Other steps
After securing the starter strip and installing corner trim pieces, the next step in your metal siding installation process is to install corner posts, corner moldings, and outer edges. These parts are important for giving your walls a polished and finished look, as well as providing support for the siding panels.
Once the corner posts and moldings are in place, you can start installing your siding panels. Begin by aligning the panels with the starter strip and nailing them into place. Make sure to overlap panel edges and leave space for expansion and contraction as the panels may expand or contract with temperature and weather changes.
To protect the walls and support the siding, it’s important to install drip edges and utility channels. Drip edges are installed at the bottom edge of the roofline to prevent water damage, while utility channels provide a place for electrical wires to run through without causing damage to the siding.
Ventilation is also key, so consider installing ridge vents and caps to prevent moisture buildup and increase energy efficiency.
Finally, add any finishing touches such as vinyl soffits or additional trim pieces for aesthetic appeal. By following these steps, you can ensure a successful metal siding installation that will enhance your home’s curb appeal and protect it for years to come.
Conclusion
In conclusion, installing metal siding can provide a homeowner with numerous benefits. Not only does it enhance the aesthetic appeal of a home, but it can also increase the home’s energy efficiency and overall value. With a fair share of options available in the market, homeowners can select the ideal type of metal siding that best suits their preferences and budget.
Installing metal siding can be a large project, but it’s worth it in the long run. By following a step-by-step guide and taking the necessary precautions, homeowners can install durable materials that can withstand harsh elements and last for years to come.
It’s important to note that while metal siding is a great investment, it’s not the only option available. Vinyl siding, cedar siding, brick siding, and shingle siding are some of the common types of siding material that homeowners can choose from, each with its own pros and cons. It’s always best to consult an expert and weigh the costs and benefits before making a decision.
In summary, metal siding installation can improve a home’s curb appeal, provide protection against water damage, and help reduce energy costs. With proper installation and maintenance, metal siding can be a long-lasting and cost-effective solution for homeowners looking to enhance their home’s exterior.