509-201-4190

Are you looking for an easy and cost-effective way to improve the look of your home? Installing metal roofing over existing shingles is one of the most popular home renovation projects today. Not only does it add a modern touch to your home, but it also increases its energy efficiency and durability in the long run. But how can you achieve a professional finish when installing metal roofing over shingles? This beginner’s guide will walk you through the process step by step, so that you can get a beautiful roof that lasts.
Disclaimer: While this guide is intended to provide a basic overview on how to install a metal roof over shingles, it is not a substitute for professional advice. If you have any doubts or questions regarding the installation process, please seek the assistance of an expert in metal roofing before proceeding with your project. Additionally, Advance Roofing LLC has been proudly serving the Spokane, WA area for many years with superior quality roofing services. We are always here to help if you have any further questions about installing metal roofs over shingles – don’t hesitate to contact us today!
What is Metal Roofing?
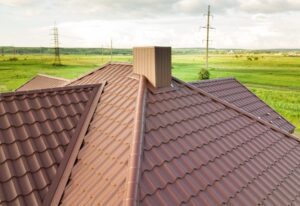
Metal roofing is an attractive and durable option for homeowners looking to upgrade the look of their home. It is made from metal sheets and can come in a variety of colors to match any exterior design. Metal roofing provides superior protection against weather damage, fire, and pests; it also helps keep your energy costs down by reflecting heat away from your home during summer months. Additionally, metal roofing is extremely lightweight compared to other roofing materials like asphalt shingles, making it easier and more cost-effective to install. With proper maintenance, a metal roof can last up to 50 years or more, making it an excellent long-term investment in your home.
Metal roofing is the perfect solution for homeowners looking to add lasting value and protection to their home. With its durability, fire-resistance, and energy-saving properties, it’s no wonder more and more people are choosing metal roofing over traditional shingles. But don’t just take our word for it – read on to learn about the top benefits of installing metal roofing over shingles!
Benefits of Installing Metal Roofing Over Shingles
Installing metal roofing over shingles can be a great way to upgrade your home. Metal roofing is more durable than traditional shingles, meaning it will last longer and better protect your home from the elements. It also offers superior fire-resistance, helping to keep your family safe in the event of an emergency. And because metal roofing reflects heat away from your home, you’ll see a decrease in energy costs during summer months. Additionally, metal roofs are much lighter than other types of roofing materials, making them easier and less expensive to install. With proper maintenance and care, a metal roof can last up to 50 years or more – making it an excellent long-term investment for any homeowner looking for lasting value and protection.
Preparing for the Project
Installing metal roofing over shingles can be a complex project, so it’s important to prepare properly. Before you begin, make sure your roof is in good condition and that all of the underlying components are in good shape. Check for any signs of water damage or rot, and repair any issues before proceeding. Take the time to remove all the existing shingles from the roof and inspect the area for any potential weak spots or structural issues. If there are any, make sure to fix them before continuing with installation. Finally, ensure that you have all of the necessary tools and materials for installation – such as screws, nails, sealants, flashings and gutters – as well as protective clothing and safety equipment like goggles, gloves and a hard hat. Taking these steps will help ensure a successful installation of your new metal roof.
Installing a metal roof over shingles is not a job to be taken lightly – it requires proper preparation, the right tools and materials, and safety precautions. With these steps in place, you’ll be well on your way to having an attractive and long-lasting roof over your home. But don’t forget one of the most important steps – properly inspecting the roof deck before installation. Stay tuned for more information about this critical step!
Properly Inspect the Roof Deck
When it comes to installing a metal roof over shingles, one of the most important steps is properly inspecting the roof deck before installation. This step is critical in ensuring that your new metal roof is installed correctly and securely. Inspecting the roof deck involves looking for any signs of wear or damage, such as water stains, rot, or missing shingles. It’s also important to look for any weak spots or structural issues that may cause problems during installation. Once you have identified any areas of concern, repair them before continuing with the installation process. Taking the time to properly inspect your roof deck before installing a metal roof can mean the difference between having a secure, long-lasting roof over your home and one that won’t stand up to the elements.
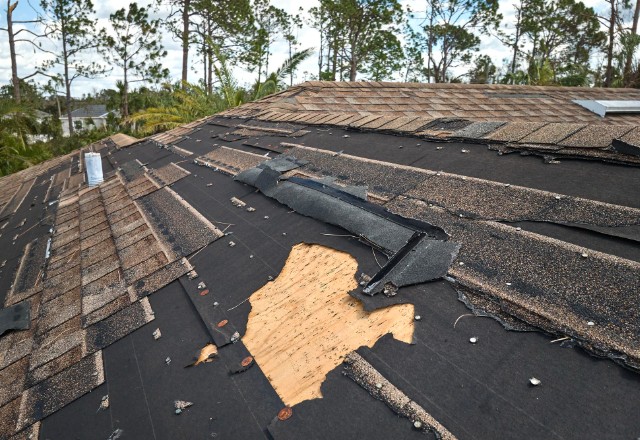
Remove Existing Shingles
Removing existing shingles is an essential step when installing metal roofing over shingles. Before you begin the installation process, you’ll need to safely and carefully remove all of the existing shingles from your roof deck. This can be a tricky task, so it’s important to take the necessary precautions and use the right tools for the job. Start by removing any nails that are holding down the shingles with a pry bar or hammer. Then, carefully pull up each row of shingles until they are all removed from your roof deck. Be sure to dispose of all debris in a safe manner so that it doesn’t become an issue during installation or in the future. With careful attention paid to safety and proper disposal, you’ll have taken an important step toward ensuring a successful metal roof installation over your existing shingle layer.
Install New Sheathing if Necessary
Once you have removed all of the existing shingles, you’ll need to check the roof deck for any signs of damage or deterioration. If there are any issues with the existing sheathing, you may need to install new sheathing before installing metal roofing. Installing new sheathing is a fairly straightforward process and should be done in accordance with local building codes. Start by measuring out an area that is slightly larger than the piece of sheathing being used. Cut the plywood to size using a circular saw and secure it into place using nails or screws. Once all of the new sheathing is installed, make sure that it is level and secured properly before moving on to installing the metal roofing panels.
Install Roof Anchors as Needed
Installing roof anchors is an important step in making sure that your metal roofing is properly secured to the underlying structure. Roof anchors help to spread the load of the metal roofing panels evenly across the entire surface while also providing a secure point of attachment. The number and placement of roof anchors will depend on several factors, including the size and pitch of the roof, as well as local building codes. Generally speaking, it’s best to install roof anchors every 24 inches along each truss or rafter and at least 8 inches from any edge of the roof deck. When installing roof anchors, make sure to use lag screws or bolts that are rated for outdoor use and sized appropriately for the job, as improperly sized fasteners can lead to serious problems down the line. Additionally, make sure that all fasteners are installed securely and their heads are flush with or slightly below the surface of the material they’re being used on.
Selecting the Right Materials and Tools for Your Project
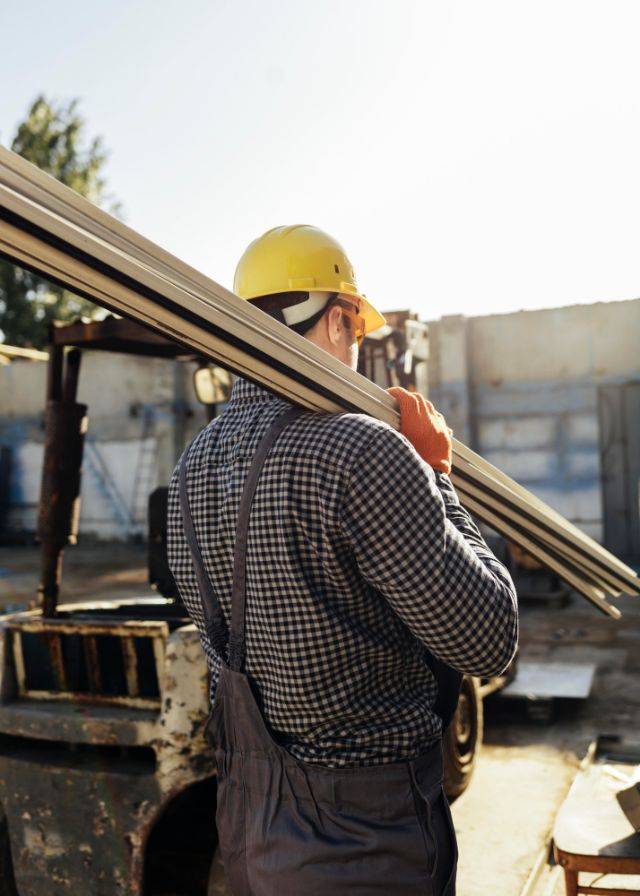
Selecting the right materials and tools for your project is essential for achieving a professional finish. First, you’ll need to select the type of metal roofing that best suits your needs – galvanized steel, aluminum, copper or zinc. Each of these materials has its own unique advantages and drawbacks, so it’s important to do your research before making a decision. Once you’ve chosen the material, you’ll need to select compatible fasteners and other hardware such as flashing and sealant. Make sure that all of these items are designed specifically for use with metal roofing and rated for outdoor use. Finally, you’ll need some basic tools like a hammer drill, circular saw, screwdriver and socket set in order to install the roofing properly. With all of these items chosen carefully and thoughtfully, you should be well on your way towards achieving a professional finish on your metal roofing project!
By selecting the right materials and tools for your project, you can ensure that your metal roofing installation will be completed with a professional finish. Now it’s time to take the next step: choosing the right type of metal roofing panel – stay tuned for more!
Choose a Type of Metal Roofing Panel
Choosing the right type of metal roofing panel is a crucial part of your installation project. Depending on the climate, budget and aesthetic preferences, there are many different types of metal roofing panels to choose from. For example, galvanized steel is an economical option that offers good durability and weather protection while aluminum can be a great choice for coastal areas due to its corrosion-resistant properties. Copper and zinc are ideal options for homeowners who want their roof to have a more luxurious appearance, but they come with higher associated costs. No matter which type you choose, make sure that it meets local building codes and is rated for outdoor use in your area. With all this in mind, you should now be well equipped to find the perfect metal roofing panel for your installation project!
Calculate How Much Material is Needed for the Entire Roof Area
Calculating how much material is needed for the entire roof area is a key step in any metal roofing installation project. To get an accurate measurement, start by measuring the length and width of your roof. Then, multiply these two numbers together to get the total square footage of the roof area. This number will tell you approximately how many panels or sheets of metal you’ll need to purchase. It’s also a good idea to add an extra 10-15% onto this number to cover any potential waste or unexpected problems that may arise during the installation process. Once you have your materials ready, it’s time to begin installing your new metal roof!
Gather All Necessary Tools for Installation of Metal Roofing Panels
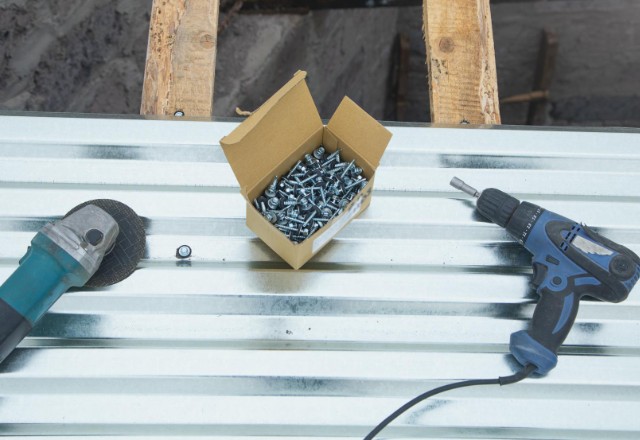
Having the right tools on hand is essential for a successful metal roof installation. Start by gathering all of the necessary tools and materials, such as an electric drill with appropriate bits, a hammer, tin snips or other metal cutting tools, a step ladder, protective goggles and gloves, and silicone caulk. You’ll also need to have the right fasteners for your specific type of metal paneling. If you are unsure which type to use, consult your local hardware store or review the manufacturer’s instructions for more information. Once you have all of your supplies together, it’s time to get started!
Installing the Metal Roofing Panels
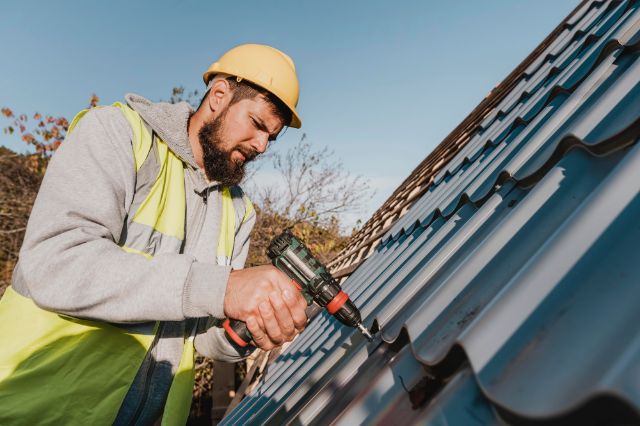
Once you have all of your tools and materials gathered, it’s time to begin installing the metal roofing panels. Start by measuring your roof’s pitch and making sure the panels will fit properly. If you plan on using a rubber membrane, make sure to roll out enough material to cover the entire area. You’ll then need to attach the metal panels to the existing shingles or plywood decking. Using self-tapping screws or nails, secure the panels into place beginning at one end and working your way up or down towards the other side. Make sure not to overdrive the fasteners as this can cause damage to the panel or membrane below. After all of your metal roofing is installed, go back over each panel and seal any exposed seams with silicone caulk for a professional finish.
Once your metal roofing is successfully installed, you can rest easy knowing that your home or building is now protected from the elements. Now it’s time to start at the eaves and work your way up toward the ridge cap for a complete installation that will last for years to come!
Start at the Eaves and Work Upward Toward the Ridge Cap
Starting at the eaves and working your way up toward the ridge cap is essential for a successful metal roofing installation. This is because the eaves are the lowest part of the roof and therefore need to be securely attached first in order to provide a good base for the rest of the roofing panels. To begin, you’ll want to attach your starter strip over any existing shingles or plywood decking. Once this is done, you can start from one end of your roof and slowly work your way up towards the ridge cap, making sure all panels are securely fastened with self-tapping screws or nails along the way. As you get closer to the ridge cap, make sure to use long pieces of metal flashing that extend beyond both sides of the ridge in order to ensure water will not leak through. Finally, seal any exposed seams with silicone caulk for a professional finish. With these steps complete, you can rest easy knowing that your new metal roof will last for many years to come!
Secure Each Panel with Nails or Screws as Recommended by Manufacturer
Attaching your metal roofing panels securely is essential for a professional finish. To do this, make sure to use nails or screws as recommended by the manufacturer. Nails are often used when attaching metal roofing to plywood decking, while self-tapping screws should be used when attaching to other surfaces such as asphalt shingle roofs. Make sure to use enough nails or screws so that each panel is securely fastened and won’t move in the wind. Additionally, you’ll want to make sure that you are using the correct type of fastener for the material being secured (i.e., wood screws for wood decks and self tapping screws for asphalt shingle roofs). With each panel properly secured, you can be sure that your new metal roof will stay in place and provide lasting protection for years to come!
Add Ridge Caps to Finish Off Edges of The Roof’s Peak
Ridge caps are the essential finishing touch for any metal roof installation. They provide an attractive and professional look to the roof’s peak, while also providing extra protection against water infiltration. Installing ridge caps is a simple process that can be done with basic tools and materials. To begin, measure the length of the peak from end to-end and cut one ridge cap piece to that length. Next, apply a generous bead of caulk along the top edge of both sides of the roof’s peak and press the ridge cap into place. Finally, secure it with galvanized nails or screws placed every 12 inches along its length. With these steps complete, your metal roof will have a finished look that will last for years to come!
Safety Considerations When Installing a Metal Roof Over Shingles
Having the right tools on hand is essential for a successful metal roof installation. Start by gathering all of the necessary tools and materials, such as an electric drill with appropriate bits, a hammer, tin snips or other metal cutting tools, a step ladder, protective goggles and gloves, and silicone caulk. You’ll also need to have the right fasteners for your specific type of metal paneling. If you are unsure which type to use, consult your local hardware store or review the manufacturer’s instructions for more information. Once you have all of your supplies together, it’s time to get started!
Installing the Metal Roofing Panels
Once you have all of your tools and materials gathered, it’s time to begin installing the metal roofing panels. Start by measuring your roof’s pitch and making sure the panels will fit properly. If you plan on using a rubber membrane, make sure to roll out enough material to cover the entire area. You’ll then need to attach the metal panels to the existing shingles or plywood decking. Using self-tapping screws or nails, secure the panels into place beginning at one end and working your way up or down towards the other side. Make sure not to overdrive the fasteners as this can cause damage to the panel or membrane below. After all of your metal roofing is installed, go back over each panel and seal any exposed seams with silicone caulk for a professional finish.
Once your metal roofing is successfully installed, you can rest easy knowing that your home or building is now protected from the elements. Now it’s time to start at the eaves and work your way up toward the ridge cap for a complete installation that will last for years to come!
Start at the Eaves and Work Upward Toward the Ridge Cap
Starting at the eaves and working your way up toward the ridge cap is essential for a successful metal roofing installation. This is because the eaves are the lowest part of the roof and therefore need to be securely attached first in order to provide a good base for the rest of the roofing panels. To begin, you’ll want to attach your starter strip over any existing shingles or plywood decking. Once this is done, you can start from one end of your roof and slowly work your way up towards the ridge cap, making sure all panels are securely fastened with self-tapping screws or nails along the way. As you get closer to the ridge cap, make sure to use long pieces of metal flashing that extend beyond both sides of the ridge in order to ensure water will not leak through. Finally, seal any exposed seams with silicone caulk for a professional finish. With these steps complete, you can rest easy knowing that your new metal roof will last for many years to come!
Secure Each Panel with Nails or Screws as Recommended by Manufacturer
Attaching your metal roofing panels securely is essential for a professional finish. To do this, make sure to use nails or screws as recommended by the manufacturer. Nails are often used when attaching metal roofing to plywood decking, while self-tapping screws should be used when attaching to other surfaces such as asphalt shingle roofs. Make sure to use enough nails or screws so that each panel is securely fastened and won’t move in the wind. Additionally, you’ll want to make sure that you are using the correct type of fastener for the material being secured (i.e., wood screws for wood decks and self tapping screws for asphalt shingle roofs). With each panel properly secured, you can be sure that your new metal roof will stay in place and provide lasting protection for years to come!
Add Ridge Caps to Finish Off Edges of The Roof’s Peak
Ridge caps are the essential finishing touch for any metal roof installation. They provide an attractive and professional look to the roof’s peak, while also providing extra protection against water infiltration. Installing ridge caps is a simple process that can be done with basic tools and materials. To begin, measure the length of the peak from end to-end and cut one ridge cap piece to that length. Next, apply a generous bead of caulk along the top edge of both sides of the roof’s peak and press the ridge cap into place. Finally, secure it with galvanized nails or screws placed every 12 inches along its length. With these steps complete, your metal roof will have a finished look that will last for years to come!
Safety Considerations When Installing a Metal Roof Over Shingles

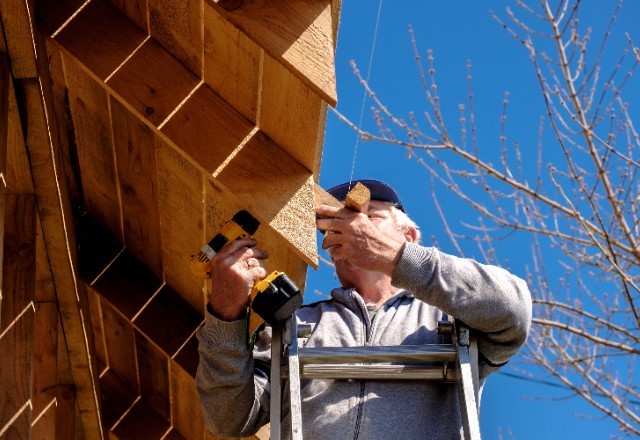
Installing a metal roof over shingles can be a great way to protect your home from the elements and add value, but it’s important to take safety considerations into account. First of all, make sure you are working from a sturdy, level platform such as scaffolding or ladders. Make sure that any tools or materials you’re using are in good condition and not damaged in any way. When climbing onto the roof, wear appropriate safety gear such as non-slip shoes, gloves, and eye protection. For extra protection when working on the edge of the roof, use guardrails or secure yourself with a safety harness. And finally, if you’re ever in doubt about something while working on the roof, don’t take chances – call a professional for help!
Working on a metal roof can be a rewarding experience, but it’s important to take safety precautions to ensure everyone’s safety. Now, let’s look at the conclusion of this installation project!
Conclusion
Congratulations on making it to the conclusion of your metal roof installation project! Now is the time to take a step back and admire your hard work in giving your home a professional finish. Before you start celebrating, take a few moments to inspect the area for any loose nails or screws, and make sure that all of the flashing around the edges of the roof are properly sealed. Once you’re done inspecting, you can be proud knowing that you have improved not only the look of your home but also its energy efficiency and protection from the elements.
We hope that this article has helped guide you through each step of installing a metal roof over shingles. We wish you all the best in enjoying your newly installed metal roof for years to come!