509-201-4190

If you’re looking for a low-maintenance, durable siding solution that will last for years to come, Hardie Board Siding is the perfect choice. Not only does this type of siding provide a flawless finish and an attractive look to your home, but it also requires minimal effort to install. From preparing the area and choosing the right tools and materials, to measuring and cutting the boards correctly, this step-by-step guide will walk you through every part of the installation process so that you can achieve a professional result. So let’s get started on your journey to a stunning new exterior with Hardie Board Siding!
Disclaimer: This article is intended to be a guide for installing Hardie Board siding and should not be taken as professional advice. The information provided in this article is based on general knowledge and may vary depending on your specific circumstances. We strongly recommend that you consult a professional for advice tailored to your individual situation before beginning any home improvement projects. If you need help with your project, please reach out to Advance Roofing LLC, who have been proudly serving the Spokane, WA area for many years with the highest standard of quality roofing solutions. We are always happy to help!
What is Hardie Board Siding?
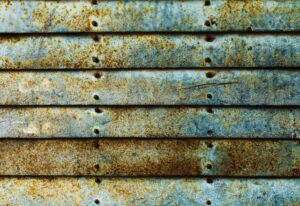
Hardie Board siding is a type of exterior siding made from fiber cement, which is a combination of wood fibers, sand, and cement. This blend creates an incredibly durable material that is resistant to fire, insects, weathering and rot. It also has the added benefit of being easily painted to match any color scheme you desire. Hardie Board siding can be used in place of wood or vinyl siding on walls and eaves and it makes a great replacement for aluminum or steel sidings too. It’s easy to install and requires minimal maintenance over time, making it an ideal choice for homeowners looking for long-term value and protection from the elements.
Hardie Board siding is an excellent choice for homeowners looking for an affordable, long-lasting and aesthetically pleasing exterior solution. With its fire-, insect-, weathering and rot-resistant properties, it’s no wonder Hardie Board siding is becoming the top choice for many households. Ready to find out why you should choose Hardie Board siding? Keep reading to learn more!
Why Choose Hardie Board Siding?
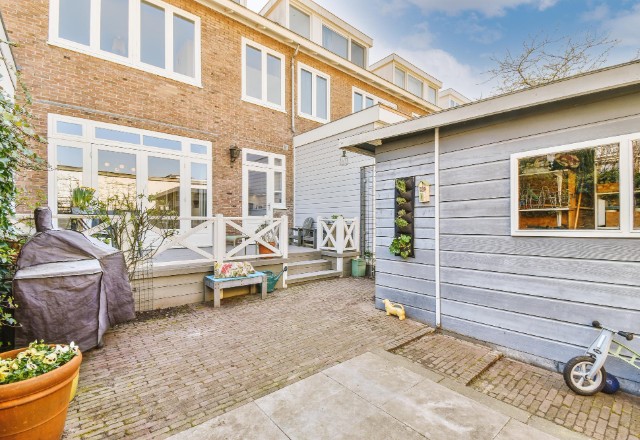
Hardie Board siding is an excellent choice for homeowners looking to increase the value and protection of their home. Not only is it incredibly durable and resistant to fire, insects, weathering and rot, but it’s also easy to install and requires minimal maintenance over time. And with its ability to be painted in any color imaginable, you can choose a design that perfectly complements your home’s unique style. On top of all this, Hardie Board siding can help increase the overall energy efficiency of a home, providing extra insulation and helping you save money on energy bills in the long run. With all these benefits combined, it’s no wonder why Hardie Board siding is becoming the go-to choice for many households.
Important Considerations When Choosing a Siding Product
It’s important to consider a variety of factors when deciding on the right siding product for your home. Durability, maintenance requirements, cost and aesthetic appeal should all
be taken into consideration when making this decision. It’s also essential to look into any local building regulations that may apply to the type of siding you choose, as these can affect both installation and end result. Additionally, it’s worth researching the manufacturer and their reputation in order to ensure that you get a high-quality product with a solid warranty. Finally, make sure to take some time to compare different materials and colors so that you end up with something that looks great and will last for years to come. With careful consideration, you can find the perfect siding product for your home!
Preparing for Installation

Once you’ve chosen the right siding product for your home, it’s time to prepare for installation. Before you get started, make sure that all necessary tools and materials are on hand. Additionally, think about whether or not you’ll need any additional help, as this is an important decision that can affect both the cost and quality of the job. Make sure to wear proper clothing and protective gear throughout the installation process. Additionally, double check your measurements before cutting any boards to size. Finally, be sure to read all instructions carefully in order to ensure a flawless finish. With careful preparation, you’ll be ready to start installing your new siding!
With the right preparation and installation knowledge, you’ll be able to transform your home’s exterior with ease. Now that you know the basics of siding installation, it’s time to choose the right tools and materials for the job – stay tuned!
Choosing the Right Tools and Materials for Installation
Choosing the right tools and materials for your siding installation is essential for a successful, high-quality job. Start by deciding if you are going to do the job yourself or hire a professional contractor. If you decide to DIY, make sure you have the necessary tools and materials on hand before starting. This might include a circular saw, spirit level, measuring tape, chalk line, hammer, utility knife, drill with screwdriver bits, and of course Hardie board siding! Additionally, choose the right fasteners for the job based on your local building codes. The type of fastener (nail or screw) will depend on the type of siding and wall material as well as whether or not extra insulation will be added. Lastly, consider using a sealant at all joints and corners before installation begins to ensure a watertight fit. With careful preparation and selection of the right tools and materials, you’ll be ready to get started with your siding installation project!
Understanding Local Building Codes and Regulations
Understanding local building codes and regulations is an important part of any siding installation project. It’s important to be aware of the codes in your area so that you can ensure that your project meets all safety standards. Start by researching the local building codes and regulations for your area, which can usually be found online or at your city or county building department. These regulations might include information on the type of siding allowed, required fastener types and distances, and other specifications. Additionally, it’s a good idea to check with your homeowner’s association or local HOA regarding any additional requirements they may have for siding projects. Making sure you understand all applicable codes and regulations before starting a siding installation project will help ensure that you complete the job safely and successfully!
Planning the Layout of Your Siding Project
Planning the layout of your siding project is an important step in ensuring a successful installation. Start by gathering all the relevant measurements for your home, including wall heights, window and door openings, fascia boards, and any other details that will affect how the siding is installed. You may also want to consider any obstacles or obstructions that could limit access to certain areas of your home. Once you have all the necessary measurements, you can create a detailed plan for where each piece of siding should go. Be sure to make adjustments as needed before starting the actual installation process – taking the time to plan ahead can save you a lot of time and headache down the road!
Measuring and Cutting the Boards Correctly
Measuring and cutting the boards correctly is essential for a successful installation of Hardie Board siding. Start by measuring the width of each board to ensure that it fits properly in the designated area. It’s important to leave a small gap between each board to ensure proper expansion and contraction of the material over time. Once your measurements are complete, use a circular saw or jigsaw to cut each board accordingly. Make sure that you’re using sharp blades and taking care not to put too much pressure on the saw as this can cause chipping and marring of the siding materials. Use a speed square or straight edge as a guide when cutting for best results. Finally, be sure to wear eye protection when cutting any siding material to avoid dust or splinters getting into your eyes. With these steps, you’ll be able to achieve perfect cuts every time!
Ensuring Nearby Surfaces Are Protected During Installation
When installing Hardie Board siding, it’s important to ensure that nearby surfaces are protected from any potential damage. This includes surrounding walls and windows as well as any existing landscaping. Before starting the installation process, cover nearby surfaces with a drop cloth or plastic sheeting to protect them from debris and dust. It’s also a good idea to use a ladder stabilizer when working on second-story installations so that your ladder doesn’t cause any damage to surrounding walls or windows. Finally, be sure to use proper footing when working on ladders or scaffolding so that you don’t accidentally kick up dirt or debris onto nearby surfaces. By taking these precautions, you can rest assured that your installation will go smoothly without causing any accidental damage!
Installing Your Hardie Board Siding
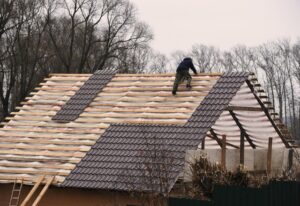
Installing Hardie Board siding is a great way to upgrade the look of your home. With proper preparation, it can be a straightforward process and if done correctly, can last for decades. The first step is to prepare the area where you plan to install the siding by clearing any debris or vegetation and making sure nearby surfaces are protected from potential damage. This includes covering windows and walls with plastic sheeting or drop cloths and using a ladder stabilizer when working on second-story installations. Once the area is ready, measure the areas where you plan to install the siding and make sure that your materials are cut accordingly. Finally, attach the Hardie Board siding using galvanized nails and caulk around any seams for a seamless finish. If done properly, you’ll have beautiful new siding in no time!
With the right preparation and installation, Hardie Board siding can dramatically upgrade the look of any home. Ready to take it a step further? Next, learn how to install starter strips at the base of walls for an even more polished finish!
Installing Starter Strips at the Base of Walls
Installing starter strips at the base of walls is a great way to give your Hardie Board siding an even more polished finish. Starter strips are thin pieces of trim that you attach to the house near the bottom of the wall, allowing for a seamless transition between the siding and the house. To install them, begin by measuring out where you would like to place them and then cut them to size. Once cut, use a drill with galvanized screws to attach them securely in place. Finally, caulk around any seams for an extra layer of protection from moisture and other elements. With these simple steps, you can take your Hardie Board siding installation from ordinary to extraordinary!
Fastening the Bottom Piece of Boards to Starter Strips with Nails or Screws
Fastening the bottom piece of Hardie Board siding to starter strips with nails or screws is an important part of making sure your installation looks great and lasts a long time. First, make sure that you’re using galvanized nails or screws specifically designed for Hardie Board, as these will provide extra protection against moisture and other elements. Place the bottom piece of Hardie Board above the starter strip and use a level to ensure it’s straight. Then, hammer in the nails or screw in the screws at a slight angle into the studs below for added strength. When you’re finished, caulk around any seams for an extra layer of protection from moisture and other elements. With these simple steps, you can rest assured that your Hardie Board siding will last for years to come!
Joining Corners and J-Mouldings with Caulk or Construction Adhesive
Joining corners and j-mouldings with caulk or construction adhesive is an important step in ensuring a clean, professional finish for your Hardie Board siding installation. Start by applying a generous layer of caulk or construction adhesive to the backside of each corner piece or J-moulding. Then, carefully press the pieces together at the corner, making sure that all edges line up perfectly. Once you have secured them into place, go over any seams with additional caulking or adhesive to ensure that no gaps remain. For extra protection from moisture, it’s also recommended to add an additional layer of sealant onto the finished joint. With these steps, you can be sure that your Hardie Board siding will look great and last for many years!
Attaching the Upper Pieces of Boards to Lower Pieces with Nails or Screws
Attaching the upper pieces of Hardie board siding to the lower pieces with nails or screws is a crucial step in ensuring your project is correctly installed and looks great. To start, select the correct type of fastener for your siding. For Hardie board, you should use either corrosion-resistant nails or stainless steel screws. Be sure to pre-drill holes if needed before inserting any fasteners. When nailing, it’s important to ensure that each nail is driven in straight and at least one inch from the edge to prevent splitting. If using screws, make sure they are inserted at least one inch from the edge and slightly countersunk so that the head does not protrude above the surface of the board. With these tips, you can be sure that your Hardie Board siding will stay securely attached for many years!
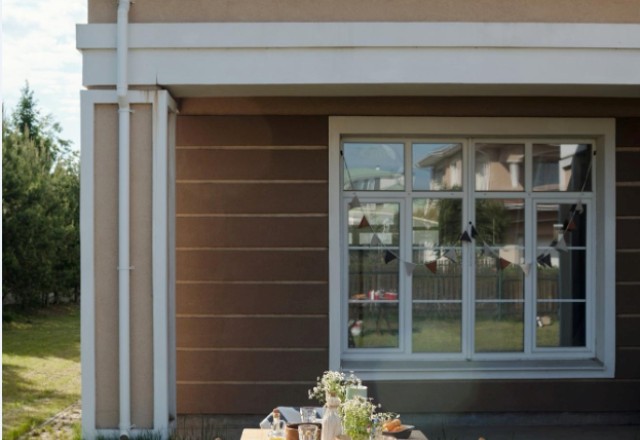
Finishing Up by Applying Exterior Trim, Such as Corner Posts and Window Casings
Finishing up your Hardie Board siding project by adding exterior trim is an important step to ensure it looks great and lasts for years. Corner posts can be used to add a decorative touch and help secure the edges of the siding panels in place. They should be attached
using galvanized nails or screws, making sure to leave at least one inch between the nail/screw head and the edge of the board. Window casings are another way to add a unique look, as well as cover any gaps that may occur between windows and walls. These are typically cut from boards and then nailed in place with corrosion-resistant nails set at least one inch from the edge. With these finishing touches, you will have a beautiful Hardie Board siding installation!
Maintaining Your Hardie Board Siding
Maintaining your Hardie Board siding is an important part of ensuring it looks great and lasts for years. To keep your siding looking its best, regular cleaning with a mild detergent is recommended at least once a year. This should remove any dirt or debris that has accumulated on the surface and prevent the build-up of harmful molds and algae. You can also use a pressure washer on low setting to clean away stubborn dirt or grime.
In addition to cleaning, you may want to inspect your siding for signs of damage such as cracks or warping, and take care of any issues immediately. Also make sure to check for loose nails or screws and re-secure them if necessary. Finally, sealing your siding every few years will help protect it from weathering and UV rays. With proper maintenance, you can ensure that your Hardie Board siding looks great for years to come!
By following these simple steps for regular maintenance, you can ensure that your Hardie Board siding looks beautiful year after year. Now let’s turn our attention to the next step: wrapping up with some conclusions about this great home improvement product!
Conclusion
Congratulations! You’ve made it through your Hardie Board siding installation project. Hardie Board siding is a great option for many homeowners as it offers excellent durability, low-maintenance and a great aesthetic that can add value to your home. Now that the installation is complete, you’ll want to make sure that you regularly clean and inspect your siding in order to keep it looking its best for years to come. With proper maintenance and care, you can be sure that your Hardie Board siding will remain beautiful for years. Thanks again for taking the time to learn about this fantastic product and how to install it correctly – we hope you enjoyed the process!