509-201-4190

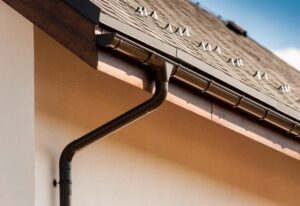
Installing cedar shake siding is an excellent way to add a unique, rustic aesthetic to your home. While it may seem intimidating, this comprehensive guide will provide you with all the information you need to ensure that your installation goes as smoothly as possible.
Disclaimer: This article is intended for informational purposes only and does not replace professional advice. Proper installation of cedar shake siding requires expertise and experience, therefore we recommend consulting with a qualified professional to ensure the best results. Advance Roofing LLC has been proudly serving the Spokane, WA area for many years with the highest standard of quality roofing solutions. If you need assistance in your particular situation, do not hesitate to contact us – we are always happy to help!
What Is Cedar Shake Siding?
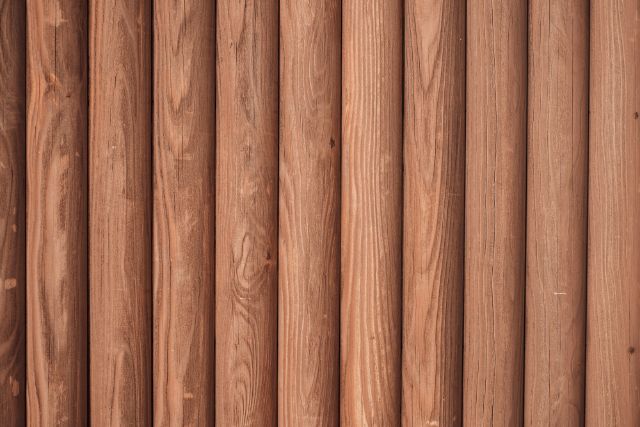
Cedar Shake Siding is a type of wooden cladding made from small, wooden blocks called “shakes”. These shakes are typically made from different types of cedar wood, such as western red cedar or white cedar, which is known for its natural beauty and high level of durability. The thickness and size of each shake can vary, giving the siding a unique, rustic look that many homeowners find appealing.
Not only does Cedar Shake Siding add to the curb appeal of a home, it also offers several benefits. Firstly, cedar is a renewable resource, making it an environmentally friendly option for homeowners. Additionally, the natural insulation properties of cedar can help reduce energy bills by keeping homes cool in the summer and warm in the winter.
However, it’s important to note that improper installation or low-quality installation can lead to moisture damage and water penetration, which can ultimately decrease the life expectancy of the siding. To ensure the highest-quality installation, it’s recommended to work with a professional installer and to choose a product that meets building codes and industry standards. Some of these standards are set by organizations like the Cedar Shake & Shingle Bureau, which provides guidelines and product labels to ensure a durable material and adequate ventilation for optimal performance.
Overall, Cedar Shake Siding is a popular option for homeowners who want a natural, durable material that can withstand the elements and add to the beauty of their homes.
Benefits of Cedar Shake Siding
Cedar Shake Siding is a popular choice among homeowners due to its aesthetic appeal and durability. However, there are also several other benefits that come with choosing this type of siding for your home.
One of the main advantages of Cedar Shake Siding is its environmental impact. Cedar is a renewable resource, making it an eco-friendly choice for homeowners concerned about sustainability. Additionally, cedar naturally repels insects, which means homeowners can avoid using harmful pesticides and chemicals to protect their homes.
Another benefit of Cedar Shake Siding is its energy efficiency. The natural insulation properties of cedar can help keep homes cool in the summer and warm in the winter, which can ultimately reduce energy bills and save homeowners money.
Cedar Shake Siding is also highly versatile, as it can be cut and shaped to fit any design or architectural style. This means homeowners have the flexibility to choose from a variety of shapes and sizes, and can even mix and match different types of cedar to create a unique look for their home.
In terms of durability, Cedar Shake Siding is known for its strength and resilience. This type of siding is resistant to moisture damage, and can withstand harsh weather conditions such as heavy rain, wind, and hail. Additionally, Cedar Shake Siding is low maintenance, requiring only occasional cleaning and sealing to keep it looking its best.
Disadvantages of Cedar Shake Siding
While there are many benefits to using Cedar Shake Siding, there are also some potential disadvantages that homeowners should be aware of before making their decision.
One issue with Cedar Shake Siding is its cost. Cedar is a high-quality, durable material that comes with a higher price tag compared to some other types of siding. While the initial investment may pay off in energy savings and longevity, the upfront cost may be a deterrent for some homeowners.
Another potential drawback of Cedar Shake Siding is the installation process. Improper installation can lead to moisture damage and water leaks, which can be costly to repair. Additionally, proper installation requires a certain level of skill and expertise, which may mean additional labor costs for homeowners.
Cedar Shake Siding also requires adequate ventilation to prevent moisture buildup, which can cause rot and decay. This may mean additional expenses for installing proper ventilation systems, which should be factored into the overall cost of using Cedar Shake Siding.
Additionally, Cedar Shake Siding requires regular maintenance to keep it looking its best. While it may not require frequent cleaning, sealing should be done every few years to prevent moisture damage and to maintain the cedar color.
Overall, Cedar Shake Siding can be a beautiful and durable option for homeowners, but it’s important to weigh the potential advantages and disadvantages before making a decision. Careful consideration of the cost, installation process, maintenance requirements, and ventilation needs can help homeowners make an informed choice that fits their budget and style preferences.
Preparing for Installation
When it comes to installing cedar shake siding, preparation is key. Proper preparation can help ensure a smooth installation process and prevent any costly mistakes or issues down the line.
The first step in preparing for cedar shake siding installation is to check local building codes and regulations. Some areas may have specific requirements for siding materials or installation methods, so it’s important to familiarize yourself with these regulations before beginning the installation process.
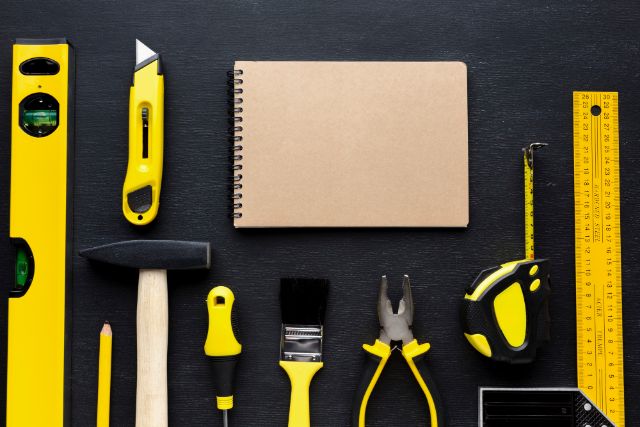
Once you know the requirements for your area, it’s time to gather the necessary materials and tools. This may include cedar shingles or shakes, galvanized or ring-shank nails, a utility knife or sharp cutting tool, and any necessary ventilation or moisture barrier materials.
Before installing cedar shake siding, it’s important to properly prepare the surface area. This may involve removing any existing siding or damaged materials, checking for any underlying moisture or water damage, and repairing or reinforcing the underlying structure as necessary.
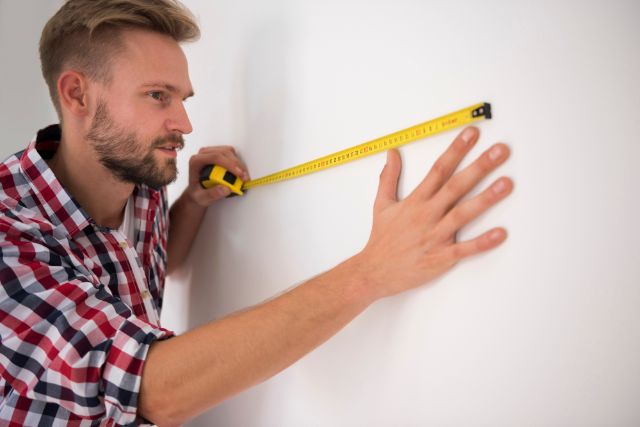
You’ll also want to consider the layout and design of the siding itself. This may involve measuring the dimensions of the wall or structure to determine the amount of material needed, as well as determining the proper shingle exposure and overall aesthetic of the finished product.
In addition to these initial steps, it’s important to take into account factors such as foot traffic and environmental impact. Protecting the surrounding environment and ensuring safe access to the work area can help ensure a safe and successful installation process.
Overall, proper preparation is key when installing cedar shake siding. By following these steps and taking into account the various factors involved, homeowners can ensure a successful and long-lasting installation that adds both beauty and value to their home.
General Guidelines for Installation
Cedar shake siding can be a beautiful and durable addition to any home, but proper installation is key to ensuring that it lasts for years to come. Here are some general guidelines to keep in mind when installing cedar shake siding:
- Quality of Installation: The quality of your installation is critical. Improper installation can cause moisture damage, reduce the life expectancy of your siding, and even result in safety hazards. It’s important to follow all manufacturer guidelines and best practices for installation.
- Type of Product: Cedar shake products come in many shapes and sizes, so it’s important to select the right product for your needs. Make sure to consider the dimensions of the product, the grain per bundle, and the bundle of shakes you’ll need for your project.
- Proper Tools and Materials: To properly install cedar shake siding, you will need a variety of tools, including a utility knife, appropriate nails (such as galvanized or ring shank nails), and any necessary ventilation or moisture barrier materials.
- Shingle Exposure: The desired shingle exposure and design of the roof cladding are important factors to consider when planning your project. In general, a 4″ exposure is standard, but this can vary depending on the product and design.
- Ventilation: Adequate ventilation is essential to prevent moisture buildup and decrease the chance of mold or decay. Make sure to provide proper ventilation where necessary, such as in attics or crawl spaces.
- Energy Efficiency: Cedar shake siding can help improve energy efficiency in your home, but this requires proper installation. Make sure to seal all gaps properly and consider using foam board insulation for added insulation and reduced energy bills.
- Environmental Impact: Cedar is a sustainable and renewable resource, but it’s important to consider the environmental impact of your project. Selecting a product that is certified by a recognized certification agency, such as the Cedar Shake & Shingle Bureau, can help ensure that your project is eco-friendly.
Following these general guidelines and taking the time to properly plan and install your cedar shake siding can result in a beautiful and long-lasting addition to your home.
Checking Building Codes and Permits
Before starting any home improvement project, it is important to check building codes and permits in your area. This ensures that your project is not only safe and up to code, but also legal and compliant with local laws and regulations.
Building codes and permits vary by location, so it’s important to do your research and find out what is required in your area. Your local building department can provide information on the specific codes and permits needed for your project.
Permits are typically required for any structural changes or alterations to your home, such as adding a new room, installing new electrical wiring or plumbing, or building an addition. Even if you are only making cosmetic changes to your home, like updating the siding or replacing windows, it’s always a good idea to check with your local authorities to ensure that you are following the proper procedures.
Not obtaining the proper permits and following building codes can result in fines or legal action. Additionally, failing to follow codes or obtain the proper permits can compromise your safety and the safety of those around you.
When applying for permits, you will need to provide detailed plans of your project, including what materials will be used and how the project will be completed. Your plans may also need to be approved by an inspection agency before work can begin.
While obtaining permits and ensuring code compliance can be time-consuming and sometimes expensive, it is always better to err on the side of caution and legality. Following the correct procedures and obtaining the proper permits will ensure that your project is safe, legal, and up to code.
Calculating Square Footage Needed
When it comes to installing cedar shake siding, one of the most important factors to consider is figuring out how much product you will need. This can be done by calculating the square footage of the area you plan to cover.
To get started, measure the length and height of each wall or section where you will be installing cedar shake siding. Multiply these two measurements together to get the square footage of each section. If the wall has windows or doors, subtract the square footage of these areas from the total.
Once you have the square footage of each section, add them together to get the total square footage needed for your project. It’s also important to add a percentage for waste and cutting to ensure that you have enough product to complete the job.
Cedar shake siding is typically sold by the bundle, and the amount of product in each bundle can vary depending on the size of the shakes and the manufacturer. To determine how many bundles you will need, divide the total square footage by the square footage per bundle. Keep in mind that some manufacturers may provide this information in linear feet or coverage per bundle instead of square footage.
When purchasing cedar shake siding, it’s important to choose a high-quality product. Look for options made from western red cedar or alaskan yellow cedar, as these are durable materials that can withstand moisture and weathering. Consider the color and grain of the shakes to ensure a cohesive look for your home’s exterior.
Proper installation is also key to ensuring the longevity and appearance of your cedar shake siding. Use galvanized or ring-shank nails to secure the shakes to the home’s exterior and leave an appropriate amount of shingle exposure. Adequate ventilation is also important to prevent moisture damage and excessive energy bills.
By following these steps to calculate the square footage needed for your cedar shake siding project, you can ensure that you have enough product to complete the job and create a beautiful, long-lasting look for your home’s exterior.
Purchasing Materials & Tools Needed
Now that you have measured the walls and determined the amount of cedar shake siding needed for your project, it’s time to purchase the materials and tools necessary for installation.
When purchasing the cedar shake siding, it’s important to consider the type of product and quality of installation. Western Red Cedar and Alaskan Yellow Cedar are popular choices for their durability and aesthetic appeal, but other cedar products may also be available. Be sure to check with the Cedar Shake & Shingle Bureau to ensure that the product you are purchasing meets building codes and is of high quality.
In addition to the cedar shake siding, you will need galvanized or ring-shank nails, a utility knife, a sharp knife, and a hammer or nail gun. The length of the nails should be at least 1.5 times the thickness of the shake, and it’s recommended to use stainless steel nails for a longer life expectancy and to prevent moisture damage.
When selecting a utility knife, choose one with a sturdy blade that can easily cut through the wood fiber. A sharp knife will also be needed for trimming and shaping the shakes.
It’s also important to consider adequate ventilation when installing cedar shake siding. This will help prevent moisture and water damage over time. Be sure to follow the manufacturer’s instructions for installation and ventilation options for your specific product.
Finally, consider the environmental impact of the materials you are purchasing. Cedar is a renewable resource, but other materials like polyvinyl chloride and stone veneers may have a greater impact on the environment. Consider the long-term energy efficiency and impact on your energy bills when choosing your siding material.
By carefully selecting high-quality materials and tools and considering the environmental impact, you can ensure a long-lasting and aesthetically pleasing cedar shake siding installation on your home.
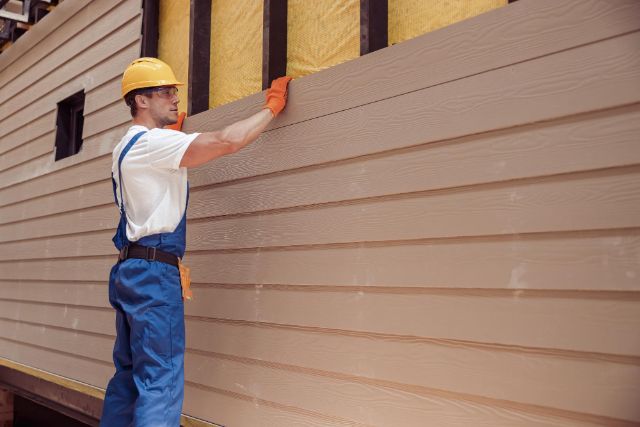
Installing Cedar Shake Siding
This durable material not only provides excellent curb appeal, but is also energy efficient and environmentally friendly. However, it’s important to ensure that the installation process is carried out properly in order to avoid any moisture damage or improper installation that can lead to costly repairs down the line.
The first step in installing cedar shake siding is to select the right product for your home. Western Red Cedar and Alaskan Yellow Cedar are popular choices for their attractive cedar color, but you may also want to consider other cedar products such as white cedar shingles. It’s important to check with the Cedar Shake & Shingle Bureau to make sure that the product you purchase meets building codes and is of high quality.
Once you’ve selected your cedar shake siding, you will need to gather the necessary tools and materials. This includes galvanized or ring-shank nails, a utility knife, a sharp knife, and a hammer or nail gun. The length of the nails should be at least 1.5 times the thickness of the shake, and it’s recommended to use stainless steel nails for a longer life expectancy and to prevent moisture damage. A sturdy utility knife that can easily cut through the wood fiber is essential, as is a sharp knife for trimming and shaping the shakes.
Before beginning installation, it’s important to consider adequate ventilation to prevent moisture and water damage over time. This may involve adding vents or other options to improve air flow. Also, be sure to follow the manufacturer’s instructions for installation and ventilation options for your specific cedar shake siding product.
Proper installation is critical to the longevity and quality of your cedar shake siding. Shingles should be installed with a proper shingle exposure, which refers to the amount of each shingle that is visible when installed. The recommended exposure will depend on the product dimensions and grain per bundle. Additionally, nails should be driven into the upper portion of each shingle to prevent moisture from pooling and causing wood rot.
In summary, installing cedar shake siding is a beautiful and practical option for homeowners. By selecting the right product, using the proper tools and materials, ensuring adequate ventilation, and following proper installation techniques, you can enjoy the benefits of a durable and attractive siding option for years to come.
Prepping the Space & Laying Down Foundation Preparations
Before starting the installation process for cedar shake siding, it’s important to make sure the space and foundation are prepped and ready to go. This involves several steps to ensure a successful and lasting installation.
The first step is to remove any existing siding and inspect the current foundation for any signs of damage or improper installation. If any issues are found, they must be addressed before moving forward with the cedar shake installation process. It’s also important to check the surface of the foundation for any nails or sharp edges that may damage the cedar shakes.
Next, the area to be covered by cedar shake siding should be measured to determine the square footage needed for the project. Considering the desired shingle exposure, the number of shakes per bundle, and any extra shakes factored in for cutting and shaping, homeowners can determine the number of bundles of shakes needed.
Once the space has been cleared and measured, it’s time to begin laying the foundation for the cedar shakes. This involves installing thick felt paper or a moisture barrier over the surface of the foundation. This creates a layer of protection between the cedar shakes and the foundation, preventing moisture and rot from damaging the wood over time.
After the moisture barrier has been installed, the first layer of cedar shake siding can be put in place. This involves starting at the bottom corner of the house and working upward, ensuring that the bottom layer of shakes is level with the foundation. This process may also involve cutting and shaping cedar shakes to fit odd spaces or accommodate features like windows and doors.
Throughout the process of laying down the foundation for cedar shake siding, it’s important to keep an eye on the weather. Cedar shake siding should not be installed in wet or damp conditions, as this can cause warping and damage to the wood over time. If necessary, try to schedule the installation for a dry and relatively warm day.
By properly prepping the space and laying down a solid foundation for cedar shake siding, homeowners can ensure a long-lasting and attractive addition to their home’s exterior.
Cutting & Fitting Shakes Into Place
When it comes to installing cedar shake siding, one of the most crucial steps in the process is cutting and fitting the shakes into place. This requires precision, patience, and the right tools to ensure a smooth and seamless finish.
First, it’s important to choose the right type of product for your cedar shake siding. There are a variety of options available, including western red cedar, alaskan yellow cedar, and white cedar shingles. Before making a decision, consider the quality of installation, the life expectancy, and the environmental impact of each type of product.
Once you’ve chosen your cedar shake product, it’s time to start cutting and fitting the shakes into place. Start by using a sharp utility knife to make precise cuts in the cedar shakes. This will help you achieve the perfect fit for odd angles and sizes in the siding.
When it comes to fitting the shakes into place, it’s important to pay attention to the grain per bundle. The bundle of shakes should be organized so that the grain runs in the same direction for a seamless finish. This will also help to prevent moisture damage and water penetration.
As you work to install the cedar shake siding, be sure to use galvanized or ring-shank nails to secure the shakes into place. The shingle exposure and spacing should be carefully considered to ensure an energy efficient and durable installation.
Throughout the entire installation process, adequate ventilation is key. This will help to prevent moisture buildup and damage to the wood over time. It’s also important to keep foot traffic to a minimum during the installation process to prevent any damage to the shakes.
Ultimately, a successful installation of cedar shake siding comes down to the quality of the installation and attention to detail. Taking the time to cut and fit the shakes into place correctly will ensure that your cedar shake siding provides long-lasting curb appeal and energy efficiency for your home.
Gluing, Nailing, and Securing Shakes in Place
When installing cedar shake siding, there are a few key factors to keep in mind when it comes to securing the shakes in place. Gluing, nailing, and other methods of securing the shakes are all important aspects of a strong and durable cedar shake installation.
One popular method for securing shakes is by using glue. Glue can be used to bond shakes to the sheathing, creating a strong and durable hold. However, it’s important to choose the right type of glue and to use it correctly to ensure a successful installation. Construction adhesive is a good option to consider, as it’s specifically designed for use with wood and other construction materials. Before applying the glue, be sure to clean and prime the surfaces to ensure a strong bond.
Another option for securing shakes is through the use of nails. Galvanized or ring-shank nails are ideal for this purpose, as they are able to withstand the elements and will hold up over time. It’s important to nail the shakes securely into place, but not to do so overly tightly. Hammering the nails in too hard can cause the shakes to split and can make it difficult to replace damaged shakes in the future.
In addition to nailing and gluing, there are other methods for securing shakes in place. Some contractors use staples or screws, while others prefer to use a combination of methods for added stability. Whatever method is chosen, it’s important to follow building codes and manufacturer guidelines to ensure a safe and effective installation.
When it comes to securing shakes in place, there are a few additional factors to consider. For example, proper placement and spacing of the shakes is important to ensure proper coverage and to prevent moisture damage. It’s also important to use the right tools, such as a sharp utility knife or saw, to cut the shakes to size and to ensure a clean and precise fit.
By taking the time to properly glue, nail, or secure shakes in place, homeowners can enjoy a beautiful and durable cedar shake installation that will withstand the elements and last for years to come.
Finishing Up Installation Process
Once all the cedar shakes are securely fastened in place, it’s time to turn to the finishing touches to complete the installation process and enhance the overall look of your home. Here are a few key steps to consider in finishing up the cedar shake siding installation:
- Trim the edges: Use a sharp utility knife or saw to trim any excess cedar shake siding from the edges of your home. This will create a clean and polished look.
- Seal the edges: Apply a high-quality sealant around the edges of your cedar shake siding to prevent moisture from seeping in and causing damage.
- Paint or stain the siding: Cedar shakes can be left to weather naturally, but if you prefer to preserve or enhance the color of your cedar shake siding, you can paint or stain it. Remember to choose a quality paint or stain that is specifically formulated for use on cedar.
- Add trim and accents: Consider adding trim, moldings or other decorative accents to further enhance the curb appeal of your home.
- Ensure proper ventilation: Adequate ventilation is essential for protecting your home from moisture damage and maintaining energy efficiency. Make sure your cedar shake siding installation includes proper ventilation techniques.
- Inspect and maintain regularly: To ensure the longevity of your cedar shake siding, inspect it regularly for any signs of damage or wear. Keep an eye out for moisture damage, as this can lead to rot and other issues over time. It’s also important to perform regular maintenance, such as cleaning and resealing, to keep your cedar shake siding looking great for years to come.
By following these steps, you can finish up the cedar shake siding installation process and enjoy a beautiful and durable exterior for your home. Remember, proper installation and maintenance of cedar shake siding is essential for protecting your home and enhancing its overall curb appeal.
Sealing & Weatherproofing the Cedar Shake Siding
Cedar shake siding is a popular choice for homeowners who want to add a touch of natural beauty to their homes. However, cedar is a porous material, which means it can be susceptible to moisture damage if it’s not properly sealed and weatherproofed. Here’s what you need to know about sealing and weatherproofing cedar shake siding to keep it looking beautiful for years to come.
- Choose the right sealant: When it comes to sealing cedar shake siding, it’s important to choose a high-quality sealant that is designed specifically for use on wood. Look for a product that contains UV inhibitors to help prevent fading and discoloration, as well as mold and mildew inhibitors to prevent the growth of unsightly black spots.
- Apply the sealant properly: Before applying the sealant, make sure your cedar shake siding is clean and dry. Use a pressure washer or a stiff-bristled brush to remove any dirt, debris, or loose paint. Then, apply the sealant in a thin, even coat with a paintbrush or a roller. Be sure to work in small sections and avoid overlapping or puddling.
- Seal the edges: In addition to sealing the entire surface of your cedar shake siding, you’ll also need to pay special attention to the edges. Use a caulk gun to apply a bead of sealant along the top, bottom, and sides of each piece of siding. This will help prevent moisture from seeping in and causing damage.
- Check for gaps: As you seal your cedar shake siding, be sure to check for any gaps or cracks where moisture could seep in. Pay special attention to areas where two pieces of siding meet, as well as around windows, doors, and other openings. Use a flexible sealant or caulk to fill in any gaps.
- Consider weatherstripping: If you live in an area with harsh weather conditions, you may want to consider adding weatherstripping to your cedar shake siding for added protection. Weatherstripping is typically made of a flexible material, such as polyvinyl chloride (PVC), and is designed to create a tight seal between your siding and other surfaces, such as windows or doors.
Sealing and weatherproofing your cedar shake siding is an important step in protecting your home from moisture damage and maintaining its beauty for years to come. By choosing the right sealant, applying it properly, and paying attention to the edges and gaps, you can ensure that your cedar shake siding stays looking great even in harsh weather conditions.
Conclusion
In conclusion, installing cedar shake siding can be a great option for homeowners who are looking to enhance their curb appeal and improve the energy efficiency of their homes. With its natural beauty and durability, cedar shake siding makes an excellent choice for those seeking a long-lasting and environmentally-friendly option.
However, it’s important to remember that installation is key to ensuring the longevity and quality of your cedar shake siding. Improper installation can lead to moisture damage, water damage, and other issues that can compromise the integrity of your siding and even your home’s structure. That’s why it’s crucial to follow the guidelines set forth by building codes and the Cedar Shake & Shingle Bureau.
When selecting your cedar shake siding product, be sure to consider factors such as the grain per bundle, type of product, and shingle exposure. Pay close attention to the product dimensions and make sure you have adequate ventilation to avoid any potential issues.
Installing cedar shake siding may require some patience and attention to detail, but the end result can be well worth the effort. Not only will it enhance your home’s curb appeal, it may even help to lower your energy bills and increase the overall value of your property.
Overall, with the proper installation and care, cedar shake siding can be a beautiful and lasting addition to any home. So whether you’re building a new home or looking to update your current one, consider the many benefits of cedar shake siding for your next home improvement project.
Are you ready to give your home a rustic, charming look with the classic beauty of cedar shake siding? Installing cedar shake siding is an investment in your home that can add value and character to the exterior. With proper installation, this natural material can last for years—even decades—while protecting your home from the elements. Let’s get started!