509-201-4190

Understanding Roof Ventilation
Proper roof ventilation is essential for the longevity and performance of your roof. It plays
a crucial role in removing excess heat and moisture from your attic space, preventing
damage to the roof structure and reducing energy costs. In this article, we will delve into
the importance of roof ventilation and the different types of vents available.
The primary purpose of roof ventilation is to create a balanced airflow in the attic. During
hot summer months, an adequately ventilated roof allows hot air to escape, preventing
moisture buildup and reducing the strain on your air conditioning system. In colder
months, ventilation helps prevent the formation of ice dams by keeping the attic space
cool and minimizing temperature fluctuations.
There are two main types of roof vents: exhaust vents and intake vents.
- Exhaust vents, such as ridge vents, static vents, and power vents, are
responsible for removing hot air from the attic. Ridge vents are installed
along the roof ridge, allowing hot air to escape naturally. Static vents,
also known as box vents, are static and require wind or natural
convection to draw air out of the attic. Power vents, on the other hand,
use electric fans to force air out of the attic space. Intake vents, like soffit vents and gable vents, bring in fresh air to replace
the hot air being expelled by the exhaust vents. Soffit vents are installed
under the eaves of the roof, allowing cool air to enter the attic. Gable vents are located on the side walls of the attic and enable cross-
ventilation for effective airflow.
When it comes to choosing the right type of vent for your roof, it is essential to consider
factors such as the roof structure and size, climate, and personal preferences. Consulting
a roofing professional can help you determine the best ventilation system for your
specific needs.
In addition to the type of vents, the placement and quantity of vents play a significant role
in achieving optimal ventilation. The general rule is to have 1 square foot of ventilation for
every 150 square feet of attic space. However, this ratio can vary depending on the
climate and roof design.
Maintaining a well-ventilated roof not only extends the lifespan of your roof but also
prevents issues like mold growth, wood rot, and excessive heat buildup. A poorly
ventilated attic can result in high energy bills, moisture damage, and diminished comfort
levels in your home.
Importance of Roof Ventilation
Proper roof ventilation is crucial for maintaining the health and longevity of your roof. It
serves two primary functions: preventing moisture buildup and improving air circulation.
Without adequate ventilation, your attic space becomes a breeding ground for excess
moisture, leading to mold and mildew growth, as well as rotting of the roof structure.
Moisture can enter your attic space through various sources, including everyday activities
like cooking and showering. If this moisture is not properly ventilated, it can condense on
the underside of the roof and cause damage over time. By installing roof vents, you create
a channel for this moisture to escape, preventing the harmful effects of moisture buildup.
In addition to preventing moisture-related issues, proper roof ventilation also improves air
circulation. During hot summer months, an improperly ventilated attic can become
extremely hot, leading to increased energy costs and discomfort in your home. By
allowing hot air to escape through exhaust vents, roof ventilation helps keep your attic
space cool, reducing the strain on your air conditioning system.
Types of Roof Vents
There are several types of roof vents available that can effectively ventilate your attic
space. The type of roof vent you choose will depend on various factors, including the
design and layout of your roof, as well as personal preference. Here are a few common
types of roof vents:
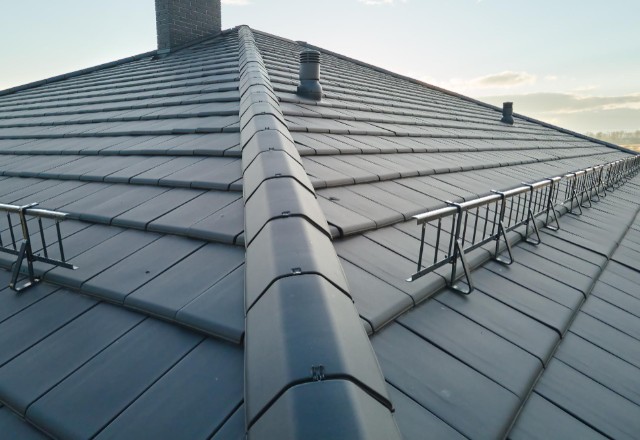
- Ridge Vents: These vents are installed along the ridge of the roof, allowing hot air to
escape from the attic. Ridge vents are often the most popular choice for attic ventilation
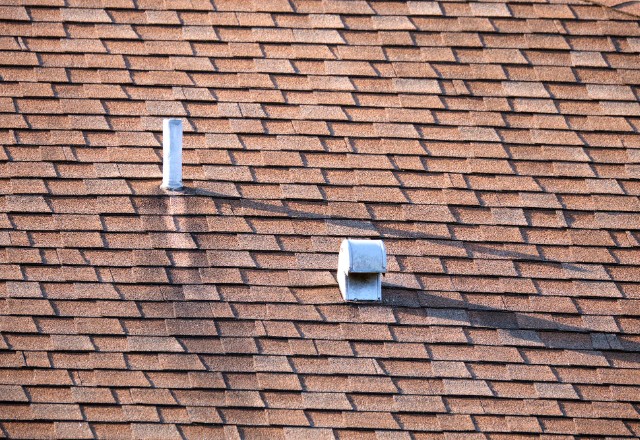
as they provide consistent airflow along the entire ridge. Box Vents: Also known as static vents, box vents are installed on the roof near the
peak. They are square or rectangular in shape and work by allowing hot air to rise and escape from the attic. Box vents are simple to install and require minimal maintenance.- Exhaust Vents: These vents are designed to remove hot air from the attic space. They
are typically placed near the roof’s peak or gable ends and work in combination with
intake vents to create a balanced airflow. - Power Vents: Unlike passive vents, power vents are equipped with electrical fans that
actively remove hot air from the attic. These vents are ideal for homes in warmer climates
or areas with limited natural ventilation. - Solar-Powered Vents: Similar to power vents, solar-powered vents use the energy from
the sun to operate the fan and remove hot air from the attic. These vents are eco-friendly
and can help reduce energy costs.
Remember, it is important to consult with a roofing professional to determine the best
type of vent for your specific roof structure and ventilation needs.
Preparing for Roof Vent Installation
When it comes to installing a roof vent, proper preparation is key to ensuring a successful
and efficient installation process. Before you begin, it’s important to gather all the
necessary tools and materials and familiarize yourself with the different types of vents
available. Here are some essential steps to help you prepare for a roof vent installation:
- Determine the type of vent you need: There are various types of roof vents available,
including ridge vents, box vents, and exhaust vents. Each type serves a different purpose
and offers its own benefits. Consider factors such as the size of your attic space, the roof
structure, and the climate in your area when choosing the appropriate vent for your
needs. - Measure the roof area: Before purchasing a vent, you’ll need to measure the size of the
roof area where the vent will be installed. This will help ensure that you choose the right
vent size that fits properly and provides adequate ventilation. Measure the length and
width of the roof area to determine the square footage. - Gather the necessary tools and materials: To install a roof vent, you’ll need a few basic
tools such as a utility knife, roofing nails, a pry bar, a caulking gun, and a screwdriver.
Additionally, you’ll need the vent itself, along with any flashing or sealant required for
installation. Make sure to gather all these materials before starting the installation
process. - Prepare the roof surface: Before installing the vent, it’s important to clean and inspect
the roof surface. Remove any debris or existing materials that might obstruct the
installation process. Ensure that the roof surface is free from any damage or weak spots.
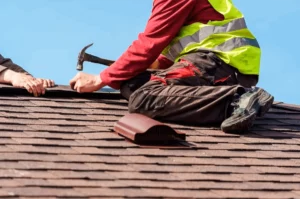
It’s crucial to have a sturdy and secure base for the vent to be properly installed. - Follow safety precautions: Taking into account that working on the roof can be
dangerous, so t’s important to prioritize safety. Use proper safety equipment such as
gloves, safety goggles, and non-slip footwear. If you’re not comfortable working at
heights or handling roofing tasks, it’s best to hire a professional roofing contractor to do
the installation for you.
By following these preparation steps, you’ll be well on your way to a successful roof vent
installation. Properly installed vents will help improve your home’s ventilation, reduce
moisture buildup, and contribute to energy efficiency. Remember, if you’re unsure about
any aspect of the installation process, it’s always best to consult with a roofing
professional to ensure a job well done.
Safety Precautions
When installing or replacing a roof vent, it is crucial to prioritize safety precautions.
Working on the roof can be dangerous, so it is important to take certain measures to
ensure your safety.
- Firstly, always wear appropriate safety gear, such as gloves and safety
goggles, to protect yourself from potential injuries. Non-slip footwear is
also essential to prevent any accidents while working on the roof. - Secondly, it is important to place your ladder in a stable position. Make
sure the ladder is on solid ground and is secured against the roof
surface. Avoid placing the ladder against gutters or unsupported areas
of the roof structure. Use ladder stabilizers or ropes if necessary for
added stability. - Additionally, be cautious of your surroundings when installing a roof
vent. Avoid working on the roof during adverse weather conditions, such
as strong winds or rain, as it can make the task more hazardous. Also,
be mindful of any overhead power lines when positioning or
maneuvering ladders.
If you are not comfortable working at heights or performing roofing tasks, it is always
best to hire a professional roofing contractor. They have the experience, tools, and
expertise to safely and efficiently install or replace roof vents.
Gathering Tools and Materials
Before you begin the installation or replacement of a roof vent, it is important to gather all
the necessary tools and materials. Having everything prepared beforehand will make the
process smoother and more efficient.
Here are the essential tools you will need:
- Roofing nails: These are used to secure the vent to the roof surface. Make sure to use
nails specifically designed for roofing. - Vent: Choose a vent that suits your needs and matches the type of roof you have.
There are various types of vents available, such as ridge vents, gable vents, static vents,
and turbine vents. - Hammer: A sturdy hammer will be needed to drive the roofing nails into place.
- Pry bar: A pry bar can help you remove the old vent if you are replacing it.
- Roofing adhesive: This is used to provide additional sealing and ensure a watertight
installation. - Roofing cement: Used to seal any gaps or openings around the vent to prevent
moisture buildup.
Make sure to gather all the necessary tools and materials before starting the installation
or replacement process. This will help ensure that you have everything you need to
complete the job efficiently and effectively.
Planning the Ventilation Placement
Planning the ventilation placement for your roof is an important step in ensuring proper
airflow and preventing issues such as moisture buildup and energy inefficiency. Here are
some key points to consider when planning the placement of your roof vents.
- Assess your attic space: Before installing or replacing a roof vent, it’s crucial to
evaluate the size and layout of your attic. Measure the square footage of the attic to
determine the appropriate number and size of vents needed. A general rule of thumb is to
have at least 1 square foot of vent opening for every 150 square feet of attic space. - Consider the type of roof vents: There are various types of roof vents available, each
with its own benefits. Ridge vents, for example, are installed along the ridge of the roof
and allow hot air to escape. Gable vents are placed on the gable ends of the roof and
promote air circulation. Static vents, turbine vents, and box vents are other popular
options to consider. Consulting with a roofing professional can help you determine the
most suitable type of vent for your specific roof structure. - Evaluate proper ventilation areas: In addition to roof vents, it’s essential to have proper
intake vents to allow fresh air to enter the attic space. Soffit vents, for example, are
installed in the eaves of the roof and provide intake air. It is important to have a balance
between intake and exhaust vents to ensure effective ventilation. Consult with a roofing
contractor or ventilation expert to determine the appropriate locations for intake and
exhaust vents. - Consider the slope of your roof: The slope or pitch of your roof can influence the
placement of vents. Different types of vents may work better on roofs with steep slopes
compared to those with shallower pitches. Discussing this with a roofing professional
can help you choose the most suitable ventilation options for your specific roof structure. - Determine the number of vents needed: To create adequate ventilation, it’s important to
install the right number of vents based on the size and layout of your attic space.
Improper ventilation can lead to issues such as excessive heat buildup, moisture
problems, and increased energy bills. Consulting with a roofing professional will help you
determine the optimal number of vents required for your roof.
Proper planning is key to ensuring the installation or replacement of your roof vents is
efficient and effective. By considering factors such as attic space, roof type, ventilation
areas, roof slope, and the number of vents needed, you can achieve optimal air circulation
and ventilation for your home.
Determining Ventilation Needs
Determining the appropriate amount of ventilation for your attic space is crucial to ensure
effective airflow and prevent issues like heat buildup and moisture problems. To calculate
the required amount of ventilation, follow these steps:
- Measure the square footage of your attic: Use a tape measure to measure the length
and width of your attic space. Multiply these measurements to calculate the square
footage. - Calculate the required ventilation area: As a general guideline, you should have at least
1 square foot of vent opening for every 150 square feet of attic space. Divide the square
footage of your attic by 150 to determine the required ventilation area. - Determine the number and size of vents: Consider the types of roof vents you plan to
install and their corresponding ventilation area. For example, if you are installing static
vents with a ventilation area of 60 square inches each, divide the required ventilation area
by the ventilation area of each vent to determine the number of vents needed. - Distribute vents evenly: To ensure proper airflow, distribute the vents evenly throughout
your roof. Place them strategically along the ridge, gables, or other suitable locations as
recommended by a roofing professional.
Remember to consult with a roofing expert to evaluate your specific attic ventilation
needs and select the appropriate type and number of vents for your roof. By calculating
the required amount of ventilation, you can create a healthier and more energy-efficient
attic space.
Choosing Vent Locations
Choosing the right locations for your roof vents is crucial for ensuring effective airflow
and proper ventilation in your attic space. Here are a few factors to consider when
deciding where to place your roof vents.
- Ridge Vents: Tese vents are typically installed along the ridge of your roof. They are the
most effective type of vent for providing continuous airflow along the entire length of your
attic. Ideally, they should be evenly distributed along the ridge to allow for proper
ventilation. - Gable Vents: Gable vents are installed on the gable ends of your roof. They work by
creating a pressure difference that allows hot air to escape through the vents. It is
recommended to install them on both sides of the roof for balanced ventilation. - Soffit Vents: Soffit vents are located under the eaves of your roof to allow fresh air to
enter the attic. They work in conjunction with other types of vents to provide intake
ventilation. It is important to make sure that the soffit vents are not blocked by insulation
or other obstructions. - Static Vents: Static vents, such as box vents or turbine vents, can be placed
strategically on the roof to enhance ventilation. They are typically installed near the ridge
or on other suitable locations where they can provide sufficient air exchange.
Consulting with a roofing professional is highly recommended when determining the ideal
placement locations for roof vents. They can assess your specific roof structure, recommend the appropriate vent types, and ensure that the vents are evenly distributed
for optimal airflow.
Installing a Roof Vent: Step-by-Step
Installing a roof vent is a crucial step in maintaining proper attic ventilation and
preventing issues such as moisture buildup, mold growth, and damage to the roof
structure. Whether you’re looking to replace an existing roof vent or install a new one,
here is a step-by-step guide to help you with the process.
- Choose the Type of Vent: There are various types of roof vents available, such as ridge
vents, static vents, turbine vents, and box vents. Consider the size of your attic space, the
type of roof you have, and your ventilation needs to determine the most suitable type of
vent for your roof. - Measure and Mark: Start by measuring the roof ridge or the area where you intend to
install the vent. Use a tape measure to determine the length and width of the vent. Mark
the area on the roof surface using a pencil or chalk. - Prepare the Roof Surface: Clear the area of any debris, including loose shingles, nails,
and dirt. Use a utility knife or a roofing tool to remove any shingles or roofing materials
from the marked area. Take care not to damage the underlying roof structure. - Install the Vent Flange: Place the vent flange over the marked area, ensuring it aligns
with the ridge or the designated location. Use roofing nails or screws to secure the flange
to the roof surface. Make sure to drive the nails or screws through the pre-drilled holes in
the flange. - Seal the Flange: Apply roofing cement or silicone sealant around the edges of the vent
flange to create a watertight seal. This will prevent any water infiltration through the vent
opening. - Attach the Vent Cover: Depending on the type of vent you’re installing, attach the vent
cover or cap to the flange using the provided screws or clips. Ensure that it is securely
fastened to prevent it from being dislodged by wind or other elements. - Test for Proper Ventilation: Once the vent is installed, check for proper airflow and
ventilation. Stand back and observe the vent to see if air is flowing through it. You can
also use a smoke pencil or a piece of tissue paper near the vent to check for any suction
or movement caused by airflow.
Remember, if you’re not confident in your DIY skills or have a complex roofing system, it’s
always best to hire a professional roofing contractor to install the roof vents. They have
the experience and knowledge to ensure proper installation and ventilation for your home.
Preparing the Roof Area
- Remove Shingles: Start by removing the shingles or roofing materials from the marked
area using a utility knife or a roofing tool. Carefully lift the shingles and slide the tool
underneath to cut the nails or adhesive holding them in place. Make sure to remove any
nails or debris from the area. Cut an Opening: With the shingles removed, use a saw or a reciprocating saw to cut an
opening in the roof surface. Follow the marked lines to ensure accuracy. Take caution not to cut into the underlying roof structure. Remove any excess roofing materials or decking
to create a clean opening for the vent.- Secure the Decking: Inspect the roof decking and make sure it is secure and in good
condition. Replace any damaged or deteriorated decking to ensure a solid foundation for
the vent installation. This step is crucial for the longevity and effectiveness of the vent. - Install the Vent Flange: Place the vent flange over the opening, aligning it with the ridge
or designated location. Use roofing nails or screws to secure the flange to the roof
decking. Drive the nails or screws through the pre-drilled holes in the flange, ensuring a
tight and secure fit. - Seal the Flange: Apply roofing cement or silicone sealant around the edges of the vent
flange to create a watertight seal. This will prevent any water infiltration through the vent
opening and protect against potential leaks.
Placing the Roof Vent
- Position the Vent: Carefully place the roof vent over the flange, ensuring it fits securely.
Align the vent with the flange and position it according to the manufacturer’s instructions.
Make sure there is enough space for air to flow freely through the vent. - Secure the Vent: Once the vent is properly positioned, use roofing nails or screws to
secure it to the roof deck. Drive the nails or screws through the vent’s pre-drilled holes
and into the decking, making sure they are tight and secure. This will prevent the vent
from being lifted or dislodged during strong winds or severe weather. - Seal the Vent: Apply a layer of roofing cement or silicone sealant around the edges of
the vent and along the flange to create a waterproof seal. This will prevent any water
infiltration and ensure the vent is protected from leaks. Smooth out the sealant with a
putty knife or your finger to ensure a even and secure seal. - Inspect and Clean: After installing the vent, inspect the area for any loose debris or
excess sealant. Remove any debris and clean the area to ensure proper ventilation. This
will help prevent clogs and allow for optimal airflow through the vent.
By following these step-by-step instructions, you can successfully place a roof vent and
ensure proper ventilation in your attic space. Always consult with a professional roofing
contractor for advice and assistance for your specific roofing project.
Sealing and Attaching
To properly seal and attach a roof vent, follow these steps:
- Position the Vent: Ensure that the vent is positioned correctly on the roof surface.
Typically, vents are placed near the ridge or at intervals along the roof. Choose a suitable
location that allows for proper ventilation and airflow in the attic space. - Secure with Roofing Nails: Using roofing nails or screws, secure the vent to the roof
deck. Drive the nails or screws through the pre-drilled holes in the vent and into the
decking. Make sure they are tight and secure to prevent any lifting or dislodgment during
severe weather. - Apply Roofing Cement: Create a waterproof seal by applying a layer of roofing cement
or silicone sealant around the edges of the vent and along the flange. This will prevent
any water infiltration and protect the vent from leaks. Use a putty knife or your finger to
smooth out the sealant, ensuring an even and secure seal. - Inspect and Clean: After installation, inspect the area for any loose debris or excess
sealant. Remove any debris and clean the area to ensure proper ventilation. This will
prevent clogs and allow for optimal airflow through the vent.
By properly securing and sealing the vent, you can ensure efficient ventilation and prevent
any potential water leaks or damage to your roof. Always follow the manufacturer’s
instructions and consult a professional if needed for a safe and effective installation.
Shingling Around the Vent
When installing or replacing a roof vent, it’s important to properly reshingle the area
around it to ensure a watertight seal. Here’s a step-by-step guide to shingling around the
vent:
- Remove Old Shingles: If you’re replacing a roof vent, start by removing the old shingles
around the vent area. Use a utility knife to carefully cut and remove the nails holding the
shingles in place. - Clean and Inspect: Clean the area around the vent to remove any debris or old sealant.
Inspect the vent flange for any damage or signs of wear. Replace the vent if necessary. - Install New Shingles: Begin reshingling by starting at the bottom. Slide the new
shingles under the existing rows, ensuring they overlap the vent flange. Nail them down
securely, following the manufacturer’s guidelines for nail placement. - Cut around the Vent: As you reach the vent, use a utility knife and cut the shingles to fit
around. Maintain a small gap (approximately 1/4 inch) between the vent flange and the
shingles to allow for expansion and contraction. - Apply Roofing Cement: To create a watertight seal, apply roofing cement or silicone
sealant around the vent flange and over the cut edges of the shingles. Smooth it out with
a putty knife or your finger to ensure an even and secure seal. - Continue Shingling: After sealing around the vent, continue installing the remaining
shingles, making sure they overlap properly for a tight seal.
By following these instructions, you can ensure that the area around the vent is properly
reshingled, providing a watertight seal and protecting your roof from leaks.
Roof Vent Cap Installation
Proper ventilation in your home is essential for maintaining a comfortable living
environment and protecting your roof from damage caused by moisture buildup. One
crucial component of an effective ventilation system is the roof vent cap. Installing a roof
vent cap can help improve airflow in your attic and promote better air circulation
throughout your entire home. In this guide, we’ll walk you through the steps to install a
roof vent cap and ensure proper ventilation for your roof.
Step 1: Choose the Right Vent Cap
Before you start the installation process, it’s important to choose the right roof vent cap
for your specific needs. There are different types of vent caps available, such as static
vents, turbine vents, and ridge vents. Consider factors like your roof’s structure, the
climate you live in, and the size of your attic space when selecting the appropriate vent
cap for your roof.
Step 2: Locate the Installation Area
Identify the ideal location for your roof vent cap. You will want to place it near the ridge of
your roof to allow for the hot and stale air to escape effectively. Ensure that there are no
obstructions, such as nearby branches or other structures, that could block the vent’s
airflow.
Step 3: Prepare the Roof Surface
Clean the roof surface thoroughly around the installation area. Remove any dirt, debris, or
old sealant to ensure a secure and reliable bond between the roof and the vent cap. Use a
wire brush or scraper to remove stubborn residue if necessary. Take this opportunity to
inspect the roof for any signs of damage or leaks that may need repair before installing
the vent cap.
Step 4: Cut an Opening
Using a reciprocating saw or a jigsaw, carefully cut a hole in your roof that matches the
dimensions of the vent cap you have chosen. Make sure to follow the manufacturer’s
instructions for the correct-sized opening. Take caution not to damage any underlying
structures, such as rafters or joists, during this process.
Step 5: Install the Vent Cap
Place the vent cap over the opening on your roof. Ensure that it sits securely and aligns
properly with the roof surface. If your vent cap requires fasteners, use roofing nails or
screws to secure it in place. Follow the manufacturer’s recommendations for proper
placement and spacing.
Step 6: Seal the Edges
To prevent any leaks or moisture penetration, apply roofing cement or silicone sealant
around the edges of the vent cap. Ensure a watertight seal by applying a generous
amount of sealant and spreading it evenly with a putty knife or your finger.
Step 7: Inspect and Maintain
After completing the installation, thoroughly inspect the vent cap and its surrounding area
for any signs of damage or dislodgment. Regularly check and clean your roof vent cap to
ensure it functions optimally and remains free of debris or blockages.
Professional Help and Considerations
When it comes to installing or replacing a roof vent, it’s important to consider whether you
should seek professional help. While some DIY enthusiasts may feel confident in tackling
this project themselves, there are certain factors to keep in mind before diving in.
- First and foremost, hiring a professional roofing contractor can ensure
the job is done correctly and efficiently. These experienced individuals
have the necessary skills and knowledge to handle roof vent installation
or replacement with ease. They understand the intricacies of different
roof types and can recommend the best venting solution for your
specific needs. - Another consideration is the warranty. Many roofing companies offer
warranties on their services, giving you added peace of mind knowing
that if any issues arise in the future, you have professional support to
rely on. Attempting a DIY installation may void warranties on roofing
materials or cause damage that may not be covered by insurance,
leaving you potentially liable for any repairs or expenses. - Additionally, professionals are equipped with specialized tools and
equipment that may not be readily available to the average homeowner.
They have the necessary safety gear to work at heights and can access
hard-to-reach areas without putting themselves or your property at risk. - One key advantage of hiring a professional is their expertise in proper
ventilation. They can assess your attic space and determine the optimal
number and type of roof vents needed to ensure adequate airflow.
Improper ventilation can lead to issues such as excessive moisture
buildup, mold growth, and reduced energy efficiency. By entrusting the
job to a professional, you can be confident that your home’s ventilation
needs are addressed effectively. - It’s also worth considering the time and effort required for a roof vent
installation or replacement. A roofing project can be physically
demanding and time-consuming, especially for those without experience
in the field. Hiring a professional allows you to save valuable time and
focus on other important tasks or aspects of your life.
While DIY projects can be rewarding, it’s important to carefully consider the complexity
and potential risks involved in installing or replacing a roof vent. Seeking professional
help ensures that the job is done correctly, efficiently, and in compliance with industry
standards. By doing so, you can rest easy knowing that you’ve made a wise investment in
your home’s ventilation system and overall well-being.
When to Seek Professional Installation
There are several scenarios where it is strongly recommended to seek professional
installation for a roof vent.
Firstly, if you have a complex roof structure or a unique type of roof, such
as a metal or seam metal roof, it is best to consult a roofing
professional. They have the expertise and knowledge to properly install vents on these types of roofs without causing damage to the roof
surface.- Additionally, if you have a larger home with a significant amount of
square footage or several attic spaces, professional installation is
recommended. Roofing professionals can accurately assess your
specific ventilation needs and determine the appropriate number and
type of vents to ensure optimal airflow throughout your home. - Furthermore, if you are dealing with other roofing projects, such as
replacing shingles or installing solar panels, it may be more efficient and
cost-effective to have the roof vent installation done by a professional at
the same time. They can integrate the vent installation seamlessly with
the other roofing tasks, saving you time and potential issues down the
line.
Ventilation Installation in Existing Roofs
Installing roof vents in existing roofs can improve ventilation and prevent issues such as
moisture buildup and higher energy bills. However, there are some challenges to consider
when adding roof vents to an existing roof.
The first challenge is determining the best location for the vents. Ideally, vents should be
evenly distributed to ensure proper airflow throughout the attic space. However, the roof
structure and existing obstructions, such as pipes or electrical wiring, may limit the
available options. It is important to carefully assess the roof’s layout and consult a
roofing professional who can determine the most suitable locations for the vents.
Another challenge is integrating the vents into the roof without causing damage.
Improper installation or poor sealing can lead to water leaks and potential structural
issues over time. To ensure a proper installation, it is recommended to hire a roofing
contractor with experience in ventilation installation. They will have the necessary
expertise and tools to complete the job correctly.
In conclusion, while adding roof vents to an existing roof can enhance ventilation, it is
essential to address the potential challenges. Consulting a roofing professional and
ensuring proper installation can help optimize airflow and prevent any future issues.
Roof Vent Maintenance
Regular maintenance of roof vents is essential to ensure their efficiency and prolong their
lifespan. Here are some tips to keep your roof vents in good working condition:
- Periodically inspect the vents: Take a close look at your roof vents to check for any
signs of damage or obstruction. Look for cracks, dents, or debris accumulation that may
obstruct airflow. - Clean the vents: Over time, dust, leaves, and other debris can accumulate in the vents,
blocking airflow. Use a soft brush or a broom to gently remove any surface debris. Be
careful not to damage the vents while cleaning. - Check for proper sealing: Inspect the vent flange and ensure it is tightly sealed to the
roof surface. If you notice any gaps or loose screws, consult a professional roofer to
address the issue promptly. - Monitor for moisture buildup: Excessive moisture in the attic can lead to mold growth
and rotting of the roof structure. Check for any signs of moisture around the vents, such
as water stains or musty odors. If you notice any issues, consider installing additional
ventilation or addressing any underlying moisture problems. - Consider professional servicing: Periodically, it is a good idea to hire a roofing
professional to conduct a thorough inspection of your roof vents. They can identify any
potential issues and provide the necessary maintenance or repairs.
By following these maintenance tips, you can ensure that your roof vents continue to
function effectively, allowing for proper ventilation and preventing potential problems
down the line.
Conclusion
Proper roof vent installation is essential for maintaining a well-ventilated and healthy
home. By providing an escape route for hot air, moisture, and pollutants, roof vents help
regulate the temperature and air quality in your attic space. This not only prevents the
build-up of harmful molds and mildews but also extends the lifespan of your roof and
improves energy efficiency.
To install roof vents, start by determining the type and number of vents needed based on
your roof’s square footage and the desired airflow. Select the appropriate vent type for
your roof structure and ventilation needs, such as ridge vents, gable vents, or turbine
vents. Install them following the instructions provided by the manufacturer and ensure
you take the necessary safety precautions.
While installing roof vents can be a DIY project, it is always recommended to consult a
professional roofing contractor for proper vent installation. They can ensure the vents are
correctly placed, sealed, and integrated into your roof system.
Proper ventilation is an investment in the long-term health and energy efficiency of your
home. By maintaining regular inspections, cleaning, and addressing any issues promptly,
you can enjoy a well-ventilated and comfortable living space for years to come.