509-201-4190

Planning and Preparation
Before embarking on any construction project, proper planning and preparation are
essential to ensure a successful outcome. This holds true for adding a porch roof to your
house as well. By giving due attention to the planning and preparation phase, you can
save yourself time, money, and potential headaches down the line. Let’s take a closer look
at the crucial steps involved in planning and preparing for the attachment of a porch roof.
- Familiarize Yourself with Building Codes and Regulations: The first and foremost step
is to familiarize yourself with the local building codes and regulations in your area.
Building code offices can provide you with the necessary information regarding permits,
materials, and structural requirements. Adhering to these codes will ensure the safety
and integrity of your porch roof. - Evaluate the Existing House Roof: Before construction begins, it is important to assess
the condition of your house roof. Consider factors such as the roof slope, type of roof,
and its framing structure. Understanding these aspects will help you determine the best
approach for attaching the porch roof and ensure compatibility and seamless integration
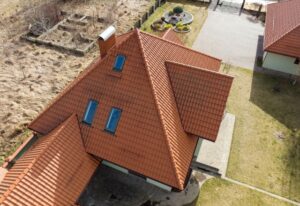
between the two structures. - Choose the Type of Porch Roof: Depending on your preferences and architectural style,
you can choose between different types of porch roofs, such as flat roofs, gable roofs, or
hip roofs. Each type has its own advantages and considerations. Take into account
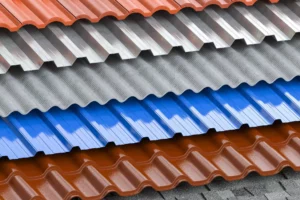
factors like aesthetics, functionality, and the impact on the overall design of your house. - Select the Right Roofing Material: The choice of roofing material for your porch roof is
crucial in ensuring durability and longevity. Asphalt shingles are a popular choice due to
their affordability, variety of colors, and ease of installation. However, other options like
metal, cedar shakes, or even a vinyl roof covering can be considered according to your
preferences and budget. - Create a Detailed Construction Plan: Once you have a clear understanding of the
building codes, existing roof structure, and the type of porch roof, it’s time to create a
detailed construction plan. This plan should outline all the necessary steps and materials
required for a successful attachment. Consider elements like the ledger board, headers,
rafters, and joists, ensuring that they are appropriately sized, placed, and connected. - Gather the Necessary Tools and Materials: To streamline the construction process,
gather all the tools and materials required beforehand. This may include various hand and
power tools like saws, drills, hammers, and levels, as well as construction materials like
joist hangers, lag screws, metal brackets, roofing cement, and roofing paper. Having
everything readily available will save you time and frustration during construction.
By following these planning and preparation steps, you will set yourself up for a smooth
and successful porch roof attachment. Remember to consult professionals or seek
expert advice if needed, especially when it comes to complex structural elements or if
you are unsure about any aspect of the construction process. With careful planning and
attention to detail, you can create a porch roof that not only enhances the aesthetics of
your house but also provides a functional and enjoyable outdoor living space for years to
come.
Assessing Design and Location
When assessing the design and location of your porch roof, there are several
considerations to take into account to ensure its compatibility with your house’s
structure.
- First, evaluate the existing architectural style of your home. You want
your porch roof design to seamlessly blend with the overall aesthetic of
your house. Consider the roof pitch, color, materials, and any
architectural features that should be incorporated into the porch roof
design. - Next, determine the location of the porch roof. This will depend on the
layout and orientation of your house, as well as the purpose of your
porch. A front porch roof can provide a welcoming entrance, while a side
porch roof can offer a more private and intimate outdoor space.
Consider the available space, accessibility, and the desired use of your
porch. - Additionally, assess the structural integrity of your house. Ensure that
the existing roof can support the weight of the porch roof. Consult with a
professional if needed to determine if any modifications or
reinforcements are necessary to ensure the safety and stability of the
structure. - Lastly, take into account any local building codes and regulations.
Depending on where you live, there may be specific requirements for
porch roof design and attachment. Familiarize yourself with these codes
to ensure compliance and to obtain any necessary permits or approvals.
By carefully assessing the design and location of your porch roof, you can create a
functional and aesthetically pleasing outdoor space that enhances the overall
appearance and value of your home.
Obtaining Necessary Permits
Before you begin building your porch roof, it is crucial to check your local building codes
and regulations. These codes can vary depending on where you live, so it is important to
familiarize yourself with them before starting any construction.
Building codes exist to ensure the safety and structural integrity of the porch roof, as well
as the overall safety of the property and its occupants. They may address specific
requirements such as the maximum load-bearing capacity, minimum slope for drainage,
or the type of roofing material that can be used.
In addition to checking the building codes, you may also need to obtain the necessary
permits or approvals from your local building code offices. They will be able to provide
you with the specific requirements and guide you through the permit application process.
Obtaining the necessary permits ensures that your porch roof construction will meet the
necessary standards and that it will be inspected for compliance during and after the
construction process. Failure to obtain the required permits can result in fines, penalties,
or even having to dismantle the construction.
By checking local building codes and obtaining the necessary permits, you can rest
assured that your porch roof will be built safely and in compliance with the regulations,
providing you with a beautiful and functional outdoor living space for years to come.
Gathering Tools and Materials
To build a porch roof attached to a house, you will need a range of essential tools and
materials. Here is a list to help you gather everything you need for the construction
process.
Tools:
– Measuring tape: Use this tool to accurately measure the dimensions of your porch and
determine the required lengths of lumber and roofing materials.
– Level: A level is essential to ensure that your porch roof is properly aligned and straight.
– Saws: You will need various saws, such as a circular saw or a miter saw, to cut the
lumber to the correct lengths.
– Hammer and nails: These tools are necessary for securing the lumber and attaching the
roof structure together.
– Brackets and hardware: Depending on your specific porch roof design, you may need
brackets and other hardware to provide additional support and stability.
Materials:
– Lumber: Choose the appropriate type and size of lumber for your porch roof. This may
include joists, rafters, and headers.
– Roofing materials: Select the roofing material that suits your preferences and the style
of your house. This could be asphalt shingles, metal roofing, or another option that meets
your needs.
– Flashing: Use flashing to prevent water from seeping into the joints and creating leaks in
your roof.
– Fasteners: Purchase the necessary fasteners, such as screws or nails, to attach the
various components of the porch roof securely.
By gathering these tools and materials beforehand, you will have everything you need to
start building a porch roof attached to your house.
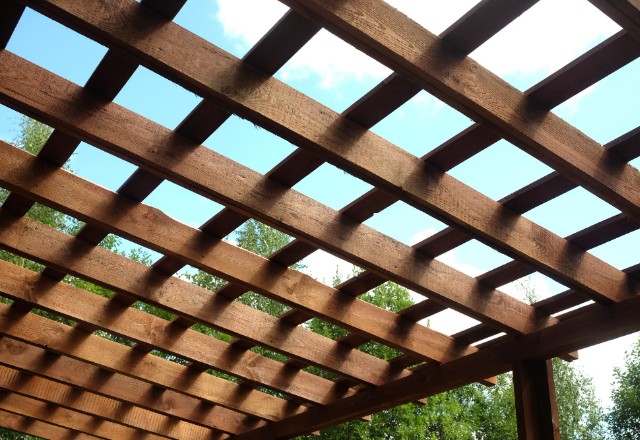
Framing the Porch Roof
Framing the porch roof is a crucial step in building a porch that not only adds aesthetic
appeal but also provides protection from the elements. Whether you’re connecting a
porch roof to an existing house or building a new porch roof altogether, the framing
process lays the foundation for a sturdy and reliable structure.
Before you begin the framing process, it’s important to familiarize yourself with your local
building codes. These codes outline the specific requirements for porch roofs in your
area, such as the allowable roof slope, types of porch roofs permitted, and required roof
structure. It’s also essential to obtain any necessary building permits from your local
building code office.
Once you have the necessary approvals, gather your tools and materials. A measuring
tape, level, saws, hammer and nails, brackets and hardware will all be needed. For
materials, you will need lumber, roofing materials, flashing, and fasteners.
- Measure and mark: Use a measuring tape to accurately measure the dimensions of
your porch and determine the lengths of lumber needed for your roof structure. Mark
these measurements on the lumber to ensure precise cuts. - Cut the lumber: With your measurements marked, use a saw, such as a circular saw or
miter saw, to make the necessary cuts. Remember to wear safety goggles and exercise
caution during this step. - Install the rafter plate: Attach a rafter plate to the exterior wall of your house, ensuring
it is level and properly aligned. This plate will serve as the base for your porch roof rafters. - Install the headers and rafters: Attach the headers to the rafter plate, providing
additional support for the rafters. Next, install the rafters to complete the overall roof
frame. Again, ensure that everything is level and properly aligned. - Add additional support: Depending on your porch roof design, you may need to install
braces, brackets, or other hardware to provide additional support and stability to the roof
structure. Consult your porch roof plans or a professional if unsure. - Secure the roof structure: Use the hammer and nails to secure the various components
of the porch roof together. Ensure everything is tightly fastened to prevent any future
issues with the structure. - Install flashing: Use flashing to prevent water from seeping into the joints and creating
leaks in your roof. Apply the flashing to areas where the porch roof connects to the
existing house roof and any other vulnerable areas. - Install roofing materials: Once the framing is complete and the flashing is in place, you
can proceed to install the chosen roofing materials. Whether you opt for asphalt shingles,
metal roofing, or another type, follow the manufacturer’s instructions to ensure a proper
and watertight installation.
By following these steps, you can successfully frame a porch roof that seamlessly
connects to your house or creates an inviting outdoor living space. Remember, if you’re
unsure about any step in the process, it’s always best to consult with a professional to
ensure the safety and stability of your porch roof.
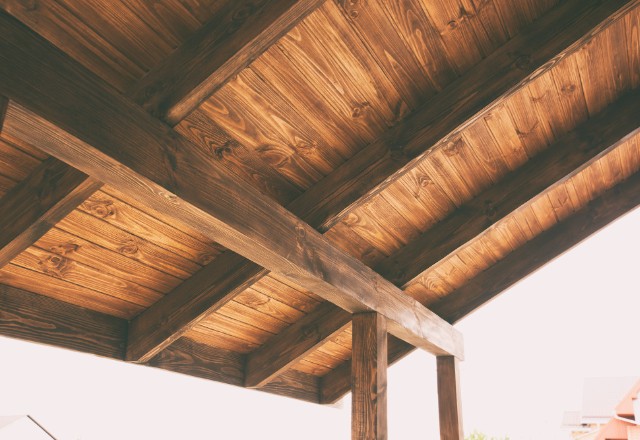
Creating the Support Framework
To start building a porch roof attached to a house, you need to create a strong support
framework that ensures stability and longevity. Here are the steps to follow when creating
the support framework:
- Measure and Mark: Begin by measuring and marking the attachment points on both
the house and porch. This will help you determine the precise location where the roof will
connect to the house. Use a measuring tape and level to ensure accuracy. - Install Support Beams: Attach support beams, also known as headers, to the exterior
wall of the house. These beams provide the foundation for the porch roof. Use lag bolts
or other appropriate fasteners to secure them to the wall studs or band joist. Make sure
the beams are level and properly aligned, as they will support the weight of the roof. - Add Joists: Install joists between the support beams to create a sturdy framework.
Joists are horizontal beams that span from the header to the outer edge of the porch.
They provide additional support for the roof and help distribute its weight evenly. Use joist
hangers to secure the joists to the beams, ensuring they are spaced correctly according
to your porch roof plans or local building codes. - Install Rafter Tails: Attach rafter tails, also known as overhangs, to the outer end of the
joists. These extensions create a decorative touch while also providing support for the
eaves of the porch roof. Use rafter hangers or metal brackets to secure the rafter tails to
the joists. - Secure the Framework: To ensure the support framework is strong and secure, use lag
screws or nails to fasten all the components together. Make sure all connections are tight
and sturdy, as the reliability of the porch roof depends on the integrity of the support
framework.
By following these steps, you can create a solid support framework for your porch roof.
Remember to consult your porch roof plans and local building codes to ensure
compliance and safety throughout the construction process.
Adding the Ridge Board
Once the support framework is in place, the next step is to attach the ridge board to the
wall of the house. The ridge board is a horizontal beam that runs along the top of the roof,
connecting the two ends.
- Measure and Cut: Measure the length of the ridge board according to your porch roof
plans. Use a saw to cut the board to the correct size. Make sure to account for any
overhang or extension you want for the porch roof. - Position the Ridge Board: Place the ridge board on top of the support beams, aligning it
with the marked attachment points on the house’s wall. Ensure that the board is level and
centered with the support beams. - Secure the Ridge Board: Use lag bolts or appropriate fasteners to attach the ridge
board to the wall studs or band joist, making sure to penetrate solid framing members.
Space the fasteners according to your porch roof plans or local building codes. Tighten
the fasteners securely to provide a strong connection. - Reinforce the Connections: To enhance the stability and longevity of the ridge board
attachment, consider adding additional support. Install metal brackets or rafter hangers
at regular intervals along the ridge board, connecting it to the support beams or outer
rafters.
By following these steps, you can successfully add the ridge board to the house’s wall,
providing a solid base for the porch roof and ensuring its structural integrity.
Installing Rafters
- Measure and Mark: Start by measuring the proper spacing for your rafters according to
your porch roof plans or local building codes. Mark these locations on the ridge board
and the outer walls of the porch. - Cut Rafters: Use a saw to cut the rafters to the appropriate length, accounting for any
overhang or extension desired for the porch roof. Ensure that the ends of the rafters are
cut at the correct angles to fit securely against the ridge board and the outer walls. - Attach Rafters to Ridge Board: Position each rafter at its designated location on the
ridge board. Use rafter hangers to secure the rafters to the ridge board, making sure they
are level and plumb. Follow the manufacturer’s instructions for properly installing the
rafter hangers. Secure Rafters to Outer Walls: Once the rafters are securely attached to the ridge
board, fasten them to the outer walls of the porch. Use joist hangers or metal brackets to provide additional support and ensure a strong connection. Space the fasteners
according to your porch roof plans or local building codes.- Reinforce Rafter Connections: To enhance the stability of the rafters, consider adding
additional support. Install collar ties or collar beams between the opposing rafters at the
mid-span of the porch. These will prevent the rafters from spreading apart and increase
the overall strength of the porch roof structure.
It is important to consult with your local building code offices and acquire any required
building permits before commencing construction. It is also crucial to adhere to all safety
guidelines and regulations throughout the entire process.
Connecting the Ledger Board
One of the crucial steps in building a porch roof attached to a house is securely attaching
the ledger board to the house’s wall. The ledger board acts as the main support for the
porch roof, so it is important to ensure a strong connection. Here’s a step-by-step guide
on how to connect the ledger board:
- Prepare the Ledger Board: Measure the length of the ledger board and cut it to the
appropriate size. It should be long enough to accommodate the porch roof span. Smooth
out any rough edges and ensure it is level. - Mark the Attachment Points: Locate the exact placement of the ledger board on the
house’s wall. Use a level to ensure it is straight and mark the attachment points on the
wall. These marks will indicate where you will need to drill holes for lag screws or bolts. - Apply Flashing: Before attaching the ledger board, it’s recommended to install a layer of
flashing. This will provide additional protection against water intrusion and potential
damage. Apply the flashing to the wall, ensuring it extends beyond the ledger board
width. Secure it with roofing cement or other suitable adhesive. - Attach the Ledger Board: With the flashing in place, position the ledger board against
the wall, aligning it with the marked attachment points. Using lag screws or bolts of
suitable length and thickness, drill pilot holes through the ledger board and into the wall.
Insert the screws or bolts and tighten them securely, ensuring the ledger board is firmly
attached to the wall. - Check for Stability: After attaching the ledger board, check for stability by applying
pressure or gently pushing on it. It should feel secure and not move or flex. If there is any
movement, reinforce the attachment by adding additional screws or bolts.
By following these steps, you will have successfully connected the ledger board to the
house’s wall, providing a solid foundation for your porch roof.
Attaching Roofing and Flashing
Attaching roofing and flashing is a crucial step in the construction process of a porch
roof attached to a house. Properly installed roofing and flashing not only provide
protection against the elements but also ensure the longevity and durability of the porch
roof. Here’s a step-by-step guide on how to attach roofing and flashing:
Choose the Right Roofing Material: Select the type of roofing material that best suits
your needs and matches the rest of your house roof. Common choices include asphalt shingles, metal, or even flat roofs for a modern and sleek look. Consider factors such as
durability, cost, and aesthetics when making your selection.- Install the Roof Sheathing: Before attaching the roofing material, it’s important to have
a solid and stable base. Install roof sheathing, such as plywood or oriented strand board
(OSB), to provide a structural surface for the roofing material. Nail or screw the sheathing
to the rafters, ensuring proper spacing as per building codes. - Lay the Roofing Material: Begin by laying an underlayment, such as roofing felt or
synthetic underlayment, over the roof sheathing. This helps provide an extra layer of
protection against moisture. Once the underlayment is in place, carefully install the
roofing material according to the manufacturer’s instructions. Secure it using nails or
roofing staples, following the recommended pattern and spacing. - Attach Flashing: Flashing plays a critical role in preventing water infiltration and
redirecting it away from vulnerable areas of the porch roof. Start by installing valley
boards along any roof valleys or intersections to create a smooth and watertight
transition between roofing sections. Then, apply flashing to areas where the porch roof
attaches to the house, such as at the ledger board connection. Use metal flashing, usually
made of galvanized steel or aluminum, and secure it using roofing cement or appropriate
fasteners. - Pay Attention to Details: Ensure that flashing overlaps correctly and is properly sealed
to prevent any water seepage. Seal any exposed nail heads or seams with roofing cement
or other suitable sealant. Properly attach and seal any vents, chimneys, or other
protrusions on the porch roof to maintain a watertight and secure connection. - Inspect and Maintain: After attaching the roofing and flashing, inspect the porch roof
regularly to identify any potential issues, such as loose shingles, damaged flashing, or
signs of water damage. Promptly address any repairs or maintenance needs to prevent
further damage and ensure the longevity of your porch roof.
Remember to check your local building codes and obtain any necessary permits before
starting the construction of your porch roof. If you are unsure about any aspect of
attaching roofing and flashing, consult a professional contractor or hire a roofing
specialist to ensure the job is done correctly and to code.
Roof Decking Installation
Roof decking is an essential step in the process of building a porch roof attached to a
house. It provides a solid surface for the roofing materials to be installed on and helps
distribute the weight evenly across the roof structure. Here is a step-by-step guide to
installing roof decking:
- Prepare the Surface: Ensure that the roof structure is properly prepared and free from
any debris or obstructions. This includes removing any old roofing materials, nails, or
shingles. - Measure and Cut the Plywood: Measure the dimensions of the porch roof and cut the
plywood sheets to fit. Leave a small gap, about 1/8 inch, between each sheet to allow for
natural expansion and contraction. - Position and Fasten the Plywood: Start at one end of the porch roof and position the
first sheet of plywood. Align it with the edges of the roof and secure it in place using nails
or screws. Use galvanized or stainless steel fasteners to prevent rusting. - Repeat the Process: Continue installing the remaining sheets of plywood, ensuring that
each one is properly aligned and fastened to the roof structure. Stagger the seams
between the sheets for added strength and stability. - Check for Stability: Once all the plywood sheets are installed, check for any loose or
uneven sections. Secure any loose areas with additional fasteners and ensure that the
surface is level and stable.
By following these steps, you can effectively install the roof decking for your porch roof.
Remember to consult the local building codes and regulations to ensure compliance and
safety.
Roofing Material Selection
When it comes to selecting the right roofing material for your porch roof, there are several
options to consider. The choice of material will depend on factors such as your budget,
climate, and desired aesthetic.
- One popular option for porch roofs is asphalt shingles. They are
affordable, easy to install, and come in a variety of colors and styles.
Asphalt shingles are also durable and can withstand harsh weather
conditions. - Another option is metal roofing, which is known for its longevity and
durability. Metal roofs are resistant to fire, rot, and insects, making them
a low-maintenance choice. They also reflect heat, helping to keep your
porch cool during hot summer months. - For a more traditional look, wooden shingles or shakes can be used.
Wood offers a natural and rustic appearance, and with proper
maintenance, it can last for several decades. However, wood requires
regular upkeep and is more susceptible to fire and moisture damage. - Lastly, there are synthetic roofing materials available, such as rubber or
plastic shingles. These materials are lightweight, easy to install, and
often made from recycled materials. They are also resistant to mold and
mildew.
Before making a final decision, consider consulting with a roofing professional to
determine which roofing material is best suited for your porch roof. They can provide
guidance based on your specific needs, local climate, and building codes.
Installing Flashing
Flashing is a crucial component when it comes to preventing leaks in a porch roof. It
serves as a watertight barrier between the porch roof and the adjacent structure, ensuring that water is directed away from vulnerable areas. Here is how to properly install flashing
to ensure a leak-free porch roof.
- Start by selecting the appropriate flashing material. Common options include
aluminum, copper, or galvanized steel, which are all durable and weather-resistant. - Measure and cut the flashing pieces according to the dimensions of your porch roof.
Ensure that the flashing extends past the edge of the roof and overlaps with the adjacent
structure. - Install a layer of roofing cement along the underside of the flashing, then carefully
position it onto the roof, aligning it with the edge. Secure the flashing in place using
galvanized roofing nails or screws. - Apply another layer of roofing cement over the exposed nail heads or screw heads to
provide extra protection against water penetration. - Repeat this process for all sides of the porch roof, making sure that the flashing pieces
overlap at corners or joints. - After the flashing is installed, apply a layer of roofing cement over the top edges and
seams to create a watertight seal.
By following these steps, you can effectively install flashing and minimize the risk of
leaks in your porch roof. Remember to regularly inspect and maintain the flashing to
ensure its continued effectiveness.
Finishing Touches
Once the main structure of your porch roof is complete, it’s time to add the finishing
touches that will enhance the overall appearance and functionality of your outdoor space.
- One important step in finishing your porch roof is to install the fascia
board. The fascia board is a horizontal board that is attached to the edge
of the rafters or trusses and serves as a decorative and protective
element. It helps to create a seamless transition between the roof and
the exterior of your house. Choose a durable material like PVC or
composite wood that will withstand weather and require little
maintenance. - Next, select the type of roofing material that best suits your porch roof.
Asphalt shingles are a popular choice due to their affordability, durability,
and variety of styles and colors. Metal roofs are another option,
providing a modern and sleek look while offering excellent protection
against the elements. Consider the slope of your roof and the aesthetic
you want to achieve when making your decision. To ensure proper water drainage, it is important to install guttering and
downspouts along the edges of your porch roof. This will redirect
rainwater away from your roof and foundation, preventing water damage and erosion. Choose guttering materials that are durable and resistant to
rust and corrosion, such as aluminum or vinyl.- In addition to functional items, you can also add decorative elements to
your porch roof to enhance its visual appeal. Consider installing
decorative trims or moldings along the edges of the roof to give it a
more finished and polished look. You can also incorporate lights to
illuminate your outdoor space and create a welcoming and inviting
atmosphere. - Lastly, don’t forget to obtain the necessary building permits and adhere
to local building codes when finishing your porch roof. Building permit
requirements and regulations may vary depending on your location, so
it’s important to check with your local building code offices to ensure
compliance.
By paying attention to these finishing touches, you can create a porch roof that not only
provides protection from the elements but also adds value and enhances the overall
beauty of your home. So, take the time to carefully consider the materials and design
elements that will make your porch roof a functional and aesthetically pleasing addition
to your outdoor living space.
Soffit and Fascia Installation
When finishing your porch roof, it’s important to install soffit and fascia to create a
polished look. Soffit is the material that covers the underside of your porch roof’s
overhang, while fascia is the horizontal board that caps the end of the rafters or trusses.
To install soffit, start by measuring the length of the underside of your
porch roof. Cut the soffit panels to fit using a circular saw. Then, install J-
channels along the edges of the roof to hold the soffit in place. Insert thesoffit panels into the J-channels and secure them using screws or nails.
- Next, it’s time to install the fascia board. Measure the length of the rafter
ends and cut the fascia board accordingly. Attach the fascia board to the
rafter ends using screws or nails. - To finish off the installation, add a drip edge along the bottom edge of
the fascia board to divert water away from the porch roof.
By properly installing soffit and fascia, you will not only enhance the visual appeal of your
porch roof but also protect it from moisture and pests. Remember to choose a material
that is durable and requires minimal maintenance to ensure long-lasting results.
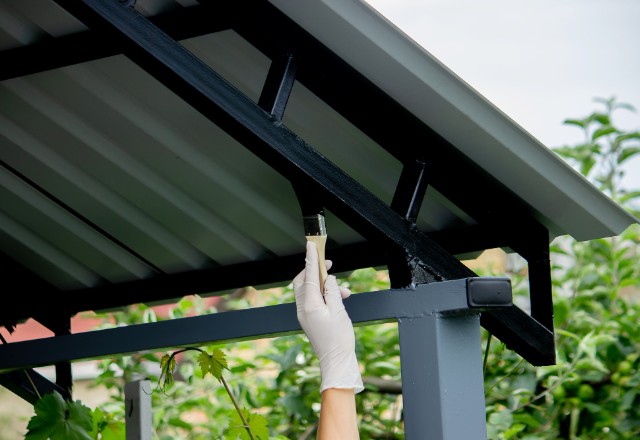
Painting and Sealing
Painting and sealing your porch roof is an essential step in protecting it from the
elements and ensuring its longevity. Here are a few tips to help you complete this
important task:
- Clean the surface: Before painting or sealing, make sure the porch roof is clean and
free of any dirt, debris, or mildew. Use a pressure washer or a mild detergent solution to
thoroughly clean the surface. Allow it to dry completely. - Choose the right paint: Select a high-quality exterior paint that is specifically designed
for roofs. Opt for a paint color that complements the overall aesthetics of your home.
Additionally, consider using a paint with UV protection to help prevent fading and damage
from the sun’s rays. - Prepare the surface: If there are any areas with peeling or chipped paint, scrape off the
loose paint and sand the surface to create a smooth base. Apply a primer to any bare
areas before painting to ensure proper adhesion. - Apply the paint: Use a brush, roller, or sprayer to apply the paint in long, even strokes.
Start at one end of the roof and work your way towards the other end. Apply multiple
coats if necessary, following the manufacturer’s instructions for drying time between
coats. - Seal the roof: After the paint has dried completely, consider applying a clear roof
sealant to provide an extra layer of protection against moisture and harsh weather.
Choose a high-quality sealant that is specifically designed for roofs and apply it
according to the product instructions.
By following these tips and properly painting and sealing your porch roof, you can help
extend its lifespan and enhance the beauty and functionality of your outdoor living space.
Safety Considerations
When working on your porch roof, it is important to prioritize safety to ensure a
successful and accident-free construction process. Here are some important safety
considerations to keep in mind:
- Work at heights safely: When working at heights, always use appropriate safety
equipment such as harnesses, ladders, and scaffolding. Make sure the equipment is in
good condition and properly secured. - Follow proper equipment usage: Use tools and equipment as instructed by the
manufacturer and follow all safety guidelines. This includes using protective gear such as
gloves, goggles, and hard hats when necessary. - Take precautions for weather conditions: Be mindful of weather conditions such as
strong winds, rain, or extreme temperatures that may affect your safety. Avoid working
during unfavorable weather and take necessary precautions, such as using non-slip
shoes and securing loose materials. - Secure the work area: Maintain a clean and organized work area to prevent accidents
caused by tripping or falling over debris. Keep tools and materials stored properly and
away from edges to avoid hazards. - Seek professional advice if needed: If you are unsure about certain aspects of the
construction process or if your porch roof is complex, consider consulting with a
professional contractor or architect who can provide guidance and ensure the work is
done safely and up to code.
Always prioritize safety when working on your porch roof to protect yourself and others
involved in the construction process. By following these safety considerations, you can
create a safe and secure outdoor living space for years to come.
Seeking Professional Help
When it comes to attaching a porch roof to your house, safety should always be your top
priority. While some porch roof attachment projects can be relatively straightforward,
others may be more complex and require professional expertise. If you are unsure about
any aspect of the construction process or if your porch roof design is intricate, it is highly
recommended to seek the help of an experienced contractor or architect.
Professional contractors and architects have the knowledge and expertise to handle
complex porch roof attachments. They understand local building codes and regulations,
ensuring that your project meets all the necessary requirements. They can also provide
valuable guidance and advice throughout the construction process, helping you make
informed decisions.
By consulting with a professional, you can ensure that your porch roof is securely
attached to your house, minimizing the risk of structural problems or accidents. They can
assess the condition of your existing structure and determine the appropriate materials
and methods for your specific project. Additionally, professionals have access to
specialized tools and equipment that may be required for intricate porch roof
attachments.
In conclusion, when it comes to attaching a porch roof to your house, seeking the
assistance of an experienced contractor or architect is strongly advised, especially for
complex projects. Their knowledge, expertise, and adherence to building codes will help
ensure that your porch roof attachment is done safely and up to standard.

Conclusion
In conclusion, connecting a porch roof to a house offers numerous benefits both
aesthetically and functionally. A well-designed and properly attached porch roof can
enhance the overall appearance of the house, creating a seamless extension of the
outdoor living space. It can also provide protection from the elements, allowing
homeowners to enjoy their porch in various weather conditions.
However, it is crucial to follow the proper steps and consult with professionals to ensure
a secure and successful porch roof attachment. Professionals have the knowledge and
expertise to navigate local building codes and regulations, ensuring that the project
meets all necessary requirements. They can also assess the existing structure and
determine the appropriate materials and methods for the specific project. By adhering to
the recommended procedures, homeowners can minimize the risk of structural problems
or accidents, ensuring a long-lasting and functional porch roof attachment.
So, whether it’s a gable porch roof or a flat porch roof, it’s essential to consult with
professionals and consider all aspects of the construction process to achieve a sturdy
and beautiful porch roof attachment that will withstand the test of time.