509-201-4190

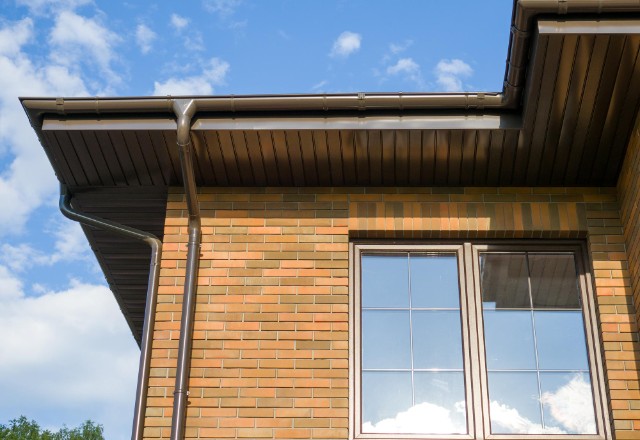
Gutters are a crucial part of any home or building’s roofing system. They are responsible for collecting rainwater and directing it away from the structure’s foundation and into a designated drainage area. Without gutters, heavy rainfall can cause extensive damage to the roof, walls, and foundation, leading to costly repairs. In this article, we will discuss the common types of gutters, their importance, and walk you through the step-by-step process of removing seamless gutters.
Disclaimer: This article is intended to provide helpful advice for removing and disposing of old seamless gutters. It should not be taken as a substitute for professional advice or service. If you are unsure or need further assistance with the removal or disposal process, we recommend that you consult with a certified roofing contractor such as Advance Roofing LLC. They specialize in gutter installation, repair, and replacement services and have years of experience serving the Spokane, WA area with high-quality roofing solutions.
The Problem of Seamless Gutters
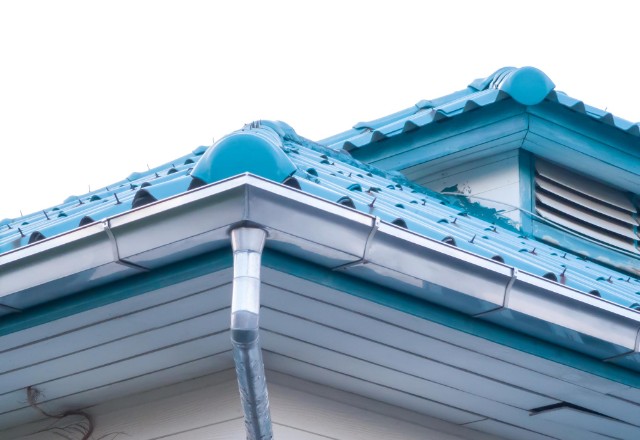
Seamless gutters are popular choices among homeowners because they do not have seams that can allow water to leak through. With their streamlined design, they are less prone to clogs and reduce the need for regular gutter cleaning. However, seamless gutters are not immune to problems and can still cause water damage if they are not properly maintained.
- One common problem associated with seamless gutters is leaks. Despite the lack of seams, leaks can still occur if the gutters are not installed correctly or become damaged over time. Water can seep through gaps or cracks in the gutters, resulting in water damage to your home’s foundation, walls, and roof. To avoid this, it is important to have your gutter installation done by a professional installer and ensure they use high-quality materials. Regular maintenance and inspections can also help detect any damage or leaks and prevent further problems.
- Another common issue with seamless gutters is clogs due to debris buildup. Over time, leaves, twigs, and other debris can accumulate in the gutters and prevent water from flowing properly. This can cause water to overflow and potentially damage the roof and walls of your home. To prevent clogs, it is important to have your gutters cleaned regularly. The rule of thumb is to have them cleaned at least once or twice a year, depending on your location and the surrounding environment. This will ensure that water flows through your gutters smoothly and reduces the potential for clogs.
- Additionally, lack of proper maintenance can also cause other problems with seamless gutters. Without regular inspection and maintenance, the entire gutter system can become damaged. This can lead to structural damage and potential water damage. To avoid this, it is important to have any damages repaired promptly and to have your gutters inspected by a licensed gutter installation company. Doing so can help prevent costly repairs and potential water damage.
While seamless gutters offer a wide range of benefits, they are not immune to problems. Regular maintenance, including gutter cleaning and inspections, can help prevent structural damage, potential water damage, leaks, and clogs. It is essential to ensure that you use high-quality materials, have your gutters installed by a professional installer, and address any damages promptly to avoid larger problems down the line.
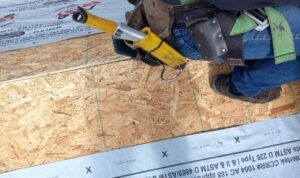
Preparation for Gutter Removal

Removing gutters can be a daunting task, especially if you’ve never done it before. However, with the right preparation and equipment, it can be a smooth and easy process. Here are some steps you should follow to prepare for gutter removal.
Materials Needed for Gutter Removal Process
When it comes to removing seamless gutters, having the right materials is crucial to ensure a smooth and successful process. The materials required for gutter removal may vary depending on the type of gutter system you have, the length of gutters you need to remove and the type of material you choose for your new gutters.
Listed below are some of the essential materials required for seamless gutter removal:
- Screws – To remove gutters, you will need screws to disassemble the gutter sections from the fascia board or the roof. Make sure you have the appropriate size screws for your specific gutter system.
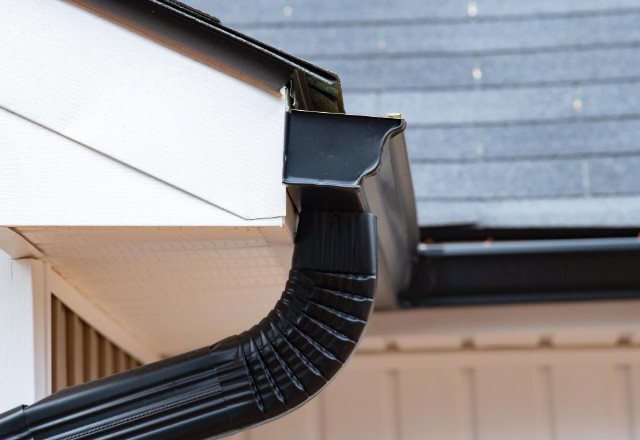
- Downspouts – These are necessary to guide water away from the roof and foundation. You will need to remove and reinstall downspouts along with the gutters.
- Elbows – Elbows direct water flow from the gutter to the downspout. You may need to replace the elbows when installing the new gutter system.
- Gutter flashing – Flashing is used to protect the roof from water damage and to prevent leaks. Removing and replacing gutter flashing is an integral part of the gutter removal process.
- Gutter hanging strap – Hanging straps are used to hang gutters from the fascia board. These may need replacement if they show signs of wear and tear.
- Gutter sealant – This is used to seal gaps and joints between the gutters to prevent water leakage.
- Other materials – Some additional materials that may be required include splash blocks, structural hangers, and a ladder if you don’t already have one.
The cost of the materials required for gutter removal will depend on the type of gutter material chosen, and the linear feet required to replace the entire gutter system. Popular choices for gutter materials include vinyl and metal gutters. Consider the cost, durability, ease of installation, and the aesthetic appeal when selecting a material.
In addition to the materials required for seamless gutter removal, you will also need to purchase downspouts, flashing, splash blocks and structural hangers to properly install the new gutter system. It is advisable to consult with a professional installer or roofing professional for expert advice on choosing materials and proper installation techniques.
Safety Measures to Consider Before Beginning Gutter Removal Process
Gutter removal is not only a tedious process but also involves considerable risks. As it includes working on ladders at a considerable height, safety should be the utmost priority. Here are some critical safety measures to consider before beginning the gutter removal process:
- Before removing gutters, it is essential to prioritize ladder safety. Select a ladder that can accommodate your weight and the required weight capacity for the job. Ensure the ladder is stable and consider utilizing ladder stabilizers to prevent it from shifting during work.
- Proper Footing: Ensure that the ground where the ladder is set up is stable and level. Avoid setting up the ladder on uneven or soft ground that can cause it to shift or topple over.
- Use the Right Equipment: Choose equipment that is capable of handling the work. Use sturdy and appropriate tools such as screwdrivers and pliers to ensure they do not break or slip during the process.
- Wear Protective Gear: It is essential to wear proper clothing that covers your skin and protects you from the sun and scrapes. Additionally, protective gear, such as work gloves, helmets, and safety glasses, will protect you from any potential harm or accidents.
- Debris Removal: It is easy to overlook debris that falls off the gutters and other trash that gathers on the roof while removing gutters. Always have an appropriate container or trash bag nearby, and dispose of the debris thoughtfully.
Following these guidelines will increase your safety and help avoid damage to yourself and your home.
Clear the Area Around the Gutter
Before starting the gutter removal process, it is important to clear the area around the gutter to ensure a safe and efficient workspace. Here are some steps to clear the area:
- Remove any debris or standing water around the area: Any debris or standing water around the gutter can be hazardous while working on a ladder. It’s important to clear the area to avoid any potential hazards. Use a bucket or wet-dry vacuum to remove standing water.
- Use a leaf blower or broom to clear the roof and gutters: Clearing the roof and gutters of debris like leaves, sticks, or other unwanted materials can make the gutter removal process more manageable. Use a leaf blower or broom to clear the debris out of the way.
- Wear protective gear: When clearing the area, it is essential to wear protective gear such as gloves and protective eyewear. This will protect you from any possible injuries like cuts or scrapes.
- Inspect the gutters for any damage or potential water damage: While clearing the area, it is also important to inspect the gutters for any damage or potential water damage. Look for signs of rust, cracks, or sagging. Signs of potential water damage could include discoloration or staining around the gutters or fascia.
By following these steps to clear the area around the gutters, you can prepare for a safe and effective gutter removal process.
Rule of Thumb for Gutter Replacement Lengths
When it comes to gutter replacement, one of the most important factors to consider is the length of the new gutters. Choosing the right length can ensure that your gutters perform their intended function of collecting and directing water away from your home. So, what is the rule of thumb for gutter replacement lengths?
To start, it’s essential to consider the size and layout of your roof. The total length of the roof’s edge where the gutters will be installed should be measured, and a few extra feet should be added to allow for any corners or turns. This ensures that the gutters will provide adequate coverage and prevent water from pooling at your home’s foundation.
A general rule of thumb for gutter replacement is to aim for a length that will allow for one downspout for every 20-30 feet of gutter. Downspouts play a critical role in efficiently directing water away from your home, and having too few can cause overflow and potential water damage.
It’s also important to note that half-round gutters may require slightly different measurements than traditional gutters due to their unique shape. In general, it’s recommended to consult with a professional installer to ensure that the proper length is chosen based on your specific roof and gutter system.
Overall, the rule of thumb for gutter replacement lengths is to determine the proper length based on your roof’s size and layout, add a few extra feet, and aim for one downspout for every 20-30 feet of gutter. By following these guidelines, you can ensure that your new gutters will effectively protect your home from potential water damage.
Removing the Seamless Gutter System Step-by-Step
Seamless gutters are popular choices for residential gutter systems due to their wide range of benefits, such as preventing potential water damage and reducing the need for regular maintenance. However, there may come a time when removing them is necessary, whether for repair or replacement purposes. In this guide, we’ll be providing step-by-step instructions on how to remove seamless gutters properly to ensure minimal damage to your roofing material and the entire gutter system.
Unscrew and Remove Downspouts
When it comes to gutter maintenance, removing downspouts is an essential step. Whether you are repairing or replacing your gutters, knowing how to unscrew and remove downspouts is crucial. Here’s a step-by-step guide to make the process easier:
- Detach the downspout from the elbow located beneath the gutter drop outlet.
- Next, loosen the downspout wall straps that keep it secured to the wall. You can do this using a screwdriver or a wrench. Be careful not to cause any damage to the downspout or the wall.
- Once the straps are loosened, carefully pull the downspout away from the house. Make sure to do this slowly and steadily to avoid any damage to the gutter or the wall.
- Use a screwdriver or hammer to disconnect the mounting hardware that holds the gutters against the roof. If you are replacing the gutters, you will need to remove all of the brackets.
- If the gutters are still attached to the bracket, gently push them upwards to dislodge them. However, make sure you have a partner to hold the gutter sections steady as you unscrew or remove the brackets.
- Finally, fix the holes left behind with either caulk or wood putty. This will prevent any water from leaking through and causing structural damage.
By following these simple steps, you can unscrew and remove downspouts without causing any damage to your gutters or your property. Remember, regular maintenance and inspection of your gutters is essential to avoid potential water damage and costly repairs.
Cut Away Seams and Connections at Corners or Joints
If you are experiencing trouble with your sectional gutter system, cutting away the seams and connections at corners or joints may be necessary to stop leaks and ensure proper water flow. To get started, you’ll need to identify the areas where the system is separating or leaking.
Once you have located these spots, it’s time to break out the offset tin snips. Use these specialized snips to carefully cut away the seams or joints that connect each section of the system. It’s essential to cut outside the line by about 1/16 inch to ensure a perfect fit when you reattach the sections later.
As you cut, be very careful not to damage your roofing material or to harm yourself. Use caution and a steady hand to create the cuts you need to remove the seams and joints.
The next step in this process is to ensure that you smooth out any rough edges left behind by the cuts you made. Take a metal file and gently remove any sharp or rough edges that could cause harm to yourself or damage your roofing materials.
By carefully cutting away your sectional gutters’ separated seams and connections, you can stop leaks and ensure proper water flow. Just remember to use offset tin snips, cut outside the line by about 1/16 inch, take great care not to damage your roofing material or harm yourself and smooth out any rough edges left behind.
Loosen Gutters from Fascia Board Attachment Points
Loosening gutters from the fascia board attachment points is an essential step in many gutter maintenance and repair projects. Here’s how to get started:
- Identify the mounting hardware: To loosen gutters from fascia board attachment points, the first step is to locate the mounting hardware. Depending on the type of gutter system you have, this may involve examining brackets or other hardware used to attach the gutter to the fascia board.
- Use the right tools: Once you have identified the mounting hardware, you’ll need to use the appropriate tools to disconnect it. In most cases, this will involve a screwdriver or hammer, depending on the type of fasteners used.
- Be careful not to damage the fascia board or roofing: When using tools to disconnect the mounting hardware, it’s essential to be careful not to damage the fascia board or the roofing material. Use caution and take your time to avoid any inadvertent damage.
- Consider using a stabilizer: If you are working alone, it may be helpful to have a partner hold the gutter or use a ladder stabilizer to help steady the ladder. This will ensure that you can work safely and effectively.
By following these steps, you can safely and effectively loosen gutters from fascia board attachment points. Whether you’re completing a gutter repair or simply performing routine maintenance, it’s important to take the time to do the job right to avoid potential damage to your home.
Carefully Pull Out Sections of Gutters from Connecting Brackets
When it comes to removing gutters, one of the essential steps that you need to follow is carefully pulling out sections of gutters from connecting brackets. This is a crucial process as it ensures that the gutters are removed without causing any damage to the connecting brackets and other surrounding structures.
To begin with, you need to identify the connecting brackets or clips that hold the gutters in place. Once you have located these brackets, you can then proceed to pull out each section of the gutter carefully. As you do this, be sure to avoid using forceful or abrupt pulling motions, as this could lead to further damage to the brackets.
If you are dealing with aluminum gutters, it is important to be cautious of any sharp edges or rough areas that may cause injury during the removal process. Also, it is advisable to have a partner to help hold a stable piece of the gutters, ensuring that the areas around the connecting brackets are clear and free of clutter.
By following these instructions and pulling out the sections of gutters carefully, you can remove the gutters without causing any damage to the connecting brackets. This will make it easier for you to install new gutters or carry out any necessary repairs without any hassle. And once the gutters are removed, you can then proceed to clean them thoroughly, ensuring that they are free of any debris or dirt that may have accumulated over time.
Dispose of Old Seamless Gutters Properly
After removing your old seamless gutters, it is crucial to dispose of them properly to prevent potential damage. Tossing them in the garbage or leaving them on the curb for pickup can be harmful to the environment and result in fines from local authorities. Here are some tips on how to dispose of old seamless gutters properly:
The best way to dispose of your old seamless gutters is to take them to a recycling center. Recycling centers are built to receive metal and can process them into raw material to manufacture new products. Be sure to contact your local recycling center to find out if they accept metal gutters or if there is a specific disposal site for metal near you.
If you can’t find a nearby recycling center, don’t worry. You can hire a junk removal service to take care of the disposal for you. Junk removal services are equipped to handle all types of waste and will dispose of your old gutters responsibly. This option is particularly useful if you have a lot of gutters or other non-recyclable materials that need disposal.
Properly disposing of your old seamless gutters is not only the responsible thing to do but can also help protect the environment. By recycling, you prevent metal from ending up in landfills, where it can take years to decompose and potentially result in toxic materials leaching into the soil. Additionally, some recycling centers pay for scrap metal, allowing you to earn some extra cash while doing your part for the environment.
Conclusion
In conclusion, maintaining gutters should be a top priority for any homeowner. Neglecting gutter maintenance can lead to water damage and potential structural damage, which can be costly to repair. By following the step-by-step removal guide provided in this article and performing regular maintenance, you can avoid these issues and ensure that your gutters are in good condition.
Don’t wait until it’s too late to clean your gutters. Make it a part of your home maintenance routine and keep your gutters functioning properly. Remember, prevention is better than cure. So, let’s take the necessary steps to prevent water damage and potential structural damage by keeping our gutters clean.
With clean gutters, you can avoid water damage and potential structural damage, which is crucial for the overall health of your home. So, make sure you follow the simple tips provided in this guide and prioritize gutter maintenance.