509-201-4190

Welcome to the world of Masonite siding repair! Are you looking to restore your home’s exterior from faded and dull to fabulous and bright? Whether you’re a DIY enthusiast or a professional contractor, this article will help you get the job done right. In it, we’ll share tips and tricks on how to properly repair Masonite siding so that your home looks its best all year long. From proper preparation and cleaning techniques to choosing the right tools for the job, we’ll cover everything you need to know about restoring your home’s exterior with Masonite siding. So let’s get started!
Disclaimer: While this article provides helpful tips and tricks for Masonite siding repair, it is not intended to replace professional advice or consultation. If you are unsure about the best course of action for your home’s siding, we highly recommend that you consult a qualified professional before attempting any repairs. Advance Roofing LLC has been proudly providing Spokane, WA and its surrounding areas with quality roofing solutions for many years, and they are always happy to help should you require further expertise.
What is Masonite Siding?
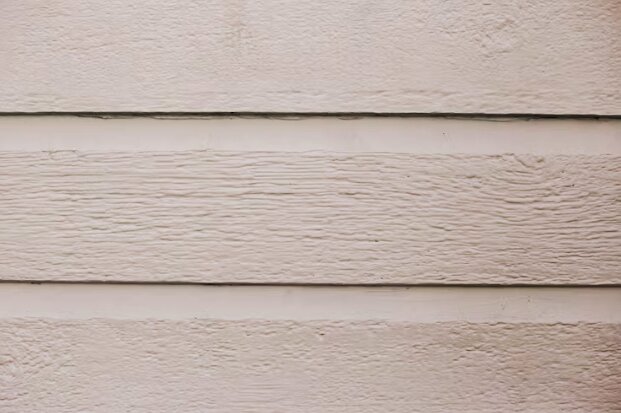
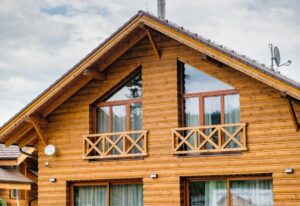
Masonite siding is a type of siding material that has been popular for decades due to its durability, affordability, and ease of installation. It consists of wood fibers that have been bonded with resin and compressed into sheets, which are then cut into siding panels. While Masonite siding is a great option for homeowners looking to update their exterior, it can also be prone to damage over time due to exposure to the elements and pests. In this article, we will share some tips and tricks for repairing different types of damage to your Masonite siding, from water damage to sun damage and everything in between.
What Causes Damage to Masonite Siding?
Masonite siding is a popular choice for property managers and homeowners alike, due to its durability and relatively low maintenance requirements. However, like any material, Masonite siding can become damaged over time. In this article, we’ll explore some of the most common causes of Masonite siding damage, as well as discuss best practices for identifying and repairing such damage.
One of the most significant factors contributing to Masonite siding damage is excessive sun exposure. Over time, prolonged exposure to sunlight can cause the siding to fade, warp, or crack, leading to unsightly damage. Additionally, water damage can also be a common cause of Masonite siding problems, particularly in areas with high humidity or frequent rainfall. When water seeps into the siding, it can cause swelling, rot, and mold growth, all of which can be detrimental to the siding’s appearance and structural integrity.
In addition to weather-related damage, pests can also be a major contributor to Masonite siding damage. Termites, carpenter ants, and other insects can easily nest in Masonite, weakening the material and causing significant damage. It’s important to note that even minor damage caused by pests can lead to long-term problems, as it can allow moisture to penetrate the material and cause rot or mold growth.
Other significant factors that can contribute to Masonite siding damage include severe damage caused by impacts or accidents, signs of paint damage, and reoccurring sidewalk damage. While it’s tempting to simply paint over exterior wall damage, doing so can lead to future maintenance repairs when the underlying damage worsens.
Identifying the cause of Masonite siding damage is crucial to taking the necessary precautions for future repairs. Professional property managers and homeowners should inspect their siding regularly for signs of weather-related, pest-related, or severe damage. Addressing these issues proactively can help prevent more significant damage in the future and ensure that the siding continues to look its best for years to come.
What are the Benefits of Repairing Masonite Siding?
Masonite siding is a popular choice among homeowners because of its durability and affordability. However, over time, it can become damaged due to weather-related factors, pests, and accidents. Fortunately, repairing your Masonite siding can offer a range of benefits that make it well worth the effort.
One of the most significant advantages of repairing Masonite siding is that it helps to protect the inside of your home from the elements. Damaged siding can allow moisture to penetrate your home’s walls, which can lead to mold growth, rot, and other issues that compromise the structural integrity of your home. Repairing your siding helps to prevent these problems, keeping your home safe and dry.
Another benefit of repairing Masonite siding is that it can improve the aesthetic appeal of your home. Faded, warped, or cracked siding can make your home look worn down and unappealing. Repairing the damage can transform the look of your home, giving it a fresh, new appearance.
Prevention is always better than cure. By repairing Masonite siding at the first sign of damage, you can prevent more severe damage from occurring. This can save you money in the long run by minimizing the need for future maintenance repairs. Regularly inspecting and maintaining your siding can keep it in good condition for years to come.
Repairing your Masonite siding can also give property managers an opportunity to evaluate their future maintenance needs and opportunities for wall upgrades. Identifying minor issues with the siding early on can allow property managers to address them before they become more severe. Additionally, repairing any damage can offer a chance to upgrade to higher-quality materials, which can improve the aesthetic appeal and durability of the building’s exterior.
In essence, repairing your Masonite siding is a wise investment that can protect your home, enhance its appearance, and save you money in the long run. Don’t wait until the damage becomes severe before taking action. When you spot signs of damage, take action promptly to keep your home looking its best.
Preparing for the Repair Project
Before beginning any repair project for your Masonite siding, it’s important to properly prepare. This will ensure that the project goes as smoothly as possible and that you achieve the best results. In this section, we will discuss some tips and tricks for effectively preparing to repair your siding, including identifying the extent of the damage, gathering the necessary tools and materials, and ensuring proper safety precautions are taken. By taking the time to prepare thoroughly, you can set yourself up for success and ensure that your siding repair is a job well done.
Check Your Local Building Codes and Regulations

When it comes to repairing Masonite siding in your home, complying with local building codes and regulations is critical. While these regulations may vary depending on your location, it is essential to understand and follow them to ensure that your repairs are up to standard.
One of the most crucial aspects of local building codes is the requirement for permits for certain repairs. Before starting any repair project, check with your local government to determine if you need a permit. Failure to obtain a permit for required repairs can result in hefty fines and even legal issues.
Additionally, building codes often specify the acceptable materials for siding repairs. Not all building materials are created equal, and using subpar materials can lead to problems down the road. Make sure you are using materials that meet the standards set by your local building codes to ensure the longevity and safety of your repairs.
It is also essential to consider the maximum height of the repaired area, as this can impact the structural integrity of your home. Local building codes often provide guidelines on the height of repairs to ensure that the siding remains securely attached to the rest of the home.
In conclusion, familiarity with local building codes and regulations is crucial when repairing Masonite siding. Compliance with regulations regarding permits, acceptable materials, and maximum height ensures that your repairs are safe, reliable, and up to standards. Remember to check with your local government to determine the specific regulations that apply to your neighborhood for a successful repair project.
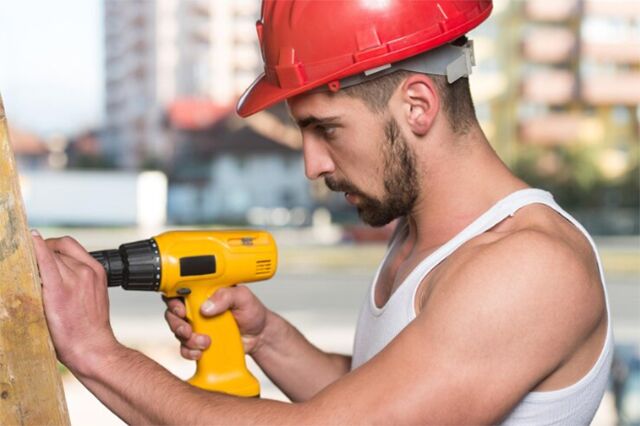
Gather Necessary Supplies and Tools
Before embarking on a Masonite siding repair project, it is crucial to gather all the necessary supplies and tools. Having everything ready and at hand will save time and ensure that the repairs are completed smoothly. The following items are needed for repairing Masonite siding:
- Caulking gun: A caulking gun is an essential tool that is used to apply caulking material over gaps and cracks of the Masonite siding. Be sure to use a caulking material that is suitable for outdoor use and able to withstand weather-related damage.
- Spackle compound: Spackle compound is necessary to fill in any large holes or divots in the Masonite siding. It is important to choose a spackle compound that is durable and able to withstand harsh weather conditions.
- Putty knife: A putty knife is used to apply spackle compound and smooth out the surface of the siding.
- Sandpaper: Fine-grit sandpaper is essential to smooth out spackle compound and remove any rough edges or bumps on the Masonite siding. This will help to ensure that the repair area is flush with the rest of the wall.
- Primer: It is important to apply primer to the repair area before painting to ensure that the paint adheres correctly. The type of primer will depend on the type of paint used.
- Paint: Choose a paint that is specifically designed for Masonite siding. This will ensure that the paint is long-lasting and can withstand weather related damage.
- Paintbrush or Paint roller: Depending on the size of the repair area, either a paintbrush or paint roller may be needed. A paintbrush is useful for small areas, while a paint roller is better for large areas.
- Ladder or scaffolding: Depending on the location of the repair area, a ladder or scaffolding may be needed to reach the Masonite siding. It is essential to choose a stable and secure ladder or scaffolding that can support your weight and the weight of any tools or materials.
In summary, gathering all the necessary supplies and tools before starting a Masonite siding repair project will make the process smoother and faster. Use the appropriate caulking material, sandpaper, primer, and paint to ensure that the repairs last long and are effective. Lastly, use a stable and secure ladder or scaffolding to reach the siding for any repairs.
Prepare the Exterior Wall for Repairs
As a property manager or maintenance personnel, preparing the exterior wall for repairs is an important task to ensure that the repairs are effective and long-lasting. In order to prepare an exterior wall for repairs, there are a few steps that need to be taken.
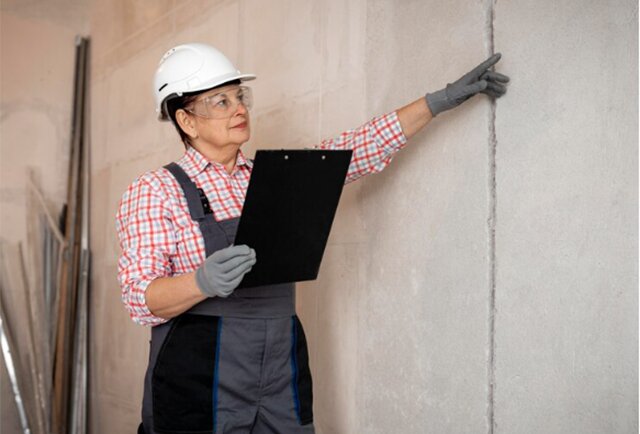
Step 1: Inspect the surface for visible damage and signs of paint damage
Before beginning any repairs on the masonite siding, it is important to thoroughly inspect the exterior wall for any visible damage or signs of paint damage. This can include any cracks, holes, missing pieces, or peeling paint. By identifying these areas, it will be easier to determine what repairs need to be made and what tools and materials will be required.
Step 2: Check for loose pieces of masonite siding
After the initial inspection, it is important to check for any loose pieces of masonite siding that need to be removed. These loose pieces can be a hazard and can also make the repairs more difficult. By removing these pieces, it will be easier to fill in any cracks or holes and create a smooth surface for painting.
Step 3: Fill in cracks, holes, or missing pieces with caulk or spackle compound
Once any loose pieces of siding have been removed, it’s time to fill in any cracks, holes, or missing pieces. A caulking gun or spackle compound can be used for this purpose, and it’s important to choose a material that is suitable for outdoor use and can withstand weather-related damage. Apply the material evenly over the repair area and use a putty knife to smooth out the surface.
Step 4: Apply primer to exposed areas before painting
After the repair area has been filled in and smoothed out, it’s time to apply primer. This will ensure that the paint adheres correctly and creates an even finish. The type of primer used will depend on the type of paint that will be applied.
Step 5: Seal repairs with paint to protect the exterior wall
Finally, it’s time to seal the repairs with paint. Choose a paint that is specifically designed for masonite siding and can withstand weather-related damage. Depending on the size of the repair area, either a paintbrush or paint roller can be used. Be sure to apply an even coat of paint to protect the exterior wall and prevent future maintenance repairs.
In conclusion, preparing an exterior wall for repairs involves a few key steps, including inspecting the surface for visible damage, checking for loose pieces of masonite siding, filling in cracks and holes with caulk or spackle compound, applying primer, and sealing the repairs with paint. By following these steps, the repairs will be more effective and long-lasting, saving time and money in the long run.
Repairing Minor Damage
Masonite siding is a popular material used for exterior walls in homes and commercial buildings. Over time, masonite siding can become damaged due to weather exposure and other factors. Repairing minor damage in masonite siding can be a cost-effective solution that prevents larger issues from occurring in the future. In this article, we will outline some helpful tips and tricks for repairing minor damage in masonite siding.
Inspect the Area for Visible Damage
When it comes to repairing Masonite siding, the first step is to inspect the area for any visible damage. This means taking a careful look at the siding to identify any issues that need to be addressed. Here’s how you can do it:
- Visually examine the siding. Start by visually examining the siding for any cracking, chipping, or missing pieces. Look closely at the surface of the siding to see if there are any signs of obvious damage or wear and tear.
- Check for mildew damage. Masonite siding is vulnerable to mildew growth, especially if it’s exposed to moist or humid conditions. Check for any discoloration or fuzzy growth on the surface of the siding, as this could be a sign of mildew damage.
- Look for pest-related damage. Insects like termites can cause significant damage to Masonite siding, so it’s essential to look for any signs of infestation. Check for any small holes or tunnels in the surface of the siding, as well as any frass or sawdust at the base of the siding.
- Check for swelling or splits. Feel the siding for any swelling or splits on the bottom edge. Splits can indicate that the siding is absorbing moisture, which can lead to further damage over time. The bottom edge of the siding is especially vulnerable to damage, so be sure to check this area carefully.
- Run your hand over the surface. Run your hand over the surface of the siding to check for any loose pieces. If the siding is starting to come loose, it may need to be reattached or replaced.
- Walk around the entire building. Finally, walk around the entire building to check for any fade or signs of previous repairing. This will give you a better sense of the overall condition of the siding and help you identify any areas that need attention.
By following these steps and keeping an eye out for visible damage, you can help ensure that your Masonite siding stays in good condition and avoid more extensive repairs down the line.
Remove Any Loose Pieces of Masonite Siding
The first step in repairing your Masonite siding is to inspect it for loose pieces. These can include splintering or crumbling of the siding. To remove any loose pieces, wear protective gloves and eyewear and gently pry them away from the exterior wall using a pry bar or a hammer with a flathead screwdriver attachment.
Once the loose pieces have been removed, proceed to smooth the surface using fine-grit sandpaper. This will prepare the area for repairs and ensure a more even surface to work with. Be sure to use protective gear while handling the sandpaper to avoid injury.
By carefully inspecting for loose pieces of Masonite siding and removing them before proceeding with repair, you can ensure a smoother and more successful repair project. So, take your time and follow these steps to remove any loose pieces and prepare the surface for repairs.
Assess If Paint Over Time Is Needed to Make Repairs Easier and More Effective

One important aspect to consider when repairing masonite siding is to assess whether paint over time is needed. This can make the repairs easier and more effective, ensuring that they will last longer and require less maintenance in the future.
As previously mentioned, excessive sun damage can degrade the color pigment molecules of paint over time, making it more vulnerable to severe damage like mildew and termites. Therefore, it is crucial to evaluate whether the area needs to be repainted or if the existing surface is still in good condition.
If it’s determined that paint over time is necessary, there are several materials that are required to ensure a successful repair. These may include a primer to prep exposed areas and a sealer to protect the repairs after painting.
When applying primer, it’s important to make sure that the surface is clean and dry to ensure proper adhesion. The primer helps to create a smooth, even surface for the paint to adhere to and helps to seal any exposed areas, preventing moisture from penetrating and causing further damage.
Additionally, it’s essential to keep in mind that different exterior wall surfaces may require different types of paint or may need to be treated differently based on their specific needs. Therefore, it’s important to research and choose the appropriate paint for the surface being repaired.
In conclusion, assessing whether paint over time is needed is crucial in making masonite siding repair easier and more effective. Applying a primer before painting and sealing any repairs with a sealer can help to ensure that the repairs last longer and require less maintenance over time.
Fill in Cracks, Holes, or Missing Pieces with Caulk or Spackle Compound
Before proceeding with any painting project, it’s important to ensure that the surface is smooth and free of any cracks, holes, or missing pieces of siding. These imperfections not only look unsightly but can compromise the integrity of the siding, leaving it vulnerable to pest-related damage or weather-related wear and tear.
To address these issues, it’s important to begin by identifying any areas with cracks, holes, or missing pieces of siding. Once these areas are identified, you can proceed with filling them in using caulk or spackle compound.
Caulk and spackle compound are both effective materials for filling in gaps, holes, or missing sections of siding. Caulk is typically used to fill in small cracks or gaps, while spackle compound is better suited for larger holes or missing pieces of siding.
To fill in cracks or small gaps, simply apply caulk evenly to the affected area with a caulking gun. Be sure to fill in any gaps or cracks thoroughly to ensure a smooth surface.
For larger holes or missing pieces of siding, use spackle compound to fill in the gaps. Apply the compound evenly, filling in any gaps or holes thoroughly. It’s important to allow the compound to dry completely before sanding down the patchwork to create a smooth surface.
By taking the time to fill in cracks, holes, or missing pieces of siding before proceeding with the painting process, you can ensure a smooth surface and a beautiful finished product. Don’t neglect this crucial step in the repair process, as it can make all the difference in the quality and longevity of your repair project.
Apply Primer to Exposed Areas Before Painting
When it comes to repairing your masonite siding, applying primer to exposed areas before painting is an essential step to ensure the long-term effectiveness of your repairs.
Primers act as a protective base coat that prevents moisture from penetrating the damaged area, which can lead to future damage. Additionally, primer provides a surface for the paint to adhere to, promoting paint adhesion while also improving the appearance of the finished surface.
To begin applying primer, it’s important to select a primer that is compatible with both your masonite siding and the type of paint you plan to use. This will ensure that the primer and the eventual paint will adhere properly, promoting long-lasting repairs.
After cleaning the damaged area, apply the primer using a brush, roller, or spray gun, making sure to cover all exposed areas completely. Ensure that the primer reaches all corners, edges, and crevices, leaving no surface exposed to moisture or other potential sources of damage.
Once the primer has been applied, allow it to dry completely before applying paint. This will ensure that the paint adheres to the primer and not to any excess moisture in the damaged area.
In conclusion, applying primer to exposed areas before painting is an important step in any masonite siding repair project. Not only does it provide a protective coat to prevent future damage, but it also promotes paint adhesion, ensuring a smooth and long-lasting finish. Remember to use compatible materials and allow the primer to dry completely for the best results.
Sealing the Repairs with Paint

After repairing masonite siding using caulk or spackle compound and applying primer, it’s crucial to seal the repairs with paint. Sealing the repairs is essential to protect the masonite siding from potential future maintenance repairs caused by pests, water damage, excessive sun damage, or weather-related damage.
Sealing the repairs with paint creates a barrier that prevents moisture, insects, and other elements from penetrating the masonite siding, which can cause further damage. By properly sealing the repairs, property managers can save time and money on future maintenance repairs.
Pests can easily cause damage to masonite siding if the repairs are not correctly sealed with paint. Insects such as termites, carpenter ants, and wood-boring beetles can easily penetrate masonite siding and cause extensive damage. Sealing the repairs with paint prevents insects from finding their way into exposed areas.
Water damage is another significant threat to masonite siding. Sealing the repairs with paint helps protect against water infiltration, which can cause decay and rot. By ensuring the repairs are adequately sealed, property managers can avoid costly water damage repairs.
Excessive sun damage can also cause issues with masonite siding. Direct sunlight can cause the siding to fade and weather over time, leading to visible damage and signs of paint damage. By sealing the repairs with paint, property managers can protect against the sun’s harmful UV rays, preserving the exterior wall’s appearance.
Weather-related damage, such as high winds, hail, or heavy rains, can also cause damage to masonite siding. Sealing the repairs with paint creates an added layer of protection against these elements, ensuring that the masonite siding remains durable and long lasting.
In conclusion, after masonite siding repairs have been performed, sealing the repairs with paint is a necessary step to protect against future maintenance repairs due to pests, water damage, excessive sun damage, and weather-related damage. Property managers should consider this step crucial to preserving the exterior wall’s appearance and extending its longevity.
Final Touches
After completing your Masonite siding repair project, there are a few final touches you should add to ensure that the repairs look seamless and neat. Here’s what you need to do:
- Inspect the area: Take a few minutes to inspect the repaired area once again. Double-check to make sure that you have made all necessary fixes and everything looks great. This final inspection will give you peace of mind, knowing that your repair project is well-done.
- Ensure repairs look great: To ensure that the repairs look great, take your time to check for any spots where you may have missed something. Suppose you find any spots that may require a touch-up or additional repairs. In that case, it’s best to address them now before cleaning the repaired area.
- Clean the repaired area: Depending on the extent of repairs, you can either use a soft cloth or pressure washer to clean the repaired area. This step will remove any debris, dirt, or dust that may have accumulated during the repair process. Cleaning the area will leave it looking clean and polished.
- Match the paint color: If the repair area needs repainting, ensure you match the paint color to the original color of the home. A mismatched color will stand out and mar the appearance of your Masonite siding. Painting the repaired area with the matching color will help the repaired section to blend in seamlessly.
- Ventilate the area: Finally, ensure that you thoroughly ventilate the repaired area by opening windows and doors to allow enough air to circulate. It’s essential to ensure that the repaired area is adequately aerated to prevent potential mold and mildew growth.
By following these final touches, your Masonite siding repair project will be complete, and your exterior wall will look as good as new.
Conclusion
Masonite siding repair is an important step for property managers to protect their exterior walls from future maintenance repairs. By sealing the repairs with paint and following the necessary steps of inspection, cleaning, and ventilation, property managers can ensure that their Masonite siding repairs look great and last long. With a little bit of extra effort, you can make sure your masonite siding remains in top shape for years to come.