509-201-4190

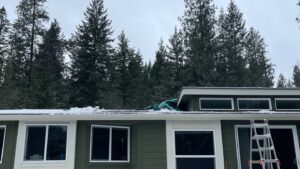
Fiber cement siding is a great choice for many homes, but like any material, it can suffer from wear and tear over time. Fortunately, repairing fiber cement siding is not as difficult as you might think. With the right tools and materials, you can make your repairs quickly and effectively. This comprehensive guide will provide you with step-by-step instructions on how to repair your fiber cement siding so that it looks as good as new.
Disclaimer: The information provided in this comprehensive guide to repairing fiber cement siding is intended for general informational purposes only. It is not intended as professional advice and should not be relied upon as such. If you have specific questions or require assistance with your repair project, please consult a qualified professional. Advance Roofing LLC has been proudly serving the Spokane, WA area with the highest standard of quality roofing solutions for many years and we are always happy to help.
Definition Fiber Cement Siding
Fiber cement siding has become a popular choice for homeowners due to its durability, moisture resistance and low maintenance needs. Made from a blend of cement, sand, and cellulose fibers, this siding option is incredibly versatile in terms of style and color choices, offering a wide variety of aesthetic options for any home exterior. In this comprehensive guide, we will discuss the basics of fiber cement siding repair, outlining the steps needed to keep your siding looking great for years to come.
Benefits of Fiber Cement Siding

Fiber cement siding is a smart choice for homeowners looking for a durable and long lasting exterior cladding. Made of a composite material that includes cement, sand, and cellulose fibers, fiber cement siding offers a number of benefits over traditional siding options. In this comprehensive guide, we’ll take a look at the many advantages of fiber cement siding.
- One of the main advantages of fiber cement siding is its excellent fire resistance. Unlike traditional wood siding, fiber cement is non combustible, which means it won’t ignite when exposed to high heat or flames. This is especially important in areas prone to wildfires or other fire hazards.
- Fiber cement siding is also highly durable and long-lasting, making it a smart investment for homeowners. With proper maintenance, fiber cement siding can last for several decades, with some manufacturers offering warranties of up to 50 years.
- Fiber cement siding is resistant to pests and termites, which can be a major problem for homeowners with traditional wood siding. The material is too hard for insects to chew through, so you won’t have to worry about costly damage from infestations.
- Fiber cement siding is also highly resistant to storms and other severe weather events. It can withstand high winds, heavy rain, and even hail, making it an ideal choice for homeowners in areas prone to extreme weather.
- Fiber cement siding is also highly resistant to moisture, which can cause traditional wood siding to warp, crack, or rot over time. This is because fiber cement siding is made of a non-organic material that doesn’t absorb water. As a result, it won’t swell, buckle, or twist, even when exposed to excess moisture.
- Fiber cement siding is available in a wide range of beautiful textures and color options, making it easy to find a style that matches your home’s architecture and complements your landscaping. In fact, fiber cement siding can even imitate the look of cedar shake siding, which is a popular choice for many homeowners.
Preparing for Repair
Preparing for Repair: Before starting any fiber cement siding repair project, it’s important to properly prepare and assess the damage. This includes identifying the potential causes of the damage, gathering the necessary tools and materials, and taking safety precautions. By taking the time to prepare properly, you can ensure a successful repair that will last for years to come.
Tools and Materials Needed
When it comes to repairing fiber cement siding, it is essential to have the right tools and materials for the job. Here is a comprehensive list of everything you will need:
Tools:
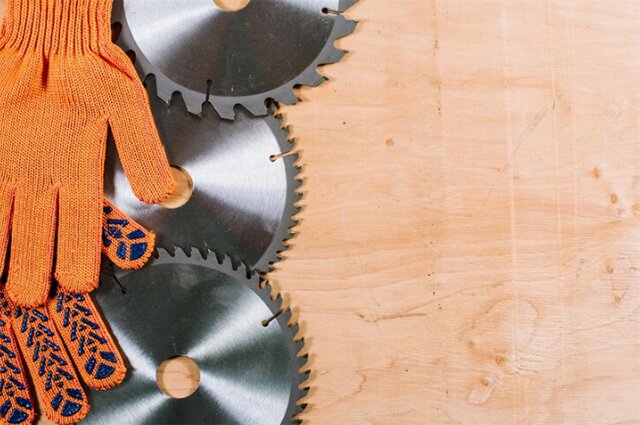
- Circular saw with a fiber cement saw blade (diamond blades work the best)
- Jigsaw with a carbide or tungsten grit blade
- Sawhorses
- Chalk line
- Pencil
- Rasp or sanding block
- Cordless drill
- Speed square
- Hammer
- Gloves
- Safety Glasses
- Dust mask
- Air compressor
- Air hose
- Caulk gun
- Stapler
- Siding gauges (optional but necessary if working alone)
- Tape measure
Materials:
- Fiber cement siding
- Galvanized finish nails 15 gauge or 6d galvanized nails
- 30 lb. felt (roofing paper)
- Acrylic caulk
- Drip cap
- Kick-out flashing
- Vinyl mounting blocks
- Paint
To cut fiber cement siding, it is necessary use a circular saw with a fiber cement saw blade. The jigsaw with a carbide or tungsten grit blade can be used to cut the smaller and intricate pieces. Sawhorses are great support when using saws. Use the chalk line and pencil to mark the siding for accurate cuts.
A rasp or sanding block is used to smooth rough edges. Cordless drills are great for drilling holes for the nails, and the speed square helps work on edges.
A hammer is needed to secure nails. Ensure you protect your hands with gloves and eyes with safety glasses. Ensure proper ventilation and use a dust mask when cutting fiber cement siding.
The air compressor and air hose can be used to clean the workspace and power a stapler. Caulk guns are necessary for recaulking. Siding gauges will help ensure precise overlap in horizontal siding. The tape measure is useful in determining the size of cuts.
Fiber cement siding can be damaged by excess moisture. So, add a 30 lb. felt layer under the siding for water resistance. Use galvanized finish nails or 6d galvanized nails to ensure long-lasting repairs.
Drip caps work well to protect walls from water damage. And kick-out flashing helps manage water flow from the roof to the gutter. Vinyl mounting blocks are perfect for installing exterior lights or mailboxes.
Finally, use high-quality paint to cover the repaired siding. By having all these necessary tools and materials at your disposal, repairing fiber cement siding will be easy.
Safety Considerations

When working with fiber cement siding, safety considerations are of the utmost importance. This is because fiber cement siding contains silica, which can be harmful to your health if inhaled. To ensure optimal protection, it is important to take the following safety precautions:
- Wear a Dust Mask: When cutting fiber cement siding, it’s essential to wear a dust mask to protect yourself from inhaling silica, which can cause respiratory problems. It’s best to use a mask with a high level of filtration, such as an N95-rated respirator.
- Use Safety Glasses: Wearing safety glasses is another important safety consideration when working with fiber cement siding. This is because debris can easily become airborne during cutting and can cause damages to your eyes without adequate protection.
- Wear Gloves: Protecting your hands with gloves is also essential to avoid cuts or injuries when handling the siding.
- Cut Fiber Cement Siding Outdoors: To prevent the buildup of harmful silica dust inside, it’s best to cut fiber cement siding outside where there is adequate ventilation. This will help to reduce the risk of inhaling silica dust and keep your workspace clean.
- Ensure Adequate Ventilation: When cutting fiber cement siding, it’s important to ensure that there is proper ventilation. This will help to prevent the accumulation of harmful dust particles in the air.
By following these precautions, you can protect yourself from the potential risks associated with working with fiber cement siding.
Guidelines for Repairing Fiber Cement Siding
Fiber cement siding can add durability, moisture resistance, and curb appeal to any home. However, over time, it may experience wear and tear, leading to the need for repairs.
Repairing fiber cement siding can be a daunting task, especially if you are not familiar with the process. In this guide, we will provide you with the necessary information to make fiber cement siding repair easy and stress-free. From analyzing the damage to selecting the right tools and materials, we’ve got you covered. Keep reading to learn more!
Identifying the Problem Area and Repairing Your Fiber Cement Siding
Fiber cement siding is a durable and beautiful siding option that provides a number of benefits for homeowners, including moisture resistance, fire resistance, and a wide variety of colors and textures. However, even the best siding can experience damage over time, often due to general wear and tear or exposure to the elements. If you notice any signs of damage in your fiber cement siding, it’s important to address the problem right away to prevent it from getting worse. Here’s a comprehensive guide to identifying the problem area and repairing your fiber cement siding.
- Identifying the Problem Area: To successfully identify the problem area in your fiber cement siding, you’ll need to start by visually inspecting the siding for any visible cracks, holes, or gaps. Check each board carefully, paying close attention to areas where neighboring siding boards meet, as these tend to be common places for cracks to occur. Additionally, keep an eye out for any signs of rodent infestation and damage, as these pests can cause serious damage to your siding.Once you’ve done a visual inspection, use a garden hose to wet the siding and observe any areas where there is a visible moisture buildup or discoloration. Also, run your fingers over the surface of the siding to feel for any soft spots or areas that have started to deteriorate. These can indicate more serious damage that will require more extensive repairs.
- Describing the Problem:Describing the issue in detail will help you determine the best course of action for repair. Make note of the location and size of any cracks, holes, or gaps you find, and take pictures if possible. Be sure to also describe any signs of moisture or rodent damage.
- Ramifications of Leaving the Issue Unaddressed:It’s crucial to address any damage to your fiber cement siding as soon as possible to prevent it from getting worse. Leaving the issue unaddressed can lead to excess moisture, which can cause mold and water damage that can spread to other areas of your home. Additionally, cracks and gaps can allow pests to enter your home, causing even more damage.
- Repairing Your Fiber Cement Siding: To repair the problem area in your fiber cement siding, you’ll need to gather the necessary tools and materials. This typically includes caulk, flashing, and replacement boards. Be sure to also have the appropriate safety equipment, such as gloves and safety goggles. Before repairing the siding, you’ll need to fix the underlying problem, such as fixing a leak or removing any pests that caused damage. Once that’s taken care of, you can begin repairing the damaged area. Start by removing any damaged boards and cutting replacement boards to fit. Secure the new boards in place with flashing and caulk to prevent moisture from getting in. Finally, paint or stain the new boards to match the rest of your siding.
Patching Holes in Fiber Cement Siding

If your fiber cement siding has sustained a hole, it’s important to address it immediately to prevent moisture and pest intrusion into your home. The good news is that patching holes in fiber cement siding is relatively easy, and can be done with a fiber cement repair kit and some basic tools. Here’s a step-by-step guide on how to patch holes in fiber cement siding:
- Assess the Damage: Before starting any repair work, assess the hole to determine if a patch or a board replacement is required. If the hole is less than a couple of inches in diameter and the surrounding fibers are in good condition, a patch can be applied in place of the damaged area. If the damage is more extensive, it may be necessary to replace the entire board.
- Obtain the Necessary Tools: If a patch can be applied, obtain a fiber cement repair kit that includes special putty for creating the patch. You’ll also need a putty knife, sandpaper, and the appropriate safety gear.
- Clean Out the Area:Clean out the area around the hole, removing any loose material without gouging into the boards. Use the putty knife to scrape away any debris or loose fibers.
- Form and Spread the Patch:Using the special putty, form and spread the patch to match the contours of the board. Be sure to press the putty firmly into the hole to ensure a good seal. Smooth out the putty with the putty knife, creating a flat surface that is flush with the surrounding siding.
- Let the Patch Dry: Allow the patch to dry completely according to the manufacturer’s instructions. This usually takes a few hours or overnight. Once dry, sand the patch with fine-grit sandpaper, smoothing out any rough edges or bumps. Make sure the patch is smooth and blends in with the surrounding siding.
- Paint the Area: Finally, paint the area to match the original color of the siding. Use a paint that is specifically formulated for fiber cement siding to ensure it adheres properly and provides sufficient moisture resistance.
Replacing Damaged or Missing Pieces of Siding
Replacing Damaged or Missing Pieces of Fiber Cement Siding: A Step-by-Step Guide
If you have identified damaged or missing pieces of fiber cement siding on your house, it’s important to address the issue as soon as possible. Luckily, replacing damaged or missing siding is a relatively easy process.
- Identify the Type and Manufacturer of Your Fiber Cement Siding. To ensure that you purchase the right replacement pieces, it’s important to identify the type and manufacturer of your current fiber cement siding. This information can usually be found on the back of the siding piece or through your siding contractor.
- Remove Damaged Siding Pieces. Using a crowbar or hammer, remove any nails or screws from the damaged siding. Carefully remove the damaged piece without damaging the surrounding siding.
- Install a Moisture Barrier. Before installing the new siding, it’s important to install a moisture barrier behind the boards. Follow the manufacturer’s guidelines for installation.
- Install the New Siding. Install the new siding according to the manufacturer’s guidelines, making sure to properly align and secure the new piece with nails or screws. Use caulk to seal any gaps between the new and existing siding pieces.
- Paint or Caulk the New Siding. Once the new siding piece is properly installed, paint it to match the surrounding siding or use caulk to seal any gaps between the new and existing pieces.
Maintenance Tips for Keeping Fiber Cement Siding in Good Condition
Fiber cement siding is a popular and durable option for many homeowners. To maintain its beauty and functionality, it’s important to keep it in good condition. In this article, we’ll provide you with some maintenance tips to help ensure your fiber cement siding lasts for years to come.
Regular Maintenance of Fiber Cement Siding Includes Cleaning
Fiber cement siding is a popular choice for homeowners because of its durability and low maintenance requirements. However, even this type of siding needs to be cleaned regularly to keep it in good condition and looking new. In this article, we’ll provide step-by step instructions on how to clean your fiber cement siding to ensure its long lifespan and beauty.
First, it’s important to note that fiber cement siding should be cleaned every 6 to 12 months, depending on the climate conditions and level of exposure to elements. This will prevent dirt and debris from building up and creating potential damage to the siding over time.
To clean your fiber cement siding, you’ll need several tools and materials, including a garden hose with a spray nozzle, a soft-bristled brush, and a cleaning solution made of water and a mild detergent. Avoid using power washers or abrasive cleaners, as they can damage the siding and cause it to deteriorate sooner.
Start by hosing down the siding to remove any loose debris, such as dirt, dust, and cobwebs. Use a gentle setting on your garden hose to avoid damaging the siding. Next, prepare your cleaning solution by mixing water and a mild detergent in a bucket according to the manufacturer’s instructions.
Dip your soft-bristled brush into the cleaning solution and gently scrub the siding in a circular motion, starting from the top and working your way down. Pay special attention to areas that are more exposed to elements and may require additional cleaning, such as those around windows and doors.
After scrubbing, rinse the siding again with your garden hose to remove any remaining soap residue. Be sure to rinse off any foliage or furniture around the siding to avoid any damage to them. Use a cloth or towel to wipe down any excess moisture from the siding and prevent water spots from forming.
In addition to regular cleaning, it’s wise to monitor your fiber cement siding for signs of wear and tear, such as fading, cracking, or discoloration, which may require more frequent cleaning or repairs. Addressing these issues as soon as possible will help prolong the life of your siding and maintain its curb appeal.
Paint Touch-Ups and Re-Coating Areas

Maintaining a good paint job is essential when it comes to preserving the appearance and durability of fiber cement siding. Depending on the climate conditions, the siding may need to be repainted every 5-10 years to maintain its vibrant finish and moisture resistance.
For small touch-ups on fiber cement siding, it’s important to prep the area properly to ensure that the new coat of paint adheres well and matches the existing color. Start by cleaning the area with water and a mild detergent to remove any dirt or debris. Let it dry completely.
Next, sand the area lightly with a fine-grit sandpaper to roughen up the surface and create a better bond for the touch-up paint. Use a paintbrush or a small roller to apply the paint, making sure to blend it in with the surrounding area for a smooth finish. Use the same type of paint that was originally used on the siding to ensure a proper color match.
When it comes to re-coating larger areas of fiber cement siding, the preparation process is crucial to ensure a long-lasting and even finish. Start by cleaning the entire surface of the siding with a pressure washer or a garden hose to remove any loose paint, dirt, or grime.
For areas with peeling or cracking paint, use a scraper or a putty knife to remove the loose paint until you reach a firm edge. Sand the edges of the remaining paint to create a smooth surface. Fill any gaps or cracks with a paintable caulk and let it dry completely before proceeding.
Next, sand the entire surface with a medium-grit sandpaper to create a slightly roughened surface for the new coat of paint to adhere to. Use a high-quality acrylic or 100% acrylic paint that is specifically formulated for fiber cement siding. Apply the paint with a paintbrush or a roller, making sure to follow the manufacturer’s instructions for application and drying time.
By following these steps, you can perform simple touch-ups or re-coat larger areas of fiber cement siding with ease and maintain its beautiful appearance for years to come.
Sealing Cracks and Gaps with Caulk
Sealing cracks and gaps with caulking is an essential part of maintaining the integrity of your fiber cement siding. It protects your home from water damage and prevents moisture from seeping in and causing larger problems such as mold, rot, and even structural damage. While caulking is durable, it’s necessary to reapply it over time to ensure your siding remains well protected.
When selecting caulking to use for your fiber cement siding, it’s recommended to choose a sealant that complies with ASTM C834 or better. This standard ensures that the caulking has excellent adhesion and provides a long-lasting seal against moisture. Silicone, polyurethane, and acrylic types of caulking are popular options for fiber cement siding, but it’s essential to read the manufacturer’s recommendation before selecting one.
The application process of caulking on fiber cement siding can vary depending on the manufacturer’s instructions. It typically involves preparing the surface by cleaning it of any debris, allowing it to dry, and then applying the caulk to the gap. Use a caulking gun to apply a uniform bead of caulk, ensuring the bead fills the entire space. Once applied, smooth it out with your finger or a caulk smoothing tool to achieve an even finish.
When cutting fiber cement boards around openings such as windows, it’s essential to ensure that the siding fits snugly. You can do this by marking the siding to fit around the opening, holding it tightly under the windowsill, and calculating the width of the cutout. Use a saw with a carbide-tipped blade to make precise cuts and reduce fiber release that can damage your respiratory system.
Regular Inspections to Look for Damage
Regular inspections are crucial to maintaining the durability and appearance of your fiber cement siding over time. Whether it’s to identify potential damage early on or prevent long-term decay, scheduling regular inspections can help you avoid expensive repairs down the road.
Here are some steps to follow when conducting a regular inspection of your fiber cement siding:
- Start by inspecting the exterior of your house, verifying that all boards are perfectly aligned. Look for any signs of defects, such as cracks or gaps, and areas where moisture may be able to penetrate.
- Examine the caulking in all joints and check for signs of damage or deterioration that may require replacement. If you notice any signs of degradation, it’s essential to remove the old caulk and replace it with a new one as soon as possible. Caulking plays a crucial role in protecting your fiber cement siding from moisture damage.
- Trim any trees, bushes, or shrubs away from your home’s siding. Overgrown greenery can cause damage to your siding by scratching the surface, allowing moisture to penetrate, and even encouraging mold growth. Make sure to keep your greenery at a safe distance from your home.
- Adjust your sprinkler system to spray away from your home. Water can damage your fiber cement siding by causing it to warp, swell, or rot over time. By avoiding the sprinkler system’s direct spray, you can help prevent damage to your home’s exterior.
- During winter months, use sand or gravel instead of deicing salts on snowy surfaces. Deicing salts can damage your fiber cement siding by causing it to corrode or discolor over time. By using sand or gravel, you can prevent any damage to your siding caused by ice or snow.
Remember, prevention is key when it comes to maintaining your siding’s durability and curb appeal.
Conclusion
Fiber cement siding is a popular and durable material for many homes, but it can suffer from wear and tear over time. Fortunately, by following the steps outlined in this comprehensive guide, you can easily repair your fiber cement siding quickly and effectively. With the right tools and materials, you can ensure that your siding looks as good as new.