509-201-4190

Vinyl siding can suffer damage from time to time, leading to holes in the material. Fortunately, it’s easy to repair these holes and get your siding looking as good as new. All you need are a few basic tools and some patience!
Disclaimer: This article provides advice on how to repair vinyl siding holes and should be used as a reference guide only. If you require further assistance, please consult with experts from Advance Roofing LLC who have many years of experience providing quality roofing solutions to the Spokane, WA area. We are always happy to help! At Advance Roofing LLC, we strive to deliver the highest standard of service for all roofing needs in Spokane and the surrounding areas.
Overview of Vinyl Siding and Its Benefits
Vinyl siding is a popular exterior covering for homes due to its durability, low maintenance, and aesthetic appeal. It is made of PVC resin and comes in a variety of colors and styles, including those resembling wood and stone. Installing vinyl siding can enhance a home’s curb appeal while protecting it from the elements and insect damage. In this article, we will delve into the benefits of vinyl siding and provide tips on how to fix any holes or damages that may occur over time.
Why Vinyl Siding has Hole?

Vinyl siding is a popular choice for homeowners looking for a maintenance-free and attractive exterior for their homes. While vinyl siding is durable, it can still suffer from small holes or punctures that may damage its look. Many factors can contribute to the cause of holes in vinyl siding, and it is essential to know the reasons to decide on the appropriate repair job.
One common cause of holes in vinyl siding is insect damage. Insects such as termites, ants, or carpenter bees can bore through the siding and create small holes that can lead to further damage in the long run.
Nail head punctures are another common reason for holes in vinyl siding. These punctures occur when nails are improperly placed or shot into the siding at the wrong angle. The result is a hole that compromises the integrity of the siding.
Mildew growth from dampness or lack of proper ventilation is another reason for holes in vinyl siding. If left unchecked, mildew can lead to extensive damage to the siding, affecting its overall appearance and durability.
Improper installation is yet another reason for holes in vinyl siding. If the siding is not installed correctly, it can bow or warp over time, leading to holes in the siding.
In addition to the reasons mentioned above, attempting to install the siding in less than ideal weather conditions, such as extreme heat or cold, can lead to damage to the siding that can result in holes.
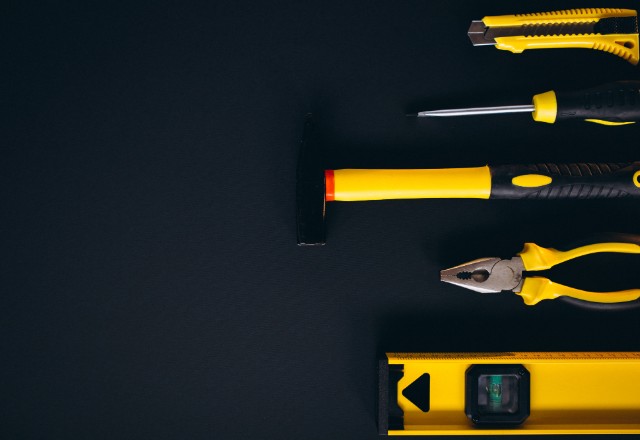
Gather the Necessary Materials
Before starting any repair job on your vinyl siding, it is important to gather all the necessary materials. This will ensure that the job can be completed effectively and efficiently without the need for multiple trips to the hardware store. Some of the materials you may need include a utility knife, zip tool, putty knife, caulk gun, replacement piece of siding, matching caulk, exterior paint, and a paintbrush. Depending on the size and severity of the damage, you may also need a replacement panel or an entire piece of siding. Be sure to also have galvanized siding nails on hand for any necessary patching.
List of Supplies Needed to Eliminate Holes in Vinyl Siding
If you’ve noticed small holes in your vinyl siding, don’t worry – they’re easily fixed with just a few supplies. Larger holes may require a bit more effort, but with the right materials, you can achieve a flawless finish. To get the job done, here’s a list of supplies you’ll need to eliminate holes in your vinyl siding.
For small holes, you will need:
- Mild detergent.
- Water solution.
- Exterior-grade caulk.
- Putty knife.
- Vinyl patch kit.
To prepare for repairing the hole, begin by cleaning the surrounding area with a solution of mild detergent and water. Rinse the area thoroughly and wait for it to dry completely. Then, apply a small amount of exterior-grade caulk to the hole using a putty knife. Use a
vinyl patch kit to repair any damage to the siding’s texture once the caulk has dried. Make sure to select a patch kit that closely matches the color and texture of your existing siding.
For larger holes, you will need:
- Vinyl siding patch kit.
- Adhesive.
- Screws.
- Exterior-grade caulk.
- Paint.
To repair larger holes in siding, it may be necessary for you replace the damaged section. Begin by using either utility knife or zip tool for cutting out the affected portion of the siding. Then, attach the vinyl siding patch kit using adhesive and screws. Make sure to seal the edges of the patch with exterior-grade caulk. Once the caulk has dried, you can paint the repair job to match the color of the surrounding siding.
It’s important to match the color and texture of your existing siding as closely as possible when selecting materials to achieve a professional repair blend. Don’t make the common mistake of using the wrong color or not blending the repair on the exterior of your home.
Helpful Tips for Choose the Materials for to Eliminate Holes in Vinyl Siding
If you’re looking to fix holes in your vinyl siding, selecting the right materials is crucial to ensuring a flawless finish that matches the existing color and texture of your siding. Below, we’ve outlined some helpful tips for choosing the right materials to eliminate holes in vinyl siding.
- The first and most important tip is to select high-quality materials made specifically for vinyl siding repairs. Using low-quality materials can result in an uneven finish that stands out against the rest of your siding. Instead, choose trusted brands and products that are specifically designed for vinyl siding repairs.
- Another key tip is to choose materials that match the color and texture of your existing siding. Popular materials for repairing holes in vinyl siding include vinyl siding panels, a zip tool, a caulk gun, exterior-grade caulk, a putty knife, and a utility knife. By matching the color and texture of your existing siding, you can ensure a seamless repair job.
- If the hole is larger than a few inches, you may need to replace the damaged section of siding. A vinyl patch kit is an excellent choice for this type of repair job. When choosing a patch kit, make sure to select a color that closely matches your siding and cut the patch piece slightly larger than the hole. This will allow the patch to overlap the hole slightly, providing a secure and lasting repair.
Steps for Sealing a Hole in Your Vinyl Siding
Vinyl siding is prone to damage from insects, hail, and other harsh environmental elements. If left untreated, holes in your siding can lead to more extensive damage to your home’s exterior. However, the good news is that you can fix these holes with a few simple steps. Here are some guidelines to help you repair and seal holes in your vinyl siding to prevent further damage to your home.
Removing Damaged Pieces of Siding
If you’ve noticed holes or damage in your vinyl siding, removing the damaged pieces is the first step in achieving a flawless finish. With the right tools and materials, you can easily remove damaged pieces of siding and replace them with new, matching panels.
A zip tool is necessary to remove vinyl siding. Using the tool, you can unhook the bottom lip of the damaged panel and slide it along the edge to separate it from the rest of the siding.
Once you’ve removed the damaged panel, you’ll need to remove any nails or screws that hold the top of the panel in place. This can be done with a hammer or pry bar, or a drill if the nails or screws are stubborn.
With the damaged panel removed and the area clear, it’s time to measure and cut a new piece of siding to fit the space. It’s important to measure the space accurately and to cut the new piece at least four inches wider than the original piece. This will ensure a proper fit and prevent any gaps from appearing.
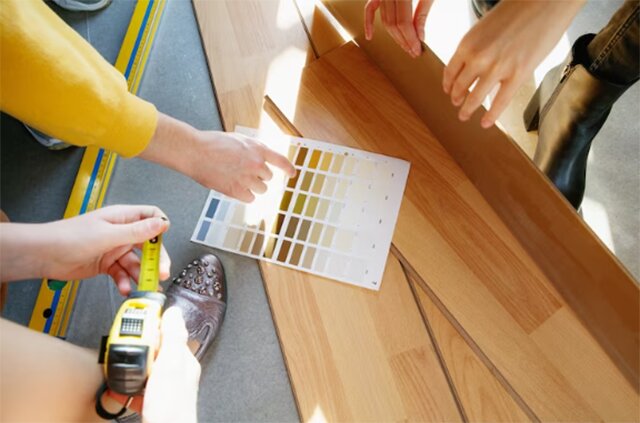
Making Measurements and Cutting a Replacement Piece of Vinyl Siding

When it comes to repairing damage to your vinyl siding, measuring and cutting a replacement panel is an important step. Here’s a step-by-step guide to making accurate measurements and cutting a replacement piece of vinyl siding.
- Measure the length and width of the damaged area with a measuring tape. Be sure to measure the entire area accurately, as this will determine the size of the replacement panel needed.
- Use a square to mark the measurements on a new piece of vinyl siding. This ensures that your cuts are straight and precise, and that the replacement panel will fit snugly into the space without any gaps.
- Cut the replacement panel to size with a circular saw or snips. A circular saw is the most efficient tool for cutting long strips of vinyl siding, while snips are better suited for smaller cuts and curved edges.
- Be sure to cut the replacement panel at least four inches wider than the original piece to ensure a proper fit. This will prevent any gaps from appearing and ensure that the new panel blends seamlessly with the rest of the siding.
Whether you’re tackling minor damage caused by insects or more significant damage from severe weather, following these steps will help you achieve a flawless finish that will enhance the beauty of your home’s exterior.
Fitting the New Piece into Place and Securing It with a Zip Tool
Once you have measured and cut the replacement piece of vinyl siding, it’s time to fit it into place. It’s important to leave a little extra room for expansion, as vinyl siding can expand and contract with temperature changes. This prevents any buckling or warping that could happen if the siding fits too tightly.
To begin, line up the replacement piece with the existing siding panels. Use a zip tool to slide the piece into place, locking it securely onto the bottom edge. This tool is specifically designed to fit into vinyl siding panels and allows you to slide the replacement piece into place without damaging the surrounding panels.
Once the bottom edge is secure, gently push the top edge of the replacement piece into place while gently snapping the snap lock. The snap lock should be lined up with the existing panels to ensure a seamless fit.
To ensure added stability for the replacement piece, employ galvanized siding nails to fasten the panel securely. It is crucial to utilize galvanized nails, as they possess the ability to withstand corrosion and will not deteriorate with time. This will ensure that the new panel stays in place for years to come.
Overall, fitting a new piece of vinyl siding into place is a straightforward process.
Applying a Bead of Caulk with a Caulk Gun
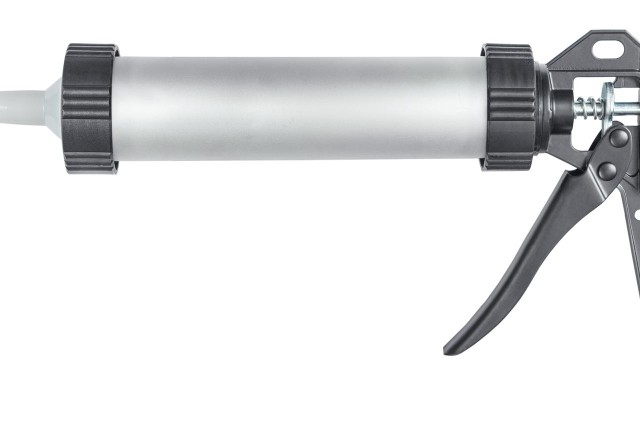
If you have minor damage on your vinyl siding, applying a bead of caulk is a quick and easy fix. Here’s how to do it using a caulk gun:
To properly prepare the caulk gun for use, it is necessary to cut the tip of the tube at a 45- degree angle and puncture the seal using a long nail or piece of metal. Afterward, it is important to pull the plunger all the way back in order to load up the tube.
Next, apply the caulk directly onto the hole or damaged area of the vinyl siding. Make sure to fill the hole completely with caulk to keep moisture and insects out.
Once you have applied the caulk, use a putty knife or utility knife to smooth out the excess caulk. Be careful not to remove too much caulk, as you want to make sure the hole is completely covered and sealed.
For a seamless finish, it’s important to use caulk that matches the color of your siding. This means using white caulk for white vinyl siding, for example. If needed, you can also apply exterior paint to the repaired area to ensure it blends in with the rest of the siding.
By following these simple steps, you can easily fix minor holes or damage in your vinyl siding without the need for a professional repair.
Smoothing Out Excess Caulk with a Putty Knife or Utility Knife
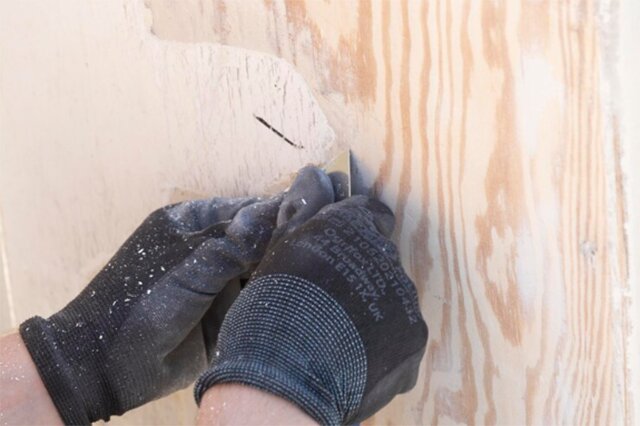
To achieve a flawless finish when repairing holes in your vinyl siding, it is essential to smooth out any excess caulk that may have seeped out during the repair process. This is an important step since leaving excess caulk on the surface can make it look uneven and unsightly.
One of the best ways to achieve a smooth finish is by using a putty knife or utility knife. Begin by running the blade’s edge along the surface of the caulk, using gentle pressure to avoid removing too much of the caulk. It’s important to keep the knife at a low angle and work slowly to ensure a clean edge.
Be careful not to leave any grooves or uneven spots, as they could trap water and cause damage in the future. As you work, the excess caulk will begin to gather on the blade’s edge. When this happens, wipe the knife with a damp cloth to remove any excess caulk and continue until the surface is smooth and even.
Once you have finished, allow the caulk to dry completely before touching it again. It is essential to ensure that the caulk is fully dry to avoid disrupting the repair job. When the surface is dry, inspect it closely to confirm that it is smooth and even.
Finishing Steps to Eliminate Holes in the Vinyl Siding
After you have successfully patched the hole in your vinyl siding using a replacement piece or a caulk, the finishing steps are essential to achieve a flawless finish. Here are some necessary steps to follow:
- Allow the patch or the caulk to dry completely: Before you move onto the finishing steps, it is essential to make sure that the patch or caulk has dried completely. This will ensure that the repair job stays intact after the painting process.
- Remove any dust or debris: To achieve a smooth and seamless finish, it’s important to make sure that the repaired area is clean and free from debris. Use a clean cloth to wipe away any residue or dust from around the hole.
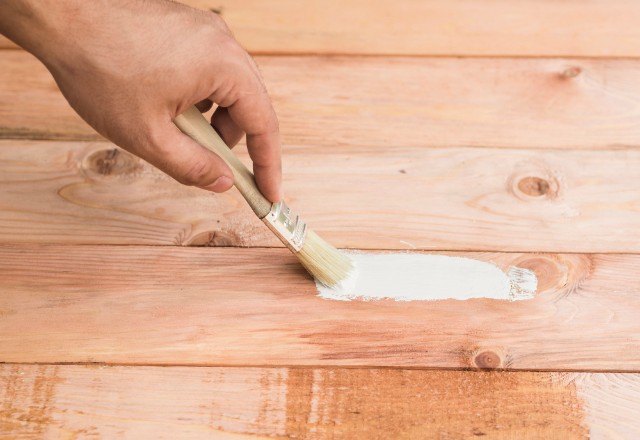
- Choose the matching color of exterior paint: Pick an exterior paint that matches the color of your vinyl siding. This will ensure that the repaired area blends seamlessly with the surrounding siding.
- Apply the paint with a paintbrush: Using a paintbrush, apply the exterior paint evenly over the repaired area and the surrounding siding surface. Be sure to spread the paint out enough to cover both the patch or caulk and the surrounding area for a smooth and seamless finish.
- Let the paint dry thoroughly: Allow the paint to dry completely before inspecting the surface. If necessary, repeat the previous step of applying the paint until you achieve the desired finish.
Conclusion
In conclusion, fixing holes in your vinyl siding is a relatively simple DIY task that can save you from hiring a siding contractor and wasting money on major repairs. With a few basic tools and some vinyl siding pieces, you can efficiently patch over holes and cracks in your siding panels. Remember to take your time and follow the instruction manual for your specific siding type to achieve a flawless finish that looks as good as new!