509-201-4190

Welcome! If you’re here, you’re probably looking for a way to replace the glass in a double pane window. It’s not as difficult as it may seem, and with the right tools and instructions, you can get the job done quickly and easily. In this guide, we’ll walk you through each step of the process so that you can replace your window glass with confidence. So let’s get started!
Disclaimer: This guide is provided for informational purposes only. It is not intended to serve as a comprehensive guide or comprehensive instructions on how to replace glass in a double pane window. In some cases, the process may be more complex than outlined here and may require specialized tools or assistance from a professional. If you are uncertain of any aspect of the process, we recommend that you seek assistance from a qualified professional before attempting this project. Advance Roofing LLC has proudly served the Spokane, WA area for many years with the highest standard of quality roofing solutions and is always happy to discuss your particular needs and offer advice.
Double Pane Windows – What is it?

Double pane windows, also known as insulated or double glazed windows, are a common type of windows used in homes and buildings. These windows consist of two panes or layers of glass with an insulated space or gap in between them. The insulated space is usually filled with air or gas to provide additional insulation and improve energy efficiency. Although double pane windows are efficient, they are still prone to damage, especially when exposed to external factors like extreme weather conditions and accidents. In this article, we’ll discuss why it’s important to replace broken glass in a double pane window and the steps involved in the replacement process.
Why Should I Replace the Glass in a Double-glazed window?
If a double pane window has a broken or damaged glass pane, it is crucial to replace it promptly. Double pane windows provide numerous benefits, such as energy efficiency, noise reduction, and increased safety. When a pane is damaged, it can drastically reduce the window’s efficiency and negate the benefits provided by the double layer of glass.
Attempting to replace a single pane glass in a double pane window is not recommended due to the potential hazards involved. Double pane windows are constructed differently to single pane windows and attempting to remove a single pane in a double pane window could lead to injury or damage to the window. It’s important to hire a professional to replace broken glass in a double pane window.
A damaged glass pane can also affect the energy efficiency of a double pane window. The insulated space between the panes of glass serves to reduce heat transfer and improve energy efficiency. When a pane is damaged, it can compromise the insulation properties and cause the window to lose heat in the winter or gain heat in the summer. This can lead to increased energy bills and a less comfortable living environment.
There are two available options for replacing a double pane window.
- The first option is to replace the entire window, including the frame and sash. This option is recommended when the window is old or in poor condition.
- The second option is to replace only the damaged pane of glass. This option is cheaper and faster compared to replacing the entire window, but it is only feasible when the window is in good condition.
Replacing a broken or damaged glass pane in a double pane window is crucial to maintain energy efficiency and safety. Attempting to replace a single pane in a double pane window can be hazardous and should be left to professionals. Replacing the entire window or only the damaged glass pane are available options, depending on the window’s condition.
Preparing for Replacement
Before attempting to replace a broken or damaged glass pane in a double pane window, it’s essential to prepare accordingly. This involves gathering the necessary tools and materials, preparing the room for replacement, and removing either the entire window or the broken glass pane. By following these steps, the replacement process can be completed safely and efficiently.
Gather the Necessary Tools and Materials
Having items on hand will make the replacement process more efficient and will reduce the possibility of errors or mishaps. Here’s a comprehensive list of the tools and materials you’ll need:
- Replacement glass
- Fine-grit sandpaper
- Glazing compound or putty
- Glazing points
- Linseed oil or wood sealer
- Putty knife (1/2-inch)
- 5-In-1 Painter’s Tool
- Heat gun
- Sash paint brush (1-inch)
- Caulking gun
- Chisel
- Duct tape
- Glass cutter
- Leather work gloves
- Paint scraper
- Paintbrush
- Rubber mallet
- Tape measure
- Wire brush
- Eye protection
Make sure to have all these necessary tools and materials on hand before beginning the glass replacement process. This will ensure that you won’t have to stop in the middle of the process to look for missing tools or materials. Some of the most important tools to have are the replacement glass, putty knife, and heat gun. The heat gun softens the old putty or glazing compound, making it easier to remove the broken glass. The putty knife is critical for removing the old putty, and the replacement glass is obviously the new glass pane that’s needed to replace the broken one.
Prepare the Room for Replacement
Preparing the room is essential before starting the replacement procedure to ensure a safe and efficient process. Follow these steps to prepare the room for replacing the glass in a double pane window:
- Remove any obstacles: Begin by removing any furniture or objects that could obstruct access to the window. Clear away any plants, picture frames or other items that might get in the way. This will make it easier to work on the window and reduce the risk of any accidents.
- Protect the floor: Place a drop cloth below the window to avoid damaging the floor with any debris or shards of glass that may fall during the replacement process. The drop cloth will also help keep the area clean and tidy.
- Increase ventilation: Open up any nearby windows and set up a fan or ventilation system to improve air flow and reduce the risk of inhaling any glass particles that may be released during the replacement process. Proper ventilation is critical to ensure the safety of everyone in the room.
- Wear protective gear: Always wear a pair of safety glasses and work gloves when replacing the glass in a double pane window. This will help protect your eyes and hands from any sharp edges, glass fragments, or debris that may come off during the process.
By following these steps, you can ensure that the room is prepared for the replacement process and that you can complete the task safely and efficiently. Remember to always prioritize safety when working with glass and wear the appropriate safety gear at all times.
The Entire Window or Broken Glass Pane?
Once you have determined whether you need to remove the entire window or just the broken glass pane, you can proceed with the next steps.
If you only need to replace the glass pane, then refer to the instructions outlined in the previous section to carefully remove the broken glass. However, if the problem is more severe and the entire window needs to be removed, then the process will vary depending on the type of window.
For slider windows, the process is relatively simple. First, lift the sash and then pull it out from the track. This should allow you to remove the entire window easily.
For double-hung windows, there are a few extra steps involved. You need to press in on the vinyl jamb liners and remove the top part of the sash before giving it a slight twist to release the latch springs in the bottom. Once you have released the latches, you can then remove the entire window from the frame.
When dealing with older casement windows, it is necessary to remove them from the frame by unscrewing them from the hinges located at the top and bottom.
If you’re dealing with larger windows, it’s a good idea to have a helper on hand to assist with the removal process. Additionally, make sure the area is completely clean before working to avoid any accidents.
By following these steps, you can safely and efficiently remove the entire window or broken glass pane, depending on your needs and the specific type of window you are working with. Keywords to keep in mind when optimizing this section include entire window or broken glass pane, type of window, slider windows, double-hung windows, and casement windows.
Replacing the Glass
Now that you have safely removed the broken glass or entire window frame, it’s time to replace your double pane window glass. The following steps will guide you through the process of measuring and cutting your replacement glass to size, applying putty knife to seal edges of new glass piece with frame, and cleaning off excess putty using a heat gun and metal glazing tool. It’s important to work carefully and precisely to ensure a tight seal and energy efficiency in your newly repaired window. Additionally, remember to use proper safety equipment like safety glasses and gloves to protect yourself from any potential hazards.
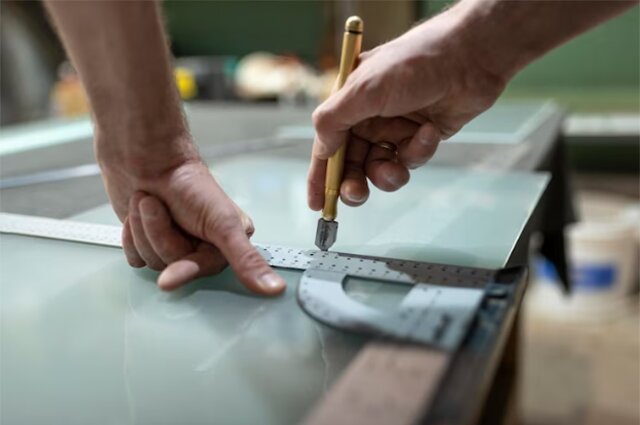
Measure and Cut Replacement Glass to Size
You’ll need to take accurate measurements of the height, width, and thickness of the broken or missing pane. Once you’ve done this, you can order a replacement piece of glass that is 1/16 inches shorter in all directions than your measurements to ensure a proper fit.
When you receive your replacement glass, it’s essential to test the fit before setting it in place. Make sure to do so without any adhesives or sealants so that you can easily remove it if it doesn’t fit properly.
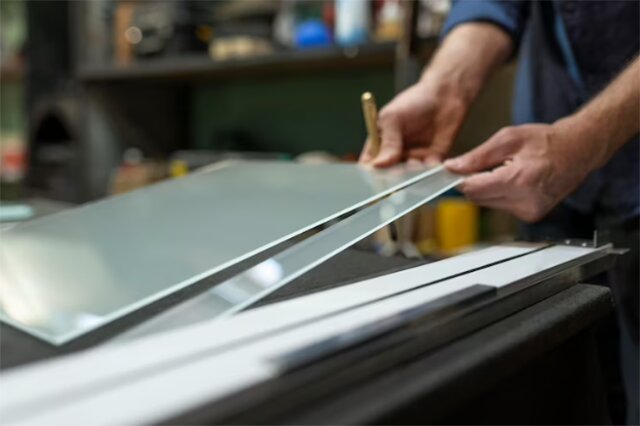
If you’re unsure how to cut the glass to size yourself, many home improvement stores offer this service for a small fee. However, if you decide to cut the glass yourself, use a glass cutter and a straight edge to create a clean and even cut. Remember to avoid applying too much pressure to the glass, as this can cause accidental breakage.
By measuring accurately, ordering the glass to be shorter, testing the fit, and cutting the glass with a straight edge while avoiding too much pressure, you can ensure that your replacement glass will fit seamlessly into your double-pane window frame. This ensures not only a tight seal and prevents heat loss, but also ensures safety by reducing the risk of broken shards of glass caused by ill-fitting panes.
Apply Putty Knife to Seal Edges of New Glass Piece with Frame
Now that you’ve measured, cut and tested the new piece of glass to fit your double-pane window frame perfectly, it’s time to seal the edges of the glass with the frame. This step is crucial to prevent air and moisture from entering and affecting the energy efficiency of your window. Here’s how to seal the edges of the new glass piece with the frame using a putty knife:
- First, ensure that the new glass piece is clean and free of any debris before proceeding with the sealing process.
- Get a putty knife and a tub of glazing compound. Make sure you choose a compound that is recommended by your window manufacturer.
- Take a small amount of the compound with the putty knife and apply it evenly to the edges of the frame where the new glass piece will be placed. Start with a small amount and add more if necessary.
- Use enough pressure to apply the compound evenly while covering the edges of the frame completely. Make sure your putty knife is angled slightly to ensure that the compound is applied evenly.
- Once you have applied the glazing compound, carefully place the new glass piece on top of it, making sure it is level.
- Finally, press down firmly on the glass to ensure that it is secured with the frame and creates a tight seal. This will help to keep out air and moisture.
By following these simple steps with a putty knife, you can ensure that your double-pane window is energy efficient and secure. Remember that applying the glazing compound evenly and with enough pressure is crucial for creating a tight seal that keeps moisture and air out of the window.
Clean off Excess Putty with Heat Gun and Metal Glazing Tool
After you have applied the putty around the edges of the new glass piece to secure it in place, you may notice some excess putty that needs to be cleaned up. This can be easily done using a heat gun and a metal glazing tool.
- Begin by holding the heat gun two to three inches away from the putty and moving it slowly across the surface until the putty becomes pliable. Be careful not to overheat the putty or the glass, as this can cause damage.
- Once the putty has become pliable, use a metal glazing tool to carefully scrape away any excess putty. Take your time and be gentle to avoid damaging the new glass piece or the window frame.
- After you have scraped away all the excess putty, use a damp cloth to clean up any remaining debris. This will ensure that the surface is clean and ready for any finishing touches, such as exterior paint or special coatings.
Remember, the key to success when cleaning off excess putty is to be patient and careful. By using the heat gun and metal glazing tool in combination, you can remove any excess putty and create a clean, professional-looking finish on your double-pane window.
Installing the Window Frame and Sash Back into Place
Now that you have successfully replaced the broken glass in your double-pane window, it’s time to re-install the window frame and sash back into place. This process involves securing the wooden frame around the new glass piece using nails, screws, or glue. Once the frame is in place, the sash can be re-installed around the new piece of glass. Finally, to ensure that there is a tight seal, add a layer of caulk around the edge of the new glass piece. By following these simple steps, you can restore the energy efficiency of your window and keep out any noise pollution or drafts.
Install Wood Frame Around New Glass Piece with Nails, Screws, or Glue

Once you have the newly cut replacement glass piece ready, it’s time to install the wood frame around it. This step is crucial to ensure that the new glass piece is securely in place and can withstand any impact. You can use nails, screws, or glue to attach the wood frame to the window frame itself.
- Begin by carefully inserting the replacement glass piece into the opening where the old glass was removed. Make sure the glass piece fits snugly into the opening. Then, apply a bead of caulk around the edge of the new glass piece to create a tight seal.
- Next, align the wood frame onto the new glass piece and use a level to ensure it’s straight. If you’re using nails, make sure they’re not too long and that they go through the wood frame and into the window frame. You can also use screws or glue to attach the frame. Screw in place but be careful not to over-tighten and cause the wood to split or crack.
- It’s important to make sure that the wood frame sits flush against the new glass piece to prevent any gaps. Any gaps or holes between the wood frame and glass piece can cause air leaks and reduce the window’s energy efficiency.
- Finally, use a putty knife to remove any excess caulk or glue and wipe away any remaining residue with a glass cleaner. Remember to be careful when handling broken pieces of glass, and always wear safety glasses or goggles.
Installing the wood frame around the new glass piece can be a tedious process, but it’s essential to ensure that the replacement glass is properly secured and will provide maximum energy efficiency. With the right tools and a bit of patience, you can successfully replace the glass piece in your double-pane window.
Reinstall Sash Back Into Place Around New Piece of Glass
Now that you have securely installed the replacement glass piece and the wood frame around it, it’s time to reinstall the sash back into place. This step is essential to restore the window’s functionality and ensure that the glass stays securely in place.
- Start by inspecting the sash and removing any debris or broken pieces that may have accumulated during the glass replacement process. Once the sash is clean, align it onto the wooden frame and slide the top corner of the sash into the frame’s channel.
- Carefully guide the sash into place, ensuring that the glass is fitting well in the sash, and there are no gaps. Repeat this process for the other three corners of the sash, and double-check that everything is fitting snugly and securely.
- Once the sash is properly installed, test whether it opens and closes smoothly. If everything is functioning correctly, you can proceed with sealing the edges of the new glass piece using caulk or glazing compound. This will help to create a tight seal between the glass and the sash, preventing any air leaks or moisture from entering the space between the panes.
By taking the time to properly reinstall the sash around the new piece of glass, you’ll ensure that your double-pane window is working correctly, and you’ll also prevent any further damage or issues from arising. Remember to take caution when handling the glass and use the appropriate safety gear at all times.
Add Caulk Around Edge of New Glass Piece to Seal it In
To ensure that the new glass piece is securely in place and to prevent any air or water leaks, it’s important to add caulk around the edges where the glass meets the frame. This step is crucial to creating a tight seal that protects both the glass and frame from potential damage.
- To start, prepare a tube of caulk and a caulking gun. Then, place a bead of caulk along the perimeter of the new glass piece where it meets the frame. Make sure to cover the entire edge and create a continuous seal.
- Using your fingers or a caulk smoothing tool, smooth out the caulk to ensure it creates a tight bond between the glass and frame. Be sure to remove any excess caulk and ensure that the entire edge is evenly covered.
- Allow the caulk to dry completely before priming and painting the frame. This will ensure that the caulk has fully bonded and create a long-lasting seal that keeps the air and water out.
By adding caulk to the edges of the new glass piece, you’ll not only protect your window from potential damage, but you’ll also increase its energy efficiency by preventing any air leaks. So, take the time to properly seal the window with caulk, and enjoy the benefits of a well-sealed and energy-efficient window.
Conclusion
Replacing the glass in a double-pane window is a tedious process, but with the right tools and instructions, you can successfully complete the job. By taking the time to install the wood frame around the new piece of glass and reinstall the sash back into place, you’ll ensure that your window functions correctly. With some patience and careful attention to detail, you can successfully replace your double-pane window’s glass piece in no time.
In the end, it’s worth investing in the proper replacement of your double-pane windows to reap the benefits of proper insulation, energy efficiency, and noise reduction. So, don’t hesitate to seek professional help if needed and enjoy the benefits of your new and functional windows.