Replacing windows in a house is a significant home improvement project that can offer numerous benefits, such as improved energy efficiency, enhanced comfort, and increased property value. If you’re wondering how to replace windows in a house, this comprehensive guide will walk you through the entire process, from assessing your current windows to installing new ones and adding the finishing touches. By following these steps and tips, you can successfully replace your windows and enjoy a more comfortable and attractive living space.
Assessing Your Windows
Before you begin the process of replacing your windows, it’s crucial to assess their current condition and determine if replacement is necessary. Here are some signs that indicate it’s time to replace your windows:
- Drafts or air leaks around the window frames
- Difficulty opening, closing, or locking the windows
- Visible damage, such as cracks, chips, or rot in the window frames or sashes
- Condensation or fogging between the window panes
- High energy bills due to poor insulation or outdated window technology
When assessing your windows, consider the different types of windows and materials available to determine which options best suit your needs and preferences.
Window Type | Description |
Double-hung | Two sashes that slide vertically, allowing for ventilation from both the top and bottom |
Casement | Hinged on the side and opens outward, providing excellent ventilation and air circulation |
Sliding | Two sashes that slide horizontally, offering a space-saving design and easy operation |
Bay or Bow | Protrude from the exterior wall, creating a decorative alcove and allowing more natural light |
Picture | Fixed, non-opening window that provides unobstructed views and maximum natural light |
Common window materials include:
- Vinyl: Low-maintenance, energy-efficient, and cost-effective
- Wood: Classic appearance, good insulation properties, but requires regular maintenance
- Fiberglass: Strong, durable, and energy-efficient, with a longer lifespan than vinyl or wood
- Aluminum: Lightweight, strong, and low-maintenance, but may not provide the best insulation
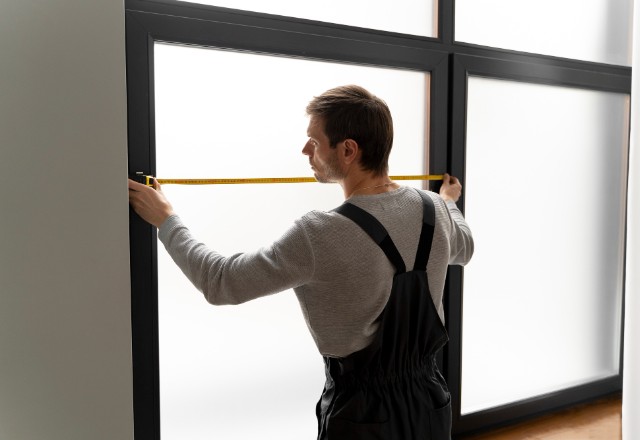
To ensure a proper fit for your replacement windows, measure the width, height, and depth of your current window openings from the interior. Measure the width at the top, middle, and bottom, and the height at the left, center, and right. Use the smallest measurements for each dimension to ensure the new windows will fit correctly.

Preparing for Window Replacement
Before you begin the window replacement process, gather all the necessary tools and materials to ensure a smooth and efficient project:
- Tape measure for accurate measurements
- Hammer for removing old window components and installing new ones
- Pry bar for removing the old window frame and trim
- Utility knife for cutting through old caulking and weatherstripping
- Caulking gun for applying new caulk and sealant
- Screwdriver for removing and installing screws
- Level for ensuring the new window is properly aligned
- Safety glasses and gloves for protection during the removal and installation process
In addition to tools, you’ll need the following materials:
- Replacement windows
- Insulation (e.g., fiberglass, foam, or weatherstripping)
- Caulk and sealant
- Shims for leveling and adjusting the new window
- Nails or screws for securing the new window frame
- Flashing tape for weatherproofing the window opening
To prepare your interior space for the window replacement project, remove any window treatments, curtains, blinds, or hardware. Cover the floor and furniture near the window area with drop cloths, plastic sheeting, or old sheets to protect them from debris, dust, and potential damage during the removal and installation process.

Removing the Old Window
- Remove the window sash and stops:
- For double-hung windows, remove the interior stops (the trim pieces that hold the sashes in place) using a pry bar or putty knife. Carefully remove the sashes by tilting them inward and lifting them out of the frame.
- For casement windows, locate the hinges that attach the sash to the frame and unscrew them. Remove the sash from the frame.
- Cut through the exterior caulking and sealant around the window frame using a utility knife. This will make it easier to remove the old frame and prepare the opening for the new window.
- Remove the old window frame:
- Locate the nails or screws that secure the window frame to the rough opening. Use a reciprocating saw or a hacksaw to cut through the nails or screws, being careful not to damage the surrounding wall.
- Use a pry bar to carefully pry the frame away from the opening, starting at the bottom and working your way up. If the frame is stubborn, use a putty knife to break the seal between the frame and the wall.
- Remove any remaining nails, screws, or debris from the window opening.
Preparing the Opening
- Clean the window opening thoroughly:
- Use a putty knife or chisel to remove any old caulking, sealant, or debris from the window opening. This will create a clean surface for the new window installation.
- Brush away any dust, dirt, or loose particles using a brush or vacuum.
- Inspect the opening for any signs of damage or rot:
- Check the window sill, headers, and sides for signs of water damage, rot, or deterioration. These issues can compromise the structural integrity of the window opening and lead to future problems if not addressed.
- If you discover any damage or rot, make the necessary repairs using wood filler, epoxy, or replacement framing materials. Allow ample time for the repairs to dry and cure before proceeding with the window installation.
- Measure the opening once more to confirm that the new window will fit properly. Compare these measurements to the dimensions of your replacement window to ensure a secure and well-sealed fit.

Installing the New Window
- Apply a continuous bead of exterior-grade caulk along the outside edge of the window opening. This will create a weatherproof seal between the new window frame and the house.
- Place the new window into the opening:
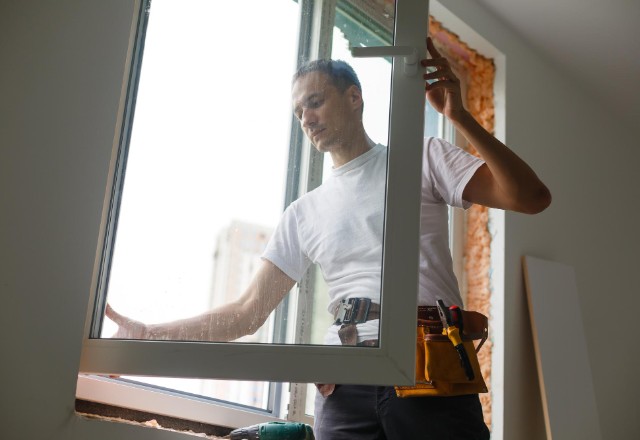
- Carefully lift and position the new window into the opening, ensuring that it is facing the correct direction (interior side facing inward).
- Use a level to check that the window is properly aligned and not tilting or leaning to one side. Adjust the position as needed.
- If necessary, use shims to level and plumb the window. Place shims at the bottom corners and along the sides of the window frame to keep it square and stable.
- Secure the window with nails or screws:
- Once the window is level and plumb, drive nails or screws through the window frame and into the rough opening at the top, bottom, and sides. Follow the manufacturer’s guidelines for proper nail or screw placement and spacing.
- Recheck the window’s alignment and make any necessary adjustments before fully tightening the nails or screws.
- Add insulation and seal gaps:
- Fill any gaps between the window frame and the rough opening with foam insulation or fiberglass insulation. This will help prevent drafts and improve the window’s energy efficiency.
- Apply weatherproofing tape or flashing around the edges of the window frame to create an additional barrier against moisture and air leaks.
Finishing Touches
- Caulk and weatherproof the exterior:
- Apply a bead of exterior-grade caulk around the perimeter of the window frame, sealing the gap between the frame and the siding or exterior wall. This will prevent water intrusion and drafts.
- Use a caulking tool or your finger to smooth the caulk for a neat and professional finish. Wipe away any excess caulk with a damp cloth.
- Install interior window trim:
- Measure and cut the trim pieces to fit around the window frame. Miter the corners for a clean, finished look.
- Nail or glue the trim pieces in place, ensuring they are straight and flush with the wall and window frame.
- Fill any nail holes or gaps with wood putty and allow it to dry completely.
- Paint or stain the window frame and trim to match your interior décor. Choose a paint or stain that complements the style and color scheme of your room.
- Reattach any window treatments, curtains, blinds, or hardware that you removed during the preparation stage. Adjust them as needed to ensure proper fit and function with your new windows.

Tips for a Successful Window Replacement
To ensure a successful window replacement project, consider the following tips:
- Work with a partner for safety and efficiency, especially when handling large or heavy windows. Having an extra set of hands can make the process easier and help prevent accidents or damage.
- Take accurate measurements of your window openings to avoid gaps, leaks, or issues with fit. Measure twice and order once to minimize the risk of ordering the wrong size windows.
- Choose energy-efficient windows with low-E coatings, double or triple panes, and insulated frames to improve your home’s comfort and reduce energy costs. Look for windows with Energy Star ratings or NFRC labels to ensure optimal performance.
- Properly dispose of old windows, frames, and materials, following local regulations for construction waste. Many communities have specific guidelines for disposing of windows, glass, and other building materials.
- If you encounter unexpected challenges or feel unsure about any step in the process, don’t hesitate to consult a professional window installer for guidance or assistance. They can provide expert advice and help ensure a successful installation.
When to Hire a Professional
While replacing windows in a house can be a rewarding DIY project, there are situations where hiring a professional window installer is recommended:
- Complex or large-scale window replacements that involve multiple windows or unique configurations
- Lack of experience, confidence, or necessary tools to complete the project safely and effectively
- Time constraints or a desire for convenience and peace of mind
- Concerns about maintaining manufacturer warranties or complying with local building codes and regulations
A professional window installer has the knowledge, skills, and equipment to complete your window replacement project efficiently and to the highest standards. They can also help you navigate the selection process, recommend the best windows for your needs and budget, and ensure that your new windows are installed correctly and in compliance with local guidelines.

Conclusion
Replacing windows in a house can be a significant undertaking, but with the right knowledge, tools, and preparation, it can also be a rewarding and beneficial home improvement project. By following this comprehensive, step-by-step guide on how to replace windows in a house, you can tackle the process with confidence and achieve the desired results. Remember to assess your current windows, gather the necessary materials and tools, and take your time to ensure a proper and secure installation. If you encounter any challenges or feel unsure about the process, don’t hesitate to seek the guidance of a professional window installer. With your newly replaced windows, you can enjoy improved energy efficiency, enhanced comfort, and a more beautiful and functional living space for years to come.


 509-201-4190
