509-201-4190

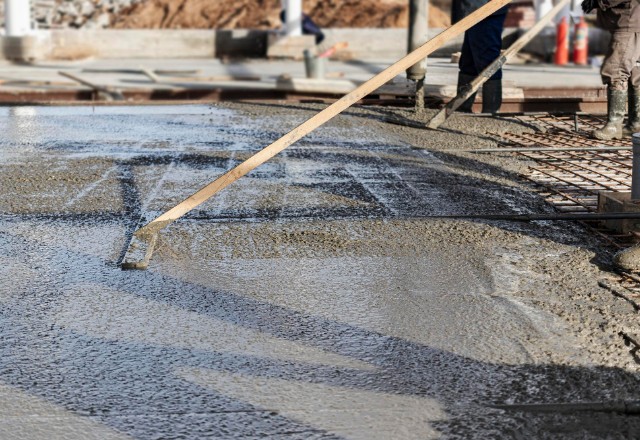
Why Concrete Curing Matters
Adequate curing enables cement hydration, progressively interlocking particles into a dense, strong matrix. Insufficient curing prevents this crystalline bonding, causing weaknesses. By maintaining proper moisture and temperature during the timeframe in which concrete gains strength, curing aims to optimize structural integrity.
Factors Influencing Curing Duration
Curing duration depends on four key parameters – cement type, mixture ingredients, ambient temperature, and humidity. Standard Portland cement takes longer than specialized blends. Water-cement ratio affects setting rate. Heat accelerates but extremes deteriorate strength. Moisture loss from dry air or wind delays hydration. Understanding these factors facilitates appropriate curing.
Recommended Temperature & Moisture Levels Over Curing Stages
| Curing Stage | Optimal Temperature Range | Optimal Humidity Range |
|---|---|---|
| First 7 days | 68-77°F | 95% |
| 7-14 days | 59-68°F | 80% |
| 14-28 days | 50-59°F | 60% |
Precisely controlling curing conditions allows efficient strength gain. Cooling and drying progress gradually enhances durability.
Curing Time Specifications
Curing Standards by Cement Type
| Cement Type | Typical Curing Time |
|---|---|
| Standard Portland | 7 days |
| High Early-Strength | 3-5 days |
| Sulfate-Resistant | 10-14 days |
| White Cement | 7 days |
| Slag Cement | 14-28 days |
Notes:
- Periods assume properly executed moist curing
- Normal curing temperatures
- Check structural requirements before loading
The type of cement dictates minimum moist curing time. High early-strength cements set quicker, enabling faster form removal. Slag blends gain strength slowly over longer durations.
Strength Gain Over Time
| Concrete Age | % of 28-day Strength | Factors Affecting Rate |
|---|---|---|
| 3 days | 20-40% | Mix design, curing & temperature |
| 7 days | 65-90% | Adequate early curing is key |
| 14 days | 90-100% | Strength gain continues over time |
| 28 days | 100% | Considered full design strength |
Notes:
- Moist curing maximizes strength development
- Higher heat accelerates early strength
While concrete achieves 70% strength at 7 days, extended curing increases durability. Controlled moist and temp curing governs rate.
Curing Time Prior to Service
| Structure | Curing Time Before Loading | Dependent On |
|---|---|---|
| Foundation | 14 days | Curing method, cement type |
| Columns | 10-14 days | Strength development |
| Slabs | 21 days | Drying shrinkage resistance |
| Exterior finishes | 28 days | Weathering durability |
Different structural elements necessitate varied curing durations before service loading per specifications. Moisture loss resistance affects timelines.
Adjusting Curing Duration Based on Temperature
| Temperature (°F) | Curing Time |
|---|---|
| 90+ | 3 days |
| 75-90 | 5 days |
| 60-75 | 7 days |
| 45-60 | 14 days |
| Under 45 | 28+ days |
Assumptions:
- Standard Portland cement
- Proper moist curing
- Normal humidity
Curing accelerates at higher temperatures but extremes deteriorate concrete strength. Maintaining 60-75°F optimizes strength development pace.
Step-by-Step Concrete Curing Monitoring
Monitoring Equipment
Professional concrete contractors use digital humidity data loggers with built-in sensors to measure relative humidity and ambient temperature. Models with remote monitoring capability via mobile apps allow accessing real-time data.
Additionally, you can use concrete-embeddable thermocouples made from corrosion-resistant stainless steel to identify temperature differentials between concrete core and surface during curing.
Sensor Placement
For humidity data loggers:
- Space vertically at 3 ft intervals to capture moisture migration
- Place additional loggers horizontally at rebar level in slabs
- Shield sensors from direct sunlight or radiant heat
For thermocouples:
- Insert pairs at 1/4 and 3/4 depth of slabs or walls
- Insert additional sensors at corners and air faces
This grid-style sensor placement tracks curing uniformly through cross sections.
Data Collection & Analysis
- Use cloud-connected loggers for round-the-clock monitoring without site visits
- The software dashboard displays time-charted temperature and humidity levels
- Compare readings against curing chart benchmarks to identify deviations
- Make corrections like adding heaters or misting based on data
Regular data analysis tracks efficacy of curing modifications for meeting targets.
 Maintaining Recommended Curing Conditions
 Maintaining Recommended Curing Conditions
Sustaining Surface Moisture
Use automatic water misting sprayers to regularly rewet concrete surfaces when humidity sensors indicate dropping moisture levels. Position spray nozzles to cover all exposed concrete.
Alternatively, wrap cured surfaces with burlap sheets soaked in water. Keep additional wet burlap available for quick replacement as drying occurs. Self-goverming soaker hoses can also provide continuous surface moisture.
Retaining Heat
Combat falling internal temperatures during curing by insulating exterior concrete forms with rigid foam blankets rated for concrete curing. Secure edges for flush contact.
Alternatively, install radiant floor heating systems on slab undersides. Electric wire mats that heat when energized maintain optimum temperatures.
Cooling Overheated Concrete
To counter overheating in hot weather, construct temporary shaded enclosures using framing and shade cloth. Orient structure to block direct sunlight while allowing breeze.
Install misting lines under the shelters to spray water that evaporates for a cooling effect.
Also use fans directing airflow over the concrete to facilitate evaporative cooling if humidity permits.
Responding to Parameter Deviations
- When relative humidity drops below the recommended percentage, activate supplemental water misting.
- If sensors show a sustained 5°F temperature decrease, immediately add insulation blankets to restore heat.
- Once readings indicate temperatures 10°F or higher than guidelines, switch on water misting and fan cooling.
Consistently comparing sensor outputs to target curing parameters and rapidly responding to deviations maintains conditions essential for proper curing.
Conclusion
Proper concrete curing relies on carefully managing critical parameters like temperature and humidity while understanding how factors like cement type impact curing time requirements.
This comprehensive curing guide with temperature and time tables provides actionable specifications for strength development milestones under various conditions. Furthermore, the monitoring techniques and regulation methods allow actively controlling the curing conditions to remain within optimum ranges.
Implementing an integrated approach of tracking curing with sensors, comparing readings to benchmark targets, and promptly responding to deviations enables precise moisture and heat control. This facilitates maximum hydration for superior concrete durability and performance.
The processes and specifications outlined create standardized yet adaptable curing protocols for reliable quality control across construction projects and stages. With active parameter manipulation combined with an informed curing schedule, concrete achieves substantial longevity and designed load-bearing capacity through optimum curing.