509-201-4190

Addressing Underlying Issues
Once the old roofing is removed, the roofer will inspect the decking and structure beneath. If any water damage, rotting wood, or mold is discovered, these issues will be addressed before proceeding with the replacement. This step is critical to ensure a solid foundation for your new roof.
- Water damage is one of the most common issues found during a roof replacement. If left unaddressed, it can lead to serious structural problems and even pose health risks to you and your family. Roofers will carefully examine the decking and rafters for any signs of water infiltration, such as stains, softness, or discoloration. If water damage is found, the affected areas will need to be replaced with new, sturdy materials.
- Rotting wood is another problem that can compromise the integrity of your roof. It often occurs as a result of prolonged moisture exposure, which can be caused by leaks or poor ventilation. Roofers will identify any rotting wood and remove it, replacing it with new, pressure-treated lumber to ensure a strong and stable base for your new roof.
- Mold growth is another issue that can arise from moisture damage. Mold not only weakens the structure of your roof but also poses serious health risks, particularly for those with allergies or respiratory issues. If mold is discovered during the roof replacement process, roofers will safely remove it and treat the area to prevent future growth.
Installing Drip Edges and Water Shields
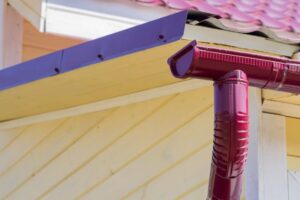
Drip edges are metal strips installed along the edges of your roof to guide water away from the fascia and into the gutters. They provide an extra layer of protection against water damage. In addition, water shields, such as ice and water barriers, are installed in vulnerable areas like valleys and eaves to prevent leaks and ice dams.
|
Area |
Drip Edge |
Water Shield |
|
Eaves |
Yes |
Yes |
|
Rakes |
Yes |
No |
|
Valleys |
No |
Yes |
|
Chimneys |
No |
Yes |
|
Skylights |
No |
Yes |
|
Roof-to-Wall |
No |
Yes |
The installation of drip edges and water shields is a critical step in the roof replacement process. Drip edges are typically installed along the eaves and rakes of the roof, where water is most likely to drip off. They are nailed in place and then covered with the new underlayment and shingles to create a seamless, watertight seal.
Water shields, on the other hand, are installed in areas where water is likely to collect or pool, such as valleys, chimneys, and skylights. These self-adhesive membranes are applied directly to the decking before the new underlayment and shingles are installed. They provide an extra barrier against water infiltration, helping to prevent leaks and extend the life of your new roof.
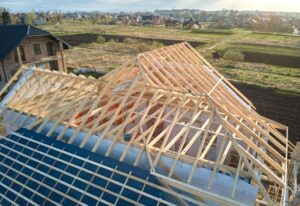
Laying Down New Underlayment
A new layer of underlayment is then installed over the entire roof deck. This felt paper or synthetic material provides an additional barrier against water infiltration and helps protect your home from the elements.
The underlayment is typically installed in a overlapping manner, starting at the bottom of the roof and working upward. Each layer should overlap the one below it by at least 2 inches to ensure proper water shedding. The underlayment is secured to the decking with nails or staples, depending on the material used and the manufacturer’s recommendations.
There are various types of underlayment available, each with its own benefits and drawbacks. Traditional felt paper is the most common and affordable option, but it can tear easily and may not provide as much protection as newer, synthetic materials. Synthetic underlayments, such as those made from polypropylene or polyethylene, are more durable and resistant to moisture, making them a popular choice for many homeowners and roofing contractors.
When installing the underlayment, roofers will also take care to seal around any penetrations, such as vent pipes or chimneys. This is typically done with a self-adhesive flashing tape or a specialized sealant to prevent water from seeping in around these areas.
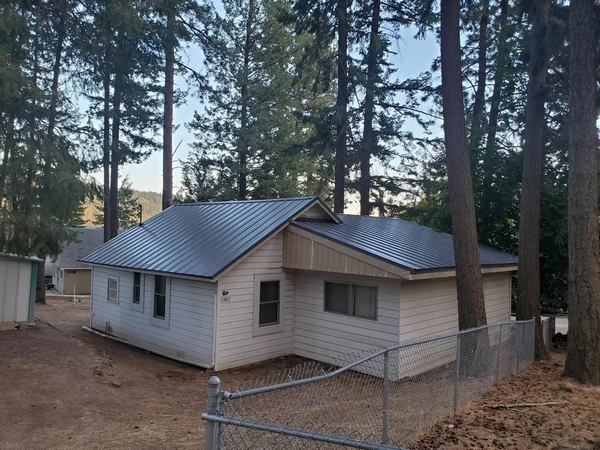
Installing New Roofing Materials
The next step is installing your chosen roofing materials. Whether you opt for asphalt shingles, metal, tile, or slate, the roofer will carefully lay out and secure the new roofing according to the manufacturer’s specifications. They will ensure proper overlap, nailing patterns, and sealing to create a watertight and wind-resistant roof.
- Asphalt shingles are the most popular roofing material in the United States, thanks to their affordability, versatility, and ease of installation. When installing asphalt shingles, roofers will start at the bottom edge of the roof and work their way up, overlapping each row by a specified amount to ensure proper water shedding. They will secure the shingles with roofing nails, taking care to place them in the designated nailing strip and to avoid overdriving or underdriving the nails.
- Metal roofing is another popular option, particularly in areas prone to wildfires or severe weather. Metal roofs are durable, long-lasting, and energy-efficient, reflecting heat away from your home. When installing a metal roof, roofers will typically use a standing seam system, which involves securing metal panels to the decking with hidden fasteners. This creates a sleek, modern look and helps prevent leaks and wind uplift.
- Tile and slate roofs are premium options that offer unmatched beauty and durability. These materials are heavy and require specialized installation techniques to ensure proper support and water shedding. Roofers will carefully lay out the tiles or slates in a specific pattern, securing them with nails or adhesives and sealing any gaps or joints to prevent water infiltration.

Flashing Installation
Flashing is a crucial component of any roof replacement. It is installed around chimneys, vents, skylights, and other roof penetrations to direct water away from these areas and prevent leaks. Roofers will use high-quality metal flashing and seal it with a waterproof adhesive to ensure long-lasting protection.
There are several types of flashing used in roof replacement, each designed for specific applications.
- Base flashing is used at the base of chimneys and walls to prevent water from seeping in behind the siding or brickwork.
- Step flashing is used along the sides of chimneys and walls, with each piece overlapping the one below it to create a watertight seal.
- Valley flashing is used in the valleys of the roof, where two slopes meet, to guide water away from this vulnerable area.
When installing flashing, roofers will take great care to ensure a proper fit and seal. They will measure and cut the flashing to size, bending it as needed to conform to the contours of the roof. They will then secure the flashing with nails or screws and seal the edges with a waterproof adhesive or caulk. In some cases, they may also use a special type of flashing tape to create an extra barrier against water infiltration.
Ventilation and Insulation
Proper attic ventilation and insulation play a vital role in the performance and longevity of your new roof. Your roofer will assess your existing ventilation system and make necessary improvements, such as installing ridge vents or gable vents. They may also recommend adding or upgrading insulation to enhance energy efficiency and prevent ice dams.
Attic ventilation helps regulate the temperature and moisture levels in your attic, which can extend the life of your roof and prevent problems like mold growth, wood rot, and ice dams.
Ridge vents and gable vents are two common types of ventilation used in roof replacement. Ridge vents are installed along the peak of the roof, allowing hot air to escape and cool air to enter. Gable vents are installed on the gable ends of the roof and work in a similar manner. Insulation is another important factor in roof performance.
Proper insulation helps keep your home warm in the winter and cool in the summer, reducing your energy bills and increasing your comfort. It also helps prevent ice dams by keeping the roof deck at a consistent temperature. Your roofer may recommend adding or upgrading your attic insulation as part of the roof replacement process, using materials like blown-in cellulose, fiberglass batts, or spray foam.
Final Inspection and Cleanup
Once the installation is complete, the roofer will perform a final inspection to ensure that all components are properly installed and functioning as intended. They will check for any missed nails, gaps, or other issues that could compromise the integrity of your new roof. They will also test the flashing and seals around penetrations to ensure a watertight fit.
After the final inspection, the roofer will clean up any debris, nails, or materials left behind, leaving your property neat and tidy. They will use magnetic tools to pick up stray nails from your yard and driveway, and they will dispose of any old roofing materials in accordance with local regulations.
As a homeowner, you should take the time to walk through the final inspection with your roofer. This is your opportunity to ask any remaining questions, review the work that was done, and ensure that you are satisfied with the results. If there are any issues or concerns, now is the time to address them with your roofer.
Warranty and Maintenance
A reputable roofing contractor will provide you with a warranty covering both the materials and workmanship. Be sure to understand the terms and conditions of your warranty and keep all relevant documentation.
To extend the life of your new roof, implement a regular maintenance plan, including annual inspections and prompt repairs when necessary. The warranty provided by your roofing contractor should cover any defects in materials or workmanship for a specified period, typically ranging from 5 to 10 years.
Some manufacturers also offer extended warranties on their products, which can provide coverage for up to 50 years or even a lifetime. Be sure to review your warranty carefully and understand what is covered and what is not.
Regular maintenance is key to extending the life of your new roof and preventing costly repairs down the road. This should include annual inspections by a professional roofer to identify any potential issues or areas of concern. You should also keep an eye out for signs of damage or wear, such as missing or cracked shingles, sagging gutters, or water stains on your ceiling.
If you do notice any issues with your roof, it is important to address them promptly to prevent further damage. Small repairs, such as replacing a few shingles or sealing a minor leak, can often be done quickly and inexpensively. However, if left unaddressed, these issues can lead to more serious problems that may require a full roof replacement.
What is included in roof replacement can vary depending on the specific needs of your home and the scope of your project. However, by understanding the key components and steps involved, you can make informed decisions and work closely with your roofing contractor to ensure a successful and long-lasting roof replacement.