While winter often brings construction projects to a halt, pouring concrete during the colder months isn’t an impossibility. With meticulous planning and strategic execution, you can achieve successful placements and defy the season’s icy grip. This guide equips you with valuable tips and best practices to overcome the chilly challenges and navigate winter concrete pours confidently.
Understanding the Winter Foes
Winter throws unique hurdles at concrete, demanding adjustments to your approach. Here are the key obstacles to be aware of:
- Freezing Temperatures: The concrete’s nemesis? Temperatures dipping below 32°F. This disrupts crucial setting and curing stages, jeopardizing the concrete’s long-term strength and durability.
- Delayed Setting: Cold slows down the chemical reactions between water and cement, leaving freshly poured concrete exposed longer, vulnerable to external threats like freezing.
- Impeded Curing: As water molecules migrate through the concrete, forming strong hydration products, frigid conditions hinder this process, impacting its resilience and ability to withstand future stresses.
Conquering the Cold with Proactive Measures
Turning winter’s bite into an advantage requires a multi-pronged approach:
Preparation is Paramount:
- Temperature Monitoring: Before mixing, closely monitor current and forecasted temperatures. Aim for pouring during the warmest part of the day and have backup insulation plans in place, like insulated blankets or heaters, in case the mercury dips.
- Warm and Thawed Subgrade: Ensure the prepared grade, base fill, rebar grid, and formwork are well above frozen ground. Consider using hot water to melt surface ice that might block concrete flow. Remember, frozen ground can compromise the structural integrity of your project.
- Extended Curing Times: Remember, cold weather demands longer curing times. Double the standard waiting period before stripping forms or applying loads, as strength development slows significantly. Patience is key to ensuring the concrete’s long-term performance.
Embrace Technology’s Help
- Heating the Mix: Thaw aggregates completely and heat mixing water to at least 70°F before combining them. Consider applying hot water on formwork to prevent surface ice buildup. This ensures the initial chemical reactions proceed efficiently.
- Insulation Matters: Utilize insulated concrete forms (ICFs) or erect durable blanket barriers around the pour area to trap heat and protect the concrete from rapid heat loss. Think of it as creating a warm microclimate for optimal curing.
- Chemical Allies: Introduce strength-boosting calcium chloride (carefully!), following manufacturer’s instructions, and add mid-range water reducers for faster setting. Consider air entrainers to enhance freeze-thaw resilience, especially in regions prone to harsh winter cycles. Consult with concrete professionals for guidance on selecting the right admixtures for your specific project.
Curing Like a Pro
- Seal in the Warmth: Immediately after finishing, apply solvent-based curing and sealing compounds to retain moisture and heat during critical hydration stages. Think of it as locking in the warmth and moisture essential for proper curing.
- Shelter from the Elements: Erect enclosures over the cured concrete to provide insulation and shield it from damaging elements like precipitation, wind, and freeze-thaw cycles while strength progresses. Imagine creating a protective dome for your newly placed concrete, safeguarding it from the harsh winter environment.
Beware the Red Flags of Inadequate Curing
Even with careful planning, inadequate curing can leave its mark. Be on the lookout for these warning signs:
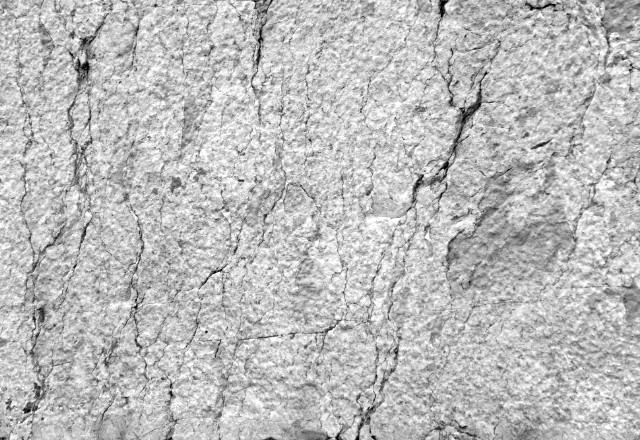
- Premature surface scaling and spalling: Pieces of the cement paste flaking off, indicating incomplete hardening due to freezing before proper curing.
- Prolonged low compressive strength values: Concrete not reaching its expected strength even after extended curing due to disrupted hydration.
- Visible joints from poor consolidation: Evidence of segregation within the concrete mix, highlighting the importance of proper mixing and placement techniques.
- Plastic shrinkage cracks: Superficial fissures caused by rapid moisture loss in windy or low-humidity conditions.
- Dusting residue from the finish: Powdery deposits remaining on surfaces, indicating inadequate curing humidity and potential long-term durability issues.
Catching these early allows for adjustments in concrete selection, handling, or protection for future pours, preventing long-term issues and ensuring the longevity of your project.
Winter Concrete Pours: Worth the Effort?
While winter concrete pouring demands extra effort and planning, the rewards are substantial. By following these guidelines and partnering with experienced concrete professionals, you can achieve lasting, high-quality concrete structures, regardless of the weather. Remember, defying the winter freeze requires careful planning, meticulous execution, and a willingness to adapt. By following these valuable tips and best practices, you can successfully navigate the chilly challenges and achieve successful winter concrete pours.
Before arranging cold weather cement deliveries, reference this concreting checklist to confirm all preparations squarely in place:
❑ Test aggregate for frozen lumps.
❑ Heat water/mix past 70°F.
❑ Inspect forms for ice & snow buildup.
❑ Verify 3-4 inch substrate insulation.
❑ Check for frost penetration depth.
❑ Space heaters around perimeter.
❑ Tent area & seal in heat.
❑ Have accelerators & calcium on hand.
❑ Ensure proper concrete cover depth.
❑ Allow 50% more initial cure time.
❑ Keep records of pour temperature.
❑ Begin concrete curing regimen immediately.
❑ Maintain protection for 5+ days.
❑ Schedule strength testing at later ages.
❑ Limit pour size to manage conditions.
While challenging, with purposeful gear, adjusted practices, and experienced oversight, concrete placements can continue through the icy grip of cold season. Implementing the strategies herein will ready any construction team to conquer temperamental weather and achieve enduring structural assets all season long.
Additional Tips and Resources
- Partner with experienced concrete professionals: Their expertise can be invaluable in navigating the complexities of winter pours, ensuring adherence to regulations, and selecting the right materials and techniques for your specific project.
- Invest in high-quality materials and equipment: Opt for concrete mixes specifically designed for cold weather use, along with durable insulation blankets, heaters, and curing compounds. Remember, quality materials translate to better performance and long-term durability.
- Continuously monitor the curing process: Regularly check the concrete’s temperature and moisture levels, making adjustments to insulation or heating as needed. Proactive monitoring ensures optimal curing conditions and helps prevent potential problems.
- Consider specialized cold weather admixtures: Explore options like accelerators, antifreeze admixtures, and viscosity modifiers, but always consult with concrete professionals and carefully follow manufacturer’s instructions for safe and effective use.
- Be mindful of safety precautions: Working in cold weather presents additional risks like slips and falls. Prioritize proper protective gear, clear communication among workers, and adherence to safety protocols established by regulatory bodies.
- Resources for further information: Explore resources from reputable organizations like the American Concrete Institute (ACI), National Ready Mixed Concrete Association (NRMCA), and Portland Cement Association (PCA) for detailed guidelines, technical specifications, and best practices for winter concrete construction.
By incorporating these additional tips and leveraging the expertise of professionals, you can confidently embark on your winter concrete project, defying the season and achieving robust, long-lasting structures. Remember, careful planning, proactive monitoring, and a commitment to quality are key to success in even the most challenging winter conditions.


 509-201-4190

