509-201-4190

Are you dealing with a hole in your aluminum siding? Whether it’s due to weather damage, wear and tear, or an accident, repairing the hole can seem like a daunting task. But don’t worry – you can do this yourself! In this article, we’ll walk you through everything you need to know about aluminum siding hole repair. We’ll cover what materials and tools you’ll need, how to prepare the area for repair, and step-by-step instructions on how to patch up the hole.
Disclaimer: The information provided in this article is for informational and educational purposes only. While every effort has been made to ensure accuracy, the content should not be taken as professional advice. Please consult a qualified professional if you have any specific questions or concerns regarding your aluminum siding hole repair project. For additional assistance, you may also seek the advice of Advance Roofing LLC – they have been proudly serving the Spokane, WA area with superior roofing solutions for many years.
What is aluminum siding?
Aluminum siding is a popular choice for many homeowners due to its durability, low maintenance requirements, and versatility. It is made from thin sheets of aluminum that are designed to mimic the look of traditional wood siding, but with added benefits. The panels are available in a variety of colors and styles, making it easy to find the perfect match for any home exterior.
Unlike wood siding, aluminum siding is not susceptible to rot or insect damage. It can also withstand intense heat, making it an ideal choice for homes located in areas prone to wildfires. Additionally, aluminum siding is less expensive than many other types of siding materials, such as fiber cement or stucco.
One of the biggest advantages of aluminum siding is its low maintenance requirements. This type of siding does not need to be painted like wood siding, as the aluminum is coated with a protective finish that resists fading and chalking. It is also resistant to water damage, which can be a concern in areas with heavy rainfall or high humidity.
Overall, aluminum siding is a durable and cost-effective option for homeowners looking to improve the curb appeal of their homes while also providing added protection against the elements. With a wide range of styles and colors to choose from, it is easy to find a perfect match for any home exterior.
Why is hole repair important?
When it comes to home maintenance, it’s important not to overlook even the smallest issues. This is especially true when it comes to siding, where a small hole can quickly turn into a larger problem if left unaddressed.
One of the main reasons why hole repair is important is to protect your home from water damage. Even small holes can allow water to seep into your walls, causing mold and mildew to develop. This can not only damage your siding but also compromise the structural integrity of your home.
Hole repair is also important for maintaining your home’s curb appeal. Small holes in your siding may not seem like a big deal, but they can detract from your home’s overall aesthetic. Over time, these holes may start to accumulate dirt and debris, making them even more noticeable.
In addition, repairing holes in your siding can help prevent pests from getting into your home. Even a small hole can provide an entryway for insects or rodents looking for a warm place to nest. By addressing any holes in your siding promptly, you can prevent an infestation from taking hold.
Finally, hole repair is important for maintaining the value of your home. When potential buyers are looking at a property, even minor cosmetic issues can make them less likely to make an offer. By keeping your siding in good condition, you can increase your home’s curb appeal and overall value.
Overall, hole repair may seem like a small and simple task, but it can have a big impact on the overall health of your home. So whether you’re dealing with a small hole or a larger issue, it’s important to address it promptly and ensure that your siding remains in top condition.
Types of Damage
When it comes to aluminum siding, there are a variety of different types of damage that can occur. It’s important to be familiar with these types of damage so you can determine the best course of action for repair.
- One common type of damage is dents. Dents can occur from a number of sources, such as hail, windblown debris, or accidental impacts. Dents that are small and shallow can often be repaired using a piece of wood and a rubber mallet. For larger dents, it may be necessary to use a filler material and sand them down.
- Another type of damage is cracks. Cracks can occur from extreme temperatures or improper installation. In many cases, cracks can be filled with caulk or sealant. However, if they are too large or severe, it may be necessary to replace entire sections of siding.
- Water damage is another common type of damage that can occur. This can be caused by improperly sealed joints, clogged gutters, or simply by age. If water damage is left untreated, it can lead to mold and mildew growth, which can cause further damage to the siding and the home’s structure.
- Loose or missing panels are another form of damage that can occur. This can happen due to improper installation or wear and tear over time. Loose panels can be re-secured using siding nails, while missing panels may need to be replaced entirely.
- Lastly, fading or discoloration can occur due to prolonged exposure to sunlight. While this type of damage does not affect the siding’s functionality, it can detract from the home’s overall appearance. To address this issue, some homeowners choose to repaint their aluminum siding.
Knowing the different types of damage that can occur with aluminum siding can help you determine the best course of action for repair or maintenance. By being proactive with repairs, you can ensure that your home remains in good condition and retains its value for years to come.
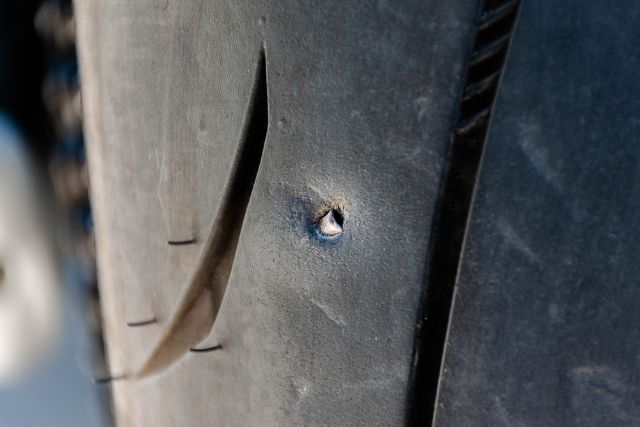
Holes
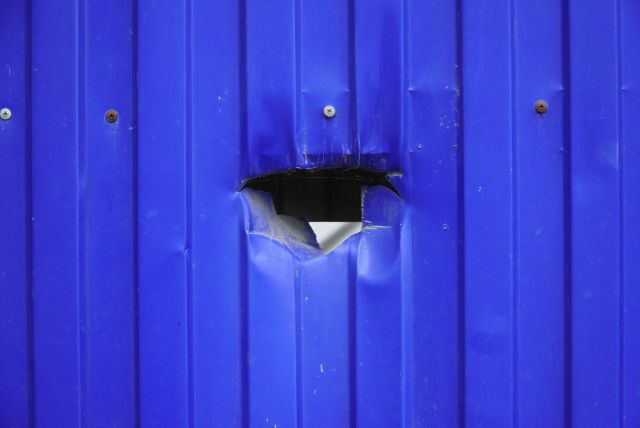
One of the most common types of damage that can occur to aluminum siding is holes. Holes can be caused by various factors, such as accidental impacts, weather damage, or general wear and tear. Whatever the cause may be, it is important to address holes as soon as possible to prevent further damage to your siding and your home’s structure.
Firstly, it is important to assess the size of the hole. Smaller holes can often be repaired easily with some caulk or sealant. Simply clean the area around the hole, fill it with caulk or sealant, and smooth out any excess with a putty knife. Let the caulk dry completely before painting over it with exterior paint to blend it in with the rest of your siding.
For larger holes, it may be necessary to cut out the damaged portion of the siding panel and replace it with a new piece. To do this, use a utility knife or zip tool to cut around the damaged area, making sure to remove all the loose pieces. Take measurements of the damaged area, and cut a replacement panel to the appropriate size. Slide the replacement panel into place, making sure it fits snugly and securely. Use galvanized siding nails to secure the new panel in place, and fill in any gaps with paintable caulk.
If the damage is severe, it may be necessary to replace the entire panel itself. This can be a more complex process and may require the help of a professional. Keep in mind that it is important to choose a replacement panel that matches the color, texture, and thickness of your existing siding to maintain a cohesive look.
Overall, repairing aluminum siding holes requires patience, precision, and attention to detail. By taking the necessary steps to address holes in your siding, you can maintain your home’s curb appeal, prevent further damage, and ensure the longevity of your siding and home’s structure.
Dents
Dents on your siding can be an unsightly blemish on your home’s exterior. While they are often caused by hail or falling debris, they can also occur from other accidents or incidents. Luckily, there are steps that you can take to repair dents on your siding without having to replace the entire panel.
The first step in repairing a dent is to assess the damage. If the dent is small, you may be able to fix it using a simple technique. Take a pair of pliers and grasp the edges of the dent. Use gentle force to pull the dent outward, taking care not to crack or damage the siding material. This technique can be effective for small dents, but larger dents may require more involved repairs.
For larger dents, you may need to use auto-body filler to repair the damage. This material is commonly used in car repairs, but it can also be used for siding repairs. After cleaning the area around the dent with soap and water, apply the auto-body filler with a putty knife.
Make sure to smooth out the filler so that it blends in with the surrounding siding. After the filler has dried, sand it down with fine-grit sandpaper until it is smooth and even. You can then paint or stain the repaired area to match the rest of your siding.
In some cases, dents may be so severe that they cannot be repaired. In these instances, you may need to replace the entire panel. Replacement siding pieces can be found at hardware stores or online sources. Make sure to measure the damaged area carefully to ensure that you get the right sized piece. Once you have the replacement panel, slide it
into place and secure it with galvanized siding nails. Use paintable caulk to fill in any gaps and smooth out any excess.
While dents can be a nuisance, they don’t have to be a permanent eyesore. With the right tools and techniques, you can easily repair dents on your siding and restore your home’s curb appeal.
Water Damage
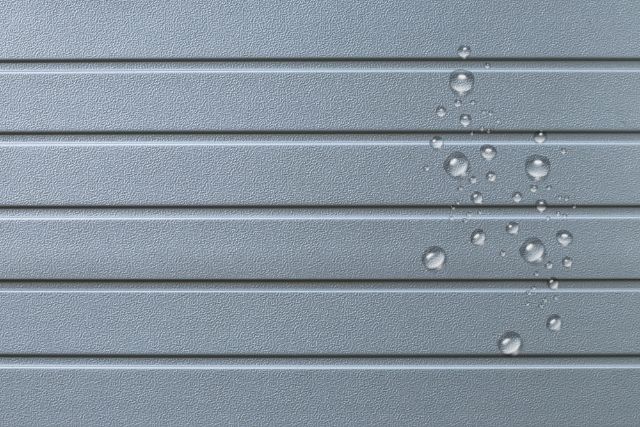
Water damage can be a major issue for any homeowner or property manager. It can be caused by a variety of factors, including flooding, burst pipes, leaking roofs, or even simple plumbing issues. Whatever the cause, the effects of water damage can be devastating.
One of the most critical things to do in the event of water damage is to act quickly. The longer water is left to sit, the more damage it can do. Water can seep into walls, floors, and furniture, causing rot, mold, and mildew to set in. These issues can be difficult and expensive to repair, and they can also pose health risks to those in the building.
When dealing with water damage, the first step is to identify the source of the problem and stop its flow. This may mean turning off the water supply or repairing a leaking roof. Once the source of the water has been addressed, it’s time to start removing any standing water. This can be done with a wet-dry vacuum or by using towels or mops to soak up as much water as possible.
After the standing water has been removed, it’s important to dry out the affected areas completely. This can be done using fans, dehumidifiers, or even opening windows to let in fresh air. It’s essential to ensure that all areas affected by the water damage are completely dried out to prevent the growth of mold or mildew.
If mold or mildew has already started to develop, it’s important to have it removed by a professional. Mold can be hazardous to health, and it can spread quickly if not dealt with properly. A professional mold removal service can help to identify the extent of the problem and remove any contaminated materials.
In some cases, water damage may be so severe that it requires extensive repairs or even a complete renovation. It’s important to work with a professional contractor who is experienced in dealing with water damage to ensure that the repairs are done correctly. They can also help to identify any underlying issues that may have caused the water damage and address those as well.
In conclusion, water damage can be a major issue for any property owner or manager. The key is to act quickly to stop the source of the water and remove any standing water as soon as possible. From there, it’s important to properly dry out the affected areas and address any mold or mildew that may have developed. Working with a professional contractor can help to ensure that the repairs are done correctly and that the property is restored to its original condition.
Excess Caulk
Excess caulk is a common problem when it comes to home repairs, including siding hole repair. While caulking can be an effective way to seal gaps around windows, doors, and other areas, too much caulk can create an unsightly mess.
One way to avoid excess caulk is to use a caulk gun that allows for precise application. It’s important to choose a caulk that is suitable for the type of siding being repaired and that can withstand the elements. Paintable caulk is a good option, as it can be painted over to match the color of the siding.
If excess caulk has already been applied, it can be removed using a utility knife or a sharp-edged tool. Be careful not to damage the surrounding siding. Once the excess has been removed, use a fine-grit sandpaper to smooth out the remaining caulk. If the excess is still visible, it may be necessary to apply a second layer of caulk and repeat the removal process.
Another option for excess caulk is to use a product such as foil tape. This can be applied over the excess caulk to create a clean and waterproof seal. However, it’s important to note that foil tape may not be suitable for all types of siding.
Overall, excess caulk is a common issue when it comes to siding hole repair. However, with proper application techniques and the use of suitable products, it can be easily avoided or dealt with.
Tools Needed for Repair

When it comes to repairing holes in aluminum siding, having the right tools on hand is crucial for a successful and efficient job. Here are some of the tools you’ll need to gather before beginning your repair project:
- Zip Tool: This tool is designed specifically for removing siding panels, making it essential for any repair job. Simply slide the tool under the lip of the siding and carefully slide it along to release the panel from the one above it.
- Pair of Pliers: These will come in handy for removing any loose panels or nails that may be obstructing your repair work.
- Utility Knife: A sharp utility knife is necessary for making precise cuts in the siding material, as well as removing any excess caulk or damaged portions of the siding.
- Piece of Siding: Having a spare piece of siding on hand is useful for when you need to replace a damaged panel. Make sure the spare piece matches the color and texture of the existing siding as closely as possible.
- Caulk Gun: A caulk gun will help you apply a smooth and even layer of caulk around the repair area, ensuring a proper seal against water and moisture.
- Fine-Grit Sandpaper: This will be necessary for smoothing out any rough edges or excess caulk after the repair has been completed.
- Paintable Caulk: If you plan on painting over the repair area, be sure to use a caulk that is specifically labeled as “paintable”.
By having these tools on hand and ready to use, you’ll be well-equipped to tackle any hole or damage that may appear in your aluminum siding.
Utility Knife
A utility knife is an essential tool for any DIY homeowner or professional contractor. With its razor-sharp blade, it can handle a wide range of cutting tasks, including slicing through materials like paper, cardboard, and plastic. However, when it comes to repairing aluminum siding, a utility knife is especially useful.
One of the most common reasons for repairing aluminum siding is to fix holes and cracks. A utility knife can be used to cut away any damaged portions of the siding, making way for a replacement piece. Additionally, it can be used to remove any excess caulk or debris that may be obstructing the repair area.
When using a utility knife for aluminum siding repair, it’s important to keep safety in mind. Always make sure the blade is sharp and use caution when making cuts to avoid injury. It’s also important to use the proper blade size and type for the job at hand.
For larger holes or dents, a pair of tin snips or aviation shears may be necessary. However, a utility knife can still be used to make precise cuts and trim away any excess material. For fine-tuning the repair work, a fine-grit sandpaper can be used to smooth out rough edges and rough spots.
In conclusion, a utility knife is an essential tool in any homeowner or contractor’s toolbox. When used properly, it can make aluminum siding repair tasks easy and efficient. Remember to prioritize safety and use the right blade for the job at hand.
Zip Tool
When it comes to repairing aluminum siding, a Zip Tool is a must-have in your toolkit. This handy tool is specifically designed to remove and replace damaged siding panels without causing any further damage.
So, how does a Zip Tool work? It has a flat blade with a hook at the end that can easily slide under the edge of the siding panel and pull it away from the house. Once you’ve removed the damaged piece, you can use the Zip Tool to snap a replacement panel into place.
Using a Zip Tool may seem intimidating at first, but with a little practice, you’ll find that it’s a simple and efficient way to repair your siding. Just follow these steps:
- Start by locating the damaged panel. Look for any obvious cracks, holes, or other signs of damage.
- Identify the top edge of the panel. This is where you’ll want to start using your Zip Tool.
- Position the blade of the Zip Tool under the top edge of the panel. Make sure the hook is facing up. Gently pull the handle of the Zip Tool away from the house to lift up the panel.
- Continue working your way down the length of the panel, using the Zip Tool to release it from the house as you go. Be careful not to bend or dent the panel as you work.
- Once you’ve removed the damaged panel, use the Zip Tool to snap the replacement panel into place. Start at the top and work your way down, making sure to overlap the panels slightly to prevent water from seeping in.
By using a Zip Tool to repair your aluminum siding, you can save both time and money by avoiding the need to replace entire panels or hire a contractor. Just make sure you follow proper safety precautions, such as wearing gloves and eye protection, and be patient as you learn to use the tool effectively. With a little practice, you’ll become a pro at aluminum siding repair in no time.
Putty Knife
When it comes to repairing holes in your aluminum siding, a putty knife can be a helpful tool to have on hand. This versatile tool can be used for a range of tasks, from smoothing out excess caulk to applying auto-body filler.
To use a putty knife for aluminum siding hole repair, start by cleaning the area around the hole with a cloth and some warm soapy water. This will remove any dirt or debris that could interfere with the repair process.
Next, use the putty knife to apply a layer of paintable caulk around the edges of the hole. This will help to seal the area and prevent water from seeping into the siding.
If the hole is larger than a quarter inch in diameter, you may need to use auto-body filler to patch it up. Mix the filler according to the manufacturer’s instructions, and then apply it to the hole using the putty knife. Smooth out the surface of the filler with the knife, making sure to blend it in with the surrounding siding.
Once the caulk or filler has dried, use the putty knife to sand down any rough edges or excess material. Start with a coarse-grit sandpaper and gradually work your way up to a finer-grit paper for a smooth finish.
Overall, a putty knife is a versatile tool that can be a useful addition to your aluminum siding repair kit. Whether you’re smoothing out excess caulk or patching up a larger hole, a putty knife can help you achieve a professional-looking repair.
Fine-Grit Sandpaper
Fine-grit sandpaper is an essential tool for any DIY enthusiast, particularly in the world of home repairs. It’s a versatile and multi-purpose tool that can be used for a range of tasks, from smoothing down rough edges to preparing surfaces for painting or staining. And when it comes to aluminum siding hole repair, fine-grit sandpaper is an essential step in achieving a professional and seamless finish.
Fine-grit sandpaper typically ranges from 150 to 320 grit and is used for finishing and smoothing surfaces. It’s important to note that this type of sandpaper should only be used once the coarser grits have been used to remove any damage or rough edges from the surface. Using fine-grit sandpaper too early can result in the sandpaper becoming clogged and ineffective.
When it comes to aluminum siding hole repair, fine-grit sandpaper is used to smooth out the repaired area after it has been filled in with auto-body filler or caulk. It’s important to ensure that the surface is completely smooth and flush with the surrounding siding material in order to achieve a seamless finish. An uneven surface can not only detract from the overall appearance of the siding but can also make it susceptible to water damage or other issues.
To use fine-grit sandpaper for aluminum siding hole repair, start by selecting a sandpaper with a grit of 220 or higher. This will ensure that the surface is sanded down without causing any scratches or damage. Use gentle, circular motions to sand down the repaired area until it is completely smooth. Then, move onto the surrounding area, sanding down any rough edges or imperfections until the surface is even and consistent.
Overall, the importance of fine-grit sandpaper in aluminum siding hole repair cannot be overstated. It’s an essential tool for achieving a professional-looking repair and ensuring that the siding is not only visually appealing but also functional and long-lasting. So, whether you’re a seasoned DIY enthusiast or a newcomer to home repairs, be sure to keep a supply of fine-grit sandpaper on hand for all your aluminum siding hole repair needs.
Foil Tape
Foil tape is a versatile and useful tool for any homeowner or DIY enthusiast. Made from a flexible and adhesive layer of metal, foil tape is ideal for sealing, repairing, and even insulating various surfaces.
One of the most common uses for foil tape is sealing HVAC ductwork and vents. The tape’s metal construction allows it to withstand intense heat and cold, making it an effective solution for sealing air leaks and preventing energy loss in your home. Simply apply the tape to any gaps or seams in your ductwork, and you’ll instantly see a reduction in energy consumption and an increase in comfort.
In addition to its use in HVAC systems, foil tape is also useful for repairing damaged metal surfaces. If you’ve noticed scratches, dents, or punctures in your metal siding or roofing, foil tape can help. Simply clean the surface with a degreaser and sandpaper, then apply the tape over the damaged area. The tape will conform to the shape of the surface and provide a durable, waterproof layer of protection.
Another great use for foil tape is insulating pipes and wires. The tape’s waterproof properties make it ideal for wrapping around water pipes or electrical wires to prevent heat loss and protect against moisture. Plus, it’s easy to apply and can be cut to fit any size or shape.
When shopping for foil tape, be sure to look for a high-quality brand that is designed for your specific use. HVAC foil tape is different from metal repair tape, for example, and you’ll want to choose the right product for your needs. You should also look for a tape with a strong adhesive and a durable backing to ensure that it stays in place and withstands the elements.
Overall, foil tape is an affordable and practical solution for a wide range of home repair and improvement projects. Whether you need to seal your HVAC ducts, repair metal surfaces, or insulate pipes and wires, foil tape is a tool that should be in every homeowner’s toolbox.
Steps to Take Before Repairs Begin
Before beginning any aluminum siding hole repairs, it is important to take several steps to ensure a successful and effective repair. Here are some recommended steps to take before repairs begin:
- Assess the damage: Take a close look at the damaged area and determine the extent of the damage. Is it a small hole or a larger puncture? Are there any dents or cracks in the surrounding area? Assessing the damage will help you determine the appropriate repair method.
- Gather necessary tools and materials: Depending on the size and nature of the damage, you will need various tools and materials for the repair. This may include a utility knife, zip tool, pair of pliers, fine-grit sandpaper, putty knife, caulk gun, foil tape, and replacement siding pieces. Make sure you have everything you need before beginning the repair.
- Choose the right repair method: Depending on the type and size of the damage, there are different repair methods to consider. Smaller holes can often be filled with caulk or patched with foil tape, while larger holes may require replacement siding pieces. Choose the appropriate method for the specific repair.
- Prepare the damaged area: Before applying any repairs, make sure the damaged area is clean and dry. Use a degreaser and sandpaper to remove any dirt, debris, or loose paint. This will ensure proper adhesion of the repair materials.
- Apply the repair: Following the chosen repair method, apply the necessary materials to fix the damage. This may involve using a putty knife to apply caulk, cutting and fitting replacement siding pieces, or applying foil tape over small holes.
By taking these steps before beginning repairs, you can ensure a successful and long lasting repair of your aluminum siding. Remember to always follow manufacturer instructions and seek professional help if needed.
Conclusion
In conclusion, aluminum siding hole repair can be a daunting task for homeowners, but with the right tools and techniques, it can be a manageable DIY project. A careful examination of the damage, consideration of the surrounding area and location of the damage, can help determine the best course of action. Small holes and cracks can often be repaired with caulk or foil tape, while larger ones may require replacement siding pieces.
It’s important to use the proper tools, such as a utility knife, zip tool, and pair of pliers, and to follow safety precautions, such as wearing gloves and protective eyewear. It’s also essential to choose the right type of caulk or auto-body filler, and to use a caulk gun to apply it evenly.
For bigger holes or larger dents, consult a professional siding supplier or contractor for assistance. They can provide advice on the best type of siding materials and can help with more extensive repairs.
Remember, timely repairs can prevent water damage and keep your home’s exterior looking great. With the proper steps and materials, homeowners can restore the integrity of their homes’ siding and improve its curb appeal. So, don’t let damaged aluminum siding bring you down- tackle the repair and get your home looking like new!