509-201-4190

Metal roofing has become an increasingly popular choice for homeowners looking for a reliable and attractive roofing option. With its ability to withstand harsh weather conditions, metal roofs provide lasting protection from the elements. However, in order to achieve perfect overlaps like a pro, it is important to understand the basics of metal roof installation and have the right tools available. In this article we will discuss all you need to know about expert metal roofing tips, from preparing the roof for installation to completing installation according to manufacturer’s instructions. So if you’re ready to learn how to create perfect overlaps and install your own metal roof like a professional, let’s get started!
Disclaimer: We at Advance Roofing LLC strongly recommend that any homeowner considering metal roof installation seek professional advice and assistance prior to beginning the project. While this article provides an overview of metal roofing tips, it is not a substitute for trained professionals who can provide guidance on proper installation techniques and safety protocols. When in doubt, please consult our experienced team of metal roofers at Advance Roofing LLC for personalized advice and customized solutions. We have proudly served the Spokane, WA area for many years with the highest standard of quality roofing solutions.
What is Metal Roofing?
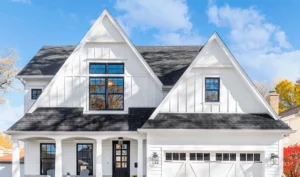
Metal roofing is a popular choice for homeowners looking to add strength and beauty to their home. It’s made from durable, lightweight materials including steel, aluminum, copper and zinc alloys, which makes it resistant to harsh weather conditions like wind and rain. Metal roofs are also easy to install and require minimal maintenance. With its sleek design and long-lasting durability, metal roofing is an excellent choice for any homeowner looking to increase the value of their property. Plus, because it reflects sunlight away from the home, metal roofing helps reduce energy costs by decreasing the need for air conditioning in the summer months. Whether you’re looking for a traditional or contemporary look on your roof, metal roofing can provide you with years of protection without compromising style or aesthetics.
Metal roofing is the perfect choice for homeowners looking to add value, strength, and beauty to their home. Not only does it last longer than traditional roofs, but its sleek design and energy efficiency make it an attractive option for any property. Now let’s explore the benefits of metal roofing even further!
Benefits of Metal Roofing
Metal roofing offers a variety of benefits to homeowners looking to upgrade their property. Its sleek design and durability make it a great choice for any home, while its energy efficiency helps reduce energy costs. Metal roofs are also resistant to harsh weather conditions like wind and rain, and require minimal maintenance. Plus, because it reflects sunlight away from the home, metal roofing helps reduce air conditioning costs during summer months. For those who want a classic look on their roof without sacrificing modern style, metal roofing can provide an ideal solution. It’s strong enough to withstand the toughest of climates but still looks great with any architectural style. If you’re looking for a long-lasting roof that will add value and beauty to your home, metal roofing could be the perfect choice!
Tools Needed
When it comes to installing a metal roof, having the right tools is essential for achieving perfect overlaps. A good tool kit will include a tin snips for cutting metal sheets, a hammer for nailing down the panels, and a level to ensure that the roof is even. You’ll also need a saw or drill to make holes in the sheeting for nails and screws. Finally Fina , you’ll need a caulking gun to apply sealant along the joints and seams.
Having these tools on hand before you begin your project will save you time and help ensure that your metal roof is installed correctly. If you’re not comfortable using any of these tools, consider hiring an experienced professional to help with your installation. With the right tools and techniques, you can achieve perfect overlaps like a pro!
Installing a metal roof can be an intimidating task, but with the right tools and techniques, you too can achieve perfect overlaps like a pro! Now that you have your tool kit ready, it’s time to learn more about the basic tools needed for metal roofing installation.
Basic Tools
When it comes to installing a metal roof, having the right tools is essential for achieving perfect overlaps.
Basic tools you’ll need include a tin snips for cutting metal sheets, a hammer for nailing down the panels, and a level to ensure that the roof is even.
You’ll also need a saw or drill to make holes in the sheeting for nails and screws.
Finally, you’ll need a caulking gun to apply sealant along the joints and seams.
Make sure all of your tools are in good condition before starting your project. Check that blades are sharp and that any drills or saws are oiled properly so they don’t overheat during use. If you’re not comfortable using any of these tools, consider hiring an experienced professional to help with your installation. With the right tools and techniques, you can achieve perfect overlaps like a pro!
Specialized Tools
For metal roofing projects, there are some specialized tools that can come in handy to help achieve perfect overlaps.
A sheet metal brake is ideal for bending and folding sheets of metal into the desired shape.
A siding break is also a great tool for creating custom shapes, such as cutting a curve around corners or windows.
Air-powered shears are an easy way to quickly cut through metal sheets and make precise cuts with minimal effort.
Finally, offset snips are a must-have for making clean cuts from odd angles, such as reaching into tight spaces where a regular pair of tin snips may not fit.
With these specialized tools, you’ll be able to complete your project like an expert!
Preparing the Roof for Installation
Proper roof preparation is crucial for achieving seamless overlaps during metal roofing installation. Before getting started, make sure to inspect the surface of your roof and remove any debris that may be present. If there are any existing nails or screws, these should be removed as well. It’s also a good idea to seal any gaps or cracks with caulk before beginning work. Additionally, you’ll want to ensure that all of your tools are in good working order and ready for use. With the proper preparation, you can get started on your project confidently knowing that it will turn out perfectly!
Now that your roof is prepped and ready, it can be time to move onto the next step of your project: calculating square footage. With the right calculations, you can ensure that all of your metal roofing will fit perfectly. But before you start, get ready for a challenge – it’s time to sharpen those math skills!
Calculating Square Footage

Accurately calculating square footage is necessary for achieving precise overlaps when installing metal roofing. Knowing the exact measurements of your roof will ensure that all of your materials are correctly sized and laid out. To begin, you’ll need to measure the length and width of your roof in feet. Then, multiply these two figures together to get the total square footage. For example, if your roof is 20 feet wide and 40 feet long, you would multiply 20 x 40 to get 800 square feet total. It’s important to double check these numbers after calculating as any small discrepancies can have a big impact on the accuracy of your project! Additionally, be sure to take into account any obstructions such as chimneys or skylights that could affect the size of panels needed for installation. With accurate calculations in hand, you can confidently move onto the next step with full confidence in your results!
Understanding Building Codes & Regulations
Having a thorough knowledge of building codes and regulations is crucial for achieving proper overlaps in metal roofing. Before beginning any project, it’s essential to make sure that you adhere to all local building codes, as failure to do so can result in costly fines and costly repairs down the line. To get started, research your municipality’s specific requirements for metal roofing. These requirements may include size, layout, fastening methods, underlayment type and more. Additionally, it’s important to check with any applicable homeowner’s associations or other governing bodies as they may have additional restrictions or requirements that must be followed. With all of this information in hand, you’ll be able to confidently move forward with your project knowing that it meets all of the necessary regulations and standards!
Choosing Appropriate Roofing Materials & Accessories
Choosing the right roofing materials and accessories for your project is essential for achieving a perfect overlap.
Start by taking into account the climate of your area and what type of weather conditions you typically experience. For example, if you live in an area that receives a lot of snow, you’ll need to make sure that your roofing material is rated to withstand heavy weight. Similarly, if you live in an area with frequent strong winds or hurricanes, you’ll want to make sure that your roofing material is also able to withstand these conditions.
Additionally, make sure to choose accessories such as nails and screws that are appropriate for the type of roofing material being used.
Finally, it’s important to purchase high-quality products from a reputable supplier so that they can stand up to the elements over time.
With all these factors in mind, you’ll be well on your way to creating a beautiful and durable metal roof!
Hiring a Professional Roofing Contractor
Engaging the services of a skilled roofing contractor can guarantee the proper and code compliant execution of your metal roofing project. When looking for a qualified contractor, it’s important to do your research.
Check out online reviews, ask around in your community for referrals, and make sure the contractor you choose is licensed and insured.
Once you’ve identified a few potential candidates, be sure to ask them questions about their experience with metal roofing, the materials they use, and any other services they offer.
You should also inquire about their estimated timeline and budget for the job so that you can get an accurate sense of what the project will cost.
Finally, don’t forget to get a written contract from your chosen contractor before work begins.
this will provide clarity on both sides regarding expectations and responsibilities throughout the duration of the project.
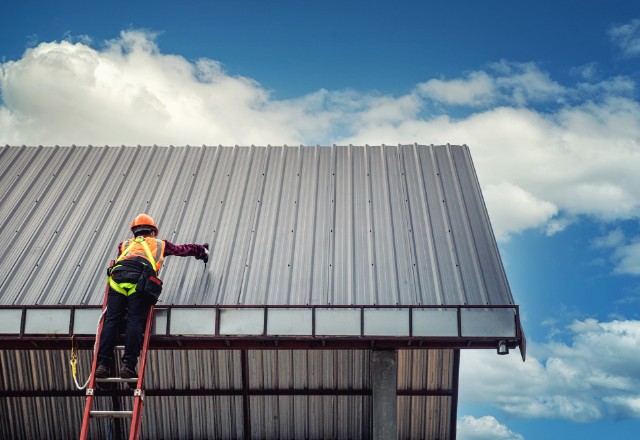
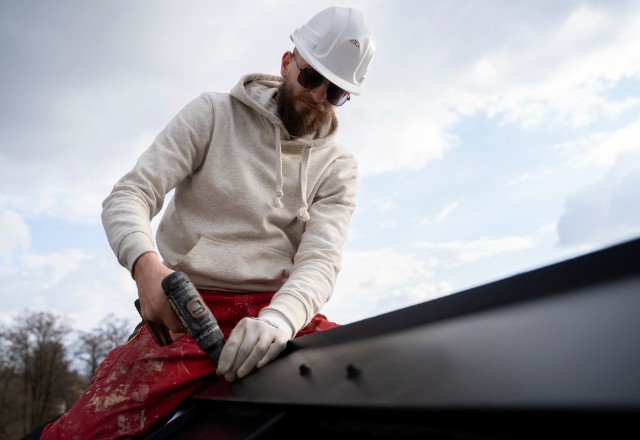
Installing the Metal Roof
Installing a metal roof can be a great way to upgrade your home’s exterior and protect it from the elements. However, this is not a job that should be taken lightly; proper installation is essential for ensuring long-term durability and performance. Before starting, make sure you have all the necessary tools and materials on hand, including an air compressor, roofing nails, sealant, screws or rivets, and the appropriate ladder or scaffolding. Once you’re ready to begin, start by laying out the panels in their designated spots before attaching them with fasteners. Make sure to use adequate sealant around each edge of a panel as well as any seams between panels to create a watertight barrier against moisture. If you need help during the process, don’t hesitate to consult an experienced roofing professional who can provide valuable tips and advice throughout the project.
A metal roof is an investment that can protect your home and add value for years to come. With the right tools, materials, and preparation, it’s possible to properly install a metal roof yourself. Coming up next, we’ll dive into securing the entire roof area with metal panels and sheets!
Securing the Entire Roof Area with Metal Panels and Sheets
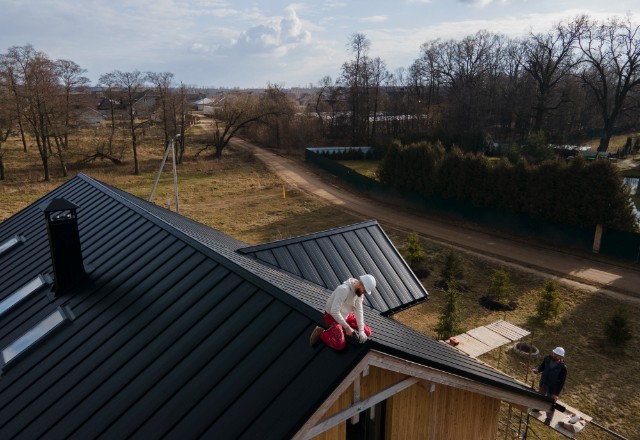
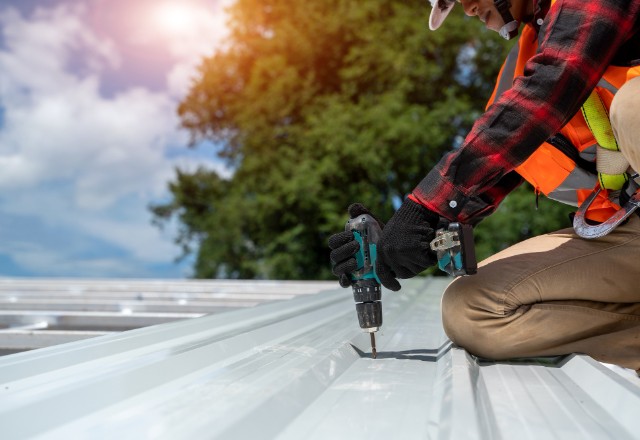
The installation of metal panels and sheets to cover the entire roof area is a crucial aspect in achieving a long-lasting roof structure. Begin by measuring the roof area and cutting the metal panels or sheets to size. When fastening them, use appropriate screws or rivets that are designed for use in metal roofs. It’s also important to use sealant around each screw point and any seams between panels to ensure a watertight barrier against moisture. Additionally, be sure to leave a gap of at least 1/8-inch between overlapping panels to allow for proper expansion when temperatures increase or decrease. If you’re unsure about any part of the process, don’t hesitate to consult an experienced roofer who can provide helpful advice and tips throughout the installation. With these tips in mind, you’ll be able to securely install your metal roof like a pro!
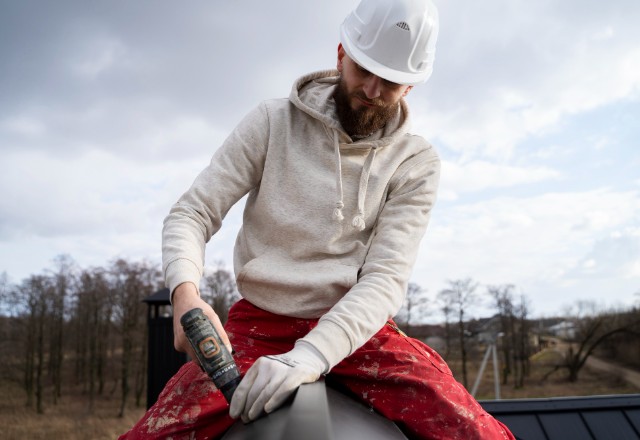
Creating Overlaps on Each Panel and Sheet Joints
To achieve a secure metal roof installation, it is important to create overlaps on each panel and sheet joint to prevent air and water from seeping through. This involves overlapping two adjacent pieces of metal, either by fastening one side of the overlap to the top sheet, then folding its other side over the bottom sheet for a “standing seam” look, or by turning both sheets upside down and lapping them together. When securing the overlap with screws or rivets, make sure you leave at least 1/8-inch gap between the two sheets to allow for expansion when temperatures change. Additionally, sealant should be used around all screws and seams for extra protection against moisture. If you’re unsure about any part of the process, don’t hesitate to get advice from an experienced roofer who can provide expert guidance throughout your installation. With these tips in mind, you’ll be able to create perfect overlaps like a pro!
Attaching the Corrugated Metal Panels to the Drip Edge
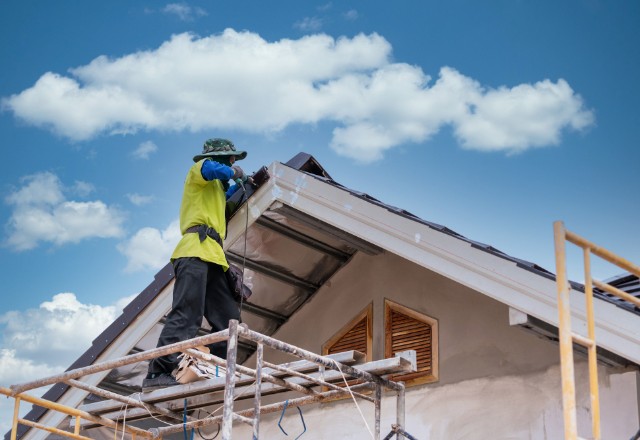
Properly securing the corrugated metal panels to the drip edge is a crucial step in the process of installing a metal roof. This should be done before installing your panels, as it will create a secure base for them and ensure that water is directed away from the top of the roof.
To attach the panels, start by measuring and cutting them with tin snips or a circular saw.
Then use galvanized nails to secure each panel at its edges and along its center, making sure they’re placed firmly into the wood deck beneath.
Finally, attach an appropriate size drip edge to the bottom of each panel with additional nails or screws.
Following these steps will help you ensure that your metal roof stays securely in place for years to come.
Sealing All Joints with Adhesive or Screws
Proper installation of a metal roof requires sealing all joints with either adhesive or screws. Adhesives are great for creating a strong, waterproof bond between the panels, while screws provide added stability and durability. Make sure to select high-quality materials that are suitable for outdoor use in order to ensure your metal roof stands up against the elements. Start by cleaning any dirt or debris from the joint area before applying the adhesive or screwing it together. Once you’ve sealed all of the joints, check them again after they dry to make sure they are secure and watertight. With these simple steps, you can rest easy knowing your metal roof will be able to stand up against anything Mother Nature throws its way!
Installing Asphalt Shingles Where Necessary
Asphalt shingles are a recommended method for protecting your roof from weather damage. When installing metal roof panels, it’s important to ensure that any areas where two panels come together are sealed with a shingle. Asphalt shingles provide an extra layer of protection from water infiltration and can help minimize the risk of leaks. Before installing asphalt shingles, be sure to clean the area thoroughly and make sure all joints are dry before applying the adhesive or screws. Once you have installed the shingles, check them again after they dry to make sure they are secure and watertight. With these simple steps, you can rest easy knowing your metal roof will be properly protected against Mother Nature’s harsh conditions!
Adding Square Root Flashing for Extra Protection
Square root flashing is an important part of metal roofing installation as it provides an extra layer of protection against water infiltration. This type of flashing is installed at the point where two pieces of metal roofing material meet, usually along the ridge line or hip line. It is important to make sure that square root flashing is properly installed in order to ensure that your metal roof will provide the highest level of protection against moisture. When installing square root flashing, be sure that the joint between two pieces of metal panel has been properly sealed using caulking and sealant tape. Additionally, use self tapping screws to secure it in place and make sure that all edges are flush with the surrounding panels. With these simple steps you can rest assured knowing your metal roof will keep you and your home safe from water damage!
Completing Installation According to Manufacturer’s Instructions
Following the manufacturer’s instructions is crucial during metal roofing installation. Following the manufacturer’s instructions will ensure that your metal roof will be installed correctly and provide the highest level of protection against the elements.
Before starting the installation, be sure to read all of the instructions provided by the manufacturer carefully and make sure you understand them completely.
During installation, it is important to pay attention to detail and follow all steps exactly as outlined in the instructions.
Additionally, always use the tools and materials specified by the manufacturer as they are specifically designed for this type of job.
Finally, take care not to over-tighten any screws or fasteners as this could damage your metal roofing material.
By following these simple steps and thoroughly reading through your manufacturer’s instructions you can rest assured knowing that your metal roof will provide years of protection!
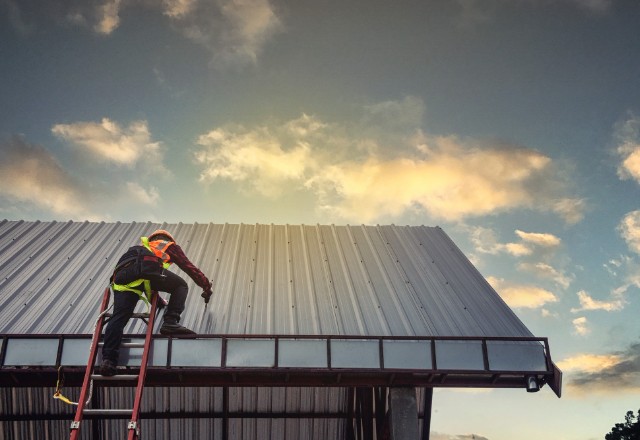
Performing Regular Inspections for Damage or Wear & Tear
Regular inspections of your metal roof are key to ensuring it remains in optimal condition. Inspecting your roof regularly helps identify any potential problems or damage early on, allowing you to take corrective action before the problem worsens. During a routine inspection, be sure to check for signs of wear and tear such as dents, rusting, or cracking. Additionally, look for any missing screws or fasteners that may need to be replaced. Any problem areas should be addressed immediately so they don’t develop into larger issues down the line. While performing an inspection yourself can be beneficial, it is always best to hire a professional to ensure that your roof is inspected correctly and thoroughly. A professional can spot small issues before they become major problems, saving you money and hassle in the long run!
Conclusion
When it comes to metal roofing, proper overlap is essential for creating a reliable, long lasting roof. To ensure perfect overlaps every time, it is important to use the appropriate materials, follow industry standards and adhere to professional installation techniques. Additionally, regular inspections of your metal roof can help identify any potential problems or damage early on so that corrective action can be taken before the issue worsens. By following these expert tips you can achieve perfect overlaps like a pro and enjoy an attractive and durable metal roof for years to come!