509-201-4190

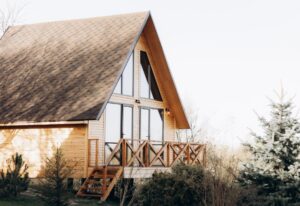
A scuttle attic, also known as an attic scuttle or scuttle hole, is a small opening that provides access to an attic space. It is typically located in a ceiling, wall, or closet, and is used to reach the attic for storage or to perform maintenance tasks. The scuttle usually has a hatch or door that can be removed to gain access to the attic. Scuttle attics are common in older homes or buildings that were not originally designed to have finished attic spaces. In this article, we will explore the meaning of scuttle attic, as well as how to insulate it properly.
Disclaimer: The information in this article is intended for general informational purposes only and should not be taken as professional advice. For specific inquiries, we recommend consulting a qualified professional at Advance Roofing LLC (https://advanceroofingllc.com/). As an experienced roofing company, we are dedicated to providing top-notch service and high-quality roofing solutions in Spokane, WA.
Reasons for Installing a Scuttle Attic
A scuttle attic is a small opening in the ceiling that leads to unused attic space. The opening is typically covered with a removable hatch or panel, making it easy to access the attic when needed. Here are some reasons why someone might consider installing a scuttle attic in their home:
- Cost-Effective: Using a scuttle attic as a storage space can be a cost-effective solution compared to renting a storage unit. It provides an additional space to store seasonal items, keepsakes, and other belongings without having to pay additional rental fees.
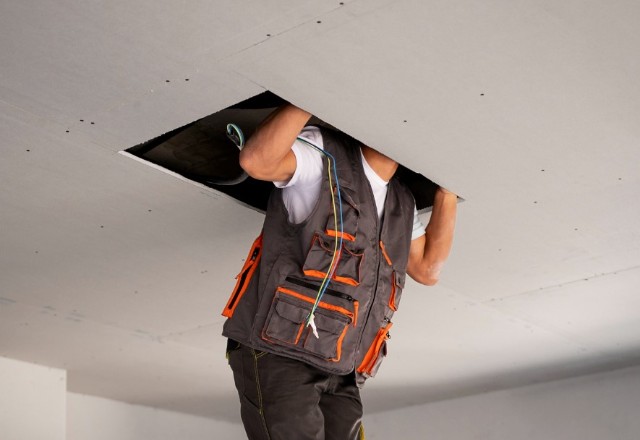
- Access for Maintenance and Repair: A scuttle attic provides easy access to your home’s roof construction, making it easier for technicians to perform repair or maintenance work efficiently. With the scuttle attic in place, you can quickly and easily inspect your roof deck and ridge vents, or to check for air leakage and cold drafts.
- Improved Organization: By using a scuttle attic for storage, you can declutter living areas and create a more organized and tidy home. Homeowners can store items that aren’t regularly used in the attic, freeing up valuable living space and making it easier to keep their home tidy.
- Increased Property Value: A scuttle attic is a great way to add square footage to a home, which can significantly increase a home’s value. It is considered an excellent selling point for potential home buyers, especially those that prefer homes with extra spaces.
- Improved Ventilation: Scuttle attics also offer improved ventilation. This is beneficial for homes located in more humid climates, as air flow through the attic can help regulate temperature and humidity levels throughout the house. Improved ventilation can also help prevent mold and mildew growth within the attic.
It is important to note that the installation of scuttle attics must follow building code considerations. If the attic space is larger than 30 square feet and at least 30 inches high, it requires an access point. A scuttle hole is not only required by code, but it also provides a convenient and safe way to enter and exit unused attic space.
Types of Scuttle Attics
Types of Scuttle Attics
Scuttle attics provide easy access to your roof and serve as an additional storage space, adding value to your home. There are different types of scuttle attics, ranging from basic designs to more complex ones that allow for enhanced insulation and energy efficiency. In the following headings, we will explore the different types of scuttle attics and how to insulate them properly.
Common Type of Scuttle Attic
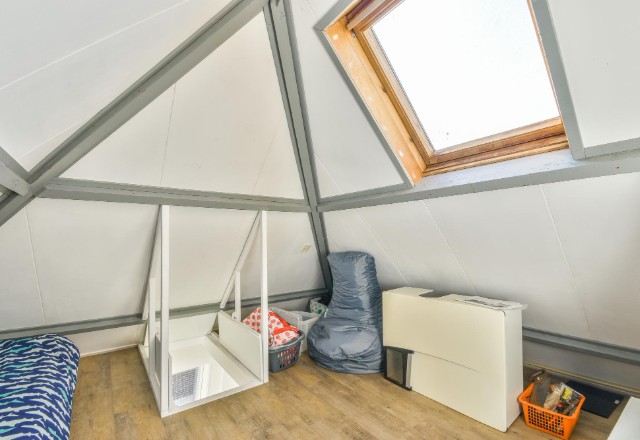
A common type of scuttle attic is typically a small opening in the ceiling that provides access to the attic space. This type of attic is often found in homes with limited vertical height or where attic access was not included in the original construction. The scuttle hole is generally covered with a thin plywood or drywall panel that can be removed to gain access to the attic space.
One key characteristic of this type of scuttle attic is its size. These attics are often smaller than those with pull-down stairs or larger access hatches, which can limit the amount of storage space available. However, this type of scuttle attic can still be a useful storage area for items that are not too large or heavy.
Compared to other types of attic access, the common scuttle attic is generally more simple and straightforward to install and use. The access hatch typically comes with a latch or door knob that allows for easy opening and closing, and the hatch itself can be easily removed for insulation or to gain access to the attic space.
Pull-Down Stairs/Ladder
Pull-down stairs or ladders provide an easy and convenient way to access attic space. There are a few different types of pull-down stairs/ladders available, each with their own unique benefits.
- One popular option is the telescoping ladder, which can extend to different lengths and is adjustable to fit different ceiling heights. This makes it a versatile choice for homes with varying ceiling heights.
- Another option is the folding ladder, which can be easily folded and stored when not in use, helping to save space in the attic.
When installing pull-down stairs or ladders, it’s important to measure and cut the opening to the correct size. This can be done by carefully measuring the ceiling opening and then using a jigsaw or reciprocating saw to cut the opening to the correct dimensions. It’s important to ensure that the opening is cut straight and level to prevent any gaps or unevenness.
Some of the tools required for pull-down stairs/ladder installation include a drill, screws, a saw, a level, and a tape measure. It’s also important to ensure that the ladder or stairs chosen have an appropriate weight capacity to support both the weight of individuals using it and any items that may be carried up and down.
Before installing pull-down stairs/ladder in an attic, it’s important to consider building code requirements. Building codes may dictate weight capacity requirements and accessibility requirements for the ladder or stairs. It’s important to consult local building codes and obtain any necessary permits before beginning installation.
Access Hatches/Panels

When it comes to accessing your scuttle attic, there are various types of access hatches/panels that you can use. Each type may differ in terms of design, size, and the materials used. In this article, we will discuss the different types of access hatches/panels available, their advantages, disadvantages, and their effects on the functionality of your attic space.
Attic Access Panels
Attic access panels are most commonly found in homes with finished attics. These panels are made from drywall and are installed like any other part of the ceiling. Unlike other types of access panels, attic access panels are flush with the ceiling and blend in seamlessly with the surrounding surface. The primary advantage of this type of access panel is that it provides easy access to your attic while maintaining the overall appearance of the room. However, attic access panels are not as common in homes with unfinished attics as they may not be practical in that situation.
Scuttle Holes
Scuttle holes are an inexpensive and simple way to access your attic. This type of access panel consists of a hole cut into the ceiling which is then covered with a removable panel or hatch. Scuttle holes can vary in size, but are typically small and circular. The primary advantage of scuttle holes is that they are very easy to install and require minimal space. However, scuttle holes may not provide the level of access you need if you plan to use your attic for storage or other purposes.
Exterior Walls & Ceiling Joists
When installing a scuttle attic access panel, it is crucial to ensure that the installation process does not interfere with the structural integrity of the building.
- One of the first steps you should take is determining the location of your ceiling and floor joists. You can do this by using a stud finder or tapping the ceiling until you locate the joists.
- Once you’ve located the joists, make sure you avoid cutting into them when cutting the access panel. Doing so can weaken the structural stability of the ceiling and cause potential damage to the building.
- Another important aspect to consider is the proximity of the exterior walls. It is essential to inspect these walls before cutting the access panel to determine if there are any obstructions or hazards that could interfere with the installation process.
- If there are obstructions in the way, try to find an alternative location to install the access panel. If this is not possible, you may need to contact a professional to assist in the installation process.
Cutting the access panel can be done using a utility knife to cut along the perimeter of the panel. Then, use a pry bar or hammer to detach the panel carefully from the surrounding drywall.
Overall, it is essential to approach the installation of a scuttle attic access panel with caution and diligence. By ensuring that the installation process does not interfere with the ceiling joists or exterior walls, you can avoid potential structural damage to your building.
Installation Process
When it comes to installing a scuttle attic, having the right tools is essential for a smooth and successful installation.
Tools Needed for Installation
The following is a list of important tools you will need for the job.
- Hammer – A good quality hammer is a must-have tool for installing a scuttle attic. It is needed to drive in nails and hold things in place.
- Circular Saw – This tool is necessary for cutting the attic hatch opening in the ceiling. Make sure the saw has a sharp blade to ensure clean and precise cuts.
- Drill – A drill is used for making pilot holes and driving in screws. Cordless drills are ideal for attic installation projects as they are more convenient to use.
- Ladder – A sturdy ladder is needed to reach the attic space. Make sure the ladder is placed on a flat, stable surface and is tall enough to reach the attic opening.
- Stud Finder – It is important to locate the ceiling joists to ensure a secure and safe installation of the scuttle attic. A good quality stud finder is a useful tool for finding the studs in the ceiling.
- 1×3 Cleats – These are wooden boards used to reinforce the attic hatch opening. Cleats are attached around the hatch opening and are screwed into the ceiling joists to provide extra support.
- Drywall Knife – A drywall knife is used to cut and measure the drywall material for the attic hatch cover.
- Utility Knife – A utility knife is useful for cutting insulation and other materials during the installation process.
- Air Compressor – An air compressor is used to power the nail gun, making the installation of the 1×3 cleats much faster and easier.
- Nail Gun – A nail gun is used to attach the 1×3 cleats to the ceiling joists. It is a quick and efficient method of securing the cleats.
Having these tools ready and available before starting the installation process can make the job much easier and ensure a successful installation.
Vertical Height Requirements for the Attic Space

When it comes to creating a scuttle attic space, one important consideration is the minimum vertical height required to comply with building codes. According to the “rule of 7s,” at least half of a finished attic should have a minimum vertical height of 7 feet. This means that if you plan to use your attic as a livable space, you will need to ensure that you have enough headroom to move around comfortably.
It is also worth noting that the area of the attic must be at least 7 feet wide and 70 square feet in size to meet these minimum requirements. However, if you plan to use your attic for storage, then the weight capacity of the space should also be taken into account.
Attics not designed for storage can typically hold up to 10 pounds per square foot of weight, while attics with limited storage can support up to 20 pounds per square foot. It is important to keep these weight limits in mind when planning to store items in your attic, as exceeding these limits can cause damage to your home’s structure.
Measuring and Cutting the Opening for the Access Panel
When it comes to insulating a scuttle attic, one important step is measuring and cutting the opening for the access panel. This is necessary to ensure that the attic can be easily accessed for future maintenance and to allow for proper insulation installation. Here are the steps to follow for this process:
- Locate the ideal spot for the access hole – The first step is to locate the spot where the access panel will be installed. This should be a spot that is easily accessible and secure, typically in a central location of the attic.
- Use a stud finder to locate the ceiling frame – Once you have found the ideal spot for the access hole, use a stud finder to locate the ceiling frame or roof deck. This will help determine the size of the hole needed for the access panel.
- Measure the size of the hole needed for the access panel – Take accurate measurements of the opening needed for the access panel, keeping in mind the size and weight requirements for the attic access. It is important to take precise measurements to avoid any gaps or irregularities in the access hole.
- Use a utility knife or drywall saw to cut the access hole – Once the necessary measurements have been taken, use a utility knife or drywall saw to cut the access hole. Make sure to wear protective gear, keep the area clean, and take the necessary precautions to avoid any damage to the surrounding areas.
By following these steps, you can ensure that the access panel for your scuttle attic is properly measured and cut, allowing for easy and secure access to the attic space. So, measuring and cutting the opening for the access panel plays an important role in insulating a scuttle attic properly and efficiently.
Securing the Access Panel to Floor Joists
To fully insulate and maintain your scuttle attic, securely installing an access panel is crucial. Here are the steps to follow for securing the access panel to floor joists:
- Measure the opening – To start, measure the opening of the attic access. This will allow you to purchase an appropriately sized panel that fits securely in place.
- Remove existing cover or door – If there is an existing cover or door in place, remove it carefully to avoid any damage to surrounding areas.
- Place the panel – Once the area is clear, place the panel on top of the opening and mark where the hinges will be attached.
- Attach the hinges – Using screws, attach the hinges to the panel. Make sure to use screws that are appropriate for the weight and size of the panel.
- Attach the panel to the floor joists – There are two ways to attach the panel to the floor joists. First, you can use screws to attach the panel directly to the joists. Alternatively, you can create a wooden frame to fit around the opening that can be attached to the joists. Once the frame is in place, secure the panel to the frame using the hinges.
- Add weatherstripping – After securing the panel in place, add weatherstripping around the edges of the panel. This will help prevent any air leakage between the panel and the joists.
Following these steps will ensure that your access panel is securely installed and insulated, allowing for easy entry and maintenance to your scuttle attic. By sealing air leaks, you’ll also save energy and reduce your heating and cooling bills.
Installing the Ladder or Hatch Systemfor a Scuttle Attic
When it comes to accessing your scuttle attic, a ladder or hatch system offers a convenient solution. Install the ladder or hatch system according to the manufacturer’s instructions. This may involve attaching hinges or other hardware, and may require the use of additional tools. To prevent air leakage and drafts, make sure to seal around the edges of the opening. This can be done using weatherstripping or other insulation materials.
Insulation of Scuttle Attic
Proper insulation is critical when it comes to scuttle attics, as they can leak heat in the winter and cool air in the summer if not insulated properly. One of the main areas of focus when insulating a scuttle attic is the access hatch or door cover.
Weather stripping or foam board insulation are viable options to insulate the scuttle attic cover.
- Weather stripping can be attached using recommended fasteners or adhesive, or can come in a self-adhesive form that is easy to install.
- Foam board insulation can be cut to fit the edges of the access panel using a utility knife and secured using recommended adhesive or fasteners.
In addition to properly insulating the access panel, it’s also important to consider the insulation of the attic space itself. This insulation should serve to retain both warm and cool air, while also lowering energy costs for heating and cooling.
When it comes to selecting the right type of insulation, there are a few options to consider.
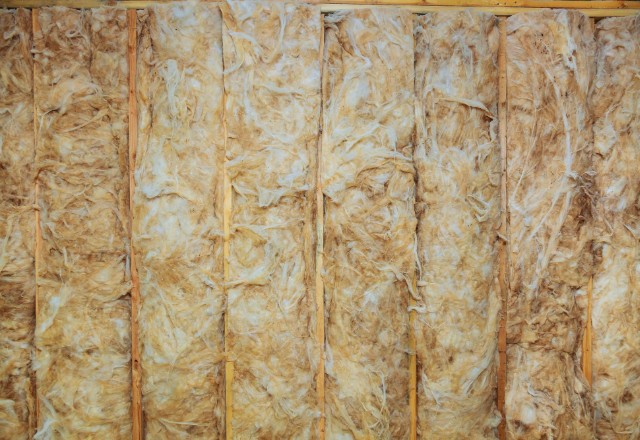
- Fiberglass batt insulation is a common type that can be installed between ceiling joists.
- Loose-fill insulation is another option that can be blown into the attic space to fill any gaps or spaces.
- Rigid foam insulation can also be used to line the vertical walls of the attic space.
By properly insulating both the scuttle attic cover and the attic space itself, you can prevent leaks and drafts and improve overall energy efficiency in your home.
Building Code Considerations
When it comes to building a scuttle attic, it’s important to keep building code regulations in mind. The International Residential Code (IRC) outlines important requirements that must be met to ensure safety and proper functionality of the attic space.
- One critical consideration is the vertical height required for the scuttle attic. According to the 2006 IRC, the clear vertical height in the attic space must be at least 30 inches above the access opening. This ensures that there is enough room for a person to enter and move around the space safely.
- The minimum rough opening size for easy access is 22 inches by 30 inches, but it’s important to check local building codes as they may have more specific requirements.
- To ensure that the access panel is properly sealed and insulated, weatherstripping is often recommended. This helps to reduce air leakage and improve energy efficiency. The access panel should also be properly insulated to match the surrounding insulation in the attic space.
- Other building code considerations for a scuttle attic include egress requirements. If the attic is intended for use as a living space, it must have a proper means of egress in case of emergency, such as a window or door. Additionally, the minimum number of ceiling lights and convenience outlets required for usable attic space should also be taken into account according to local building codes.
By keeping these building code regulations in mind, homeowners can ensure a safe and functional scuttle attic that meets all necessary requirements.
Conclusion
Proper insulation and finishing can make a significant difference in the comfort and value of scuttle attics and partially-finished attics. As we have seen, following building codes is crucial to ensure the space meets safety and usability standards. Seeking expert help can also provide useful guidance on this front.
A well-insulated attic can help reduce energy bills and improve overall home comfort. Therefore, it is essential to ensure the attic space is finished and insulated in line with appropriate standards. By doing so, homeowners can reap the benefits of this additional storage or living space, while maintaining a safe and comfortable home.