509-201-4190

Causes of Ice Dams
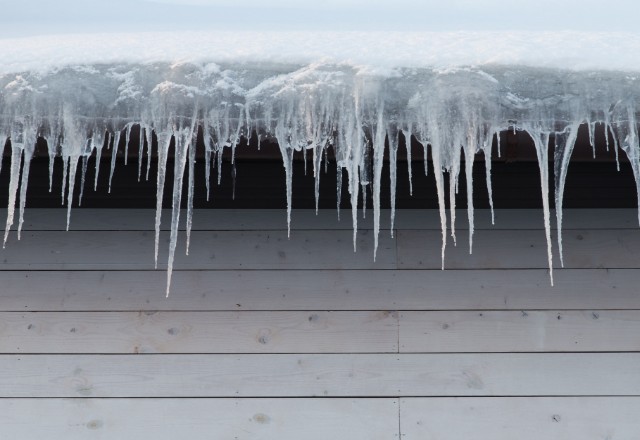
Ice dams are formed when snow and ice accumulate on the roof and then melt, only to
refreeze along the roof’s edges. Several factors contribute to the formation of ice dams.
- One key cause is uneven heating of the home’s interior. Heat rises and
can cause the upper parts of the roof to warm up, melting the snow.
However, closer to the eaves and gutters, the roof remains cold, causing
the melted snow to refreeze and form a dam. - Fluctuating outdoor temperatures also play a role in ice dam formation.
When the outdoor temperature rises during the day, the snow on the roof
can start to melt. But when the temperature drops again at night, the
melted snow refreezes along the roof’s edges, creating an ice dam. - Snow and ice accumulation is another contributing factor. If there is a
significant amount of snow on the roof, it can create an excessive
buildup of ice, making it easier for ice dams to form. Wind exposure and
sun exposure can also affect ice dam formation. Strong winds can blow
snow onto the roof, while sunlight can cause snow and ice to melt
unevenly. - Lastly, air leakage in the attic can contribute to ice dam formation. When
warm air escapes into the attic and then makes its way to the roof, it can
cause the snow to melt rapidly. The melted snow then refreezes along
the eaves, leading to the formation of ice dams.
Understanding the causes of ice dams is crucial for preventing their formation and the
potential damage they can cause to your roof and home. By addressing factors such as
uneven heating, fluctuating outdoor temperatures, snow and ice accumulation, wind exposure, and sun exposure, you can take proactive measures to prevent ice dams from
forming in the first place.
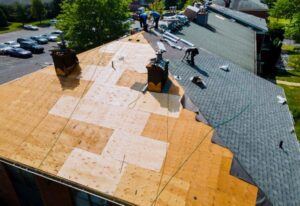
Roof Preparation
To prevent ice dams from forming and causing potential damage to your roof and home,
proper roof preparation is essential. This involves taking proactive measures to ensure
that your roof is well-maintained and equipped to handle winter conditions.
Rake the Roof
Raking the roof is a crucial step in preventing ice dams and avoiding potential water
damage to your home. When heavy snow accumulates on the roof, it can lead to the
formation of ice dams along the roof’s edges, preventing melted snow from properly
draining. This can cause water to seep under the roof shingles and into your home.
To prevent ice dams, it is important to regularly rake the roof after each snowfall. This
involves using a snow rake, a tool specifically designed for this purpose. A snow rake
typically has a long handle with a plastic or metal blade attached to it. By standing safely
on the ground and carefully reaching up to the roof, you can easily remove the excess
snow without damaging the roof.
Raking the roof allows you to clear off the snow before it has a chance to melt and
contribute to the formation of ice dams. By removing the snow, you create a clear path for
the melted snow to drain off the roof properly.
Investing in a snow rake is a wise choice for homeowners in regions susceptible to heavy
snowfall. It is a simple and effective method of preventing ice dams and potential
damage to your home. Don’t forget to rake the roof regularly to keep your home safe and
dry.
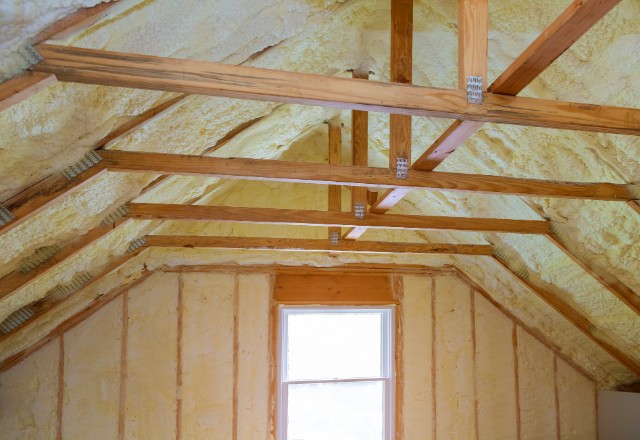
Insulate the Attic
Insulating the attic is a crucial step in preventing ice dams and maintaining a comfortable
and energy-efficient home. By effectively reducing heat transfer and retaining heat inside
the living space, proper attic insulation plays a vital role in minimizing the risk of ice
dams.
To safeguard against ice dam formation, it is recommended to add an additional layer of
insulation, typically 8 to 10 inches, to the existing insulation. This extra insulation acts as
a barrier, preventing the escape of warm air from the home into the attic, where it can
melt snow on the roof and contribute to ice dam formation.
Proper attic insulation offers numerous benefits beyond ice dam prevention. It helps
lower heating costs by reducing heat loss, ensuring that the warm air produced by
heating systems stays inside the living areas. Additionally, it creates a more comfortable
living environment by preventing drafts and uneven temperature distribution.
Check for Air Leaks and Poor Ventilation
One of the most common causes of ice dam formation is the presence of air leaks in the
attic. These leaks allow warm air from the living spaces below to enter the attic, where it can melt the snow on the roof and contribute to the formation of ice dams. It is important
to identify and seal these air leaks to prevent ice dams and potential water damage.
Some common sources of air leaks in attics include plumbing stacks, recessed lights,
chimneys, electrical service penetrations, and attic hatches. These areas can often have
gaps or cracks that allow warm air to escape into the attic. Additionally, poor attic
ventilation can contribute to ice dam formation by trapping warm air and preventing it
from escaping the attic.
Sealing these air leaks is an important step in preventing ice dam formation and avoiding
potential water damage. By sealing the gaps and cracks in these areas, you can prevent
warm air from entering the attic and melting the snow on the roof. This helps maintain a
consistent temperature on the roof, preventing the formation of ice dams and reducing
the risk of water seeping into the home.
Regularly checking for air leaks in the attic and ensuring proper ventilation can go a long
way in preventing ice dams and protecting your home from potential water damage. By
addressing these issues, you can maintain a safe and dry living environment even during
harsh winter conditions.
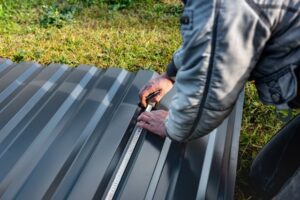
Choose the Right Roofing Material
When it comes to choosing the right roofing material, there are several options available,
each with its own set of benefits and drawbacks.
1. Asphalt Shingles: This is one of the most popular and affordable roofing materials on
the market. Asphalt shingles are easy to install and come in a variety of colors and styles.
However, they are not as durable as other options and may require more maintenance
over time.
2. Metal Roofs: Metal roofs are known for their ability to shed snow and prevent ice
dams. This is because metal is a slippery material, allowing snow to slide off rather than
accumulate and form ice dams. While metal roofs may be more expensive initially, they have minimal maintenance requirements and can last for 50+ years, making them a cost-
effective long-term option.
3. Wood Shingles: Wood shingles offer a natural and traditional look to a home. They are
eco-friendly and have good insulating properties. However, wood shingles require regular
maintenance and are more prone to rot and fire damage.
4. Slate and Tile: Slate and tile roofs are highly durable and can last for over 100 years.
They provide a unique and upscale appearance to a home. However, these materials are
heavy and may require additional roof support. They are also more expensive than other
roofing options.
5. Synthetic Roofing: Synthetic roofing materials, such as rubber or plastic composites,
are gaining popularity due to their durability and low maintenance requirements. They can
mimic the look of other roofing materials but are often less expensive.
Choosing the right roofing material depends on factors such as budget, durability,
maintenance requirements, and aesthetic preferences. Metal roofs, although more
expensive initially, are known for their ability to prevent ice dams and require minimal
maintenance, making them a popular choice for homeowners.
Preventing Ice Dams
Ice dams can cause significant damage to a roof and the interior of a home. Fortunately,
there are several measures homeowners can take to prevent ice dams from forming.
Taking these preventive measures can save homeowners from the costly damage that ice
dams can cause and provide peace of mind during the winter months.
Rock Salt and Other Melting Agents
Rock salt is a commonly used melting agent to address ice dams on roofs. While it can
effectively melt the ice, it should not be used on roofs as it can cause damage to the
shingles and harm vegetation. Fortunately, there are alternative melting agents such as
calcium chloride that are safe for shingles and vegetation.
Calcium chloride is a mineral-based compound that can effectively melt ice dams without
causing any harm. It is commonly available in a crystal or pellet form and can be easily
spread over the affected areas. Additionally, calcium chloride is known for its ability to
generate heat and melt ice even in extremely low temperatures.
One ingenious DIY solution to melt ice dams is to create “ice melt socks” using calcium
chloride and tube socks. Simply fill the tube socks with calcium chloride and tie the open
end securely. These socks can then be strategically placed on the roof, near the ice dams.
As the calcium chloride reacts with the ice, it generates heat and melts the ice dams,
providing a safe channel for water drainage.
Remember, when using any melting agents, it’s important to consider the safety of your
roofing material and surrounding vegetation. Using alternatives like calcium chloride can
help you effectively address ice dams without causing any potential damage.
Heat Cables
Heat cables are an effective solution for preventing ice dams on roofs. These cables are
designed to generate heat and melt the ice, creating a safe pathway for water drainage.
There are two types of heat cables available: constant wattage and self-regulating.
- Constant wattage heat cables have a fixed heat output regardless of the
outdoor temperatures. They are typically less expensive and are
commonly used in areas with milder climates. However, they can
consume more energy and may cause overheating if not properly
monitored. - On the other hand, self-regulating heat cables are more advanced and
energy-efficient. These cables automatically adjust their heat output
based on the surrounding temperatures. This feature helps to prevent
overheating and reduces energy consumption. Self-regulating heat
cables are recommended for colder climates with fluctuating outdoor
temperatures.
To install heat cables, first, clean the roof and remove any debris. Measure the length of
the roof edge where the cables will be installed and purchase the appropriate length of
heat cables. For constant wattage cables, evenly space them along the roof edge and secure them with cable clips. For self-regulating cables, it is highly recommended to hire
a professional for installation, as they require proper positioning and connection to
ensure optimal performance.
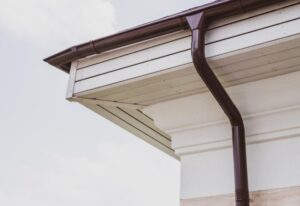
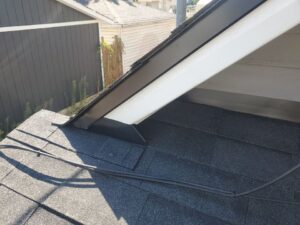
Ridge Vents and Eaves Protection
Ridge vents and eaves protection play a crucial role in preventing ice dams on the roof.
- Ridge vents are installed at the highest point of the roof and create a
continuous airflow system in the attic space. This system maintains
uniform roof temperatures, preventing hot spots that can lead to the
melting of snow on the roof. By evenly distributing the heat, ridge vents
help to eliminate the formation of ice dams. - Eaves protection is another important aspect of preventing ice dams.
One option is to use insulation baffles combined with ridge vents. These
baffles, also known as vent chutes, create a clear space between the
insulation and the roof decking, allowing for proper airflow. This helps to
maintain a consistent temperature on the roof, preventing snow from
melting and refreezing as ice dams.
Alternatively, soffit or gable vents can be used for intake air, while conventional roof vents
are used for exhaust air. This allows for efficient airflow in the attic space, balancing the
temperature and minimizing the risk of ice dam formation.
Heated Walkways, Gutters, or Downspouts
Heated Walkways, Gutters, or Downspouts can be an effective solution for preventing ice
dam formation and minimizing the risk of damage to your roof. These innovative heating
systems are designed to melt snow and ice, ensuring that it doesn’t accumulate and form
ice dams.
Heated walkways provide a safe and ice-free path for homeowners and visitors during the
winter months. By installing heating elements beneath the surface of the walkway, snow
and ice can melt quickly, preventing the build-up that can lead to hazardous conditions
and potential accidents.
Similarly, heated gutters and downspouts use heating cables or mats to melt snow and
ice, keeping them clear and preventing blockages. This helps to maintain proper water
flow, preventing any potential damage to your roof or foundation that may result from
overflowing or frozen gutters.
With the use of heated walkways, gutters, or downspouts, you can effectively eliminate
the conditions that contribute to ice dam formation. This proactive approach helps to
protect your home from potential water damage and costly repairs.
By investing in these innovative heating systems, you can enjoy peace of mind during the
winter season, knowing that you have taken the necessary steps to prevent ice dams and
their associated risks. Prioritizing snow and ice melt with heated walkways, gutters, or
downspouts can help maintain the integrity of your roof and ensure the safety of your
home.
Removing Existing Ice Dams
If you already have ice dams on your roof, it is crucial to remove them promptly to prevent
any further damage to your home. Here are some ways to safely and effectively remove
existing ice dams:
1. Use a roof rake: A roof rake with a long handle can be used to remove snow from the
edge of the roof, where ice dams form. By removing the snow, you can eliminate the
source of water that contributes to ice dam formation.
2. Create channels for melting ice: Using an ice pick or shovel, carefully create channels
through the ice dam to allow melted snow and ice to drain off the roof. Be cautious not to
damage the roof or gutters while doing this.
3. Apply ice melt or rock salt: Spread ice melt or rock salt along the edge of the roof to
help melt the ice dams. Use caution when using these products, as they can damage
plants, landscaping, and the surrounding environment. It is advisable to consult a
professional if you have concerns about using ice melt or rock salt.
4. Use heat cables: Heat cables can be installed along the edge of the roof and in gutters
and downspouts to melt the ice dams. These cables generate heat, which helps melt the
ice and create channels for water to flow off the roof.
5. Hire a professional: If you are unsure about safely removing ice dams or if the ice dams
are extensive, it is best to hire a professional ice dam removal company. These
professionals have the equipment and expertise to safely remove ice dams without
causing further damage to your roof or gutters.
Remember, removing existing ice dams is just a temporary solution. To prevent ice dams
from forming in the future, it is essential to address the underlying issues such as proper
insulation, attic ventilation, and sealing air leaks. Regular maintenance and proactive
measures can help protect your home from the potential damage caused by ice dams.
Using an Ice Pick or other Tool to Remove Large Pieces of Ice
Using an ice pick or other tool to remove large pieces of ice from an ice dam on the roof
is another method to effectively get rid of ice dams. This method involves carefully
breaking up the ice and removing it from the roof.
When using an ice pick or other tool, it is crucial to be cautious to avoid damaging the
roof. Work slowly and carefully, applying gentle pressure to break up the ice. Make sure to
wear appropriate safety gear such as gloves and goggles to protect yourself from any
potential injuries.
By removing large pieces of ice, you can help alleviate the weight and pressure on the
roof caused by the ice dam. This method is particularly effective in quickly removing the
immediate problem area of the ice dam.
However, it is important to note that this method may not be suitable for everyone as it
requires physical effort and can be dangerous if not done properly. If you are unsure or
uncomfortable with using an ice pick or other tool, it is best to consult a professional ice
dam removal company to ensure the job is done safely and efficiently.
Applying Calcium Chloride Solution or Hot Water to Melt Snow on Your Roof
When it comes to removing ice dams from your roof, there are a few methods you can try.
One effective option is applying a calcium chloride solution or hot water to melt the snow.
This process helps break down the ice and create a channel for the water to flow off the
roof.
To apply a calcium chloride solution, homeowners should mix the calcium chloride with
water to create a solution. This can be done by following the manufacturer’s instructions
for the appropriate ratio. Once the solution is ready, you can use a sprayer or a bucket and
brush to apply it directly to the ice dam. Start from the bottom of the dam and work your
way up, ensuring that it covers the entire affected area.
It is important to take safety precautions while doing this task. Wear gloves to protect
your hands and eye protection to prevent any injuries. The calcium chloride solution can
be corrosive, so avoid contact with any metal surfaces.
Alternatively, you can use hot water to melt the ice dam. Fill a spray bottle with hot water
and apply it directly to the ice, focusing on the area where the ice dam is the thickest. The
hot water helps to melt the ice and create a path for the water to drain off the roof.
By following these steps and taking necessary safety precautions, you can effectively
remove ice dams from your roof using a calcium chloride solution or hot water.
Conclusion
In conclusion, addressing ice dams requires a multi-faceted approach that combines
several strategies to effectively prevent their formation and minimize potential damage.
By addressing excessive heat flow, removing excessive heat through ventilation, and
providing a waterproof roof membrane, homeowners can significantly reduce the risk of
ice dams.