509-201-4190

Welcome! If you have a crack in your vinyl siding, don’t worry — it’s an easy fix. We’ll show you how to repair the crack in just a few simple steps, so that your siding looks as good as new again. In this article, we’ll give you all the information and materials you need to make the necessary repairs. Let’s get started!
Disclaimer: This article is intended for informational purposes only and should not be used as professional advice. If you have any specific questions about your particular situation, we recommend that you contact a professional contractor or roofing specialist such as Advance Roofing LLC. We are always happy to help! For many years, Advance Roofing LLC has provided the people of Spokane, WA with quality roofing solutions and unbeatable customer service.
What is Vinyl Siding?
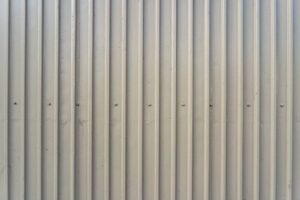
Vinyl siding is a popular exterior home cladding material. It is sturdy, low-maintenance, affordable, and easily installed. Homeowners enjoy its availability in various styles, colors, and textures. Vinyl siding is made from polyvinyl chloride (PVC) resin, which makes it waterproof and resistant to fading, peeling, or cracking. It is an excellent choice for a home that needs a fresh look or protection from the elements. In this guide, we will outline a simple solution on how to repair a crack in vinyl siding. Just follow the steps below.
Signs of Damage to Vinyl Siding
Vinyl siding is a popular option for many homeowners due to its affordability, low maintenance, and various color options. However, even the best quality vinyl siding can become damaged over time. Here are some signs that indicate your vinyl siding may need repair:
- Cracks and holes – Any visible holes or cracks in the siding may indicate damage. They may have been caused by hail, thrown objects, or even animals.
- Loose siding – If you notice that some panels appear to be coming loose from the wall, it could indicate that the nails holding them in place have given way, or the panels have warped.
- Fading and discoloration – Over time, vinyl siding can fade or change color due to exposure to the sun and other environmental factors.
- Water damage – If water has entered behind the vinyl siding, it may cause it to warp, buckle, or develop mold.
If you notice any of these signs of damage, it is important to conduct a visual assessment to determine if you can handle the repairs yourself or will need professional assistance. Here’s how:
- Examine all areas of the siding to identify any damage that may have been missed initially.
- Determine how extensive the damage is and if it affects the structural integrity of the siding.
- Assess the location of the damage and confirm if it can be easily accessed or if it’s in a less visible area.
- Check if there are any extra pieces of vinyl siding available that you can use to replace the damaged ones.
It is important to note that improper installation can contribute to damage and the need for frequent repairs. Proper installation involves using the right building paper, roofing nails, and vinyl siding installation tools. In contrast, an incorrect installation may cause the vinyl siding to warp, crack, or even fall off completely.
It’s important to address any damages to your vinyl siding early on to prevent extensive structural damage. A simple crack or hole today can become a more serious problem if left unattended for a long time. Repairing the issue while it is still minor will save you money and time in the long run.
Benefits of Repairing Cracks in Vinyl Siding
Repairing a crack in the vinyl siding as soon as you notice it can provide several benefits that go beyond simply making the exterior of your house look better. The advantages of repairing a crack far outweigh the cost and effort involved in fixing the problem. Here are some reasons why:
- Preventing Water Damage: One of the most significant benefits of repairing a crack in vinyl siding is that it helps prevent water damage. If water gets behind your siding, it can result in extensive damage to the structure of your home. Over time, water can cause your walls to rot, mold to develop, and even weaken the foundation of your house. Repairing the crack can stop the water from penetrating your house and prevent these costly damages.
- Improving Curb Appeal: Repairing the crack in your vinyl siding can improve your home’s curb appeal. A small crack can be an eyesore and make your house look neglected. In contrast, a well-maintained siding adds to the overall value of your home, making it more attractive to potential buyers when it’s time to sell.
- Preventing Insects and Pests:A crack in the siding can be an open invitation for insects and pests to enter your home. Insects, such as termites, can chew through the wood beneath the siding, causing extensive damage. Repairing the crack can prevent these unwanted guests from entering your home.
- Extending Lifespan: Repairing a small crack in your vinyl siding now can extend the lifespan of your siding. Neglecting this repair can ultimately cause the siding to deteriorate over time, leading to more severe problems that may require replacing the entire siding. Repairing the crack while it is still minor can help you avoid these significant expenses later.
- Simple Process: Finally, repairing a crack in vinyl siding is a simple process that can be done quickly and easily with the right tools and materials. The process involves cutting out the damaged section, applying a bead of caulk, and then pressing a new vinyl panel in place. With a sharp utility knife, clean surface, and smooth surface area, you can repair the crack with little effort.
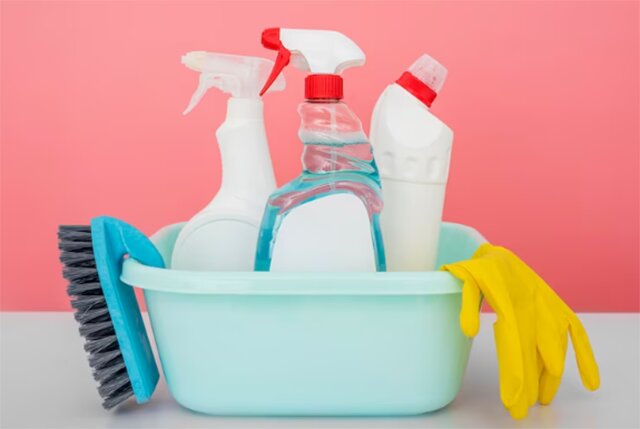
Tools and Materials Needed for Repair
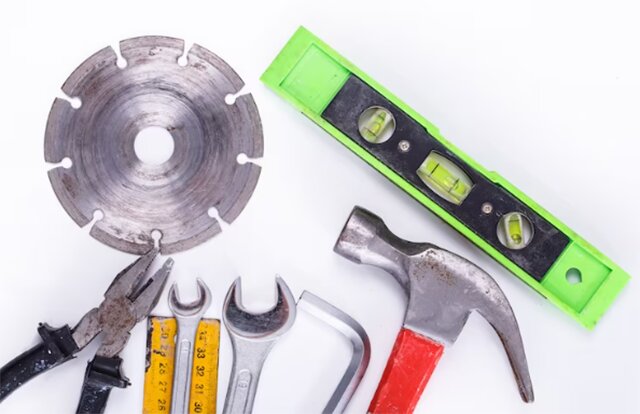
Before beginning the repair process for a crack in vinyl siding, it is essential to gather the necessary tools and materials required for the job. With a few simple items, repairing the crack can be a breeze, helping to prevent water damage, improve curb appeal, and extend the lifespan of your home’s siding. Here are the tools and materials you will need to get started.
What You’ll Need
If you have a crack in your vinyl siding, you can easily repair it with some basic tools and materials. Here is a list of what you’ll need:
Tools:
- Hammer
- Tape measure
- Zipper tool
- Flat pry bar
- Tin snips
- Utility knife
- Caulking gun
Materials:
- Replacement siding panels
- Butyl caulk (or gutter caulk)
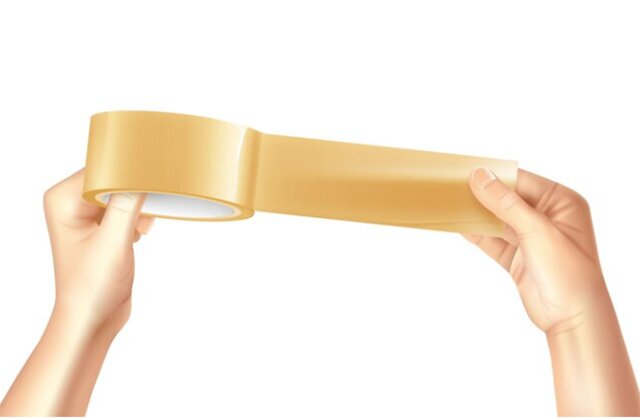
- Duct tape
Additionally, you may need materials for bracing a patch temporarily to keep it in place while the caulk dries.
Before starting the repair, it’s important to clean the surrounding area of the crack with a cloth or soft-bristle brush. If recommended by your siding manufacturer, you can also power wash the area.
To maintain the original color of vinyl siding during home renovation projects, it is recommended to cover it when using substances such as stains and sealants.
Gathering the Supplies
Before you begin to repair a crack in vinyl siding, it’s important to make sure you have all the necessary tools and materials on hand. To complete this repair job, you will need:
- Vinyl adhesive caulk: This is a special type of caulk designed specifically for use on vinyl siding. When selecting your vinyl adhesive caulk, choose a color that’s as close a match as possible to your siding, or go with a color depth that’s similar enough to blend in with your siding.
- Replacement siding: You may need to replace the entire siding panel if the damage is extensive. Make sure to match the color and texture of the replacement siding panel with the existing siding.
- Paint: After replacing the siding, you may need to paint it to match the surrounding area. Choose a color that will match the rest of your vinyl siding as closely as possible.
- Nails and screws: These will be used to secure the replacement siding panel into place.
- Caulk gun: You will need a caulk gun to apply the vinyl adhesive caulk to the crack in the siding.
Remember to always follow the instructions and safety guidelines included with your tools and materials, and take your time to ensure a quality repair.
Preparation for Repair
Before you can repair a crack in your vinyl siding, it’s important to prepare by gathering all of the necessary tools and materials. This includes vinyl adhesive caulk, replacement siding (if necessary), nails and screws, a caulk gun, a utility knife, and paint. Be sure to choose a color of caulk and replacement siding that matches your existing siding as closely as possible. Proper preparation will ensure a smooth and successful repair process.
Assessing the Damage

Vinyl siding is a popular choice among homeowners due to its durability, low maintenance, and curb appeal. However, over time, vinyl siding can develop cracks, punctures, or warping, which can compromise its functionality and overall appearance. If left unaddressed, these damages can lead to more extensive damage and costly repairs. Here are some steps to properly assess the damage on your vinyl siding before proceeding with repairing it.
The first step in assessing the damage to your vinyl siding is to identify the type and extent of the damage. Look for cracks, punctures, holes, or warping in the siding panel. Check for any signs of water damage, which can cause the panel to discolor or soften. Also, keep an eye out for any structural damage, which can affect the stability of your home’s foundation or framing.
In addition to assessing the damage to the panel itself, it is crucial to check for loose siding and improper installation. Loose siding can cause gaps between panels, allowing water and pests to enter your home. Improper installation can cause the panels to warp, buckle or crack, making it necessary to replace the entire panel.
Once the extent of the damage has been identified, the next step is to determine the size of the replacement panel needed for the repair. Measure the damaged panel from corner to corner, including any curved edges, and add a few inches more in case of any errors. This will ensure that the replacement panel will fit correctly and match the same size as the rest of the vinyl on your home.
Removing Loose or Damaged Pieces of Siding
If you have loose or damaged pieces of siding on your vinyl panel, it’s important to remove them to prevent further damage and ensure a proper repair. Here’s how to remove loose or damaged pieces of vinyl siding panel:
- Locate the Point of Damage. The first step is to locate the point of damage on your siding panel. Look for any cracks, punctures, or warping in the panel, which can indicate loose or damaged siding.
- Disengage the Damaged Panel.If the damage is beyond repair, you will need to disengage the damaged panel from the surrounding panels. To do this, you will need a siding removal tool, which is specifically designed for this purpose.
- Use the Siding Removal Tool.With your siding removal tool, gently lift the panel above the damaged one and unhook it from the next. Be careful not to damage the surrounding panels as you work.
- Push Up the Damaged Panel.Once you have disengaged the panel, push the damaged panel up and remove it from its locked position at the top. Be sure to remove any roofing nails or other fasteners holding the panel in place.
- Replace the Damaged Panel.With the damaged panel removed, you can replace it with a new one of the same size and color. Be sure to properly install the replacement panel and secure it in place with roofing nails or other fasteners.
By following these steps, you can ensure a proper repair and prevent further damage to your home’s siding.
Cleaning the Area Around the Crack in the Vinyl Panel
It is essential to properly clean the surrounding area of the crack in the vinyl panel before repairing it with caulk. This is because any dirt or debris will weaken the bond between the caulk and the vinyl, making it less effective. Here are the steps you should follow to clean the area:
- Take a clean cloth and use it to wipe the cracked area. Be sure to remove any loose pieces of debris or dirt that may have collected around the crack.
- Mix a mild detergent solution in a bucket of clean water. Use a gentle detergent that is safe for the vinyl siding. Avoid using any harsh or abrasive detergents that may cause damage to the vinyl.
- Dampen the cloth with the mild detergent solution and carefully clean the cracked area, working in circular motions. Be sure to apply gentle pressure while rubbing the surface to avoid causing any damage. Avoid getting the solution on any uncracked areas, as this may cause discoloration.
- After cleaning the area, rinse the vinyl panel with clean water to remove any leftover soap. Rinse thoroughly to ensure all the detergent is removed from the surface.
- Wipe the area with a clean, dry cloth to remove any excess water. Allow the surface to air dry completely before applying the caulk. It is crucial that the surface is completely dry before applying the caulk.
Measuring and Cutting a Replacement Panel
After properly cleaning the damaged area and allowing it to dry completely, the next step in repairing a crack in vinyl siding is to measure and cut a replacement panel. This process is relatively simple and can be done in a few steps.
Step 1: Measure the Damaged Area. Using a tape measure, accurately measure the damaged area on the vinyl siding panel. It is crucial to get this measurement right to ensure the replacement panel overlaps the damaged area correctly.
Step 2: Add Extra Width to the Replacement Panel. To ensure the new panel overlaps the damaged area correctly, add four inches to the width of the panel. This extra space will allow for a two-inch overlap on each side of the replacement panel.
Step 3: Cut the Damaged Panel. Using a utility knife, cut through the panel(s) on one or both sides of the damage with care to avoid harming the building paper beneath.
Step 4: Cut the Replacement Panel. Using the measurements you took in step one and the extra four inches added in step two, cut a new piece of vinyl siding using a sharp blade. Ensure that the replacement panel is four inches wider than the original siding piece.
Applying Caulk and Securing with Tape or Nails (if Necessary)
Once you have cut out the damaged section of vinyl siding and prepared the replacement panel, the next step is to apply caulk and secure the panel into place. This stage is crucial to ensure the repair lasts and maintains the siding’s waterproofing. In this section, we will outline the steps for applying the caulk and securing the replacement panel with tape or nails if necessary.
Preparing the Caulk Gun and Loading it with Excess Caulk
Repairing a crack in vinyl siding may seem like a daunting task, but with the right tools and techniques, it’s a simple process. One crucial step in vinyl siding repair is using a caulk gun to apply a bead of caulk over the damaged area. Here are the steps for preparing the caulk gun and loading it with excess caulk:
Step 1: Gather your supplies. To complete this repair, you will need a caulk gun, a caulk tube, and a sharp utility knife. Make sure that you have a steady hand and a clean, smooth surface to work on before beginning.
Step 2: Prepare the caulk gun.Start by cutting the tip off the caulk tube with a sharp blade. Be sure to cut the tip at a slight angle to create a small hole. To facilitate the flow of caulk, it is recommended to puncture the seal on the tube using a nail or a piece of metal.
Step 3: Load the caulk gun.Once the tube is prepared, insert it into the caulk gun. To load the tube into the caulk gun, pull the plunger all the way back, which will create pressure and ensure the flow of caulk is smooth.
Step 4: Apply the caulk.Hold the caulk gun at a slight angle and apply an even layer of the caulk over the exposed crack in the vinyl siding. Make sure that you apply enough caulk to completely fill in the crack and create a smooth, even surface.
Step 5: Smooth the caulk.Use a clean putty knife or your finger to smooth the caulk down. This will ensure that the caulk adheres properly and creates a smooth surface. If you have purchased a paintable caulk, you can paint the caulk to match the color of your existing vinyl siding.
Applying Caulk Along Edges, Curved Areas and Holes in Vinyl Siding
When it comes to repairing vinyl siding, applying caulk to edges, curved areas, and holes can be an effective solution for fixing cracks. Follow these steps for a successful repair:
- Determine the size of the damage: For small holes less than half an inch in diameter, using a matching color caulk to fill in the opening can be sufficient. However, for larger holes, a vinyl siding patch kit may be necessary for repairs up to an inch in diameter.
- Prepare the surface: Before starting the repair, it’s important to prepare the surface properly. This includes removing any loose or damaged pieces of siding and cleaning the area thoroughly.
- Apply caulk to edges and curved areas: Start the repair by applying a bead of caulk to the edges and any curved areas of the siding. Use a putty knife to smooth out the caulk and ensure it adheres properly to the surface.
- Fill in any holes: For any holes in the vinyl panel, fill them in with caulk. Use a caulk smoother or your finger to smooth the surface and create a seamless finish.
- Allow the caulk to dry: Once the caulk has been applied, allow it to dry completely before painting or applying any additional finishes.
By following these steps and using the right techniques, you can repair cracks in your vinyl siding and restore your home’s curb appeal.
Finishing Touches on Your Repair Job

After applying the caulk to the edges and curved areas of the siding, as well as filling in any holes with caulk, it’s important to complete the job for a professional finish. Here are some finishing touches to keep in mind:
- Remove excess caulk: After the caulk has dried, you may notice that there is excess caulk along the edges of the patch. To remove any excess caulk, use a sharp utility knife to carefully cut it away. Be sure not to damage the surrounding siding.
- Smooth the surface: Once the excess caulk has been removed, smooth the surface of the repair with a putty knife. This will ensure a seamless finish and help the repair blend in with the surrounding siding.
- Cover nail heads and screw holes: If there were any nail heads or screw holes exposed during the repair, cover them with a bead of caulk. This will help protect the area from moisture and ensure a professional finish.
- Paintable or color-matching caulk: Depending on the color of your vinyl siding, you may want to use paintable or color-matching caulk to help the repair blend in even better. Apply the caulk as needed and allow it to dry completely before painting or applying any additional finishes.
Conclusion
In conclusion, repairing a crack in vinyl siding is a simple process that can be done with the right tools and techniques. By following the steps outlined above, you can easily fix small damages to your vinyl siding and maintain the curb appeal of your home. However, for more extensive damage or structural issues, it is recommended to seek professional assistance from a siding supplier or contractor. Remember, proper maintenance and inspection of your vinyl siding can prevent future damages and ensure the longevity of your home’s exterior.