509-201-4190

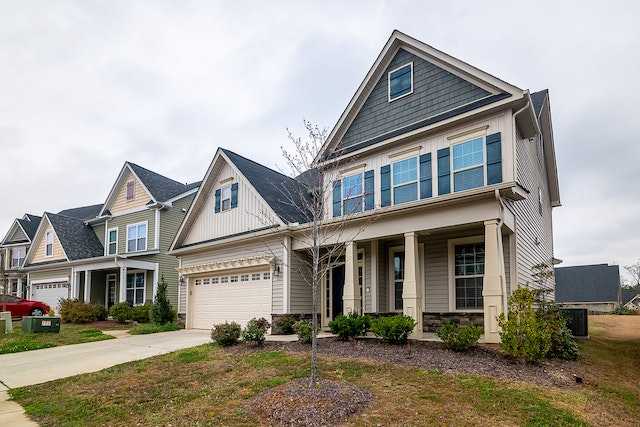
Welcome to the world of home improvement projects! Installing vinyl siding along the roofline can be a great way to boost your home’s curb appeal and add value. In this article, we’ll provide you with an overview of the process and tips for getting started on your project. From choosing the right type of siding for your needs to installing it correctly, we’ll walk you through every step in detail. So grab your tools and let’s get started!
Disclaimer: While we have provided detailed instructions for installing vinyl siding along the roofline, it is important to note that this article should be used for informational purposes only. It is highly recommended that you seek professional advice from a licensed contractor or roofer before beginning any home improvement project. Advance Roofing LLC has been proudly offering the Spokane, WA area with top-notch roofing services and solutions for many years and would be more than happy to assist you with your home improvement needs.
Understanding the Basics of Roofs and Siding
When it comes to home construction, a roof and its exterior siding are two key components that must be carefully considered. A well-designed and properly installed roof and siding can protect a home from environmental elements such as wind-driven rain, make it more energy-efficient, and enhance its curb appeal. Whether you’re building a new home or renovating an existing one, it’s essential to understand the basics of roofs and siding to make informed decisions about your construction choices. In this article, we’ll dive into the key elements of installing vinyl siding along the roofline, offering valuable tips and information for homeowners and contractors alike.
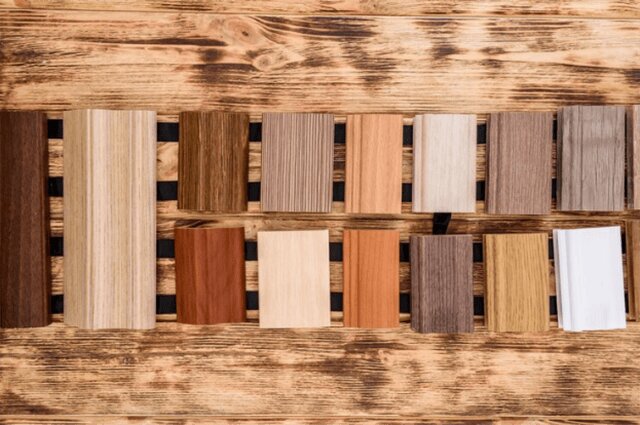
What is Vinyl Siding?
Vinyl siding is a type of exterior siding typically made out of polyvinyl chloride (PVC). It is an attractive and affordable option for those looking to enhance the look and feel of their homes. Vinyl siding comes in a variety of colors and styles that can be customized to fit the aesthetic of any home.
One of the key benefits of vinyl siding is its affordability. Compared to other types of exterior siding, vinyl siding is a more cost-effective option that doesn’t sacrifice on appearance or quality. Additionally, vinyl siding is easy to install, making it a great option for DIY homeowners or those looking to hire a professional.
Another advantage of vinyl siding is its low maintenance requirements. Unlike other materials such as wood or fiber cement siding, vinyl siding doesn’t require painting or staining. It is also resistant to moisture, insects, and rot, making it a durable and long lasting option for homeowners.
In addition to its aesthetic benefits, installing vinyl siding can also improve the energy efficiency of a home. By reducing air leaks and providing an additional layer of insulation, vinyl siding can help to lower energy bills and increase the overall comfort of the home.
Overall, the affordability, easy installation, low maintenance, durability, and energy efficiency of vinyl siding make it a viable option for homeowners who want a stylish and practical solution for protecting their homes from the elements.
Preparing for Installation
Before beginning the installation of vinyl siding along the roofline, there are several important steps to take for proper preparation. From ensuring the necessary tools and materials are on hand to properly measuring and planning the installation, taking the time to prepare for the installation process can help to ensure a successful and long-lasting result. In this section, we will outline the key steps for preparing for vinyl siding installation along the roofline.
Selecting the Right Supplies
When it comes to installing vinyl siding along the roofline of your home, selecting the right supplies is crucial for a successful and long-lasting installation. Before beginning your project, it’s important to take stock of what you’ll need to make the installation process as smooth as possible.
The first step is to select the vinyl siding and vinyl accessories that you’ll be using. When choosing your vinyl siding, consider the style and color that will best complement the aesthetic of your home. You may also want to consider the width of your vinyl siding panels, as wider panels can help reduce the number of seams and provide a more streamlined appearance. Along with your vinyl siding, you’ll also want to select vinyl accessories like J-Mold and outside corner pieces. These accessories will help you achieve clean edges and create a professional-looking finish. The clean edges and drip edges will ensure that water-resistant barriers and soffit overhang will function properly. If your existing shingles are uneven, you can use a type of sheet metal to create a smooth, even surface for attaching the vinyl siding.
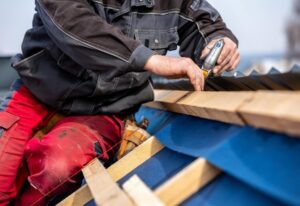
In addition to your vinyl siding and accessories, there are a few key tools and supplies that you’ll need to have on hand. A measuring tape will be essential for ensuring that you’re cutting your vinyl siding to the correct length. Siding nails will also be needed to attach your vinyl siding panels to the wall. Having a pencil on hand is also helpful for marking where your vinyl siding panels will need to be cut. It’s important to have all of these supplies ready before you begin your installation to avoid delays or interruptions.
Selecting the right supplies for your vinyl siding installation can make all the difference in the success of your project. By taking the time to choose high-quality vinyl siding, accessories, and tools, you’ll be able to achieve a professional-looking finish that will protect your home from wind-driven rain and other forms of water penetration for years to come.
Gather Necessary Tools
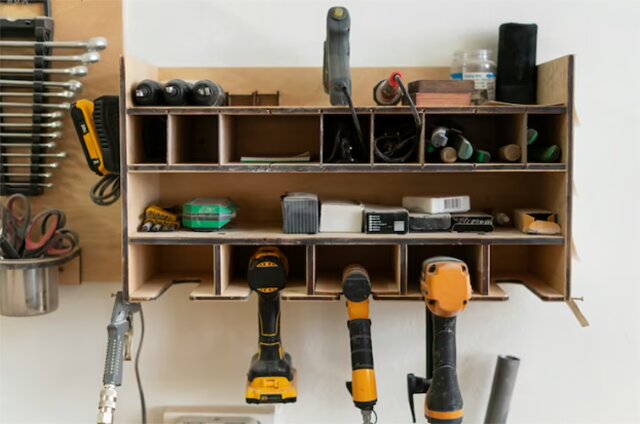
When installing vinyl siding along the roofline, it is crucial to have all the necessary tools at your disposal. Here are some necessary tools that you will need for this task:
- Scaffolding, pump jacks, or ladders may be necessary to reach high and difficult areas.
- Carpenter’s level is essential in ensuring that the panels are level. You can use it to make sure that the panels aren’t skewed in any way.
- A carpenter’s square is useful in ensuring that the corners are perfectly square. It helps to ensure that the panels align correctly, giving the house an aesthetically pleasing look.
- A snap lock punch is necessary if you opt for snap-lock vinyl siding. It helps to create mounting holes that are required in the installation process.
- Nails are crucial in securing the vinyl siding panels to the roofline. It’s essential to use galvanized or stainless-steel nails to ensure they are resistant to rust and weather elements.
- A nail hole punch can help create precise nail holes in vinyl siding, which is important for preventing panel cracking during installation.
- You will need aviation snips to cut the vinyl siding panels to fit in specific areas such as corners, slopes, and edges.
Metal shears can be used to cut the vinyl siding panels.
- A miter saw is critical in cutting the vinyl siding panels accurately. It will help you ensure exact measurements and cuts on the siding panels.
- A chop saw is optional but useful in ensuring precise cuts on the vinyl siding panels. If you have one, it will save you time and ensure that all cuts are perfect.
- A hammer is necessary to drive in nails into the vinyl siding panels.
- A utility knife is useful in scoring the vinyl siding panels to fit in particular areas.
- A zip tool is essential in loosening the panels when necessary. It’s necessary when the panels become stiff and hard to remove, and you can use it to unlock the panels.
- Flashing is necessary to prevent water penetration to the wooden framework behind the vinyl siding panels. You will need to insert it around windows, doors, and any gaps present.
Do not underestimate the importance of having the right tools for the job. Proper installation of vinyl siding along the roofline is crucial for the longevity and functionality of your building materials. It will prevent wind-driven rain and other elements from compromising the overall structure of your building.
Make Sure You Have Enough Helpers

When it comes to installing vinyl siding, having enough helpers is crucial to making the process go smoothly and efficiently. You will need at least one or two people to assist you in lifting and securing the siding in place while you attach it to the roofline.
However, it’s important to ensure that your helpers are reliable and have experience handling tools and equipment safely to avoid any incidents or accidents. Before you begin the vinyl siding installation, make sure you go over the safety precautions with your helpers, such as wearing gloves and eye protection when handling the tools.
You’ll need your helpers to hold the vinyl siding panels in place while you attach them with galvanized or stainless-steel nails. This is especially important when installing vertical siding or when working with a hip roof or areas with a degree angle.
If you’re using starter strips, your helpers can help you position and secure them on the fascia board or nailing base. They can also assist in installing exterior siding accessories and trim pieces to ensure the vinyl siding panels have clean edges and a finished look.
With enough helpers, you can efficiently finish the vinyl siding installation project in no time. Just make sure you assign tasks and areas where you need their help, and communicate with them clearly to ensure a successful installation process.
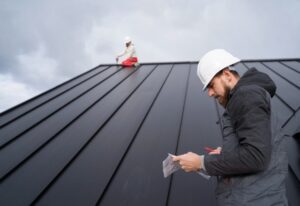
Safety Precautions to Consider

Installing vinyl siding along the roofline may seem like a straightforward task, but it’s essential to prioritize safety when undertaking any home improvement projects. Before beginning the installation process, it is crucial to consider the necessary safety precautions to ensure that your project is completed securely and without injury.
- Use OSHA Approved Tie-Off to Secure Yourself When Dealing with Steep Roofs. Working on a steep roof can be dangerous, and it’s crucial to consider using OSHA (Occupational Safety and Health Administration) approved tie-offs to secure yourself. Most importantly, never work on a roof without proper safety gear and equipment.
- Remove All Potential Obstructions Before Beginning the Side Installation Process. Before beginning the vinyl siding installation process, make sure to remove any potential obstructions. Check the wall area to remove any dirt, debris, and tree limbs that may interfere with the installation process. This step ensures that you have a clear and safe area to work in.
- Remove Any Gutter Systems When Installing Fascia or Soffits. Gutter systems can be challenging to work around. Therefore, it’s best to remove them before installing fascia or soffits. Using a scaffold placed at a safe distance away from your work will enable you to work freely without any hindrances.
- Purchase Any Necessary Materials and Tools before Working on High Ground. When working on high ground, it is crucial to have all the necessary materials and tools before you start. Purchasing any missing items during the installation process may not only delay your project but may also put you in danger.
- Always Use Appropriate Cutting Tools When Cutting Around Obstructions. It is crucial to own and use appropriate cutting tools when working around obstructions like vents, pipes, and other protruding objects. Using incorrect cutting tools can lead to accidents, injuries, and shoddy work.
Installing Your Vinyl Siding Along the Roofline
Vinyl siding is a popular and durable option for exterior walls. However, installing it along the roofline can be a bit of a challenge. In this article, we will provide a step-by-step guide on how to install vinyl siding along the roofline safely and efficiently. From preparing the work area to installing the necessary materials, we’ve got you covered. So, let’s get started!
Marking The Line For Your Vinyl Siding Installment

Before any vinyl siding can be installed along the roofline, the horizontal line to which all siding panels will attach must be established. This is done by marking the line where the bottom of the starter strip will be placed.
To begin, measure and mark the high and low points of the roofline to create a level line. A level line is vital to ensure that the siding is installed correctly and looks neat and straight.
Next, use a chalk line to snap a straight line along the determined height of the roof’s edge. The chalk line will give a clear and visible guide to follow during the installation process. It’s important to ensure that the line is level and square to the house’s frame to prevent any uneven gaps or crooked lines.
Marking the line accurately will help ensure that the vinyl siding is installed properly, and there is no water penetration, which can cause damage to your exterior walls. It’s important also to consider the wind-driven rain and water vapor that can pass through the soffit panels or soffit overhang. Vinyl siding is an effective type of water-resistant exterior siding that can reduce the risk of water damage to your home’s structure.
By marking the line for your vinyl siding installation accurately, you can instill confidence for a proper installation. This process helps create nailing bases, clean edges, and drip edges for finishing trim and accessory trim pieces in a 10-foot by 10-foot wall section. This process is also helpful when covering uneven shingles or nailing vertical base or layer of bricks with nail hole punches, pieces of metal, or brick ties for a larger roof.
Attaching Starter Strip and Corner Post Pieces
When installing vinyl siding along the roofline, it’s essential to attach starter strips and corner post pieces to ensure a proper and secure installation. Here are the steps to follow for attaching these components:
- To securely anchor vinyl siding panels to a wall and withstand wind and other elements, it is recommended to select wider starter strips that provide a standard one-inch overlap for the foundation.
- Ensure that the starter strips are level and accurately placed to maintain evenness of the entire installation. Use a level to check that the starter strips are straight along the roofline, and fix them in place using nails or screws.
- Once the starter strips are in place, introduce the corner post pieces at each corner of your wall. These pieces provide support, strength, and an attractive finish for the corners.
- Attach the corner post pieces securely to the starter strips, ensuring that they are level and plumb. For a hip roof that has a degree angle, use a corner post with a pivoting top and bottom to attain the right fit.
By properly attaching starter strips and corner post pieces, you can create a clean and professional-looking finish for your vinyl siding installation. Follow these guidelines carefully to ensure that your vinyl siding panels remain secure and your home remains protected from exterior elements like wind-driven rain.
Setting Up The Vinyl Siding Panels in Place
Now that the starter strips and corner posts are securely in place, the next step in installing vinyl siding along the roofline involves setting up the vinyl panels.
The first vinyl panel is secured at the bottom to the starter strip using the nailing technique mentioned earlier. It’s crucial to ensure that the first panel is level and plumb, as this will set the consistent angle along the roofline for the rest of the installation.
After securing the first panel, align the following panels along the starter strip, and fasten them into their corresponding corner posts. To make it easier to nail the panels in place, use a nail hole punch and add a nail to the center punch. Adjust its indentation before starting.
As you work along the roofline, you may encounter obstructions such as vents, chimneys, or windows. In such cases, cut and fit vinyl panels using cutting tools mentioned in the Background Information section.
By following these steps, you’ll ensure that the vinyl siding is correctly installed along the roofline. Remember to use proper nailing techniques and to double-check that the panels are level and plumb before securing them into place. With the right starter strips, corner posts, and vinyl panels, your exterior siding will keep your home protected from wind driven rain and water penetration.
Cutting and Fitting The Panels as Needed Along the Roofline

When it comes to installing vinyl siding along the roofline, one of the most important aspects is cutting and fitting the panels with accuracy. This step ensures that the panels will fit snugly and create a seamless appearance along the roofline.
To achieve precise cuts, it’s recommended to use a miter saw with a vinyl cutting blade or plywood blade turned backwards. This will provide clean, straight cuts without damaging or warping the vinyl material. Additionally, a speed square can be used to ensure that the cuts are made at a 90-degree angle.
Alternatively, scoring the vinyl siding with a utility knife and using the speed square as a guide can be an effective cutting technique. This method requires some patience and skill, but it can produce accurate cuts without the need for specialized equipment.
When measuring and cutting the panels, it’s important to add 1-2 inches to the measurements to allow for overlaps. This will help to prevent water penetration and ensure that the panels fit tightly along the roofline.
For smaller obstructions such as vents or pipes, aviator snips can be used to cut the vinyl siding with precision. On the other hand, larger obstructions may require the use of metal shears, which can be more difficult to handle and require more time to make accurate cuts.
Once the panels are cut to size, they should be fitted tightly and securely along the roofline. This will prevent wind-driven rain from infiltrating the exterior walls and causing damage to the building materials. With accurate measurements and precise cuts, the vinyl siding can provide an attractive and water-resistant finish to the larger roof.
Securely Nailing Down Each Panel Into Place
When it comes to installing vinyl siding along the roofline, securely nailing down each panel into place is crucial. To ensure that the siding stays in position and doesn’t buckle or warp, it’s important to follow some guidelines for secure nailing.
Firstly, it’s recommended to set your nails within 1/16 of an inch from the edge of the siding. This allows the vinyl siding to move laterally without buckling, which can cause gaps or unevenness in the installation. It is necessary to leave 1/4-inch gaps on each end of the panel to account for the expansion and contraction of the siding after it is mounted.
To conceal the gaps, channels can be used. However, it’s important not to leave larger tolerances, which could result in exposed openings when the siding contracts. It’s also crucial to lock each panel in place by joining the locking leg of the panel with the locking portion of the previous panel.
To prevent warping, it’s important to make sure that each nail penetrates the solid nailing base. Otherwise, the siding may warp and buckle, causing gaps or unevenness in the installation. Lastly, spacing the nails according to the instructions provided with the specific type of vinyl siding you have selected is necessary for a secure installation.
By following these guidelines for securely nailing down each panel into place, you can ensure a smooth and secure installation of your vinyl siding along the roofline that will last for years to come.
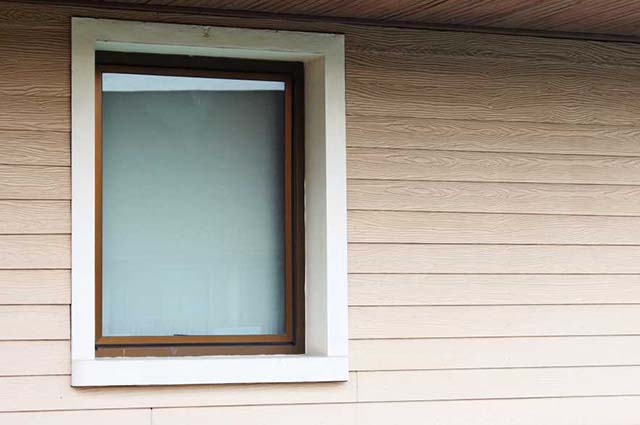
Sealing Around Windows and Doors
When installing vinyl siding along the roofline, it is crucial to properly seal any gaps between the windows, doors, and the siding to prevent water penetration and damage. In order to achieve a secure seal, a few steps should be taken.
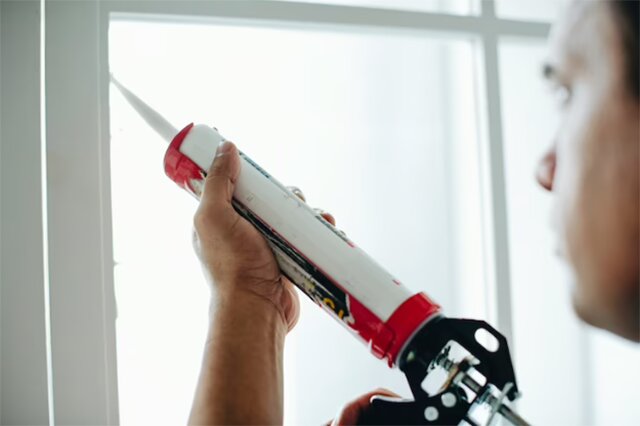
Firstly, start by removing any old caulk or paint with a scraper or putty knife. This will ensure that the new sealant adheres properly. Next, choose a high-quality caulk that is waterproof and can withstand extreme temperatures, as it will be exposed to the outside elements.
Using a caulk gun, apply the caulk in a continuous and consistent bead along the edges of the windows and doors, ensuring complete coverage. Make sure to pay close attention to any seams or gaps where the siding meets the windows or doors, as these are the most vulnerable areas for water penetration.
To smooth out the caulk and create a uniform seal, use a caulk smoothing tool or a finger dipped in soapy water. This will help the caulk to adhere properly and fill any voids or gaps. Allow the caulk to dry completely before continuing with the installation.
By following these steps, you can effectively seal around your windows and doors, preventing any potential water penetration and damage to the structure. Remember to use a high-quality, waterproof caulk and take your time to ensure complete coverage for the best results.
Finishing Touches: Adding Trim, Overhangs, and Ventilation
When it comes to installing a roof, it’s essential to consider not only the materials you use, but also the finishing touches that will ensure maximum effectiveness and longevity. Adding trim and accessory pieces such as drip edges, starter strips, and corner posts will not only prevent water penetration but also add aesthetic value to the finished project.
Drip edges are placed along the edges of the roofline to help direct water away from the fascia board and prevent it from seeping into the interior of your home. Meanwhile, starter strips are installed at the base of the roofline to provide a nailing base for the first row of vinyl siding panels. And corner posts are vertical pieces that run along the corners of your walls to cover the ends of the horizontal siding boards.
Overhangs such as soffit panels provide necessary intake ventilation to bring fresh air into your attic space, while exhaust vents like ridge vents or box vents help push out old, musty air. Proper ventilation is crucial to the health of your home’s air quality, preventing the buildup of harmful moisture and lowering energy bills by reducing the need for air conditioning in the hotter months.
By introducing these finishing touches, you can ensure the longevity and durability of your roof. Trim pieces provide clean edges and a professional look, while overhangs and ventilation keep your home healthy and comfortable. So, whether you’re installing vertical siding on a hip roof or applying batten siding to a larger wall section, remember that proper installation of building materials and finishing touches like trim, overhangs, and ventilation are essential to weathering wind-driven rain and standing up to the test of time.
Conclusion
Installing vinyl siding along the roofline can be a great way to increase your home’s value and curb appeal. With the right approach, it’s possible to complete this project yourself with minimal difficulty. Start by researching different types of siding, taking into account your budget, climate, and preferences. Once you’ve chosen the right type for your needs, make sure to take the time to install it correctly in order to get the best results. With a little preparation and dedication, you can have a beautiful roofline that will last for years!